API-Anfragen erstellen und Antworten verarbeiten

In diesem Dokument wird beschrieben, wie API-Anfragen formuliert und API-Antworten der Compute Engine API behandelt werden. Folgende Themen werden abgedeckt:

  • Formulierung eines Anfragetextes.
  • Bestimmung der Ressource-URIs, die für die Anfrage erforderlich sind.
  • Verarbeitung von API-Antworten.
  • Prüfen, ob eine API-Anfrage erfolgreich war.

Die Authentifizierung bei der API wird in diesem Dokument nicht behandelt. Weitere Informationen zur Authentifizierung bei der API finden Sie unter Bei Compute Engine authentifizieren.

Vorbereitung

API-Anfrage erstellen

Die Compute Engine API erwartet API-Anfragen im JSON-Format. Um eine API-Anfrage zu senden, können Sie entweder eine direkte HTTP-Anfrage stellen, indem Sie Tools wie curl oder httplib2 verwenden, oder Sie können eine der verfügbaren Clientbibliotheken verwenden.

Wenn Sie eine API-Anfrage stellen, die einen Anfragetext erfordert, z. B. eine POST-, UPDATE- oder PATCH-Anfrage, enthält der Anfragetext Ressourcenattribute, die Sie in der Anfrage festlegen sollten. Mit dem folgenden curl-Befehl wird beispielsweise eine POST-Anfrage an den URI der Instanzressource gesendet. Die Anfrage erstellt eine Instanz mit den im Anfragetext definierten Attributen. Der Anfragetext wird durch das Flag -d angezeigt:

curl -X POST -H "Authorization: Bearer [OAUTH_TOKEN]" -H "Content-Type: application/json" \
https://compute.googleapis.com/compute/v1/projects/PROJECT_ID/zones/ZONE/instances -d \
'{
  "disks":[
    {
      "boot":"true",
      "initializeParams":{
        "sourceImage":"https://www.googleapis.com/compute/v1/projects/debian-cloud/global/images/debian-10-buster-v20210122"
      }
    }
  ],
  "machineType":"https://www.googleapis.com/compute/v1/projects/PROJECT_ID/zones/ZONE/machineTypes/e2-standard-2",
  "name":"VM_NAME",
  "networkInterfaces":[
    {
      "accessConfigs":[
        {
          "name":"external-nat",
          "type":"ONE_TO_ONE_NAT"
        }
      ],
      "network":"https://www.googleapis.com/compute/v1/projects/PROJECT_ID/global/networks/default"
    }
  ]
}'

Der Image-URI hat eine andere Projekt-ID (debian-cloud) als Ihre Projekt-ID, da die Images je nach Image-Typ zu unterschiedlichen Projekten gehören. So werden beispielsweise alle öffentlich verfügbaren Debian-Images, die von Compute Engine angeboten werden, im Projekt debian-cloud gehostet.

Verwenden Sie beim Verweis auf eine andere Ressource den voll qualifizierten Ressourcen-URI. Das Attribut network verwendet beispielsweise einen voll qualifizierten URI zum default-Netzwerk.

Beispiel: API-Anfragen

Python

from __future__ import annotations

import re
import sys
from typing import Any
import warnings

from google.api_core.extended_operation import ExtendedOperation
from google.cloud import compute_v1


def get_image_from_family(project: str, family: str) -> compute_v1.Image:
    """
    Retrieve the newest image that is part of a given family in a project.

    Args:
        project: project ID or project number of the Cloud project you want to get image from.
        family: name of the image family you want to get image from.

    Returns:
        An Image object.
    """
    image_client = compute_v1.ImagesClient()
    # List of public operating system (OS) images: https://cloud.google.com/compute/docs/images/os-details
    newest_image = image_client.get_from_family(project=project, family=family)
    return newest_image


def disk_from_image(
    disk_type: str,
    disk_size_gb: int,
    boot: bool,
    source_image: str,
    auto_delete: bool = True,
) -> compute_v1.AttachedDisk:
    """
    Create an AttachedDisk object to be used in VM instance creation. Uses an image as the
    source for the new disk.

    Args:
         disk_type: the type of disk you want to create. This value uses the following format:
            "zones/{zone}/diskTypes/(pd-standard|pd-ssd|pd-balanced|pd-extreme)".
            For example: "zones/us-west3-b/diskTypes/pd-ssd"
        disk_size_gb: size of the new disk in gigabytes
        boot: boolean flag indicating whether this disk should be used as a boot disk of an instance
        source_image: source image to use when creating this disk. You must have read access to this disk. This can be one
            of the publicly available images or an image from one of your projects.
            This value uses the following format: "projects/{project_name}/global/images/{image_name}"
        auto_delete: boolean flag indicating whether this disk should be deleted with the VM that uses it

    Returns:
        AttachedDisk object configured to be created using the specified image.
    """
    boot_disk = compute_v1.AttachedDisk()
    initialize_params = compute_v1.AttachedDiskInitializeParams()
    initialize_params.source_image = source_image
    initialize_params.disk_size_gb = disk_size_gb
    initialize_params.disk_type = disk_type
    boot_disk.initialize_params = initialize_params
    # Remember to set auto_delete to True if you want the disk to be deleted when you delete
    # your VM instance.
    boot_disk.auto_delete = auto_delete
    boot_disk.boot = boot
    return boot_disk


def wait_for_extended_operation(
    operation: ExtendedOperation, verbose_name: str = "operation", timeout: int = 300
) -> Any:
    """
    Waits for the extended (long-running) operation to complete.

    If the operation is successful, it will return its result.
    If the operation ends with an error, an exception will be raised.
    If there were any warnings during the execution of the operation
    they will be printed to sys.stderr.

    Args:
        operation: a long-running operation you want to wait on.
        verbose_name: (optional) a more verbose name of the operation,
            used only during error and warning reporting.
        timeout: how long (in seconds) to wait for operation to finish.
            If None, wait indefinitely.

    Returns:
        Whatever the operation.result() returns.

    Raises:
        This method will raise the exception received from `operation.exception()`
        or RuntimeError if there is no exception set, but there is an `error_code`
        set for the `operation`.

        In case of an operation taking longer than `timeout` seconds to complete,
        a `concurrent.futures.TimeoutError` will be raised.
    """
    result = operation.result(timeout=timeout)

    if operation.error_code:
        print(
            f"Error during {verbose_name}: [Code: {operation.error_code}]: {operation.error_message}",
            file=sys.stderr,
            flush=True,
        )
        print(f"Operation ID: {operation.name}", file=sys.stderr, flush=True)
        raise operation.exception() or RuntimeError(operation.error_message)

    if operation.warnings:
        print(f"Warnings during {verbose_name}:\n", file=sys.stderr, flush=True)
        for warning in operation.warnings:
            print(f" - {warning.code}: {warning.message}", file=sys.stderr, flush=True)

    return result


def create_instance(
    project_id: str,
    zone: str,
    instance_name: str,
    disks: list[compute_v1.AttachedDisk],
    machine_type: str = "n1-standard-1",
    network_link: str = "global/networks/default",
    subnetwork_link: str = None,
    internal_ip: str = None,
    external_access: bool = False,
    external_ipv4: str = None,
    accelerators: list[compute_v1.AcceleratorConfig] = None,
    preemptible: bool = False,
    spot: bool = False,
    instance_termination_action: str = "STOP",
    custom_hostname: str = None,
    delete_protection: bool = False,
) -> compute_v1.Instance:
    """
    Send an instance creation request to the Compute Engine API and wait for it to complete.

    Args:
        project_id: project ID or project number of the Cloud project you want to use.
        zone: name of the zone to create the instance in. For example: "us-west3-b"
        instance_name: name of the new virtual machine (VM) instance.
        disks: a list of compute_v1.AttachedDisk objects describing the disks
            you want to attach to your new instance.
        machine_type: machine type of the VM being created. This value uses the
            following format: "zones/{zone}/machineTypes/{type_name}".
            For example: "zones/europe-west3-c/machineTypes/f1-micro"
        network_link: name of the network you want the new instance to use.
            For example: "global/networks/default" represents the network
            named "default", which is created automatically for each project.
        subnetwork_link: name of the subnetwork you want the new instance to use.
            This value uses the following format:
            "regions/{region}/subnetworks/{subnetwork_name}"
        internal_ip: internal IP address you want to assign to the new instance.
            By default, a free address from the pool of available internal IP addresses of
            used subnet will be used.
        external_access: boolean flag indicating if the instance should have an external IPv4
            address assigned.
        external_ipv4: external IPv4 address to be assigned to this instance. If you specify
            an external IP address, it must live in the same region as the zone of the instance.
            This setting requires `external_access` to be set to True to work.
        accelerators: a list of AcceleratorConfig objects describing the accelerators that will
            be attached to the new instance.
        preemptible: boolean value indicating if the new instance should be preemptible
            or not. Preemptible VMs have been deprecated and you should now use Spot VMs.
        spot: boolean value indicating if the new instance should be a Spot VM or not.
        instance_termination_action: What action should be taken once a Spot VM is terminated.
            Possible values: "STOP", "DELETE"
        custom_hostname: Custom hostname of the new VM instance.
            Custom hostnames must conform to RFC 1035 requirements for valid hostnames.
        delete_protection: boolean value indicating if the new virtual machine should be
            protected against deletion or not.
    Returns:
        Instance object.
    """
    instance_client = compute_v1.InstancesClient()

    # Use the network interface provided in the network_link argument.
    network_interface = compute_v1.NetworkInterface()
    network_interface.network = network_link
    if subnetwork_link:
        network_interface.subnetwork = subnetwork_link

    if internal_ip:
        network_interface.network_i_p = internal_ip

    if external_access:
        access = compute_v1.AccessConfig()
        access.type_ = compute_v1.AccessConfig.Type.ONE_TO_ONE_NAT.name
        access.name = "External NAT"
        access.network_tier = access.NetworkTier.PREMIUM.name
        if external_ipv4:
            access.nat_i_p = external_ipv4
        network_interface.access_configs = [access]

    # Collect information into the Instance object.
    instance = compute_v1.Instance()
    instance.network_interfaces = [network_interface]
    instance.name = instance_name
    instance.disks = disks
    if re.match(r"^zones/[a-z\d\-]+/machineTypes/[a-z\d\-]+$", machine_type):
        instance.machine_type = machine_type
    else:
        instance.machine_type = f"zones/{zone}/machineTypes/{machine_type}"

    instance.scheduling = compute_v1.Scheduling()
    if accelerators:
        instance.guest_accelerators = accelerators
        instance.scheduling.on_host_maintenance = (
            compute_v1.Scheduling.OnHostMaintenance.TERMINATE.name
        )

    if preemptible:
        # Set the preemptible setting
        warnings.warn(
            "Preemptible VMs are being replaced by Spot VMs.", DeprecationWarning
        )
        instance.scheduling = compute_v1.Scheduling()
        instance.scheduling.preemptible = True

    if spot:
        # Set the Spot VM setting
        instance.scheduling.provisioning_model = (
            compute_v1.Scheduling.ProvisioningModel.SPOT.name
        )
        instance.scheduling.instance_termination_action = instance_termination_action

    if custom_hostname is not None:
        # Set the custom hostname for the instance
        instance.hostname = custom_hostname

    if delete_protection:
        # Set the delete protection bit
        instance.deletion_protection = True

    # Prepare the request to insert an instance.
    request = compute_v1.InsertInstanceRequest()
    request.zone = zone
    request.project = project_id
    request.instance_resource = instance

    # Wait for the create operation to complete.
    print(f"Creating the {instance_name} instance in {zone}...")

    operation = instance_client.insert(request=request)

    wait_for_extended_operation(operation, "instance creation")

    print(f"Instance {instance_name} created.")
    return instance_client.get(project=project_id, zone=zone, instance=instance_name)

Java

public static Operation startInstance(Compute compute, String instanceName) throws IOException {
  System.out.println("================== Starting New Instance ==================");

  // Create VM Instance object with the required properties.
  Instance instance = new Instance();
  instance.setName(instanceName);
  instance.setMachineType(
      String.format(
          "https://www.googleapis.com/compute/v1/projects/%s/zones/%s/machineTypes/e2-standard-1",
          PROJECT_ID, ZONE_NAME));
  // Add Network Interface to be used by VM Instance.
  NetworkInterface ifc = new NetworkInterface();
  ifc.setNetwork(
      String.format(
          "https://www.googleapis.com/compute/v1/projects/%s/global/networks/default",
          PROJECT_ID));
  List<AccessConfig> configs = new ArrayList<>();
  AccessConfig config = new AccessConfig();
  config.setType(NETWORK_INTERFACE_CONFIG);
  config.setName(NETWORK_ACCESS_CONFIG);
  configs.add(config);
  ifc.setAccessConfigs(configs);
  instance.setNetworkInterfaces(Collections.singletonList(ifc));

  // Add attached Persistent Disk to be used by VM Instance.
  AttachedDisk disk = new AttachedDisk();
  disk.setBoot(true);
  disk.setAutoDelete(true);
  disk.setType("PERSISTENT");
  AttachedDiskInitializeParams params = new AttachedDiskInitializeParams();
  // Assign the Persistent Disk the same name as the VM Instance.
  params.setDiskName(instanceName);
  // Specify the source operating system machine image to be used by the VM Instance.
  params.setSourceImage(SOURCE_IMAGE_PREFIX + SOURCE_IMAGE_PATH);
  // Specify the disk type as Standard Persistent Disk
  params.setDiskType(
      String.format(
          "https://www.googleapis.com/compute/v1/projects/%s/zones/%s/diskTypes/pd-standard",
          PROJECT_ID, ZONE_NAME));
  disk.setInitializeParams(params);
  instance.setDisks(Collections.singletonList(disk));

  // Initialize the service account to be used by the VM Instance and set the API access scopes.
  ServiceAccount account = new ServiceAccount();
  account.setEmail("default");
  List<String> scopes = new ArrayList<>();
  scopes.add("https://www.googleapis.com/auth/devstorage.full_control");
  scopes.add("https://www.googleapis.com/auth/compute");
  account.setScopes(scopes);
  instance.setServiceAccounts(Collections.singletonList(account));

  // Optional - Add a startup script to be used by the VM Instance.
  Metadata meta = new Metadata();
  Metadata.Items item = new Metadata.Items();
  item.setKey("startup-script-url");
  // If you put a script called "vm-startup.sh" in this Google Cloud Storage
  // bucket, it will execute on VM startup.  This assumes you've created a
  // bucket named the same as your PROJECT_ID.
  // For info on creating buckets see:
  // https://cloud.google.com/storage/docs/cloud-console#_creatingbuckets
  item.setValue(String.format("gs://%s/vm-startup.sh", PROJECT_ID));
  meta.setItems(Collections.singletonList(item));
  instance.setMetadata(meta);

  System.out.println(instance.toPrettyString());
  Compute.Instances.Insert insert = compute.instances().insert(PROJECT_ID, ZONE_NAME, instance);
  return insert.execute();
}

Ressourcen-URIs erstellen

In der Compute Engine API wird ein Verweis auf eine andere Google Cloud Ressource als voll qualifizierter URI angegeben:

https://compute.googleapis.com/compute/v1/projects/PROJECT_ID/zones/ZONE/RESOURCE_TYPE/SPECIFIC_RESOURCE

Jedes Mal, wenn Sie ein Image, einen Maschinentyp, ein Netzwerk oder irgendeine andere Ressource angeben, müssen Sie bei Verwendung der API den URI zur Ressource angeben. Client-Tools wie die Google Cloud CLI und die Google Cloud Console erstellen diese Ressourcen-URIs automatisch, sodass dieser Aufwand für Sie wegfällt. Wenn Sie jedoch direkt mit der API interagieren, müssen Sie diese Ressourcen-URIs selbst erstellen.

Bei unterschiedlichen Arten von Ressourcen kann es Abweichungen bezüglich der Ressourcen-URIs geben. Eine zonale Ressource hat beispielsweise die Spezifikation zone im URI:

https://compute.googleapis.com/compute/v1/projects/PROJECT_ID/zones/ZONE/machineTypes/e2-standard-2

Regionale Ressourcen ersetzen die Spezifikation zone durch die Spezifikation region:

https://compute.googleapis.com/compute/v1/projects/PROJECT_ID/regions/REGION/addresses/ADDRESS_NAME

Globale Ressourcen haben ebenfalls die Spezifikation global:

https://compute.googleapis.com/compute/v1/projects/PROJECT_ID/global/images/VM_NAME

Die Compute Engine API akzeptiert auch Teil-URIs, da der Dienst Informationen wie die Projekt-ID ableiten kann. Daher sind auch die folgenden Teilversionen der früheren URIs akzeptabel:

zones/ZONE/machineTypes/e2-standard-2
regions/REGION/addresses/ADDRESS_NAME
project/PROJECT_ID/global/images/VM_NAME

In den Teil-URIs haben die zonalen und regionalen URIs die Projekt-ID jeweils weggelassen, die Image-URI jedoch nicht. Dies liegt daran, dass öffentlich verfügbare Compute Engine-Images in anderen Projekten gehostet werden, z. B. debian-cloud für alle Debian-Images und ubuntu-os-cloud für alle Ubuntu-Images. Bevor Sie diese Images verwenden können, müssen Sie die entsprechende Projekt-ID angeben. Wenn Sie die Projekt-ID für Images weglassen, versucht Compute Engine, das Image in Ihrem Projekt zu finden, und die Anfrage schlägt fehl, da das Image nicht vorhanden ist.

Wenn Sie jedoch ein benutzerdefiniertes Image verwenden, das zu Ihrem Projekt gehört (demselben Projekt, in dem Sie diese Ressource erstellen), können Sie die Projektspezifikation weglassen, wenn Sie ein Image-URI bereitstellen.

Erforderliche Properties ermitteln

In der Referenzdokumentation zur Compute Engine API, die sowohl für die v1 als auch für die beta APIs verfügbar ist, werden alle möglichen Attribute beschrieben, die Sie für eine bestimmte Ressource festlegen können. Die Referenzdokumentation unterscheidet zwischen veränderlichen und nicht veränderlichen Attributen (in der Attributbeschreibung mit [Output Only] gekennzeichnet). Um die erforderlichen Attribute für eine Ressource zu bestimmen, müssen Sie jedoch die spezifische Dokumentation für diese Aufgabe nachschlagen.

Wenn Sie beispielsweise eine Instanz erstellen, lesen Sie die Dokumentation Instanz aus einem Image erstellen, um zu sehen, welche API-Attribute für die Anfrage erforderlich sind. Wenn Sie in der API eine statische externe IP-Adresse erstellen möchten, lesen Sie die Dokumentation Statische externe IP-Adressen.

API-Anfragen validieren

So validieren Sie API-Anfragen:

  1. Suchen Sie in der Referenz zur Compute Engine API nach der Methode, die Ihr Code aufruft. Beispiel: v1/compute.instances.insert.
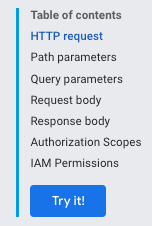
  2. Klicken Sie im Inhaltsmenü auf Jetzt testen. Dadurch wird das Fenster API testen geöffnet.

    Der Button &quot;Testen!&quot; im Inhaltsmenü.

  3. Unter Anfrageparameter müssen Sie kein Projekt oder keine Zone angeben, da die Validierung keine Übermittlung der Anfrage erfordert.

  4. Fügen Sie Ihre Anfrage unter Anfragetext ein.

    Das Fenster &quot;API testen&quot; mit dem Feld &quot;Anfragetext&quot;, um zu zeigen, wo eine Anfrage zur Validierung eingefügt werden sollte

Fehlerhafte Elemente der Anfrage sind blau unterstrichen. Klicken Sie auf jeden unterstrichenen Abschnitt, um weitere Informationen zu dem zu behebenden Problem zu erhalten.

Behandlung von API-Antworten

Wenn Sie eine Anfrage stellen, durch die Daten mutiert (geändert) werden, gibt Compute Engine ein Operation-Objekt zurück, das Sie abfragen können, um den Status der Vorgänge für Ihre Anfrage abzurufen. Die Operation-Ressource sieht so aus:

{
 "kind": "compute#operation",
 "id": "7127550864823803662",
 "name": "operation-1458856416788-52ed27a803e22-1c3bd86a-9e95017b",
 "zone": "https://www.googleapis.com/compute/v1/projects/PROJECT_ID/zones/ZONE",
 "operationType": "insert",
 "targetLink": "https://www.googleapis.com/compute/v1/projects/PROJECT_ID/zones/ZONE/instances/EXAMPLE_VM",
 "targetId": "4132355614508179214",
 "status": "PENDING",
 "user": "user@example.com",
 "progress": 0,
 "insertTime": "2016-03-24T14:53:37.788-07:00",
 "selfLink": "https://www.googleapis.com/compute/v1/projects/PROJECT_ID/zones/ZONE/operations/operation-1458856416788-52ed27a803e22-1c3bd86a-9e95017b"
}

Wenn die ursprüngliche Anfrage eine zonale Ressource mutieren (ändern) soll, z. B. zum Erstellen eines Snapshots eines Laufwerks oder zum Beenden einer Instanz, gibt Compute Engine ein zoneOperations-Object zurück. Regionale und globale Ressourcen geben ein regionOperations- bzw. globalOperations-Objekt zurück. Sie können den Status eines Vorgangs abrufen, indem Sie eine Anfrage ausführen, die die Methode get oder wait für die jeweilige Ressource Operation verwendet und den name des Vorgangs angibt.

Ihre Anfrage ist erst abgeschlossen, wenn der Status der Vorgangsressource Operation als DONE zurückgegeben wird. Dies kann je nach Art Ihrer Anfrage etwas Zeit in Anspruch nehmen. Wenn der Status der Ressource Operation schließlich als DONE zurückgegeben wird, sollten Sie prüfen, ob der Vorgang erfolgreich war oder ob Fehler aufgetreten sind. Dies kann je nach Art Ihrer Anfrage etwas Zeit in Anspruch nehmen. Wenn der Status der Operation-Ressource schließlich als DONE zurückgegeben wird, sollten Sie prüfen, ob der Vorgang erfolgreich war oder ob Fehler aufgetreten sind.

Die folgende Antwort gibt mit dem Status DONE beispielsweise an, dass der vorherige Vorgang jetzt abgeschlossen ist:

endTime: '2016-03-24T14:54:07.119-07:00'
id: '7127550864823803662'
insertTime: '2016-03-24T14:53:37.788-07:00'
kind: compute#operation
name: operation-1458856416788-52ed27a803e22-1c3bd86a-9e95017b
operationType: insert
progress: 100
selfLink: https://compute.googleapis.com/compute/v1/projects/PROJECT_ID/zones/ZONE/operations/operation-1458856416788-52ed27a803e22-1c3bd86a-9e95017b
startTime: '2016-03-24T14:53:38.397-07:00'
status: DONE
targetId: '4132355614508179214'
targetLink: https://compute.googleapis.com/compute/v1/projects/PROJECT_ID/zones/ZONE/instances/EXAMPLE_VM
user: user@example.com
zone: https://compute.googleapis.com/compute/v1/projects/PROJECT_ID/zones/ZONE

Stellen Sie zur Bestätigung eine get-Anfrage an die Ressource, um zu prüfen, ob sie vorhanden ist und ausgeführt wird. Beispiel:

GET /compute/v1/projects/PROJECT_ID/zones/ZONE/instances/EXAMPLE_VM

{
  "cpuPlatform": "Intel Haswell",
  "creationTimestamp": "2016-03-24T14:53:37.170-07:00",
  "disks": [
    ..[snip]..
  "selfLink": "https://www.googleapis.com/compute/v1/projects/PROJECT_ID/zones/ZONE/instances/EXAMPLE_VM",
  "status": "RUNNING",
  "tags": {
    "fingerprint": "42WmSpB8rSM="
  },
  "zone": "https://www.googleapis.com/compute/v1/projects/PROJECT_ID/zones/ZONE"
}

Vorgänge abfragen

Sie können Code schreiben, um den Vorgang regelmäßig mit einer get- oder wait-Anfrage abzufragen, die zurückgegeben wird, wenn der Vorgangsstatus DONE lautet.

Bei einer get-Anfrage wird der Vorgang sofort zurückgegeben, unabhängig vom Status des Vorgangs. Sie müssen den Vorgang regelmäßig abfragen, um zu erfahren, wann er abgeschlossen ist.

Wenn Sie eine wait-Anfrage stellen, wird die Anfrage zurückgegeben, wenn der Vorgang DONE ist oder wenn sich die Anfrage der Frist von zwei Minuten nähert. Sie können wait oder get verwenden, um Ihre Vorgänge abzufragen. Die Methode wait bietet jedoch bestimmte Vorteile gegenüber der Methode get:

  • Sie können Ihre Clients so einrichten, dass sie den Vorgangsstatus weniger häufig abfragen, und somit die Abfragen pro Sekunde der Compute Engine API reduzieren.
  • Die durchschnittliche Latenz zwischen der Fertigstellung des Vorgangs und dem Zeitpunkt, zu dem der Client über die Fertigstellung des Vorgangs informiert wird, reduziert sich erheblich, da der Server antwortet, sobald der Vorgang abgeschlossen ist.
  • Die Methode bietet begrenzte Wartezeiten. Die Methode wartet nicht mehr als die standardmäßige HTTP-Zeitüberschreitung (2 Minuten) und gibt dann den aktuellen Status des Vorgangs zurück, der DONE oder "Noch in Bearbeitung" sein kann.

Die Methode wait ist eine Best-Effort-API. Wenn der Server überlastet ist, wird die Anfrage möglicherweise zurückgegeben, bevor sie die Standardfrist erreicht oder nachdem nur null Sekunden gewartet wurde. Es wird auch nicht garantiert, dass die Methode nur zurückgegeben wird, wenn der Vorgang den Status DONE hat. Wenn sich die Anfrage beispielsweise der Frist von 2 Minuten nähert, wird die Methode auch dann zurückgegeben, wenn der Vorgang nicht abgeschlossen ist. Zur Prüfung Ihrer Vorgänge empfehlen wir, die Methode wait oder get in einer Wiederholungsschleife mit zwischengeschaltetem Ruhemodus zu verwenden, um den Vorgangsstatus regelmäßig abzufragen. Das maximale Wiederholungsintervall sollte die Mindestaufbewahrungsdauer für Vorgänge nicht überschreiten.

Beispielabfragen

In den folgenden Beispielen wird die get-Methode verwendet. Sie können die get-Methode durch die wait-Methode ersetzen:

Python

from google.cloud import compute_v1


def wait_for_operation(
    operation: compute_v1.Operation, project_id: str
) -> compute_v1.Operation:
    """
    This method waits for an operation to be completed. Calling this function
    will block until the operation is finished.

    Args:
        operation: The Operation object representing the operation you want to
            wait on.
        project_id: project ID or project number of the Cloud project you want to use.

    Returns:
        Finished Operation object.
    """
    kwargs = {"project": project_id, "operation": operation.name}
    if operation.zone:
        client = compute_v1.ZoneOperationsClient()
        # Operation.zone is a full URL address of a zone, so we need to extract just the name
        kwargs["zone"] = operation.zone.rsplit("/", maxsplit=1)[1]
    elif operation.region:
        client = compute_v1.RegionOperationsClient()
        # Operation.region is a full URL address of a region, so we need to extract just the name
        kwargs["region"] = operation.region.rsplit("/", maxsplit=1)[1]
    else:
        client = compute_v1.GlobalOperationsClient()
    return client.wait(**kwargs)

Java

/**
 * Wait until {@code operation} is completed.
 *
 * @param compute the {@code Compute} object
 * @param operation the operation returned by the original request
 * @param timeout the timeout, in millis
 * @return the error, if any, else {@code null} if there was no error
 * @throws InterruptedException if we timed out waiting for the operation to complete
 * @throws IOException if we had trouble connecting
 */
public static Operation.Error blockUntilComplete(
    Compute compute, Operation operation, long timeout) throws Exception {
  long start = System.currentTimeMillis();
  final long pollInterval = 5 * 1000;
  String zone = getLastWordFromUrl(operation.getZone()); // null for global/regional operations
  String region = getLastWordFromUrl(operation.getRegion());
  String status = operation.getStatus();
  String opId = operation.getName();
  while (operation != null && !status.equals("DONE")) {
    Thread.sleep(pollInterval);
    long elapsed = System.currentTimeMillis() - start;
    if (elapsed >= timeout) {
      throw new InterruptedException("Timed out waiting for operation to complete");
    }
    System.out.println("waiting...");
    if (zone != null) {
      Compute.ZoneOperations.Get get = compute.zoneOperations().get(PROJECT_ID, zone, opId);
      operation = get.execute();
    } else if (region != null) {
      Compute.RegionOperations.Get get = compute.regionOperations().get(PROJECT_ID, region, opId);
      operation = get.execute();
    } else {
      Compute.GlobalOperations.Get get = compute.globalOperations().get(PROJECT_ID, opId);
      operation = get.execute();
    }
    if (operation != null) {
      status = operation.getStatus();
    }
  }
  return operation == null ? null : operation.getError();
}