
Channels are configurable and should be enabled and set up individually.
IVR (Interactive Voice Response) is your standard phone line channel or entry point. You can assign multiple languages, numbers, and many other configurations once enabled.
Mobile is used once the CCAI Platform SDK is installed in your customer-facing Android or iOS app.
Web channel requires the configuration of the Web SDK on one or more of your webpages.
Once channels are enabled, and call or chat channels have been assigned agents, you are ready to handle end-user questions and requests.
Details
At least one agent must be assigned to a call or chat queue for the queue to be enabled
Agents can only be assigned to a leaf queue, so if there is a sub-queue associated, agents must be assigned to one of the sub-queues
Queue menus are set up and ready to use when the color turns from red to white
If enabling multiple languages, see Enable multiple languages for IVR, mobile, and web channels
Assign agents to the IVR channel
Go to Settings > Queue.
Toggle the switch to On.
Click Edit / View.
Queue menu names are listed in the left panel. Select a queue to edit by clicking anywhere next to the name of the queue.
Check the box next to Instant Voice Call.
Click Assign agents to go to the agent assignment page.
Enter the agent names or team names, then click Save.
Follow the steps for either Cascade Groups or Percent Allocation Groups to use an advanced routing configuration.
Assign agents and configuring the mobile channel
Go to Settings > Queuex.
Click Edit / View in the Mobile panel.
Queue menu names are listed in the left panel. Select a queue to edit by clicking anywhere next to the name of the queue.
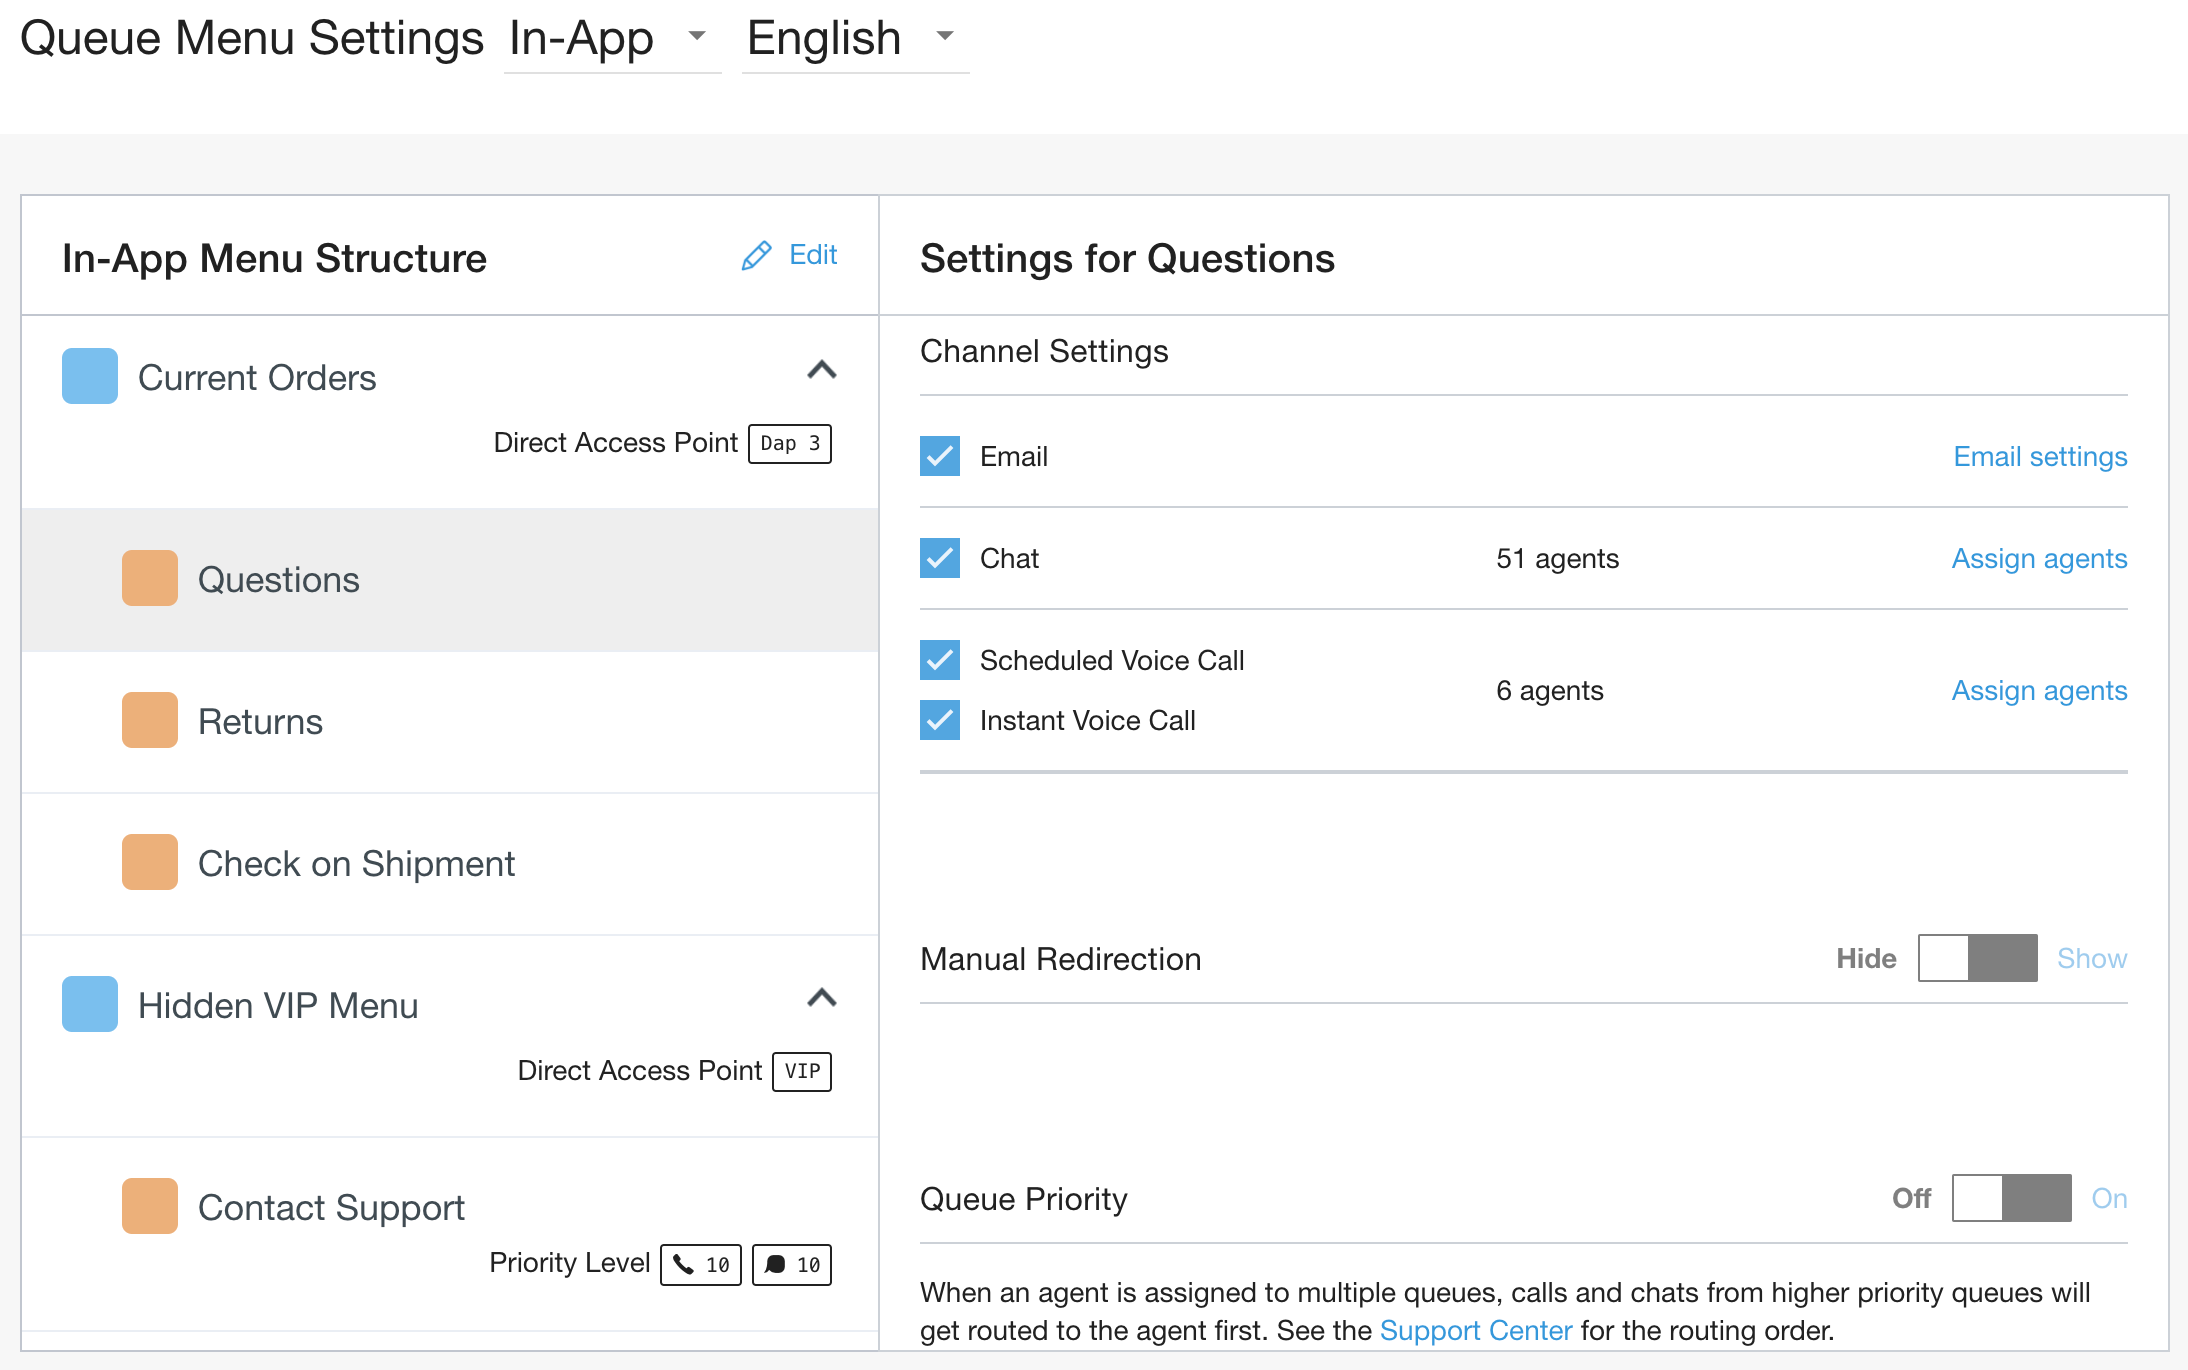
Mark the checkbox for Email to show an email option to customers. Set the email address and instructions for the message field, then click Save Email.
Enter an Email address that will appear as the 'Sender', and check the 'Email' box. This will automatically save the email address that you entered.
(optional) Enter any Instructions for the Message field to appear just above the Message field.
If you enabled either of the optional settings then make sure to click Save Email .
Mark the checkbox for Chat to show chat as an option for this queue.
Mark the checkbox for Scheduled Voice Call to show an option for customers to select from a list of available times to receive a call. See
Mark the checkbox for Instant Voice Call to show an option in the SDK for customers to place a call using the app.
Click Assign agents next to each of the options enabled for the queue.
Follow the steps for either Cascade Groups or Percent Allocation Groups to use an advanced routing configuration.
If using Mobile calls, set up the fallback to IVR setting for each queue. Step-by-step instructions see Mobile: PSTN Fallback.
To hide the menu option so that it is not shown as an option in the SDK, toggle Hide Selection from Menu to Hide.
To direct consumers to a message, phone number, or voicemail, use Automatic Redirection. More information here: Automatic Redirection.
For Custom After Hour Message Deflection Options Mobile and Display After Hour Deflection Message details, see Mobile and SDK Messages.
Enable and add agents to the web channel
Go to Settings > Queue.
Toggle the switch to On.
Click Edit / View to access the editing section for queues within that channel.
Queue names are listed in the left panel. Select a queue to edit by clicking anywhere next to the name of the queue.
Mark the checkbox for Email to show an email option to customers.
Enter an Email address that will appear as the 'Sender', and check the 'Email' box. This will automatically save the email address that you entered.
(optional) Enter any Instructions for the Message field to appear just above the Message field.
(optional) Check the Enable reCAPTCHA box to help prevent spam emails.
If you enabled either of the optional settings then make sure to click Save Email.
Mark the checkbox for Chat to show chat as an option for this queue.
Mark the checkbox for Scheduled Voice Call to show an option for customers to select from a list of available times to receive a call.
Mark the checkbox for Instant Voice Call to show an option for customers to receive a call-back call to the phone number they enter.
Click Assign agents next to each of the options enabled for the queue.
Enter the agent names or team names, then click Save.
Follow the steps for either Cascade Groups or Percent Allocation Groups to use an advanced routing configuration.
To hide the menu option so that it is not shown as an option in the SDK, toggle Hide Selection from Menu to Hide.
To other options than directing consumers straight to an agent, use Automatic Redirection. More information here: Automatic Redirection.
To direct an end-user directly to this queue, use a Direct Access Point. See Direct Access Points (DAPs).
For Display After Hour Deflection Message settings, see Mobile and Web SDK messages.