
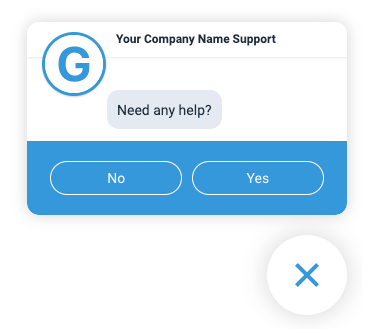
When triggers are configured, and the trigger conditions are met, the Web SDK window will appear expanded on the page, prompting the consumer to make a selection from choices dictated by the trigger configuration. Ex. "Can we help you?" "Want to learn more?"
Proactive triggers help increase product sales and customer retention while minimizing customer churn by sending a relevant, targeted message from any web page.
Feature details
Web SDK Icon options:
Before the trigger conditions are met on a page, the Web SDK icon will still appear on the page by default. The trigger expands the Web SDK window, but the icon is not hidden before the trigger conditions are met.
When configuring the Web SDK, you can hide the Web SDK icon, and have the proactive trigger show the icon and launch the Consumer UI. See hiding the launcher ine the Web SDK Guide.

Triggers conditions can only be met once per day, per consumer/prospect.
Triggers can be set for:
Time spent on a page
Keywords present or not present in the URL
Returning or new visitor to the page
Visited page _ number of times
Setting up Proactive Triggers
There are four steps to follow when setting up a new Proactive Trigger.
Step 1: Name the trigger
From the CCAI Platform portal, select Settings > Chat.
Click View Triggers in the Web Proactive Triggers section.
Click Add Trigger.
Name the trigger for internal identification - if you plan on having multiple, we suggest coming up with a naming convention that will make it easier to find later on. The Next button will turn blue when the trigger has a name.
Click Next.
You can click Save for Later to stop here and save your progress to resume at a later date.
Step 2: Set the trigger conditions
You can set multiple trigger conditions using ADD statements. The criteria for all ADD statements must be met before a session is initiated.
To set the trigger conditions, follow these steps:
To set the first trigger condition, do the following:
In the first field, select whether the keyword is or isn't included in the URL for the page.
In the second field, enter the keyword.
Optional: Click Add OR condition and enter another keyword.
Repeat this step to add more keywords.
Optional: To add an AND condition, do the following:
Click And condition, and then click a condition.
Repeat this step to add more AND conditions.
Click Next.
Step 3: Define actions
After the end-user meets the trigger requirements, the web SDK widget launches. Defining the actions determines what the user sees when the widget appears, letting you direct the end-user to a specific queue and display a specific message.
Example: Trigger is set to launch when there is a consumer who has been on the page before, is on the page for longer than 60 seconds and is on a page that has "help" and "Product1" in the URL. In this case, you would want to direct the consumer straight to the queue that has support agents ready to help with Product 1. The message would say "Looks like you are trying to figure out the specifics of Product 1, would you like to connect with an agent who can help?"
Select the Queue Language associated with the trigger. This will determine the queues presented in the following step, and will allow you to create chat messages in the language for that queue.
Search for the queue to direct the consumer to once the trigger conditions are met. The available queues will be pulled from the Settings > Queues> Web page. Once the setup is complete, an alert will appear, asking you to confirm or cancel the queue selection.
Enter a proactive message in the form of a question, like, "Looking for help?". The answers will always be YES/NO, and the following screen is dictated by the sub-queues which are set up in the Queue Settings. The default message after they select "Yes" is "How can we help?"
To enter hyperlinked text:
Text format structure:
\{https://www.yourcompany.co \| Visit our
website\}
Click Finish to save the trigger and be directed back to the trigger page.
Step 4: Launching and editing your trigger
Click Go Live to launch the trigger and you'll see a confirmation once enabled.
Status: Shows the status of your trigger (Live, Draft).
Conditions Dropdown: Shows current conditions and actions that trigger a session.
Take Offline: Disables the proactive trigger.
Edit: Returns you to the conditions or actions section of the trigger setup.
Delete: Deletes the trigger.