

Allow the mobile (Pro) SDK to be integrated into multiple, distinct mobile apps.
You can control technical settings, queue structures, and routing separately for each app if you have two different iOS and Android apps, one for customers and one for employees.
The Multi Mobile App (MMA) mode in order to manage existing or new mobile apps
In-App Queue Management per Mobile App: Define distinct queue structures and agent assignments per mobile app.
Languages & Messages: Define distinct in-app messages for each mobile app and language combination.
PSTN Fallback to IVR Queue per Mobile App: Assign each mobile app to a top-level IVR queue for fallback calls when VoIP calls aren't possible
This is not strictly necessary to upgrade our SDK in your mobile app, however, CCAI Platform portal based configuration for PSTN fallback and data connectivity threshold levels is only available using SDK v 0.30+.
Guide
The following sections provide a guide for the configuration and various scenarios available.
Step 1: SDK Integration
Integrate the latest CCAI Platform SDK into your mobile apps.
Scenario 1: Single app existing SDK integration
It is recommended, but not strictly necessary to upgrade our SDK in your mobile app, however, CCAI Platform portal based configuration for PSTN fallback and data connectivity threshold levels is only available using SDK v 0.30+.
Scenario 2: New SDK integration
Integrate our latest SDK into your mobile apps
Step 2: Mobile app queue menu structure
Setup the mobile app queue menu.
Scenario 1: Existing Mobile Queue Structure
Modify your existing queue structure by moving the entire structure for your existing app, into a single new top-level queue menu.
Go to Settings > Queue > Mobile, and click Edit/View.
Click Edit to access the Mobile queue structure edit screen.
Create separate top-level Mobile queue structures for each mobile app.
Scenario 2: New mobile app
Create your Mobile queue menu structure. Start by creating a top-level queue for each mobile app and then add the app-specific queue structures within each top-level queue menu.
Step 3: MMA app configuration
Configuration of the mobile application.
Scenario 1: Existing mobile app
Go to Settings > Developer Settings.
There will be a 'Mobile Apps' section if you have an existing app configured:
To prepare your existing app for MMA mode, click the edit (pencil) icon and complete the required fields in the Edit Mobile app window.
Mobile app name (required): Must be a unique name across previously defined mobile apps.
Mobile Identifier iOS / Android - at least one of these is required
Enter the Mobile App identifiers. Without the correct identifier(s), notifications and the SmartAction functionality (via Agent call adapter) won't work.
At least one identifier (OS or Android) needs to be defined
The same identifier can be used for both iOS and Android
The same identifier can't be the same across mobile apps.
To enable the ability for agents to send an SMS to download your app, switch the setting to On.
Enter the appropriate URLs for the App and Play stores.
Fallback phone number: requires the inclusion of country code. For example in the US: 1 714 450 5656
If the mobile SDK detects that the data connectivity for a given call does not meet the configured minimum threshold set, the call will fall back to a PSTN phone call using the number defined here.
Fallback phone number threshold (required if PSTN number is specified): A threshold based on the condition of the caller's data network connectivity, determining whether a call should occur using VoIP or using the fallback PSTN phone number.
Valid range 0 to 1. A high threshold number like 0.98 indicates that a call will occur using PSTN unless data connectivity is excellent. A threshold value of 0 would initiate using VOIP, even for relatively poor data connectivity conditions, likely resulting in reduced call quality. A threshold value of 1, initiates all calls using PSTN.
If the data network connection can't support a VOIP call, PSTN fallback still occurs even with value set to 0.
Don't permit PSTN calls from outside the app: Mark this checkbox if you want to restrict PSTN fallback calls to those made from within the mobile SDK.
When enabled, callers making a direct call from outside the app will be directed to a customizable message and the call is automatically ended after the message has played.
All calls from the mobile app (assuming suitable data connectivity), will include the custom data flow from the app to the CRM / agent.
Push Notifications (required): Certificate PEM file (iOS), FCM (Android) Key
Ensure that PEM file is added if the iOS identifier is specified
Ensure FCM Key is added if Android identifier is specified
Configure Push notification settings based on the readme documents.
Scenario 2: Add your first mobile app
Go to Settings > Developer Settings and navigate to the Mobile Apps section.
Click Add Mobile App and complete the mobile-app configuration dialog as described previously.
Click Submit to save.
Mobile app list - configured app status - not assigned to In-App Queue
When the mobile app status shows an inactive "Off / Active" toggle and a warning triangle, the only available option is to go to the next step and assign the mobile app to an In-App queue.
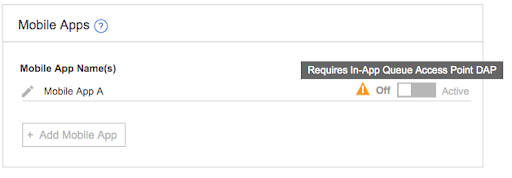
Step 4: In-App queue structure - Mobile App Direct Access Point (DAP) assignment
Define dedicated Mobile top-level queues for each mobile app.
In order to activate a mobile app in Settings > Developer Settings, the mobile app must be assigned as a Mobile App type Direct Access Point (DAP) in the Mobile queue menu structure.
Go to Settings > Queue > In-App > Edit / View.
Click a top-level queue.
In the queue menu settings, navigate to the Direct Access Point section.
Click the Create direct access point link.
Select Mobile App as the Access Point Type. This option is only available for top-level queue menus, so if you don't see it, make sure there isn't a queue above the one you have selected.
Name the Access Point.
Select the mobile app to assign this queue structure to.
Each mobile app can only be applied once as a DAP within the entire In-App queue structure. A mobile app that has already been assigned to a different top-level queue won't be available for selection in another top-level queue.
Click Create to save.
Repeat to assign a Mobile App DAP to each top-level queue menu if you have more than one app.
Details
In-App Queue DAP evaluation will follow existing priority - user segment and general DAPs are evaluated before mobile app.
Alert: Ensure that the DAP evaluation logic conforms to the MMA parent queues and doesn't route end-users from, for example, MMA A to parent queue B because of another DAP.
Step 5: Mobile App DAP assignment to IVR queue menu
PSTN fallback calls generated from a specific mobile app can be sent to a configured Mobile App DAP in the IVR menu. Mobile app-specific messages will be applied.
Similar to how a mobile app is assigned to a top-level Mobile queue menu using DAP, a mobile app can be assigned to an IVR queue using a Mobile App type DAP.
Go to Settings > Queue > IVR | Edit / View.
Click a top-level queue.
In the queue menu settings, navigate to the Direct Access Point section.
Click the Create direct access point link.
Select Mobile App as the Access Point Type. This option is only available for top-level queue menus.
Name the Access Point.
Select the mobile app to assign this queue menu structure to.
Each mobile app can only be applied once as a DAP within the entire IVR queue structure. A mobile app that has already been assigned to a different top-level queue won't be available for selection in another top-level queue.
Click Create to save.
Dial '0' edge case
In PSTN fallback to IVR scenarios it is initially possible for an end-user to navigate to the top of the IVR queue structure by pressing '0' once, or the requisite number of times, depending on where in the queue that is initiated.
This can be averted by updating the "Dial 0" routing per queue, which offers the ability to prevent a user from inadvertently reaching the mobile queue.
Step 6: Messages Setup
On the Settings > Messages & Languages page, it is possible to customize the following messages for each mobile app:
After hour message
Audible messages
- In order to be able to specify audible messages per app, the mobile app DAP (for each mobile app) must be applied to the appropriate IVR menu app(s). See Step 5 - Mobile App DAP assignment to IVR queue menu.
Voicemail message
IVR messages (excluding only the 'purchase flow' messages)
Custom Callback Messages
Important: The channel drop-down selection automatically regulates all message configurations listed in both "Mobile & Web SDK" and "Audible Messages" sections for the selected mobile app, with the following exceptions:
IVR 'purchase flow' messages
All IVR specific messages can only be configured for English
Step 7: Mobile App Activation
Go to Settings > Developer Settings.
Return to the mobile app management section. You will see that the mobile app "Off / Activate" toggle is now enabled.
Toggle switch to Active to activate the mobile app.
Activated app - an existing mobile app will hereby be upgraded to MMA mode.
Once Active:
New apps - all new apps will automatically be generated in MMA mode.
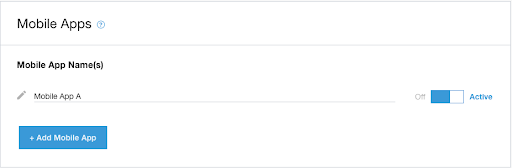
Additional apps - you will be able to define and manage multiple apps from this page.
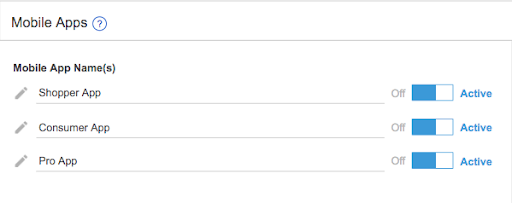
Step 8: Test Push Notifications
You now have the ability to test push notification functionality on a mobile app by mobile app basis. A drop-down enables the administrator or developer to select the specific mobile app to engage the testing with.
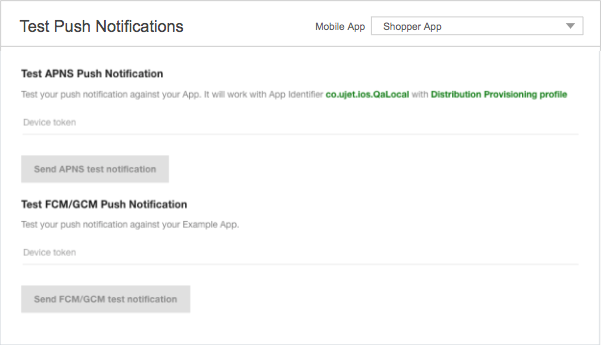
Changes with MMA Mode Activated
The following sections outline the changes needed to enable MMA.
Changes to Portal Settings
After you have upgraded your mobile app to MMA or have created your first MMA app, the following changes are applied:
Settings > Operation Management > Send SMS links section - will be removed from the page. This configuration will then be accessible using the mobile app config dialog.
In-App Queue Structure - ability to assign a mobile app DAP to top level queues.
Settings > Languages & Messages - ability to select specific messaging per mobile app will be added
IVR Queue Structure- ability to assign a mobile app DAP to top-level queues for English language.
Settings > Developer Settings > Test Push Notifications - a mobile app drop-down is added. Select the appropriate app for which you want to test sending notifications.
Agent Call Adapter - has added app selection list for sending links to install and open the app using SMS.
Changes to Mobile Session Flow
Mobile menu session flow with MMA mode enabled
Calls / Chats: When MMA mode is enabled, all incoming calls and chats are directly assigned to the appropriate mobile app assigned through the Mobile App DAP at the top-level queue menu.
Mobile SDK menu: Once a mobile app has been assigned to an in-app top-level queue and the mobile app is activated, the SDK only retrieves menu items in the assigned top-level in-app menu to which it was assigned using DAP.
Languages: Mobile queue languages are applied automatically.
Changes to Agent Adapter and actions
Updates to the agent adapters and actions are outlined in the following sections.
Session Transfers
Session transfers will adopt the following rules:
Transfers to queue
Sessions originating from 'mobile app A' can only be transferred to (sub) queues within that apps' parent queue using the agent call adapter transfer UI. I.e. an agent looking to transfer a 'mobile app A' session to another queue will only be able to:
See destination queues in the originating parent queue, such as 'mobile app A' parent queue.
Select a destination queue in the originating parent queue.
Transfer to agent - a session can be transferred to any available agent, including agents not assigned to any queues in the 'mobile app A' parent queue.
- Follow-on transfer considerations = same rules as the original transfer agent, queue options
Sending 'App Install' / 'Open App' SMS messages
For the following scenarios the agent needs to select the appropriate mobile before they can send the app info using SMS. For example, 'Send SMS to Install' and 'Send SMS to Open App' for:
Outbound calls
IVR calls
In the Agent Adapter, when multiple mobile apps have been configured and the agent is either making an outbound call or handling an inbound IVR call, the agent will be presented with a second screen to select the appropriate mobile app after selecting one of the 'Send SMS to Install / Open App' SmartActions. The list presents the names of the active, configured mobile apps.
Left mobile app screen - various SMS / SmartAction options
Right mobile app screen - 'Send SMS to install App' option selected. Agent then selects the appropriate app (note: the actual configured app names. For example App1, App2 in this example) will be shown in this list.