

This deployment guide provides detailed instructions on how to run state-of-the art Large Language Models (LLMs) using open-source software (OSS) on Google Distributed Cloud (GDC) air-gapped environments. Particularly, this guide presents all the steps required to run the latest releases of Gemma, DeepSeek and Llama models, while introducing common procedures to serve other publicly available LLMs. We will leverage containerized serving backends, such as vLLM and Ollama, which cover a wide range of functionalities, different levels of configuration and ease of deployment.
Content summary
This guide details the deployment and operation of open-source Large Language Models (LLMs) on Google Distributed Cloud (GDC) air-gapped environments.
Core objectives and infrastructure
- Purpose: Detailed instructions for running state-of-the-art LLMs, including Gemma 3 (multimodal), DeepSeek-R1, and Llama (3.1/3.2) using optimized backends like vLLM and Ollama.
- Minimum release: GDC air-gapped software release 1.15.x*.
- Hardware requirements: Minimum 1 NVIDIA A100 GPU is required. High-performance storage (500GiB+ PVC) is recommended to optimize model weight loading times from 30 minutes to under 5 minutes.
Deployment components
| Component | Description |
|---|---|
| LLM backends | vLLM (high-throughput serving with PagedAttention) and Ollama (simplified local management and multimodal support) |
| Models | Publicly available LLMs including Gemma, DeepSeek, and Llama families |
| Accelerators | Supports full NVIDIA A100 GPUs or Multi-Instance GPU (MIG) slices depending on the model's VRAM footprint |
| GDC services | Uses GDC Container Service, Load Balancer (ELB/ILB), Harbor Container Registry |
Key operational procedures
- Model Management: The LLM backend manages model loading and unloading based on usage. vLLM pins models to memory for consistent low latency, while Ollama allows for dynamic model loading but automatically unloads models after 30 minutes of inactivity.
- Customization: Users can bring preferred LLMs by pulling them from the Internet, building new Docker images and uploading to the local Harbor registry.
Prerequisites
Release
- GDC air-gapped version 1.15.1 or higher.
Components
- User cluster created with sufficient resources (CPU, Memory, GPU).
- A minimum of 1 NVIDIA A100 GPU is required.
- Harbor instance available and accessible.
kubectlandgdcloudCLIs configured to access the user cluster.- Docker client installed and configured to push to Harbor.
- Necessary IAM permissions granted (for example, Namespace Admin, Cluster Developer).
- Hugging Face account and authentication configured if using gated models.
Capacity needed
| Resource | Capacity |
|---|---|
| CPU | 8 vCPU |
| RAM Memory | 32 GiB |
| Ephemeral Storage | 16 Gi |
| GPUs | 1 NVIDIA A100 GPU |
| Persistent volume | *500GiB+ |
These hardware resources are needed for serving backends to run LLMs with GPU acceleration. For example, one a2-ultragpu-1g-gdc machine type would provide enough resources.
High-level diagram
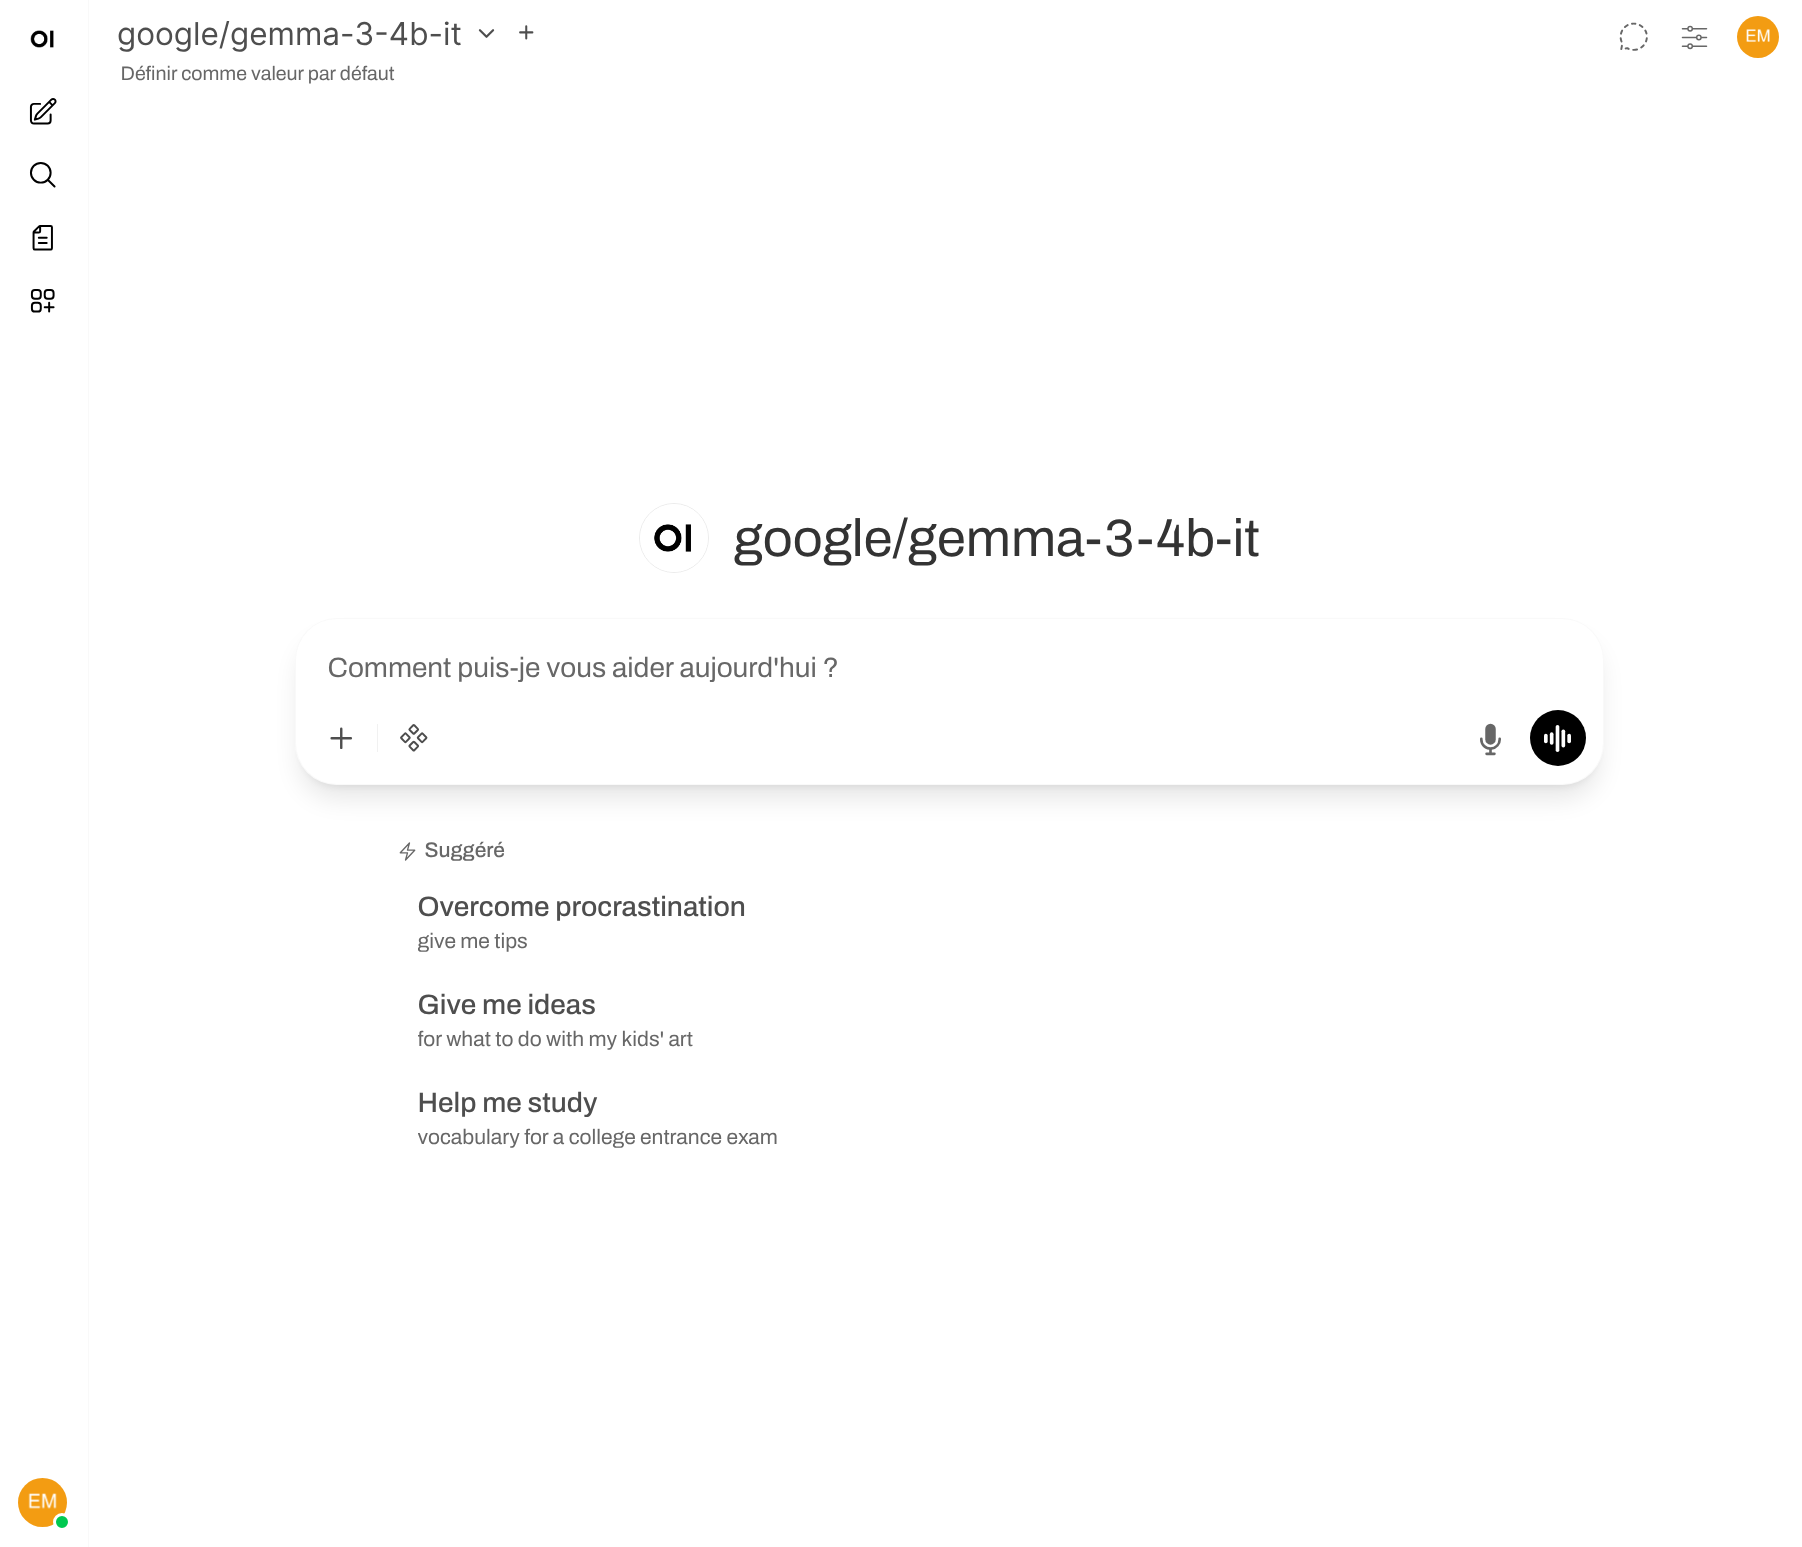
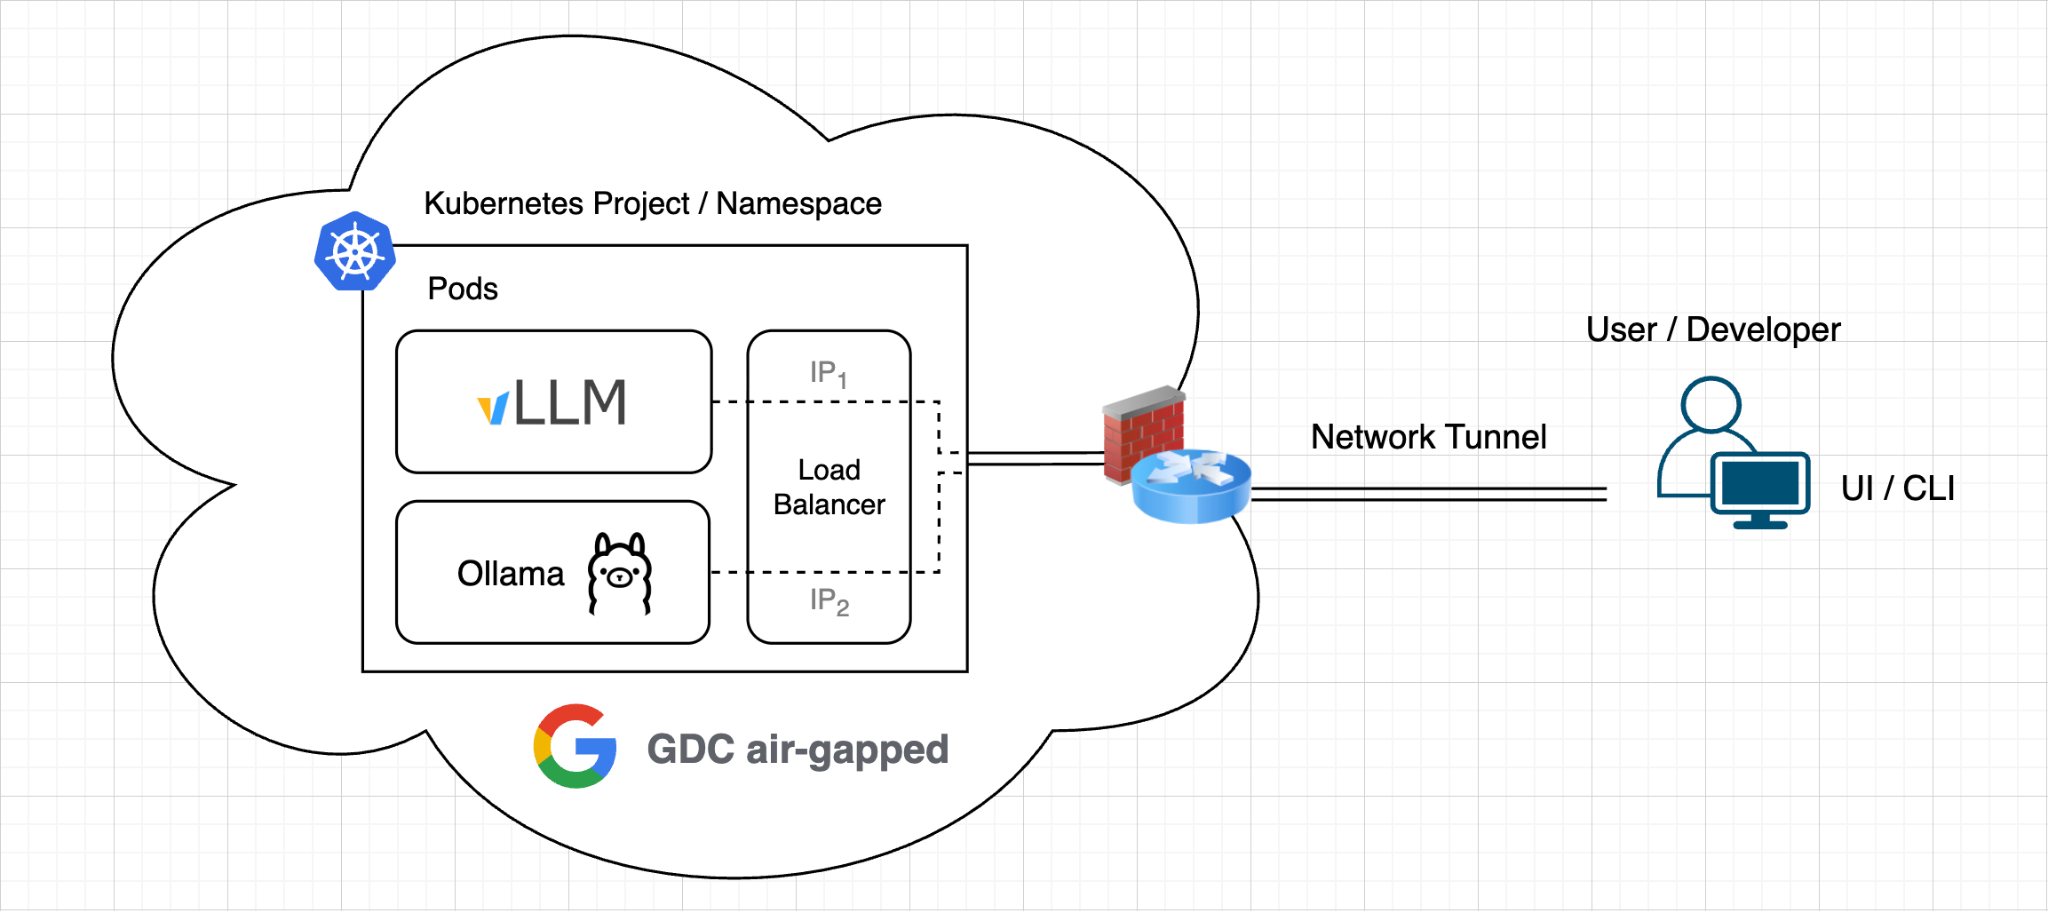
This diagram depicts a user who is consuming APIs exposed by two LLM backends, vLLM and Ollama, to get inference responses from open-source models, such as Gemma, Llama and DeepSeek. Depending on the model size, measured in billions of parameters, each LLM might need a full GPU or a slice of it to run.
Service and security boundary diagram for an LLM deployment
This solution relies upon the following services already included in the GDC air-gapped software stack:
- GDC Container Service: to run all processes and scale them using HPA.
- GDC Load Balancer: using a Kubernetes Service, to serve all backends in this solution and make the LLMs accessible from the customer network, this is called ELB stand for External Load Balancer. Conversely, the customer can opt to keep LLMs reachable from inside a user cluster only, which might be useful when there is only an internal agent requesting inferences inside their solution, this is called ILB stand for Internal Load Balancer.
- GDC CI/CD: Harbor Container Registry to store LLM backends and model weights.
- GDC Observability Stack: to collect and search backend logs and provide dashboards.
In terms of security, the access to the LLM deployment depends on which users can reach the Load Balancer service that exposes the LLM serving backends, which are running as pods in a Kubernetes project / namespace.
Deployment
Prerequisites
Install the following tools on a workstation connected to your GDC air-gapped environment:
This document contains all the source code and configuration files you need to deploy LLMs.
Create a secret to pull images from Harbor
To configure an image pull secret for a container workload in
GDC air-gapped, you need to create a Kubernetes
docker-registry secret containing credentials to access your private Harbor
project. This secret is then referenced in your deployment specification.
You should use a Harbor robot account for programmatic access to images in private Harbor projects.
Follow these steps to configure the image pull secret:
Create a Harbor robot account:
- Navigate to your Harbor instance UI.
- Go to your Harbor project.
- Select the "Robot Accounts" tab.
- Click "+ NEW ROBOT ACCOUNT".
- Give it a name (for example,
oss-llm-puller) and grant it the necessary permissions (at least "pull" access) until an expiration time. - Securely store the robot account name (for example,
robot$oss-llm-puller) and the secret token provided.
Authenticate Docker to Harbor:
On your machine with Docker installed and network access to the Harbor registry, sign in using the robot account credentials:
export INSTANCE_URL="your-harbor-instance-url"
# for example, harbor1-project1.org1.zone1.google.gdc.com

export ROBOT_NAME="your-robot-account-name"
# for example, robot\$oss-llm-puller (note how we escape the $ character)

export ROBOT_SECRET="your-robot-account-secret"

docker login ${INSTANCE_URL} --username ${ROBOT_NAME} --password ${ROBOT_SECRET}

# Sample output:

WARNING! Using --password via the CLI is insecure. Use --password-stdin.

WARNING! Your credentials are stored unencrypted in '$HOME/.docker/config.json'.
Configure a credential helper to remove this warning. See
https://docs.docker.com/go/credential-store/

Login Succeeded
As shown in the sample output, this command updates your local Docker configuration file ($HOME/.docker/config.json) with the authentication details. The config.json file looks like this:
{
    "auths": {
        "harbor1-project1.org1.zone1.google.gdc.com": {
            "auth": "...omitted..."
        }
    }
}
If you used your Docker client to log into other registries in the past, you will see more entries inside "auths".
Create the Kubernetes image pull secret:
Use kubectl to create a secret of type docker-registry in your project
namespace, using the Docker configuration file updated in the previous step:
# Log in to GDC air-gapped using the next commands

gdcloud auth login --login-config-cert {path to your web TLS certificate}

gdcloud clusters get-credentials {Your User Cluster}
kubectl config set-context --current --namespace=NAMESPACE

export SECRET_NAME="oss-llm-pull-secret" # You can choose another name
export NAMESPACE="your-project-namespace"
# Assuming default Docker config path. Adjust if necessary.
export DOCKER_CONFIG_PATH="$HOME/.docker/config.json"

kubectl create secret docker-registry ${SECRET_NAME} \
      --from-file=.dockerconfigjson=${DOCKER_CONFIG_PATH} \
      -n ${NAMESPACE}
You will reference this secret later in your LLM backend container
specification by including the imagePullSecrets field.
By following these steps, your Kubernetes cluster will now use the provided credentials to pull a container image from your private Harbor registry in your GDC air-gapped environment. These steps are also included in the product documentation.
Set up the LLM deployment
You have the following two options for the LLM Backend:
- vLLM
- Ollama
You can pick one of them or deploy both backends. Each backend can run one or more LLMs, for example:
- Gemma 3
- DeepSeek
- Llama
- Other LLMs
In section 1, we provide instructions on how to deploy vLLM, and in section 2, we show how to install Ollama.
1. Deploy vLLM as your LLM backend
Get the vLLM Docker image
In general, vLLM is used to serve models downloaded from HuggingFace as we will show in this LLM deployment. Some models are gated, this means that users must explicitly request or agree to access their files and contents on the Hugging Face Hub before they can download or use them.
Sign in to your Harbor instance using Docker as explained in the documentation. On a machine with internet access, pull the vLLM Docker image and then transfer it to your Harbor project:
# Pull and Tag vLLM (v0.13.0 recommended for stability)
docker pull vllm/vllm-openai:v0.13.0
docker tag vllm/vllm-openai:v0.13.0 HARBOR_URL/PROJECT/vllm-openai:v0.13.0
docker push HARBOR_URL/PROJECT/vllm-openai:v0.13.0
Replace the following:
HARBOR_URL: the Harbor instance URL.PROJECT: the Harbor project name.
The vLLM version used for this deployment guide is: v0.13.0
Store your LLM model weights in a PVC
Open a new Terminal and create a folder where you will save your vLLM deployment files:
mkdir vllm-deployment
cd vllm-deployment
Then create a YAML file (for example, model-pvc.yaml) to declare a Persistent
Volume Claim (PVC) using standard Kubernetes primitives:
apiVersion: v1
kind: PersistentVolumeClaim
metadata:
  name: model-pvc
spec:
  accessModes:
  - ReadWriteOnce
  resources:
    requests:
      storage: 500Gi
  storageClassName: standard-rwo
  volumeMode: Filesystem
Connect to your GDC air-gapped cluster and apply the PVC:
# Log in to GDC air-gapped using the next commands

gdcloud auth login --login-config-cert {path to your web TLS cert}

gdcloud clusters get-credentials {Your User Cluster}
kubectl config set-context --current --namespace=NAMESPACE

# Apply the PVC manifest
kubectl apply -f model-pvc.yaml
Download model weights from Hugging Face:
# Log in to Hugging Face
hf auth login

# Download weights for Gemma 3 (for example, 4B instruction-tuned)
hf download google/gemma-3-4b-it
Sample output:
Fetching 9 files: 100%| 9/9 [00:00<00:00, 19.34it/s]
Downloading (…)7f58a/.gitattributes: 100%| 1.62k/1.62k [00:00<00:00, 7.82MB/s]
Downloading (…)del-00002-of-00002.safetensors: 100%| 3.75G/3.75G [00:46<00:00, 81.3MB/s]
Downloading (…)del-00001-of-00002.safetensors: 100%| 4.90G/4.90G [00:54<00:00, 90.1MB/s]
Downloading (…)-3-4b-it/README.md: 100%| 23.3k/23.3k [00:00<00:00, 48.0MB/s]
Downloading (…)8a/model.safetensors.index.json: 100%| 26.3k/26.3k [00:00<00:00, 39.5MB/s]
Downloading (…)f58a/config.json: 100%| 908/908 [00:00<00:00, 4.41MB/s]
Downloading (…)generation_config.json: 100%| 210/210 [00:00<00:00, 936kB/s]
Downloading (…)tokenizer.json: 100%| 33.1M/33.1M [00:01<00:00, 17.6MB/s]
/Users/rashjab/.cache/huggingface/hub/models--google--gemma-3-4b-it/snapshots/952ec8ffca3adadfd00c6d71b40280ebdbb7f58a
As you can see in the sample output, the model size on disk is 8.64 GB which fits into the 500 GiB PVC we defined before. Always ensure this is the case for any model you choose to load into the Persistent Volume (PV) and, for example, a 15GB model, using a 500 GiB PVC to achieve 1,500 IOPS, significantly reducing weight loading time from ~30 minutes to under 5 minutes.
Populate the PV by copying the model files into its volume. This often involves:
- Creating a temporary "helper" pod that mounts the PV.
- Using
kubectl cpto copy the model files from your workstation into the helper pod's mounted volume. - Example helper pod:
helper-pod.yaml
apiVersion: v1
kind: Pod
metadata:
  name: model-uploader
spec:
  containers:
  - name: uploader
    image: HARBOR_URL/PROJECT/busybox:latest
    command: ["sleep", "3600"]
    volumeMounts:
    - name: model-data
      mountPath: /data
  imagePullSecrets:
  - name: oss-llm-pull-secret
  volumes:
  - name: model-data
    persistentVolumeClaim:
      claimName: model-pvc
Replace the following:
HARBOR_URL: the Harbor instance URL.PROJECT: the Harbor project name.oss-llm-pull-secret: if you chose a different image pull secret name.model-pvc: with the name you gave to your PVC.
Push the helper Docker image (busybox):
docker pull busybox:latest
docker tag busybox HARBOR_URL/PROJECT/busybox:latest
docker push HARBOR_URL/PROJECT/busybox:latest
Replace the following:
HARBOR_URL: the Harbor instance URL.PROJECT: the Harbor project name.
Apply the helper-pod.yaml file and copy model weights to the PV:
kubectl apply -f helper-pod.yaml

# Wait for the pod to be Running
kubectl cp ~/.cache/huggingface/hub/ NAMESPACE/model-uploader:/data/

# After copying, delete the helper pod
kubectl delete pod model-uploader
Deploy the vLLM backend
Create the deployment file for vLLM to run the model server. The following example deploys the gemma-3-4b-it model.
vllm-gemma-3-4b-it-deployment.yaml
apiVersion: apps/v1
kind: Deployment
metadata:
  name: gemma-3-4b-it
  labels:
    app: gemma-3-4b-it
spec:
  replicas: 1
  selector:
    matchLabels:
      app: gemma-3-4b-it
  template:
    metadata:
      labels:
        app: gemma-3-4b-it
    spec:
      volumes:
      - name: cache-volume
        persistentVolumeClaim:
          claimName: model-pvc # change with the name you gave initially to your PVC
      # vLLM needs to access the host's shared memory for tensor parallel inference.
      - name: shm
        emptyDir:
          medium: Memory
          sizeLimit: "16Gi"
      containers:
      - name: gemma-3-4b-it
        image: HARBOR_URL/PROJECT/vllm-openai:v0.13.0
        command: ["python3"]
        args: [
          "-m",
          "vllm.entrypoints.openai.api_server",
          "--model",
          "google/gemma-3-4b-it", # Use the repo ID
          "--max-model-len",
          "32768",
          "--enforce-eager"
        ]
        env:
        - name: HF_HUB_OFFLINE
          value: "1"
        - name: HF_HOME
          value: "/model" # Tells vLLM to look for models in /model/hub
        # --- PERFORMANCE & STABILITY OPTIMIZATIONS ---
        - name: NCCL_P2P_DISABLE
          value: "1" # Prevents initialization hangs on P2P checks
        - name: NCCL_IB_DISABLE
          value: "1" # Prevents initialization hangs on InfiniBand checks
        # --- FIPS BYPASS ---
        - name: BORINGSSL_FIPS
          value: "0"
        - name: OPENSSL_FIPS
          value: "0"
        - name: OPENSSL_CONF
          value: "/dev/null"
        - name: FIPS_SIG
          value: "off"
        ports:
        - containerPort: 8000
        securityContext:
          privileged: true
          runAsUser: 0
        resources:
          limits:
            nvidia.com/gpu-pod-NVIDIA_A100_80GB_PCIE: 1
            cpu: "8"       # Increased to handle model weight verification
            memory: "64Gi"  # Increased to ensure headroom for weight loading
          requests:
            nvidia.com/gpu-pod-NVIDIA_A100_80GB_PCIE: 1
            cpu: "8"
            memory: "32Gi"
        volumeMounts:
        - name: cache-volume
          mountPath: /model
        - name: shm
          mountPath: /dev/shm
      imagePullSecrets:
      - name: oss-llm-pull-secret
Replace the following:
HARBOR_URL: the Harbor instance URL.PROJECT: the Harbor project name.oss-llm-pull-secret: the name you gave during the image pull secret creation.claimName: the name you gave to your initial PVC creation.
Next, create a Kubernetes Service file to expose the vLLM backend APIs:
vllm-gemma-3-4b-it-service.yaml
apiVersion: v1
kind: Service
metadata:
  name: gemma-3-4b-it
  namespace: NAMESPACE
spec:
  ports:
  - name: http-gemma-3-4b-it
    port: 80
    protocol: TCP
    targetPort: 8000
  selector:
    app: gemma-3-4b-it
  sessionAffinity: None
  type: LoadBalancer
Apply the deployment and service configurations:
kubectl apply -f vllm-gemma-3-4b-it-deployment.yaml
kubectl apply -f vllm-gemma-3-4b-it-service.yaml
Verify and test the vLLM deployment
Check pod status:
kubectl get podsWait for the pod to be in the
Runningstate.Check the service:
kubectl get serviceSample output:
# NAME          TYPE         CLUSTER-IP     EXTERNAL-IP      PORT(S)        AGE
# gemma-3-4b-it LoadBalancer 10.201.136.62  136.125.37.198   80:30109/TCP   3d1h
Keep a note of the
EXTERNAL-IPof the vLLM service (for example,136.125.37.198) from the previous output. You can also print it with:kubectl get service gemma-3-4b-it \ -o jsonpath='{.status.loadBalancer.ingress[*].ip}'View logs:
kubectl logs YOUR_VLLM_PODLook for messages indicating the server has started and the model is loaded (for example,
INFO: Application startup complete.). Since there's no Hugging Face download, it should be quick if the files are on the PVC with a high Persistent Volume capacity.Test inference with curl:
After you have verified that the vLLM pod is running and you have the Service's external IP address, you can send an inference request using
curl. Since vLLM provides an OpenAI-compatible API, you can use the/v1/chat/completionsendpoint:curl http://EXTERNAL_IP/v1/chat/completions \ -H "Content-Type: application/json" \ -d '{ "model": "google/gemma-3-4b-it", "messages": [ {"role": "user", "content": "What is Google Distributed Cloud air-gapped?"} ], "max_tokens": 100 }'Replace
EXTERNAL_IPwith the external IP address of the vLLM service.
2. Deploy Ollama as your LLM backend
Ollama is a popular framework for running open-source LLMs locally and in containerized environments. It simplifies model execution by handling weight downloads, quantization, and GPU acceleration. It includes a built-in REST API for generating completions, chat responses, and embeddings.
Unlike other serving engines, Ollama manages model execution dynamically:
- Dynamic Model Loading: When a request for a specific model is received, Ollama loads the weights into memory (GPU VRAM or system RAM) on demand.
- Inactivity Unloading: If no inference requests are received for a model
for 30 minutes (configurable with
OLLAMA_KEEP_ALIVE), Ollama unloads it from memory to free up hardware resources for other workloads. - Single Active Model per Instance: Ollama processes requests for one active model at a time per server instance. If multiple models are called in parallel, Ollama queues the requests and swaps models sequentially, which can introduce latency. To serve multiple models simultaneously without swapping, you should deploy separate Ollama instances for each model.
Download model weights and create a Docker image
Unlike vLLM, which can load weights directly from a Persistent Volume, Ollama
typically expects models to be stored in its internal directory format
(~/.ollama/models).
In an air-gapped environment, where the runtime containers cannot download models from the public internet, you must pre-package the model weights into the container image itself during the build phase. This approach ensures the container is completely self-contained and ready to serve immediately upon deployment without requiring external network access.
Create a folder for the Ollama deployment:
mkdir ollama-gemma3
cd ollama-gemma3
Create a Dockerfile with the following content:
# Use a standard Linux base image
FROM ubuntu

# Install necessary dependencies
RUN apt-get update && apt-get install -y --no-install-recommends \
    curl \
    ca-certificates \
    zstd \
    && rm -rf /var/lib/apt/lists/*

# Install Ollama
# This uses Ollama's official installation script, which adds Ollama to /usr/local/bin
RUN curl -fsSL https://ollama.com/install.sh -o install.sh && \
    chmod +x install.sh && \
    ./install.sh && \
    rm install.sh

# Set environment variables for Ollama (optional, but a good practice)
# ENV OLLAMA_HOST="0.0.0.0"

# If you want to customize the model storage path within the container, set OLLAMA_MODELS, for example:
# ENV OLLAMA_MODELS="/usr/local/ollama/models"
# The default OLLAMA_MODELS is /root/.ollama
# Then, ensure you create and populate that directory.

# --- Download Gemma 3 model weights ---
# This step starts Ollama server in the background, pulls the model,
# and then kills the server to allow the Docker build to continue.
# This approach works around the Docker RUN command limitations for services.

RUN ollama serve & \
    # Give the Ollama server a moment to start up
    # Use --retry and --retry-connrefused to handle startup delays
    curl --retry 10 --retry-connrefused -s http://localhost:11434 || true && \
    # Pull the Gemma 3 model weights
    ollama pull gemma3:latest && \
    # Stop the background Ollama server process cleanly
    pkill ollama || true

# Expose Ollama's default port
EXPOSE 11434

# Command to run Ollama server when the container starts
CMD ["ollama", "serve"]
If you want to try a different open source LLM, such as a model from Llama 3.2 or DeepSeek-R1 families, modify this Ollama command in the previous Dockerfile:
ollama pull gemma3:latest
For example, if you want to pull Llama 3.2 with 3 billion parameters, use this command:
ollama pull llama3.2:3b
Or, if you prefer to use DeepSeek-R1 with 8 billion parameters, use this command:
ollama pull deepseek-r1:8b
You can also download more than one LLM and have their model weights containerized. Then, Ollama will be able to switch between models as you request inferences by different pre-loaded models. For example, you can have both Gemma and Llama models added into your Docker image. Recall that in an air-gapped environment, an Ollama backend does not have access to the Ollama library to download any model at any time.
Remember to check and agree to each model license and terms of use before running them in your applications. There are many LLMs in Ollama's library. You will only need an Internet connection to download the model weights while building the LLM backend Docker image.
Build the Docker image and push it to Harbor
Sign in to your Harbor instance using Docker as explained in the documentation. Build the Gemma 3 docker image and upload it to your Harbor repository:
docker build -t ollama-gemma3 .
docker tag ollama-gemma3 HARBOR_URL/PROJECT/ollama-gemma3:latest
docker push HARBOR_URL/PROJECT/ollama-gemma3:latest
Replace the following:
HARBOR_URL: the Harbor instance URL.PROJECT: the Harbor project name.
Ollama version used for this deployment guide: 0.14.1
Prepare a Kubernetes deployment and a service
Create a file named ollama-gemma3.yaml to define the Ollama backend deployment and its load balancer configuration to expose it as a service:
apiVersion: apps/v1
kind: Deployment
metadata:
  name: ollama-gemma3
  namespace: osd-dev
  labels:
    app: ollama-gemma3
spec:
  replicas: 1
  selector:
    matchLabels:
      app: ollama-gemma3
  template:
    metadata:
      labels:
        app: ollama-gemma3
    spec:
      containers:
      - name: ollama-gemma3
        image: rashjab-mhs-rashjab-test2.gdc1.us-west6-a.staging.gpcdemolabs.com/rashjab-repo/ollama-gemma3:latest
        env:
        # This is the crucial fix: Tell Ollama to listen on all network interfaces
        - name: OLLAMA_HOST
          value: "0.0.0.0"
        imagePullPolicy: Always
        ports:
        - containerPort: 11434
        securityContext:
          privileged: true
          runAsUser: 0
        resources:
          limits:
            nvidia.com/gpu-pod-NVIDIA_A100_80GB_PCIE: 1
          requests:
            nvidia.com/gpu-pod-NVIDIA_A100_80GB_PCIE: 1
      imagePullSecrets:
      - name: oss-llm-pull-secret
---
apiVersion: v1
kind: Service
metadata:
  name: ollama-gemma3
  namespace: osd-dev
spec:
  type: LoadBalancer
  selector:
    app: ollama-gemma3
  ports:
  - name: ollama-gemma3-port
    port: 11434
    protocol: TCP
    targetPort: 11434
Replace the following:
HARBOR_URL: the Harbor instance URL.PROJECT: the Harbor project name.oss-llm-pull-secret: if you chose a different image pull secret name.
Verify the GPU allocation
GDC air-gapped supports NVIDIA Multi-Instance GPUs (MIG), and its different MIG profiles can be reviewed in the public documentation. If you are deploying small LLMs, it is advisable to check their sizes (in memory) and partition your GPUs accordingly. The partitioning scheme for a node pool is defined in its Cluster custom resource. For more information on how to apply a GPU partitioning scheme, see Add a node pool. If you are an Application Operator (AO), consult your Platform Administrator (PA) about the installed and available accelerators in your project / cluster. You can find more details on how to configure a container to use GPU resources and how to check GPU resource allocation.
The Gemma 3 4B model default precision is 16-bit. According to this table published by Google, the GPU memory requirement for this LLM is 6.4 GB, using BF16 (16-bit) precision.
In the previous ollama-gemma3.yaml, we attached a 10 GB GPU slice (NVIDIA
A100) to the container, since this amount of VRAM memory is enough to load the
Gemma 3 4B model and run it, as shown next:
ollama-gemma3.yaml
... omitted ...

        resources:
          limits:
            nvidia.com/mig-1g.10gb-NVIDIA_A100_80GB_PCIE: 1
          requests:
            nvidia.com/mig-1g.10gb-NVIDIA_A100_80GB_PCIE: 1

... omitted ...
Deploy the Ollama backend and expose it as a service
Connect to your cluster and set the context to your project namespace:
# Log in to GDC air-gapped using the next commands

gdcloud auth login --login-config-cert {path to your web TLS certificate}

gdcloud clusters get-credentials {Your User Cluster}
kubectl config set-context --current --namespace=NAMESPACE
Apply the Ollama manifest:
kubectl apply -f ollama-gemma3.yaml
Ensure the Ollama pod is running and the associated service is in place:
kubectl get pods
Sample output:
# NAME                             READY   STATUS    RESTARTS   AGE
# ollama-gemma3-6fc6fff74b-9qtpf   1/1     Running   0          1h
kubectl get service
Sample output:
# NAME             TYPE          CLUSTER-IP    EXTERNAL-IP    PORT(S)          AGE
# ollama-gemma3   LoadBalancer  172.0.0.1     10.0.0.1       11434:31822/TCP  1d
Keep a note of the EXTERNAL-IP of the Ollama service (for example, 10.0.0.1)
from the previous output. You can also print it with:
kubectl get service ollama-gemma3 \
-o jsonpath='{.status.loadBalancer.ingress[*].ip}'
Before checking that Ollama Gemma 3 is working, you will need to apply a Network policy such as :
apiVersion: networking.gdc.goog/v1
kind: ProjectNetworkPolicy
metadata:
  name: allow-ollama-ingress
  namespace: osd-dev
spec:
  subject:
    subjectType: UserWorkload
  policyType: Ingress
  ingress:
  - from:
    - ipBlock:
        cidr: 0.0.0.0/0 # Allows traffic from any IP. Restrict this for production.
    ports:
    - protocol: TCP
      port: 11434
Apply the network policy:
kubectl apply -f ollama-netpol.yaml
Verify and test the Ollama deployment:
Check if Ollama is running:
curl http://EXTERNAL_IP:11434Expected response: "Ollama is running"
Send a completion request:
curl -X POST http://EXTERNAL_IP:11434/v1/completions \
  -H "Content-Type: application/json" \
  -d '{
    "model": "gemma3:latest",
    "prompt": "Google Distributed Cloud air-gapped is a",
    "max_tokens": 128,
    "temperature": 0.90
  }'
Request inferences
Now that your LLM backends (vLLM and Ollama) are deployed and reachable through their respective LoadBalancer services, you can start consuming them for inference.
Depending on your use case, you have several options:
- Interactive Web UI: For testing, prototyping, or providing a ChatGPT-like experience for users, you can deploy Open WebUI or a similar frontend.
- Command-Line Interface (CLI): For quick verification, scripting, or
automation, you can use
curlor custom scripts. - Application Integration: Connect your internal applications, AI agents,
or IDE plugins (for example, Continue for VS Code/JetBrains) directly to the
OpenAI-compatible endpoints provided by vLLM (
/v1) or Ollama (/v1).
1. Interact with the LLM using a UI
To provide a ChatGPT-like interface for interacting with your models, deploy Open WebUI in your cluster.
Create the Open WebUI Deployment
Create open-webui-deployment.yaml:
apiVersion: apps/v1
kind: Deployment
metadata:
  name: open-webui
  namespace: osd-dev
  labels:
    app: open-webui
spec:
  replicas: 1
  selector:
    matchLabels:
      app: open-webui
  template:
    metadata:
      labels:
        app: open-webui
    spec:
      containers:
      - name: open-webui
        image: HARBOR_URL/PROJECT/open-webui:latest
        imagePullPolicy: IfNotPresent
        ports:
        - containerPort: 8080
        env:
        - name: OPENAI_API_BASE_URL
          value: "http://gemma-3-4b-it/v1" # Point to your vLLM service
        - name: OPENAI_API_KEY
          value: "EMPTY"
        - name: WEBUI_AUTH
          value: "False"
      imagePullSecrets:
      - name: oss-llm-pull-secret
---
apiVersion: v1
kind: Service
metadata:
  name: open-webui
  namespace: osd-dev
spec:
  type: LoadBalancer
  selector:
    app: open-webui
  ports:
  - port: 80
    targetPort: 8080
Apply the Network Policy
You must allow your machine to reach the Open WebUI service on port 80.
Update your PNP Project Network policy to include the open-webui service or apply a broad one:
apiVersion: networking.gdc.goog/v1
kind: ProjectNetworkPolicy
metadata:
  name: allow-webui-ingress
  namespace: NAMESPACE
spec:
  subject:
    subjectType: UserWorkload
  policyType: Ingress
  ingress:
  - from:
    - ipBlock:
        cidr: 0.0.0.0/0 # Allows traffic from any IP then restrict this for production
    ports:
    - protocol: TCP
      port: 8080
Verification
Get the WebUI IP:
kubectl get service open-webui -n NAMESPACEAccess the UI: Open your browser and navigate to
http://WEB_UI_EXTERNAL_IPConfigure: On the first sign in, create an administrator account. In the settings, ensure the OpenAI connection points to
http://gemma-3-4b-it/v1Select Model: In the chat interface, select
google/gemma-3-4b-itfrom the model drop-down.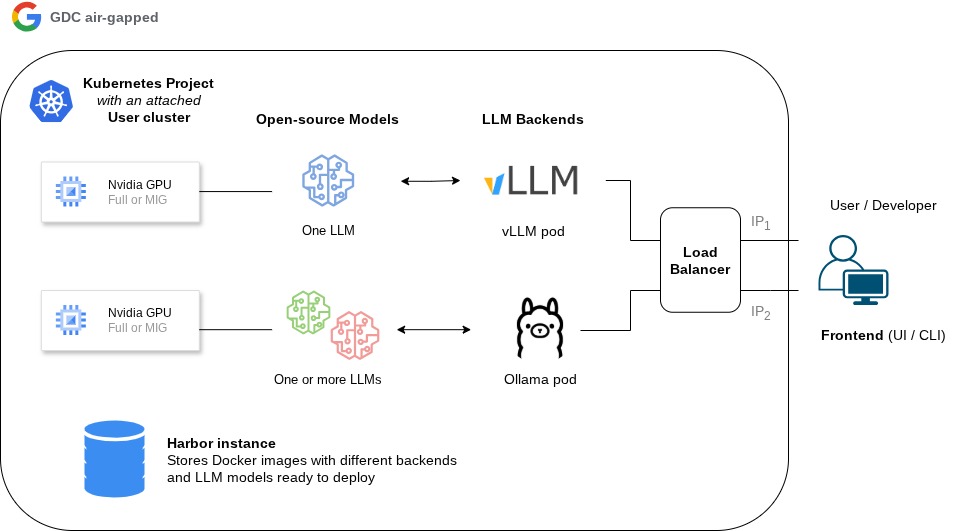
2. Make HTTP requests using a CLI
- curl:
curl -X POST http://OLLAMA_LOAD_BALANCER_IP:11434/v1/completions \
-H "Content-Type: application/json" \
-d '{
  "model": "gemma3:latest",
  "prompt": "Google Distributed Cloud air-gapped is a",
  "max_tokens": 128,
  "temperature": 0.90
}'
Validation and verification
Check that all containers and services are Running:
# Log in to GDC air-gapped using the next commands

gdcloud auth login --login-config-cert {path to your web TLS cert}
gdcloud clusters get-credentials {Your User Cluster}
kubectl config set-context --current --namespace=NAMESPACE

# Pods

kubectl get pods # This command should return results like below

# NAME                                   READY   STATUS    RESTARTS   AGE
# vllm-6fc6fff74b-9qtpf                 1/1     Running   0          1h
# ollama-798fbf6ff6-9m7ln               1/1     Running   0          1h


# Services

kubectl get services # This command should return results like below

# NAME                      TYPE           CLUSTER-IP      EXTERNAL-IP    PORT(S)           AGE
# vllm-service              LoadBalancer   172.0.0.1        10.0.0.1       11434:31822/TCP   1h
# ollama-service        LoadBalancer   172.0.0.2        10.0.0.2       11434:30728/TCP   1h
Removal steps
Remove all Kubernetes resources:
kubectl delete -f vllm-gemma-3-4b-it-deployment.yaml
kubectl delete -f vllm-gemma-3-4b-it-service.yaml
Delete unused containers manually from your Harbor repository.
Operations
vLLM backend
vLLM Basics
vLLM is designed as a high-performance single-model serving engine. It does not support serving multiple models within a single server process or defining multiple models in a single startup command. To serve more than one model (for example, a chat model and a separate embedding model), you must launch separate vLLM instances, each in its own pod or container, optionally assigned to different GPUs or GPU slices. Unlike other backends that might dynamically swap models, a vLLM instance pins its model and the associated KV cache memory upon initialization to ensure consistent high throughput and low latency.
You can open a terminal on any of the vLLM pods by using the next commands:
kubectl exec -it gemma-3-4b-random-string -n NAMESPACE -- /bin/bash
This will show you which models are loaded, their arguments, and their PIDs :
ps aux | grep vllm
Expected similar output:
root           1  0.1  0.8 9436960 1550504 ?     Ssl  Feb04   9:18 python3 -m vllm.entrypoints.openai.api_server --model google/gemma-3-4b-it --max-model-len 32768 --enforce-eager
root         504  0.0  0.0   3476  1596 pts/0    S+   02:48   0:00 grep --color=auto vllm
If you want a cleaner, more "Ollama-like" view without the clutter of the
grep command itself and the system PIDs, you can use this one-liner:
ps aux | grep [v]llm.entrypoints | awk -F'--model ' '{print $2}' | awk '{print $1}'
Sample response :
google/gemma-3-4b-it
You can monitor the status of your vLLM deployment using standard kubectl
commands and by querying the internal API endpoints.
Check Pod Logs
Open a terminal to view the initialization and serving logs:
kubectl logs -f gemma-3-4b-it-random_string -n NAMESPACE
Look for the confirmation that the server is ready:
(APIServer pid=1) INFO:     Started server process [1]
(APIServer pid=1) INFO:     Waiting for application startup.
(APIServer pid=1) INFO:     Application startup complete.
Query Internal Status
Since vLLM provides an OpenAI-compatible API, you can verify the loaded models and system health directly from a terminal inside the cluster (for example, using a debug-sh pod).
You need first to launch the debug pod, here are the instructions :
Launch the Debug Pod
Run the following command to start an ephemeral shell in your project
namespace. This configuration uses the busybox image (previously pushed to your
Harbor registry) and injects the necessary credentials with the --overrides
flag:
kubectl run --rm -it debug-sh \
  --image=HARBOR_URL/PROJECT/busybox:latest \
  --restart=Never -n osd-dev --overrides='{
    "spec": {
      "imagePullSecrets": [{"name": "oss-llm-pull-secret"}]
    }
  }' -- sh
Key parameters:
--rm: Automatically deletes the pod upon exit, preserving cluster resources.--overrides: Mandatory in air-gapped environments to allow the pod to authenticate with the private Harbor registry.
Query Model Server Status
Once inside the pod, use the wget utility to query the vLLM API. Since the
vLLM service maps internal port 8000 to port 80, you can use the service's DNS
name:
List Loaded Models: Verify that the vLLM engine has successfully initialized and loaded the Gemma 3 weights.
wget -qO- http://gemma-3-4b-it/v1/modelsSuccess Response:
{"object":"list","data":[{"id":"google/gemma-3-4b-it"}]}Check Application Health: Confirm the API server is ready to process requests.
wget -qO- http://gemma-3-4b-it/healthSuccess response:
OK
Ollama Basics
Ollama doesn't support loading multiple models into memory, simultaneously. Also, if you don't use the LLM for a certain amount of time (usually 30 minutes by default), Ollama unloads the current model from memory.
Due to the behavior described previously, the solution implements two or more Ollama backends depending on your needs and use case so that many developers or users can use them in parallel without having only one Ollama instance loading and unloading models frequently, producing unnecessary latency.
You can open a terminal on any of the Ollama pods by using the next commands:
kubectl exec -it ollama-chat-random_string -- sh
kubectl exec -it ollama-autocomplete-random_string -- sh
Inside the pods, you can use the Ollama CLI to explore your available models and see which one is loaded:
In the ollama-chat pod you'll find one model:
# ollama list
NAME                     ID              SIZE      MODIFIED
codegemma:7b-instruct    0c96700aaada    5.0 GB    2 hours ago

# ollama ps
NAME                     ID              SIZE     PROCESSOR    UNTIL
codegemma:7b-instruct    0c96700aaada    10 GB    100% GPU     4 minutes from now
In the ollama-autocomplete pod you'll find two models:
# ollama list
NAME                     ID              SIZE      MODIFIED
codegemma:2b             926331004170    1.6 GB    2 hours ago
codegemma:7b-code        aee9a63c13b9    5.0 GB    2 hours ago

# ollama ps
NAME                 ID              SIZE      PROCESSOR    UNTIL
codegemma:7b-code    aee9a63c13b9    7.1 GB    100% GPU     4 minutes from now
When Ollama unloads its current model, the output is empty:
# ollama ps
NAME    ID    SIZE    PROCESSOR    UNTIL
Note that, Ollama dynamically loads back a model when you send the next code assistance request, without any manual intervention.
Importance of GPU capacity
If you provision one slice of a GPU with 10GB, but the model memory footprint is (slightly) larger than that, you'll notice that part of the LLM is loaded on the CPU, like the following:
# ollama ps
NAME                     ID              SIZE     PROCESSOR         UNTIL
codegemma:7b-instruct    0c96700aaada    10 GB    6%/94% CPU/GPU    29 minutes from now
This is not optimal and produces a higher response latency, so make sure you provide the GPU size suggested in this guide.
LLMs
Bring a different or your preferred LLM with vLLM
To run different sizes of Gemma or any other open-source Large Language Model (LLM) with vLLM on GDC air-gapped, such as DeepSeek-R1 or Llama 3.1, you must ingest the new model weights into your environment and update the deployment manifest to point to the new assets.
Based on the operational procedures established for this solution, follow these steps to load a different model :
Download New Model Weights:
On a workstation with internet access, use the Hugging Face CLI to download the weights for your preferred model.
- For Gemma 3 (3-12b-it):
hf download google/gemma-3-12b-it- For DeepSeek-R1 (7B Distill):
hf download deepseek-ai/DeepSeek-R1-Distill-Qwen-7B- For Llama 3.1 (8B):
hf download meta-llama/Meta-Llama-3.1-8B-InstructNote: Ensure you have accepted the model's license terms on Hugging Face before downloading.
Populate the Persistent Volume (PVC):
Update your existing
model-pvcor create a new one with sufficient capacity for the new model. Use the helper pod method to transfer the weights from your workstation. Larger form factors require significantly more disk space. Ensure your Persistent Volume Claim (PVC) has sufficient capacity to store the new weights.- Gemma 3 4B: ~15.2 GB.
- Gemma 3 27B: ~54 GB+.
- Recommendation: Maintain the 500GiB PVC recommendation to ensure high IOPS (1,500) for faster loading, regardless of the model size.
# Copy the new model's hub directory to the helper pod
kubectl cp ~/.cache/huggingface/hub/ osd-dev/model-uploader:/data/
Update the vLLM Deployment Manifest:
Modify your vLLM deployment YAML to reference the new model ID. Unlike Ollama, which can swap models dynamically, a vLLM instance is dedicated to a single model and must be updated or redeployed to change models.
Update the args section of your deployment depending of the model you are using, here deepseek as sample:
args: [
  "-m", "vllm.entrypoints.openai.api_server",
  "--model", "deepseek-ai/DeepSeek-R1-Distill-Qwen-7B", # Update to new Repo ID
  "--max-model-len", "32768",
  "--enforce-eager" # Recommended for GDC stability
]
Adjust GPU and Memory Resources:
Larger models require more VRAM for weights and the KV cache. If you move from a 4B model to an 8B or 14B model, ensure your resource limits are sufficient to avoid "Out of Memory" crashes.
- VRAM Footprint: At 16-bit precision, an 8B model requires approximately 16
GB for weights alone, plus additional memory for the vLLM
PagedAttentioncache. - Recommendation: Use a full A100 GPU
(
nvidia.com/gpu-pod-NVIDIA_A100_80GB_PCIE: 1) for models larger than 7B parameters to ensure optimal performance and headroom for the KV cache.
- VRAM Footprint: At 16-bit precision, an 8B model requires approximately 16
GB for weights alone, plus additional memory for the vLLM
Verify the New Model:
Once the deployment has finished reconciling, verify the new model is active with the internal API:
# Inside a debug-sh pod
wget -qO- http://gemma-3-4b-it/v1/models
Success Response:
{"object":"list","data":[{"id":"deepseek-ai/DeepSeek-R1-Distill-Qwen-7B"}]}
Bring a different LLM with Ollama
If you want to try a different open source LLM, such as a model from Llama 3.2 or DeepSeek-R1 families, modify this Ollama command in the previous Dockerfile:
ollama pull gemma3:latest
For example, if you want to pull Llama 3.2 with 3 billion parameters, use this command:
ollama pull llama3.2:3b
Or, if you prefer to use DeepSeek-R1 with 8 billion parameters, use this command:
ollama pull deepseek-r1:8b
You can also download more than one LLM and have their model weights containerized. Then, Ollama will be able to switch between models as you request inferences by different pre-loaded models. For example, you can have both Gemma and Llama models added into your Docker image. Recall that in an air-gapped environment, an Ollama backend does not have access to the Ollama library to download any model at any time.
Remember to check and agree to each model license and terms of use before running them in your applications. There are many LLMs in Ollama's library. You will only need an Internet connection to download the model weights while building the LLM backend Docker image.
Open WebUI
Check if the Open WebUI pod is in running state :
kubectl get pods -n NAMESPACE
Expected output :
NAME                             READY   STATUS    RESTARTS   AGE
open-webui-69df4664d-przjl       1/1     Running   0          6d3h
Check the service IP :
kubectl get service -n NAMESPACE
Expected output:
NAME          TYPE            CLUSTER-IP       EXTERNAL-IP      PORT(S)           AGE
open-webui     LoadBalancer   10.201.137.164   136.125.37.224   80:30492/TCP      6d3h
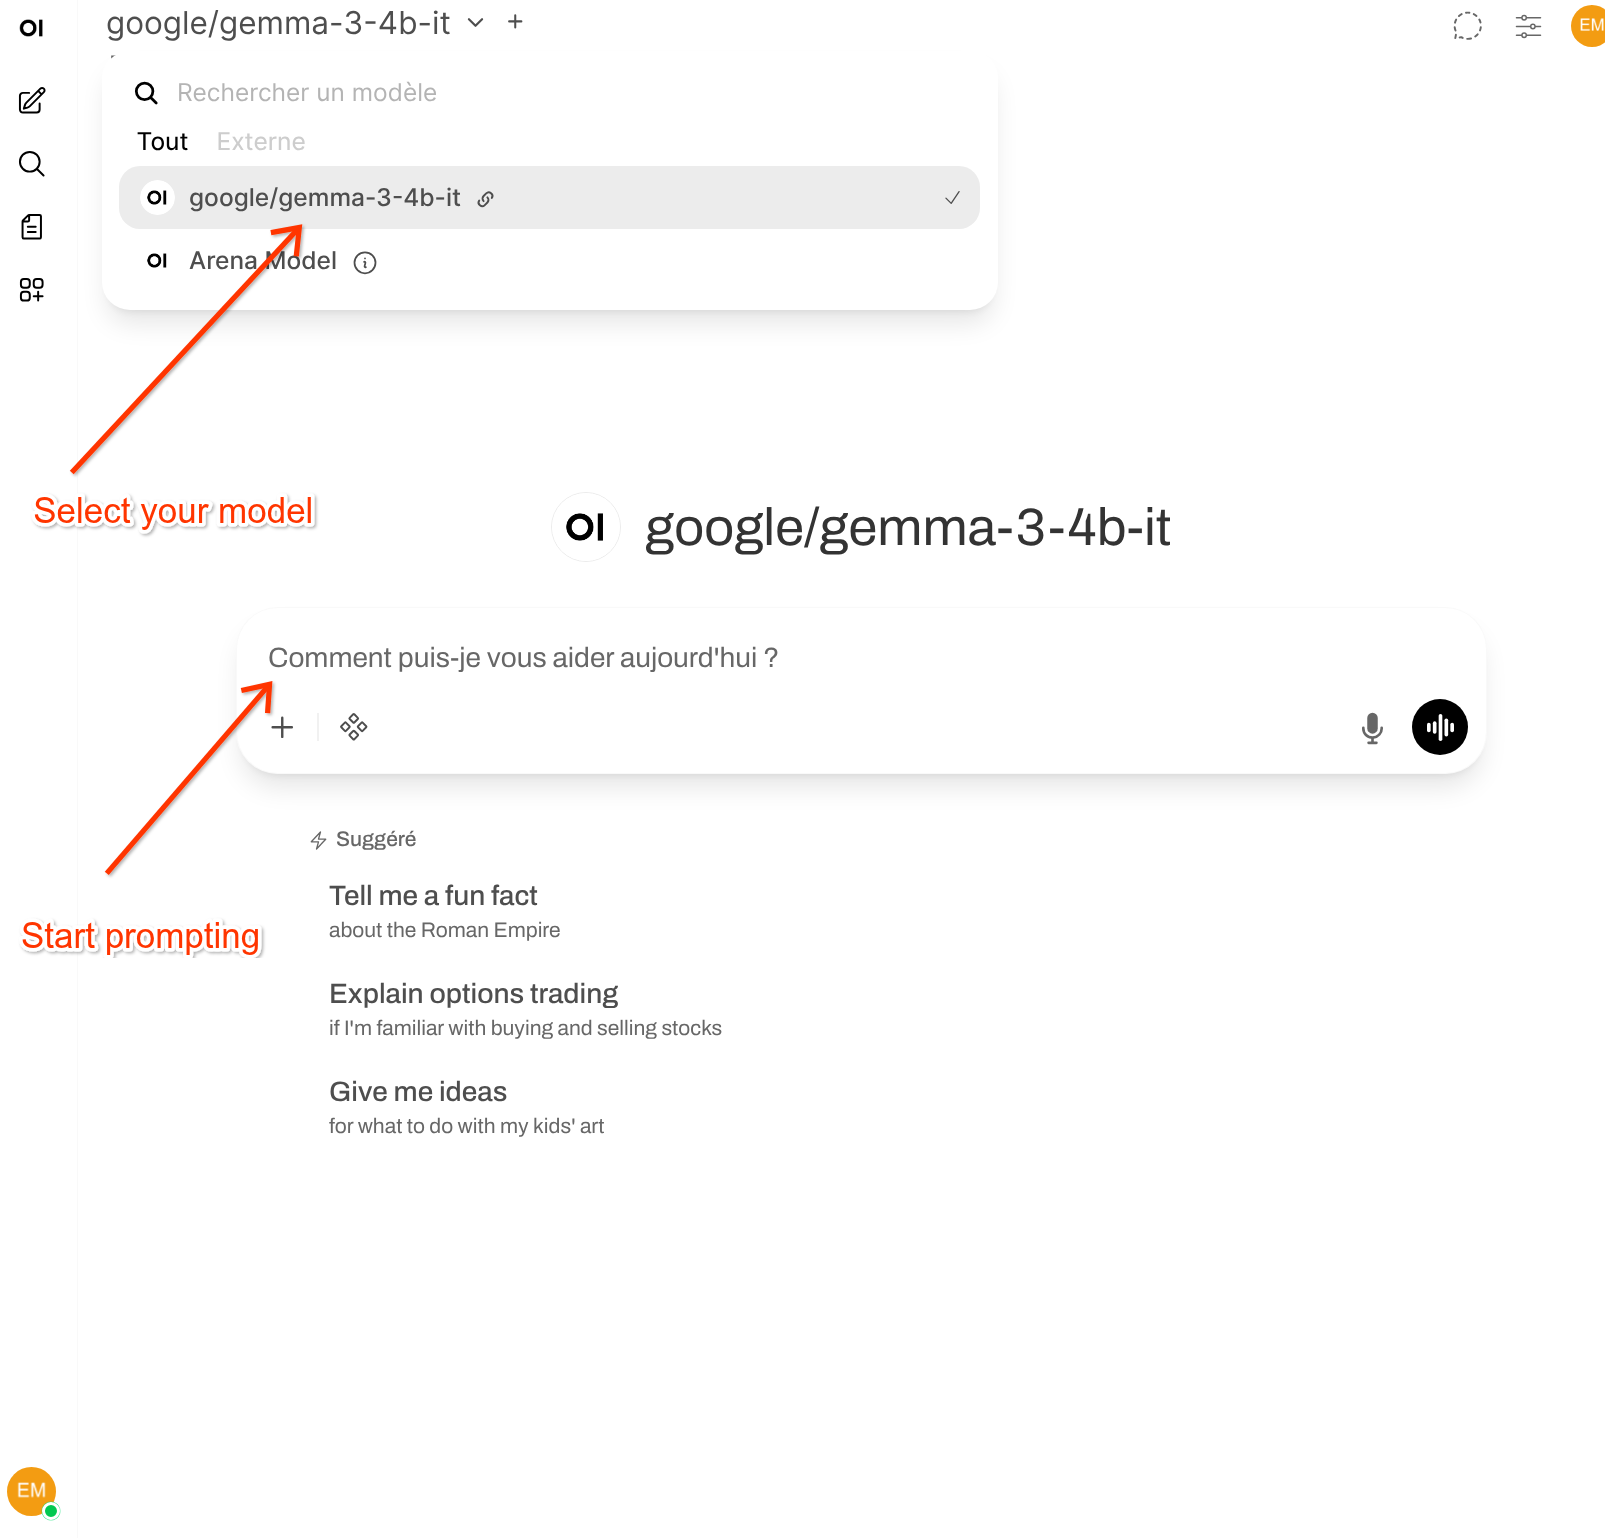
The following sections show how to use the main UI features.
Scale the solution with an Ollama backend
Vertically
- Allocate a larger GPU slice for your LLM that has become a bottleneck until you use a full GPU.
- If you want to use a larger LLM for better response accuracy, for example, a 405B parameter LLM instead of a 7B one, you might need more than one GPU to run it smoothly.
- Models that fit into more than one GPU experience some latency related to inter-GPU communication.
Horizontally
- Deploy as many Ollama pods as you need to achieve your target throughput on a
given LLM.
- To achieve this, increase the replica number in the corresponding Ollama deployment YAML file.
- The Kubernetes service, which is of LoadBalancer type, will distribute code assistance requests between endpoints (i.e. pods) and return their respective responses through the exposed external IP.
- Remember, the Continue plugin points to only one IP address per functionality.
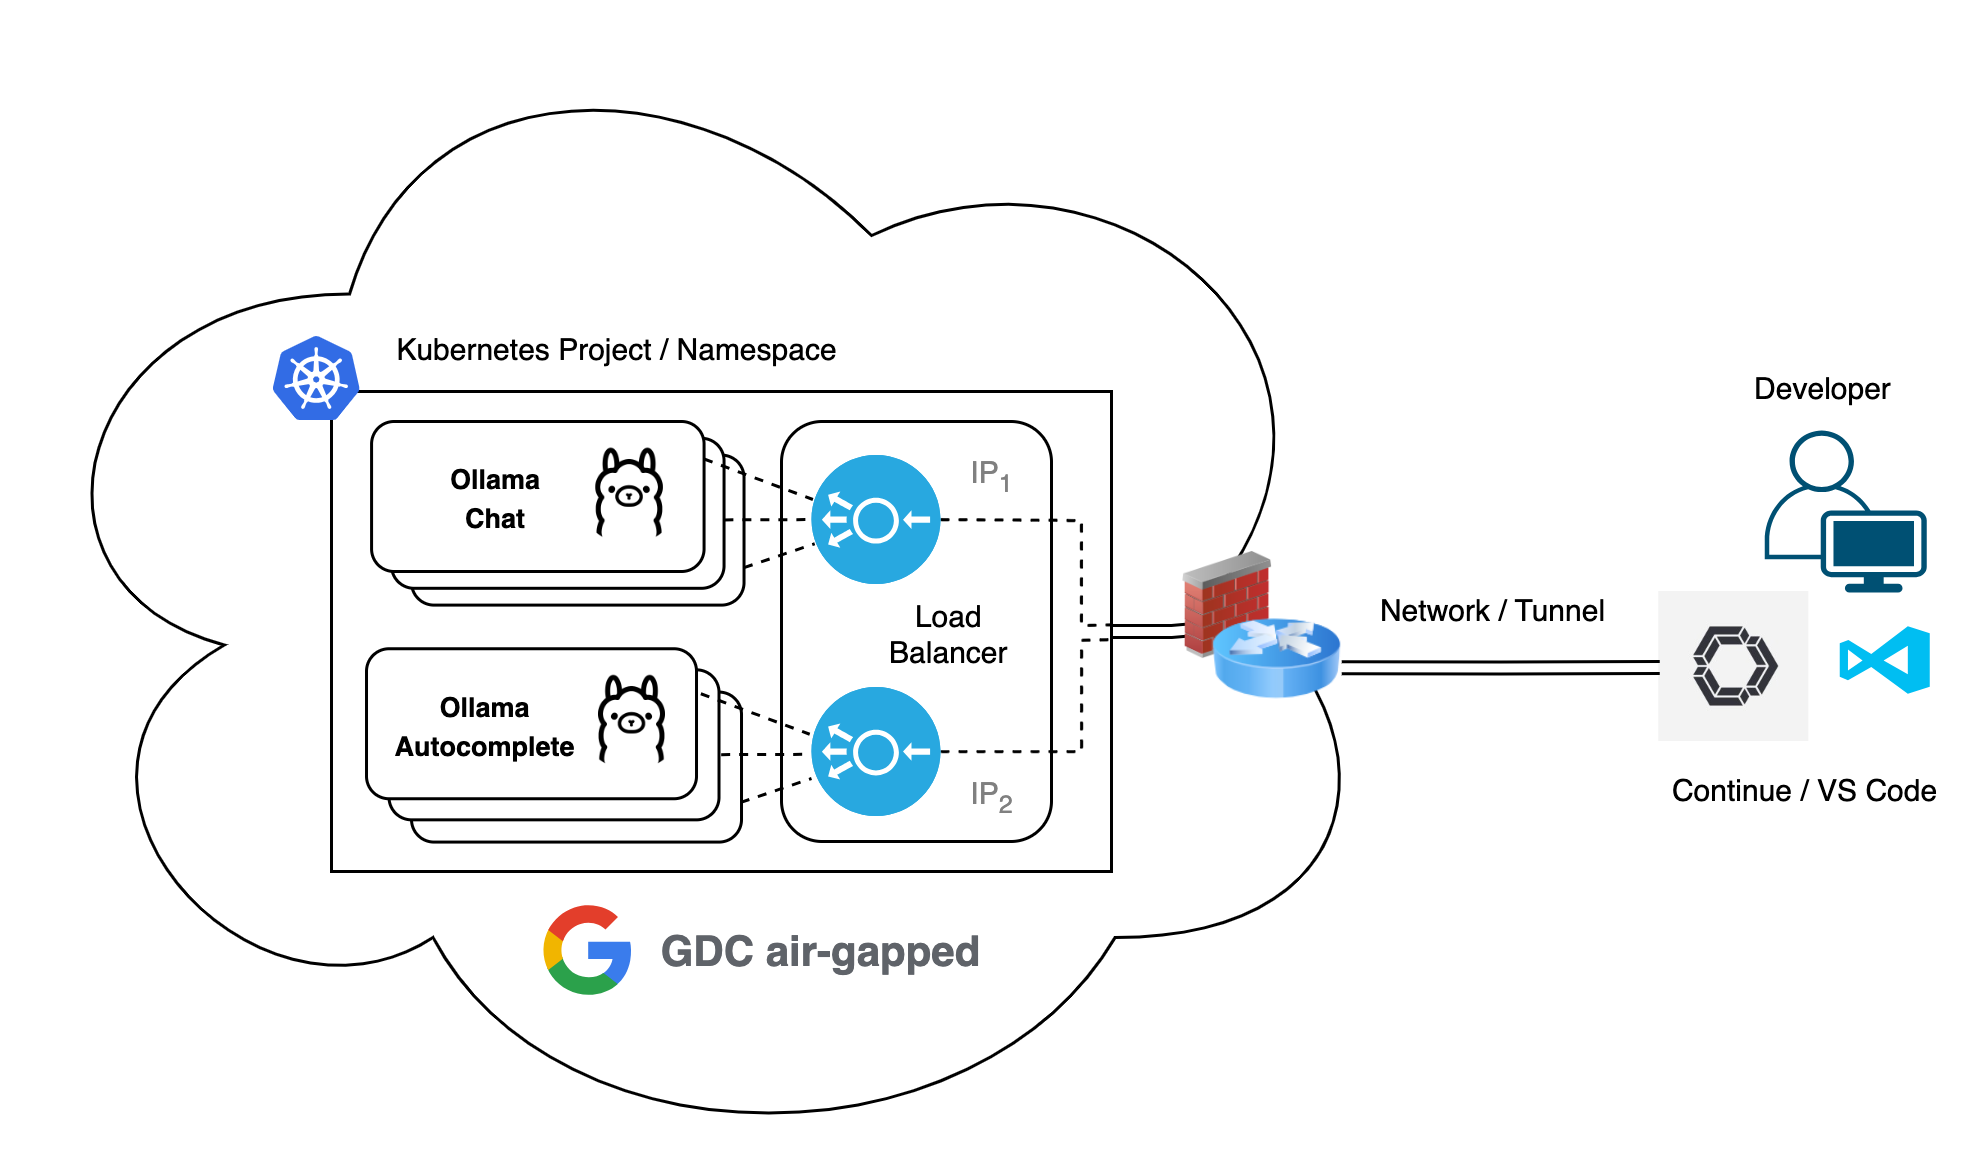
To scale the vLLM backend within your GDC air-gapped environment, you can follow a strategy similar to the one used for Ollama, focusing on both hardware resource allocation and pod replication.
Scale the solution with a vLLM backend
Vertically
- Upgrade GPU Allocation: If the inference throughput (tokens/sec) becomes a bottleneck, allocate a larger GPU slice until you use a full NVIDIA A100 GPU.
- Multi-GPU Configurations: For massive models (for example, 70B to 405B parameters) that don't fit in the memory of a single 80GB A100, you must scale to multiple GPUs using tensor parallelism.
- Latency Consideration: Note that models spanning more than one GPU might experience slight overhead related to inter-GPU communication (for example, NCCL sync).
Horizontally
- Increase Throughput via Replicas: To handle a higher volume of concurrent
user requests for the same model, increase the
replicascount in your vLLM deployment YAML. - Dedicated Model Instances: Since vLLM is designed as a single-model serving engine and pins its KV cache memory upon initialization, you must deploy a separate set of pods for each different LLM you want to host.
- Load Balancing: The GDC Kubernetes service (type
LoadBalancer) will automatically distribute incoming inference requests among all healthy vLLM pod endpoints associated with that service.
Troubleshooting
| Error | Mitigation |
|---|---|
| FIPS SELFTEST FAILURE | Occurs when libraries like BoringSSL lack integrity signatures. Fix by setting BORINGSSL_FIPS=0 and utilizing official vLLM images |
| Stalled Weight Loading | Check for IOPS throttling on small PVCs. A 500GiB volume is required for performance model initialization. |
| Connection Refused | Confirm the PNP explicitly allows the targetPort (8000/8080). GDC firewalls don't automatically grant access to backend ports for Load Balancer VIPs. |