
適用於 Apple iOS 作業系統的 Contact Center AI 平台 (CCAI 平台) 行動版 SDK,可在 iOS 行動應用程式中嵌入 CCAI 平台行動版體驗。
需求條件
iOS 行動 SDK 必須符合下列條件:
- iOS 12.0 以上版本
擷取公司憑證
使用管理員憑證登入 Contact Center AI 平台 (CCAI 平台) 入口網站。
前往「設定」>「開發人員設定」。
在「公司金鑰」和「密碼」下方,記下公司金鑰和公司密碼。
開始使用
以下指南說明如何開始使用 CCAI Platform iOS 行動 SDK。
安裝
如要開始使用,請先安裝 iOS SDK。
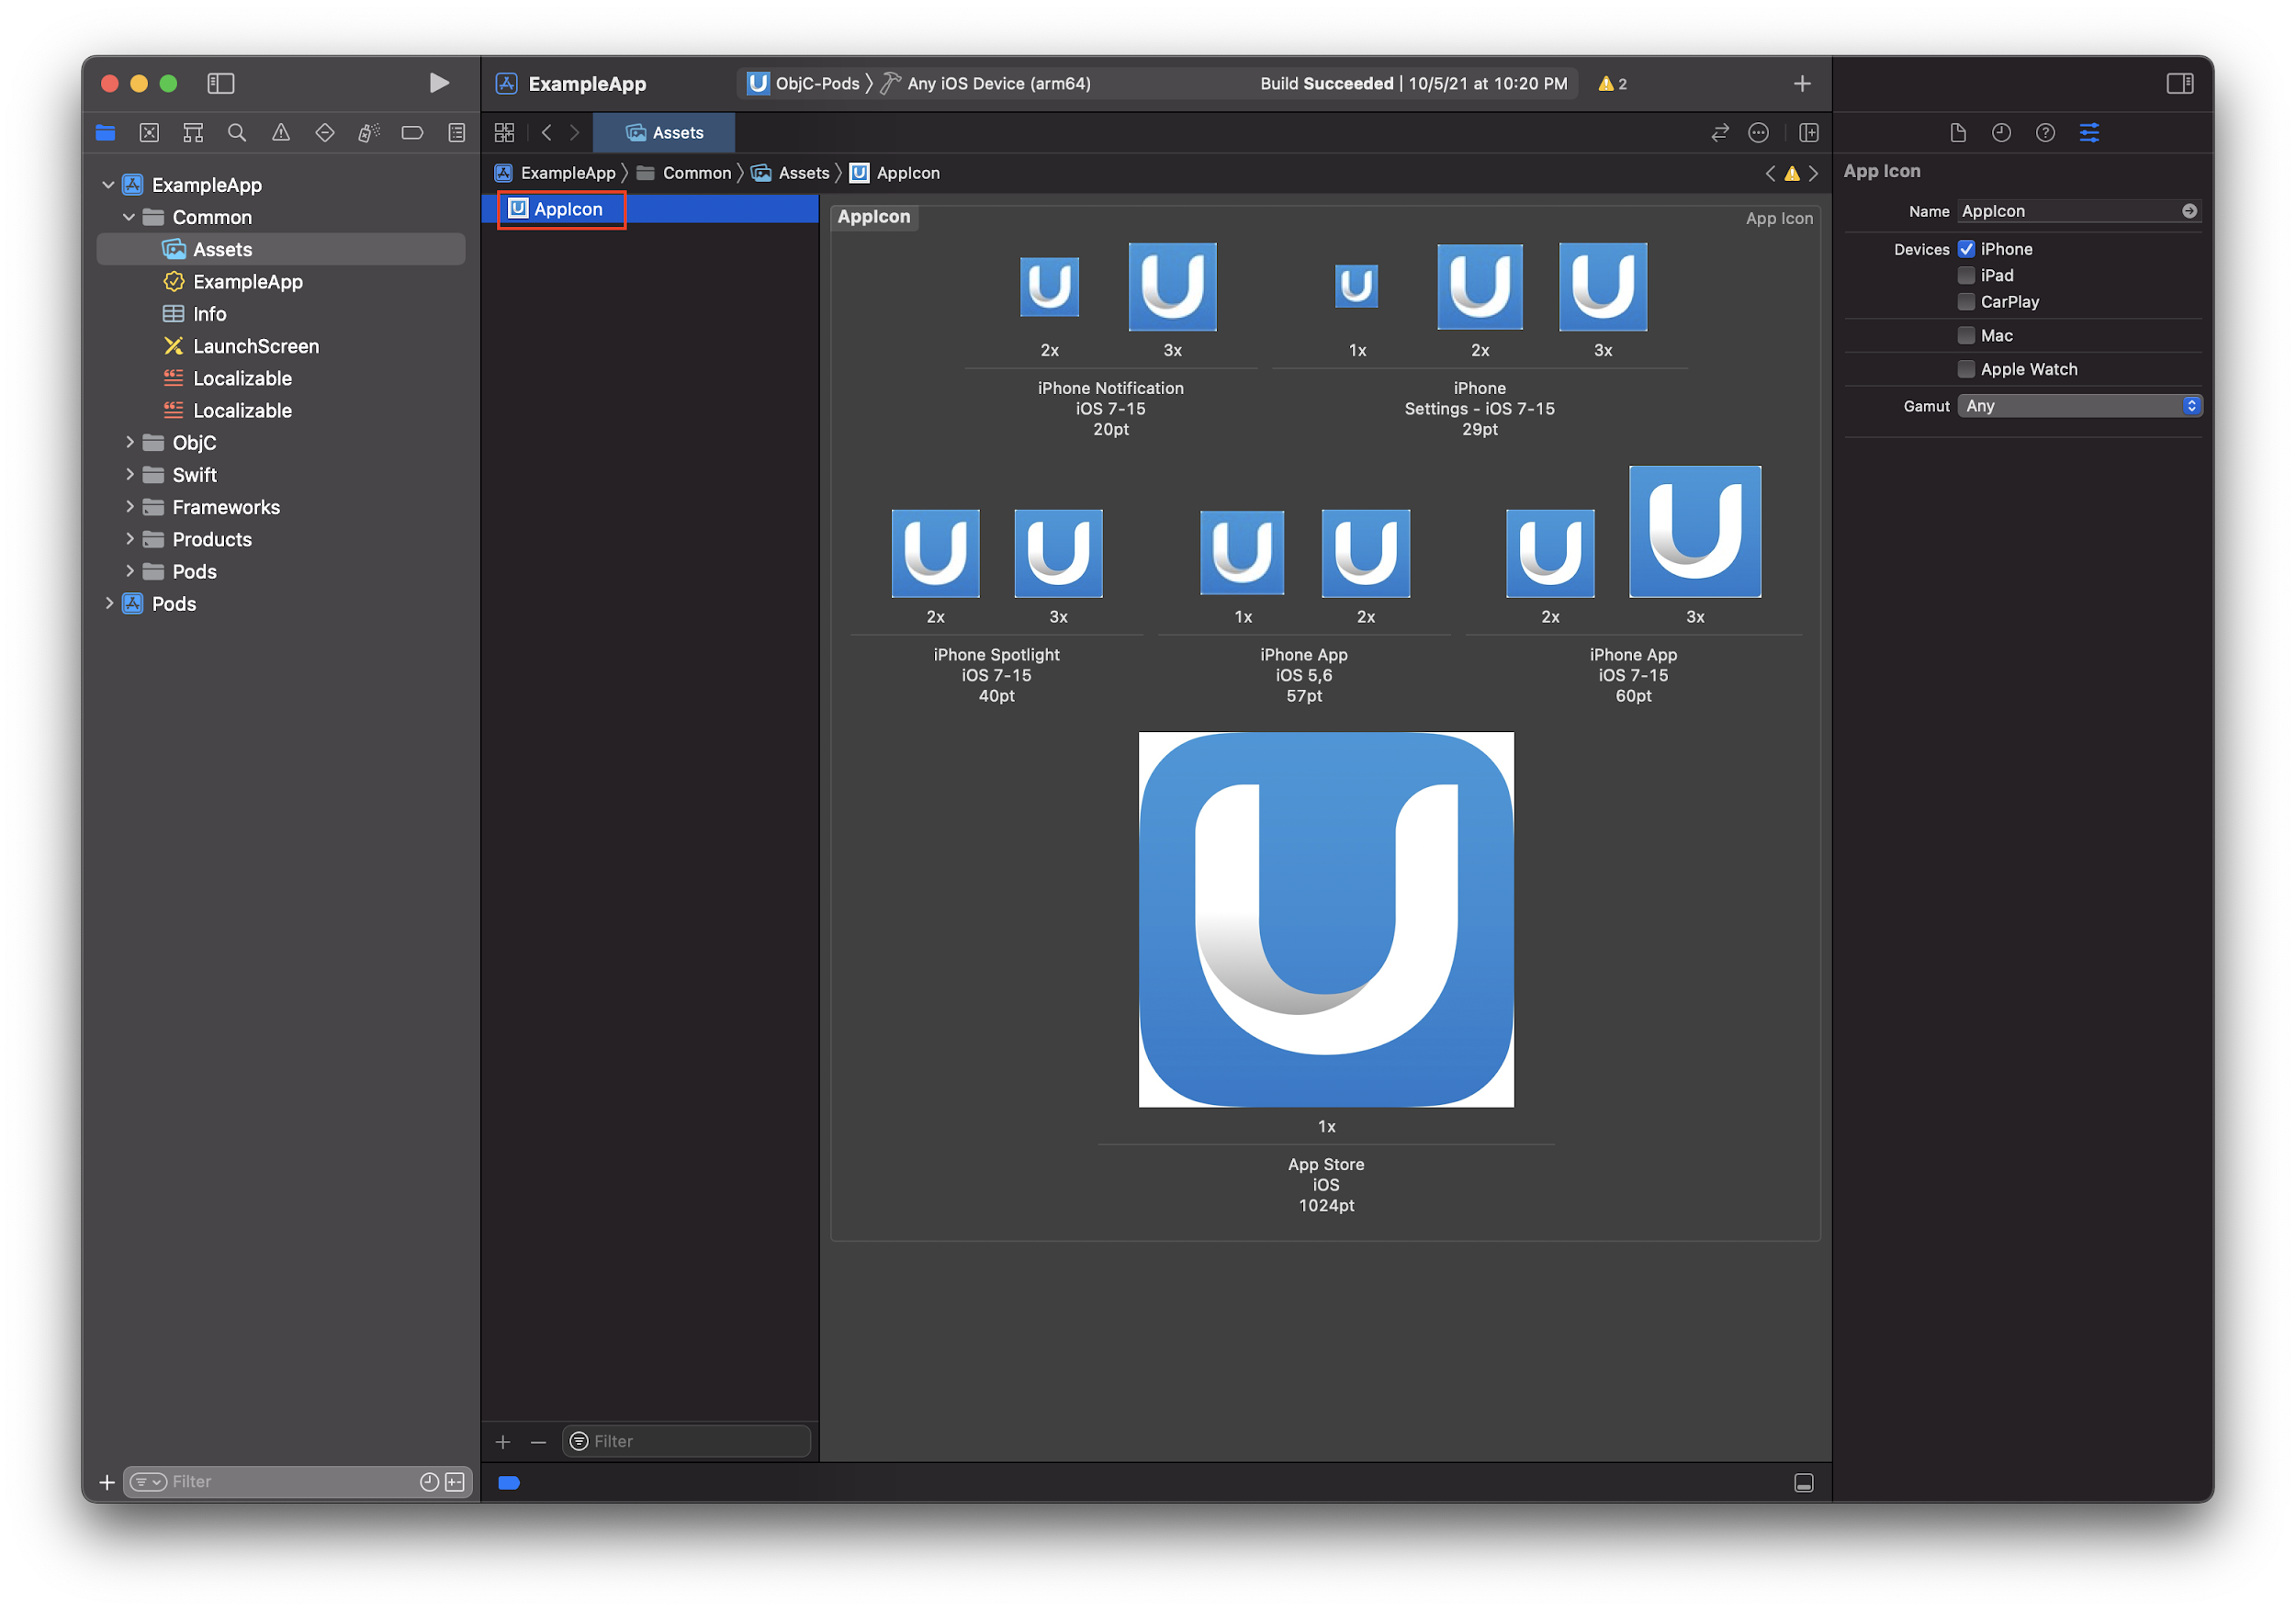
下載範例應用程式
下載 iOS 範例應用程式。
前往資料夾,然後使用 CocoaPods 安裝依附元件:
$ pod install --project-directory=ExampleApp如要快速設定專案,請執行 Shell 指令碼:
$ ./setup.sh或者,您也可以按照下列步驟手動編輯專案設定:
開啟
ExampleApp.xcworkspace。將
Info.plist中的UJETCompanyKey和UJETCompanySecret值,替換為 CC AI Platform 入口網站「Settings」(設定) >「Developer Settings」(開發人員設定) 頁面中的「Company Key」(公司金鑰) 和「Company Secret Code」(公司密碼) 值。請將
Info.plist中的UJETSubdomain值,替換成 CCAI 平台入口網址中的子網域。子網域會直接出現在網址中的.ujet.com之前,例如https://your-subdomain.ujet.com/settings/developer-setting中的your-subdomain。
整合至專案
將 iOS SDK 整合至應用程式的方式,取決於您的開發環境。
Swift 套件管理工具
在建構設定中,將 -ObjC 放在 Other Linker Flags 上。
在最新版 Xcode (目前為 13.2) 中,使用 Swift Package Manager 發布二進位架構時,會發生已知問題。目前解決這個問題的方法,是在 Xcode 專案的建構階段中新增「執行指令碼階段」。這個「Run Script」階段應在「Embed Frameworks」建構階段之後。這個新的「Run Script Phase」應包含下列程式碼:
find "${CODESIGNING_FOLDER_PATH}" -name '*.framework' -print0 | while read -d $'0' framework
do
codesign --force --deep --sign "${EXPANDED_CODE_SIGN_IDENTITY}" --preserve-metadata=identifier,entitlements --timestamp=none "${framework}"
done
CocoaPods
在 Podfile 中新增下列指令列:
pod 'UJET', :podspec =>
'https://sdk.ujet.co/ios/x.y.z/ujet.podspec' #specific version
x.y.z
執行 pod install。如果先前已整合 iOS SDK,請改為執行 pod update CCAI Platform。
迦太基
Google Cloud 建議使用依附元件管理工具或手動整合,因為 CC AI Platform 依附元件不支援 Carthage。如要這麼做,請新增下列程式碼:
binary "https://sdk.ujet.co/ios/UJETKit.json
binary "https://sdk.ujet.co/ios/UJETFoundationKit.json
binary https://raw.githubusercontent.com/twilio/twilio-voice-ios/Releases/twilio-voice-ios.json
手動整合
不支援: https://github.com/twilio/conversations-ios/issues/12。
二進位檔 https://raw.githubusercontent.com/twilio/conversations-ios/master/twilio-convo-ios.json
執行
carthage bootstrap --use-xcframeworks(或carthage update --use-xcframeworks(如果您要更新依附元件))。下載
UJETKit.xcframework、UJETFoundationKit.xcframework、UJETChatRedKit.xcframework、UJETChatBlueKit.xcframework、UJETTwilioCallKit.xcframework和所有依附元件TwilioVoice.xcframework和TwilioConversationsClient.xcframework。將 UJETKit.xcframework 拖曳至「Frameworks, Libraries, and Embedded Content」區段,即可新增至目標。
針對步驟 1 中的所有依附元件,重複執行步驟 2 和 3。
在「Build Settings」中,將
-ObjC放在Other Linker Flags上。在目標的
Linked Frameworks區段中,將libc++.tbd新增為依附元件。
如要使用範例專案手動建構 SDK,請按照下一節的步驟操作。
使用範例專案手動建構 SDK
請依序完成下列步驟:
下載所有架構,包括
UJETKit.xcframework和其他依附元件。在專案根目錄中建立 CCAI Platform 資料夾,並解壓縮所有架構。
選取
Objc-Manual或Swift-Manual目標並建構。
匯入架構
以下各節提供匯入架構的操作說明。
Objective-C 專案
@import UJETKit;
Swift 專案
swiftimport
UJETimport UJETKit
初始化 SDK
使用 UJET_COMPANY_KEY 和 UJET_SUBDOMAIN 初始化 CCAI 平台。
In application:didFinishLaunchingWithOptions: method:
- (BOOL)application:(UIApplication *)application didFinishLaunchingWithOptions:(NSDictionary *)launchOptions {

    // Initialize CCAI Platform
    [UJET.initialize:UJET_COMPANY_KEY subdomain:UJET_SUBDOMAIN delegate:self];

    // YOUR CODE

    return YES;
}
您可以將記錄層級從 verbose 變更為 error。預設記錄層級為 UjetLogLevelInfo。
[UJET.setLogLevel:UjetLogLevelVerbose];
使用者驗證
透過 iOS 應用程式存取 iOS SDK。
為確保使用者通過驗證,我們導入了 JWT 簽署機制。
需要驗證時,iOS SDK 會要求簽署酬載。如果簽署成功,應用程式會將已簽署的 JWT 換成使用者驗證權杖。成功或失敗區塊必須在委派項目傳回前呼叫。
如果是匿名使用者 (ID = nil),應用程式會為使用者建立 UUID。如果使用者之後透過 ID 驗證身分,應用程式會嘗試根據 UUID 合併這兩位使用者。
在範例專案的 UJETObject.h 中:
@import UJETKit;

@interface UJETObject : NSObject <UJETDelegate>
實作 signPayload:payloadType:success: failure: delegate method。
- (void)signPayload:(NSDictionary *)payload payloadType:(UjetPayloadType)payloadType success:(void (^)(NSString *))success failure:(void (^)(NSError *))failure {
  if (payloadType == UjetPayloadAuthToken) {
    [self signAuthTokenInLocal:payload success:success failure:failure];
  }
}

- (void)signAuthTokenInLocal:(NSDictionary *)payload success:(void (^)(NSString *))success failure:(void (^)(NSError *))failure {
    NSMutableDictionary *payloadData = [payload mutableCopy];

    NSDictionary *userData = [[NSUserDefaults standardUserDefaults] objectForKey:@"user-data"];
    [payloadData addEntriesFromDictionary:userData];
    payloadData[@"iat"] = [NSNumber numberWithDouble:[[NSDate date] timeIntervalSince1970]]; // required
    payloadData[@"exp"] = [NSNumber numberWithDouble:([[NSDate date] timeIntervalSince1970] + 600)]; // required

    NSString *signedToken = [self encodeJWT:payloadData];

    if (signedToken.length > 0) {
        success(signedToken);

    } else {
        NSDictionary *userInfo = @{ NSLocalizedDescriptionKey: @"Failed to sign token" };
        NSError *error = [NSError errorWithDomain:@"ExampleApp" code:0 userInfo:userInfo];
        failure(error);
    }
}

- (NSString *)encodeJWT:(NSDictionary *)payload {
    id<JWTAlgorithm> algorithm = [JWTAlgorithmHSBase algorithm384];
    NSString *secret = NSBundle.mainBundle.infoDictionary[@"UJETCompanySecret"];
    return [JWTBuilder encodePayload:payload].secret().algorithm(algorithm).encode;
}
強烈建議您從應用程式伺服器簽署酬載,而非在用戶端簽署。
本範例使用本機簽署進行測試。請參閱 UJETObject.m 檔案中的 signDataInRemote: success: failure:。
詳情請參閱「SDK 使用者驗證」。
設定推播通知
應用程式會傳送推播通知,要求執行智慧動作,例如驗證和拍照,以及回報來電。應用程式需要兩種不同類型的憑證 (VoIP 和 APNs),並儲存在管理入口網站中。
準備 VoIP 服務憑證
如需參考說明文件,請參閱 Apple 的 VoIP 推播通知。
從 Apple 開發人員網站建立並下載 VoIP 憑證。
按兩下憑證,將其新增至「鑰匙圈」。
在 Mac 上啟動「鑰匙圈存取」應用程式。
在左側邊欄中選取「我的認證」類別。
在「VoIP Services: your.app.id」憑證上按一下滑鼠右鍵。
在彈出式選單中選擇「匯出」。
將其儲存為 cert.p12,並將密碼留空,不要以密碼保護。
在終端機中執行下列指令。
openssl s_client -connect gateway.push.apple.com:2195 -cert cert.pem -debug -showcertcert.pem 的上半部是憑證,下半部則是私密金鑰。
確認憑證可與 Apple 的推播通知伺服器搭配運作。
openssl s_client -connect gateway.push.apple.com:2195 -cert cert.pem -debug -showcerts如果成功,應該會傳回:
---
New, TLSv1/SSLv3, Cipher is AES256-SHA
Server public key is 2048 bit
Secure Renegotiation IS supported
Compression: NONE
Expansion: NONE
SSL-Session:
    Protocol  : TLSv1
    Cipher    : AES256-SHA
    Session-ID:
    Session-ID-ctx:
    Master-Key: XXXXXXXXXXXXXXXXXXXXXXXXXXXXXXXXXXXXXXXXXXXXXXXXXXXXXXXXXXXXXXXXXXXXXXXXXXXXXXXXXXXXX
    Key-Arg   : None
    Start Time: 1475785489
    Timeout   : 300 (sec)
    Verify return code: 0 (ok)
---
使用管理員憑證登入 CCAI Platform 入口網站,然後依序前往「Settings」>「Developer Settings」>「Mobile App」。
在「VoIP 服務憑證」部分填寫憑證,然後儲存。 請務必為憑證和私密金鑰加上界線 (
-----BEGIN-----和-----END-----)。如果您使用開發布建設定檔執行應用程式 (例如在 Xcode 中進行偵錯),請勾選「Sandbox」核取方塊。如果應用程式是為 Ad hoc 或 App Store 封存,且使用發布佈建設定檔,請取消勾選「Sandbox」核取方塊。
準備 Apple 推播通知服務 SSL
這項程序的做法與 VoIP 服務憑證類似。在本例中,使用的是 Apple 推播通知服務 SSL (沙箱和正式版) 憑證。如需建立憑證的指引,請參閱 Apple 遠端通知伺服器說明文件。
整合推播通知
在 AppDelegate.m 中:
@import PushKit;

@interface AppDelegate() <PKPushRegistryDelegate>
In application:didFinishLaunchingWithOptions: method:
// Initialize CCAI Platform
[UJET] initialize:UJET_COMPANY_KEY subdomain:UJET_SUBDOMAIN delegate:self];

//  Register for VoIP notifications on launch.
PKPushRegistry *voipRegistry = [[PKPushRegistry alloc] initWithQueue: dispatch_get_main_queue()];
voipRegistry.delegate = self;
voipRegistry.desiredPushTypes = [NSSet setWithObject:PKPushTypeVoIP];
在實作 UIApplicationDelegate 通訊協定檔案中新增下列委派方法:
請列印裝置權杖,測試推播通知。
// PKPushRegistryDelegate

- (void)pushRegistry:(PKPushRegistry *)registry didUpdatePushCredentials:(PKPushCredentials *)credentials forType:(NSString *)type {
  [UJET updatePushToken:credentials.token type:UjetPushTypeVoIP];
}

- (void)pushRegistry:(PKPushRegistry *)registry didReceiveIncomingPushWithPayload:(PKPushPayload *)payload forType:(PKPushType)type withCompletionHandler:(void (^)(void))completion {
  if (payload.dictionaryPayload[@"ujet"]) {
    [UjetreceivedNotification:payload.dictionaryPayload completion:completion];
  } else {
    completion();
  }
}

// UIApplicationDelegate

- (void)application:(UIApplication *)application didRegisterForRemoteNotificationsWithDeviceToken:(NSData *)deviceToken {
  [UjetupdatePushToken:deviceToken type:UjetPushTypeAPN];
}

- (void)application:(UIApplication *)application didReceiveRemoteNotification:(NSDictionary *)userInfo fetchCompletionHandler:(void (^)(UIBackgroundFetchResult))completionHandler {
  if (userInfo[@"ujet"]) {
    [UJET receivedNotification:userInfo completion:nil];
  }
}

// UserNotificationsDelegate overrides [UIApplicationDelegate didReceiveRemoteNotification:]

- (void)userNotificationCenter:(UNUserNotificationCenter *)center willPresentNotification:(UNNotification *)notification withCompletionHandler:(void (^)(UNNotificationPresentationOptions))completionHandler {
    NSDictionary *userInfo = notification.request.content.userInfo;

    if (userInfo[@"ujet"] != nil) {
        [UJET receivedNotification:userInfo completion:nil];
    }
}

- (void)userNotificationCenter:(UNUserNotificationCenter *)center didReceiveNotificationResponse:(UNNotificationResponse *)response withCompletionHandler:(void (^)(void))completionHandler {
    NSDictionary *userInfo = response.notification.request.content.userInfo;

    if (userInfo[@"ujet"] != nil) {
        [UJET receivedNotification:userInfo completion:nil];
    }
}
啟用推播通知
選取目標,然後開啟「功能」分頁。
開啟「推播通知」的切換按鈕。
測試推播通知
以下各節提供如何測試推播通知的指南。
推播通知偵錯部分
在管理員入口網站中,依序前往「設定」>「開發人員設定」。在本頁面中,找到名為「推播通知偵錯」的部分:
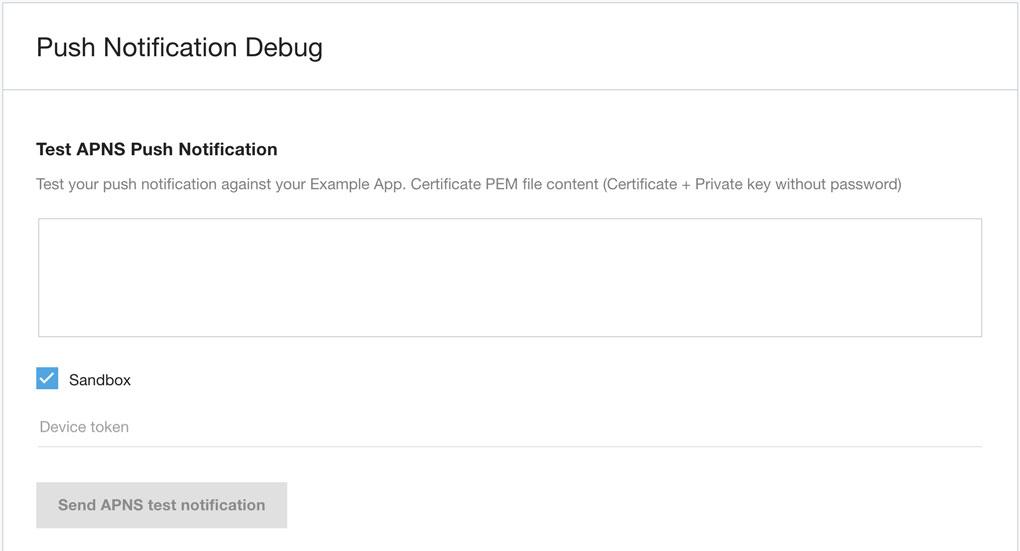
複製裝置權杖並貼到右側文字區域,然後選取正確的行動應用程式。
取得裝置權杖
裝置權杖字串範例如下:
7db0bc0044c8a203ed87cdab86a597a2c43bf16d82dae70e8d560e88253364b7
通常會在符合 UIApplicationDelegate 或 PKPushRegistryDelegate 通訊協定的類別中設定推播通知。裝置權杖會在某個時間點提供給您。您可以先列印出來,再傳遞至 iOS SDK。如要取得裝置權杖,請使用程式碼片段。
Swift
func tokenFromData(data: Data) -> String {
  return data.map { String(format: "%02x", $0) }.joined()
}

func application(_ application: UIApplication, didRegisterForRemoteNotificationsWithDeviceToken deviceToken: Data) {
  print("apns token: ", tokenFromData(data: deviceToken))
  ...
}

func pushRegistry(_ registry: PKPushRegistry, didUpdate credentials: PKPushCredentials, for type: PKPushType) {
  print("voip token: ", tokenFromData(data: credentials.token))
  ...
}
Obj-C
- (NSString *)tokenFromData:(NSData *)data {
  const char *d = data.bytes;
  NSMutableString *token = [NSMutableString string];

  for (NSUInteger i = 0; i < data.length; i++) {
    [token appendFormat:@"%02.2hhX", d[i]];
  }

  return [[token copy] lowercaseString];
}

- (void)pushRegistry:(PKPushRegistry *)registry didUpdatePushCredentials:(PKPushCredentials *)credentials forType:(PKPushType)type {
  NSLog(@"voip token: %@", [self tokenFromData:credentials.token]);
  ...
}

- (void)application:(UIApplication *)application didRegisterForRemoteNotificationsWithDeviceToken:(NSData *)deviceToken {
  NSLog(@"apns token: %@", [self tokenFromData:deviceToken]);
}
結果
輸入憑證 PEM 檔案和裝置權杖後,請按一下按鈕。
如果測試推播通知成功送達,結果會顯示「已成功設定推播通知」訊息。
視裝置的網路連線而定,我們無法保證 100% 會傳送推播通知。
專案設定
以下各節會概略說明設定專案時需要進行的變更。
功能
在目標設定中,開啟下列功能:
推播通知
背景模式 (檢查這些項目)
音訊和 AirPlay
IP 網路語音傳遞技術
Info.plist
為保護使用者隱私權,凡是連結至 iOS 10.0 以上版本,且會存取裝置麥克風、相片圖庫和相機的 iOS 應用程式,都必須聲明存取意圖。請在應用程式的 Info.plist 檔案中加入下列鍵,並為這個鍵提供目的字串。如果應用程式嘗試存取裝置的任何麥克風、相片庫和相機,但沒有對應的用途字串,應用程式就會結束。
NSMicrophoneUsageDescription:允許存取麥克風,以便撥打電話及與支援或疑難排解團隊對話,並傳送與產品查詢相關的音訊影片。
NSCameraUsageDescription:允許存取相機,讓顧客拍攝及傳送與客戶服務查詢相關的相片。
NSPhotoLibraryUsageDescription:允許顧客傳送與客戶服務查詢相關的相片。
NSFaceIDUsageDescription:允許使用 Face ID 進行驗證。
啟動 iOS SDK
在要啟動 iOS SDK 的位置新增下列程式碼:
[UJET startWithOptions:nil];
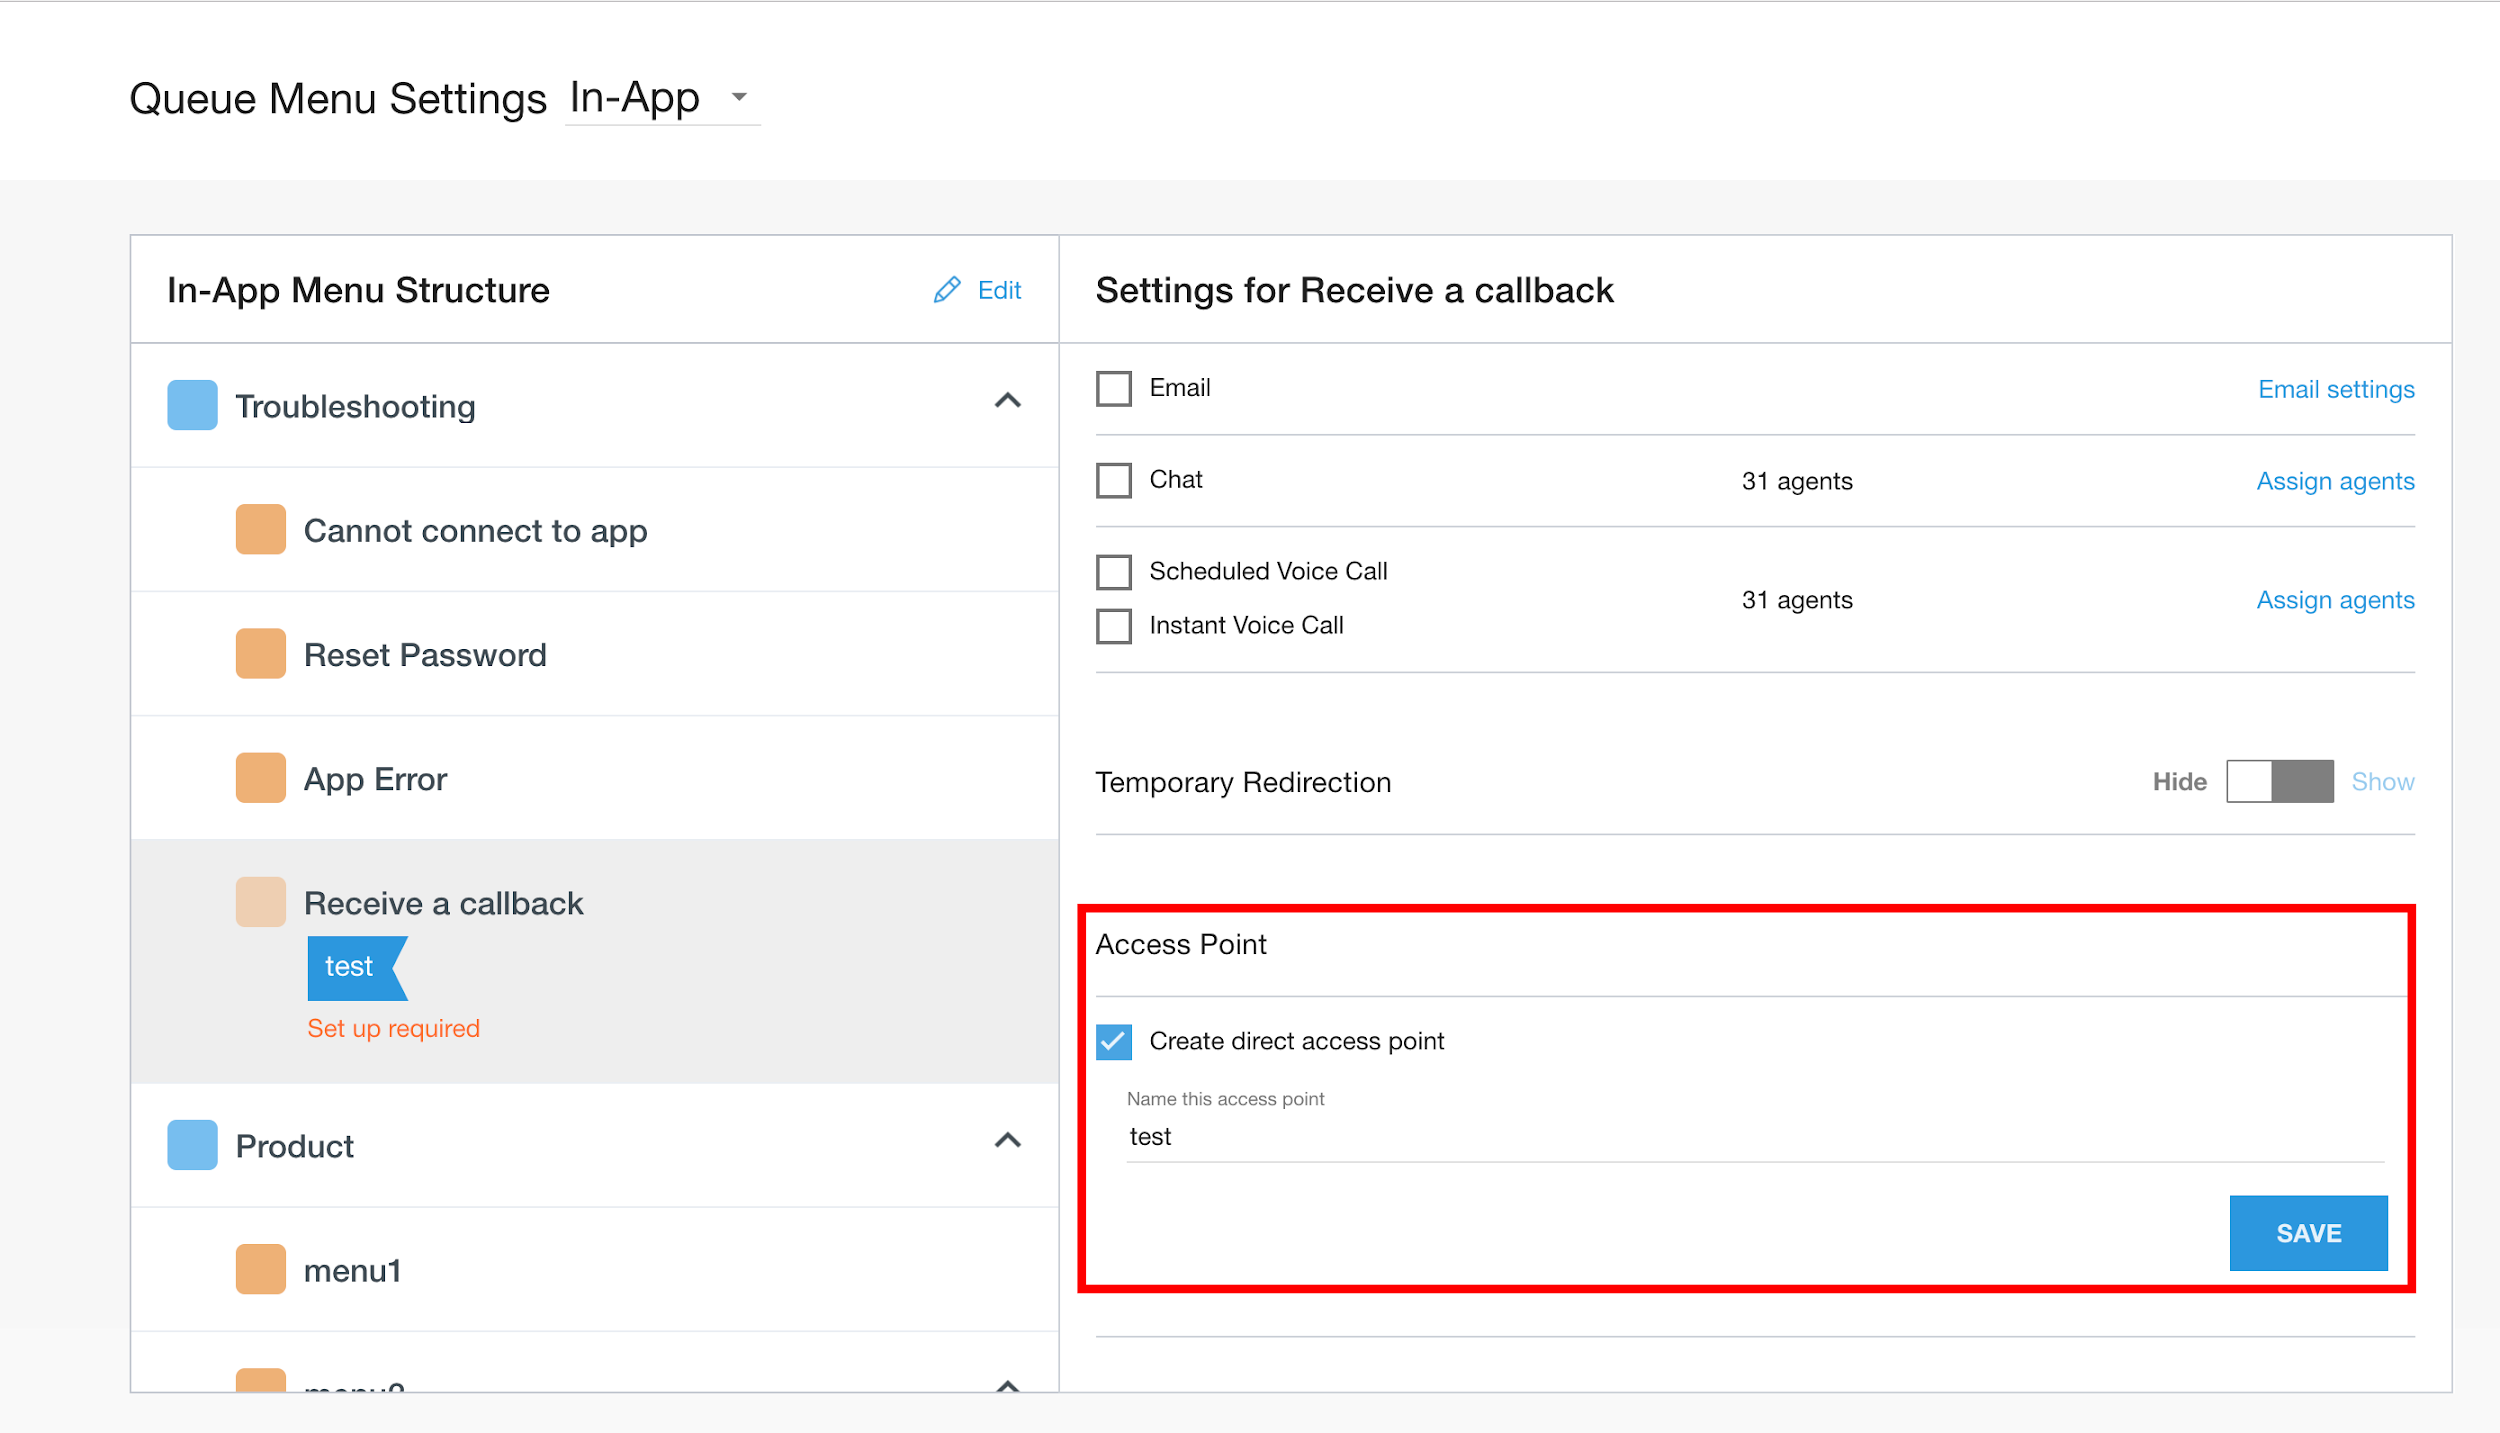
您也可以使用直接存取點,透過這個鍵從選單中的特定位置啟動 iOS SDK:
UJETStartOptions *option = [[UJETStartOptions alloc] initWithMenuKey:@"MENU_KEY"];
[UJET startWithOptions:option];
建立直接存取點 (DAP) 即可建立 menuKey。下列步驟說明如何建立 DAP:
使用管理員憑證登入 CCAI Platform 入口網站。
依序前往「設定」>「佇列」。
從選單結構中選取任一佇列。
選取「建立直接存取點」
在文字表單中輸入金鑰。
按一下 [儲存]。
如果使用者資料已更新,請清除本機快取
我們會在 Keychain 中快取驗證權杖,以便重複使用,並減少從主機應用程式要求簽署酬載的次數。SDK 會使用該權杖,直到權杖過期或透過 clearUserData 呼叫遭撤銷為止。只要使用者相關資料有變更或更新 (例如登出事件),主機應用程式就會負責撤銷這個快取。
[UJET clearUserData];
啟動 Contact Center AI 平台前,請先檢查現有工作階段
開始工作階段前,請先確認目前沒有工作階段。如果 userId 已變更,這一點尤其重要。
[UJET getStatus];
如果已有工作階段,我們應提示使用者繼續工作階段或取消動作:
if ([UJET getStatus] != UjetStatusNone) {
  // Display alert to cancel login or resume existing session
}
自訂
UJETGlobalTheme.h 列出幾種 SDK 主題選項。
在 [UJET initialize] 後設定主題,例如:
UJETGlobalTheme *theme = [UJETGlobalTheme new];

theme.font = [UIFont fontWithName:@"OpenSans" size: 16.0f];
theme.lightFont = [UIFont fontWithName:@"OpenSans-Light" size: 16.0f];
theme.boldFont = [UIFont fontWithName:@"OpenSans-Bold" size: 16.0f];
theme.tintColor = [UIColor colorWithRed:0.243 green:0.663 blue:0.965 alpha:1.00];

[Ujet setGlobalTheme:theme];
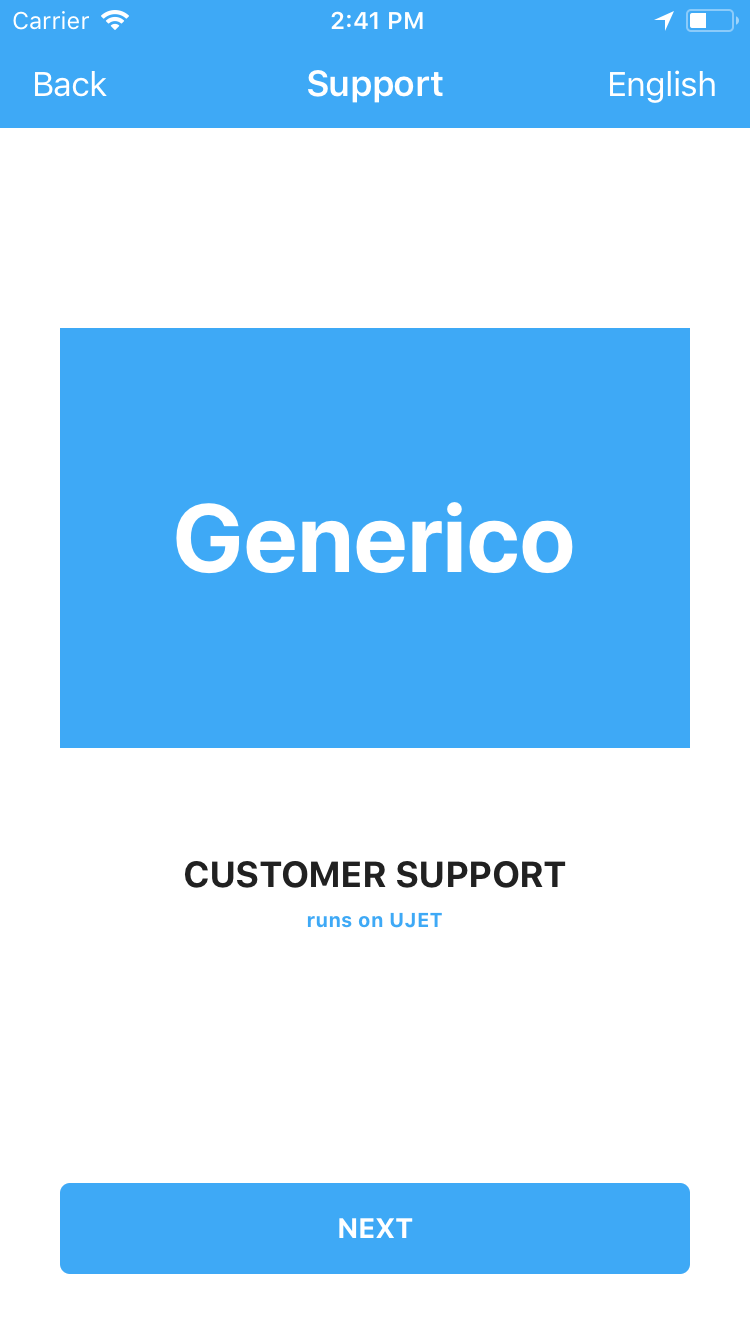
公司名稱會從「管理入口」>「設定」 >「支援中心詳細資料」>「顯示名稱」中擷取。
您可以設定標誌圖片,而非公司名稱,如下所示:
theme.companyImage = [UIImage imageNamed:@"logo"];
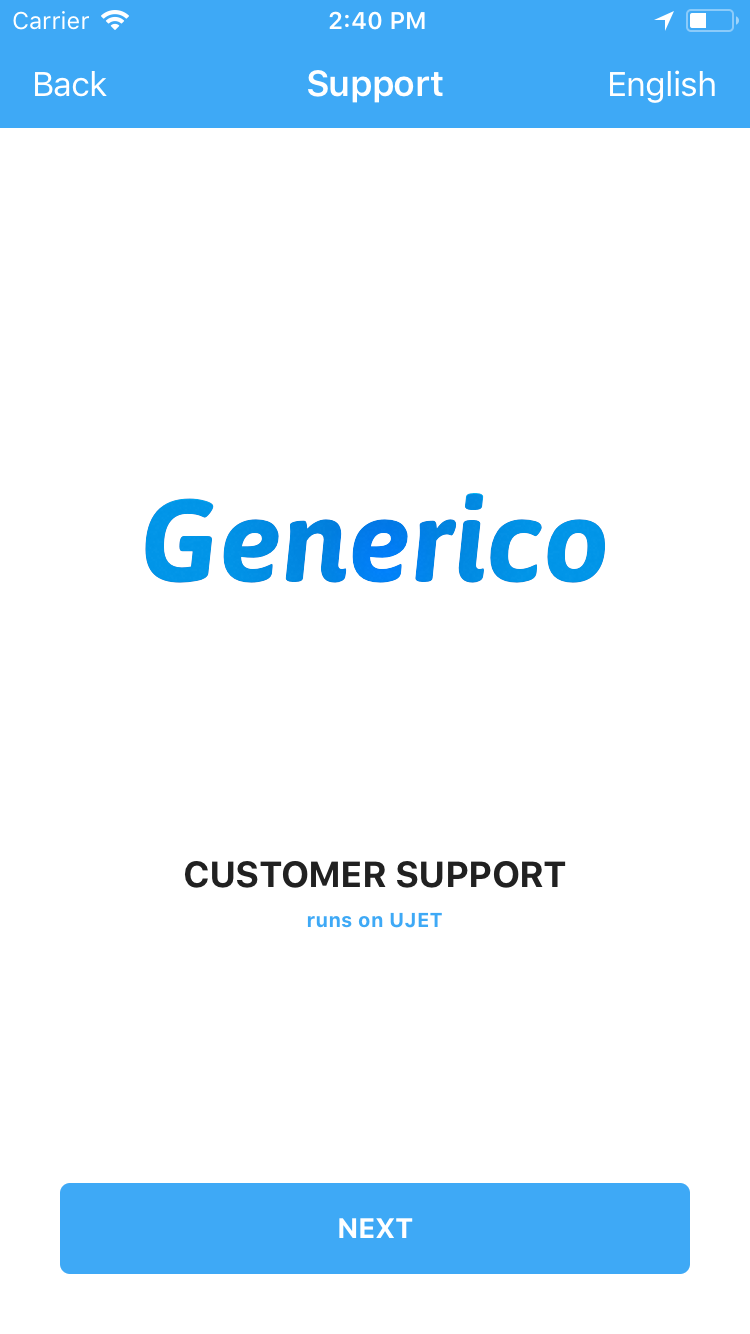
如果圖片過大,系統會調整大小,以符合區域大小。
字串
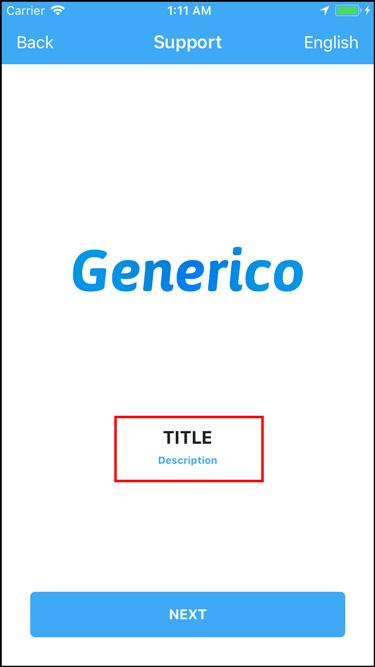
您也可以覆寫值來自訂字串。舉例來說,在 Localizable.strings 中加入這個鍵值組:
"ujet_greeting_title" = "Title";

"ujet_greeting_description" = "Description";
可自訂的字串會列在 ujet.strings 檔案中。
深色模式
您可以為深色模式指定所需顏色的色調,讓字型更容易閱讀。
@property (nonatomic, strong) UIColor \*tintColorForDarkMode;
如未設定屬性,系統會將 UJETGlobalTheme.tintColor 用於深色模式。如果應用程式支援深色模式,建議您設定這項屬性。 如要瞭解如何為深色模式選擇合適的色調,請參閱下列 Apple 文章:
即時通訊主題
如要自訂對話畫面,可以選擇使用 JSON 字串或各個主題類別。
如需參考,請參閱範例應用程式,並取消註解 customizeChatTheme 方法。
func customizeChatTheme() throws {
  guard let file = Bundle.main.path(forResource: "chat-theme-custom", ofType: "json") else { return }
  let json = try String.init(contentsOfFile: file, encoding: .utf8)

  let chatTheme = UJETChatTheme.init(jsonString: json)

  let quickReplyTheme = UJETChatQuickReplyButtonTheme()
  quickReplyTheme.style = .individual
  quickReplyTheme.alignment = .right
  quickReplyTheme.backgroundColor = UJETColorRef(assetName: "white_color")
  quickReplyTheme.backgroundColorForHighlightedState = UJETColorRef(assetName: "quick_reply_color")
  quickReplyTheme.textColor = UJETColorRef(assetName: "quick_reply_color")
  quickReplyTheme.textColorForHighlightedState = UJETColorRef(assetName: "white_color")

  let fontTheme = UJETFontTheme()
  fontTheme.family = "Arial Rounded MT Bold"
  fontTheme.size = 14
  quickReplyTheme.font = fontTheme

  chatTheme?.quickReplyButtonTheme = quickReplyTheme

  let globalTheme = UJETGlobalTheme()
  globalTheme.chatTheme = chatTheme
  globalTheme.defaultAgentImage = UIImage(named: "agent_avatar_image")
  globalTheme.font = UIFont(name: "Arial Rounded MT Bold", size: 14)

  UJET.setGlobalTheme(globalTheme)
}

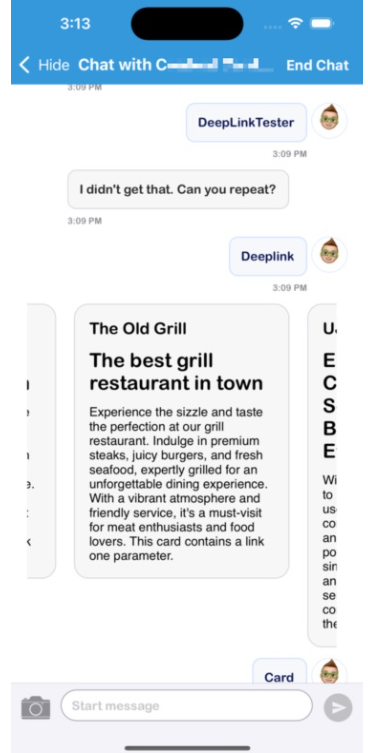
內容資訊卡主題
您可以同時自訂內容資訊卡和對話。您可以使用 JSON 檔案 (請參閱 content_card 屬性) 或 UJETChatContentCardTheme 類別執行這項操作。
func customizeChatTheme() throws {
  guard let file = Bundle.main.path(forResource: "chat-theme-custom", ofType: "json") else { return }
  let json = try String.init(contentsOfFile: file, encoding: .utf8)

  let chatTheme = UJETChatTheme.init(jsonString: json)

  let contentCardTheme = UJETChatContentCardTheme()
  contentCardTheme.backgroundColor = UJETColorRef(assetName: "agent_message_background_color")
  contentCardTheme.cornerRadius = 16

  let contentCardFontTheme = UJETFontTheme()
  contentCardFontTheme.family = "Arial Rounded MT Bold"
  contentCardFontTheme.size = 18
  contentCardTheme.font = contentCardFontTheme

  let contentCardBorder = UJETBorderTheme()
  contentCardBorder.width =  1
  contentCardBorder.color = UJETColorRef(assetName: "agent_message_border_color")
  contentCardTheme.border = contentCardBorder

  let contentCardFontTheme = UJETFontTheme()
  contentCardFontTheme.family = "Arial Rounded MT Bold"
  contentCardFontTheme.size = 18
  contentCardTheme.font = contentCardFontTheme

  // The font family is inherited from the contentCardFontTheme
  let subtitle = UJETFontTheme()
  subtitle.size = 12
  contentCardTheme.subtitle = subtitle

  // The font family is inherited from the contentCardFontTheme
  let bodyFont = UJETFontTheme()
  bodyFont.size = 10
  contentCardTheme.body = bodyFont

  theme.chatTheme?.contentCard = contentCardTheme

  let globalTheme = UJETGlobalTheme()
  globalTheme.chatTheme = chatTheme
  globalTheme.defaultAgentImage = UIImage(named: "agent_avatar_image")
  globalTheme.font = UIFont(name: "Arial Rounded MT Bold", size: 14)

  UJET.setGlobalTheme(globalTheme)
}
表單卡片主題
您可以同時自訂表單資訊卡和對話。方法是使用 JSON 檔案 (請參閱 form_card property) 或 UJETChatFormCardTheme 類別。
func customizeChatTheme() throws {
    guard let file = Bundle.main.path(forResource: "chat-theme-custom", ofType: "json") else { return }
    let json = try String.init(contentsOfFile: file, encoding: .utf8)

    let chatTheme = UJETChatTheme.init(jsonString: json)

    let formCardTheme = UJETChatFormCardTheme()
    formCardTheme.backgroundColor = UJETColorRef(assetName: "agent_message_background_color")
    formCardTheme.cornerRadius = 16

    let formCardFontTheme = UJETFontTheme()
    formCardFontTheme.family = "Arial Rounded MT Bold"
    formCardFontTheme.size = 18
    formCardTheme.font = formCardFontTheme

    let formCardBorder = UJETBorderTheme()
    formCardBorder.width =  1
    formCardBorder.color = UJETColorRef(assetName: "agent_message_border_color")
    formCardTheme.border = formCardBorder

    let titleFontTheme = UJETFontTheme()
    titleFontTheme.family = "Arial Rounded MT Bold"
    titleFontTheme.size = 18
    formCardTheme.title = titleFontTheme

    // The font family is inherited from the formCardFontTheme
    let subtitleFontTheme = UJETFontTheme()
    subtitleFontTheme.size = 12
    formCardTheme.subtitle = subtitleFontTheme

    chatTheme?.formCard = formCardTheme

    let globalTheme = UJETGlobalTheme()
    globalTheme.chatTheme = chatTheme
    globalTheme.defaultAgentImage = UIImage(named: "agent_avatar_image")
    globalTheme.font = UIFont(name: "Arial Rounded MT Bold", size: 14)

    UJET.setGlobalTheme(globalTheme)
}
設定網路表單
如要設定網頁表單功能,請實作 UJETDelegate 通訊協定的 ujetWebFormDidReceive 方法。這個方法會收到事件 (FormMessageReceivedEvent 字典) 做為參數,內含表單相關資訊。事件 (FormMessageReceivedEvent) 字典包含下列 JSON 結構:
  {
    "type": "form_message_received",
    "smart_action_id": 1,
    "external_form_id": "external_foobar"
    "signature": "4868a7e1dcb5..."
  }
如要處理事件,請按照下列步驟操作:
從事件字典 (
smart_action_id、external_form_id和signature) 中擷取相關資訊。產生表單 URI 和表單資料的簽章。
使用
completion closure將表單資料以FormDataEvent字典形式傳遞至 SDK。如果在產生 URI/簽章時發生任何錯誤,請使用
callback.onError()搭配Error叫用回呼。
傳遞至 SDK 的字典 (FormDataEvent) 應具有下列結構:
 {
    "type": "form_data",
    "signature": "4868a7e1dcb5...",
    "data": {
       "smart_action_id":1,
       "external_form_id": "form_id",
       "uri":"foobar"
    }
  }
簽章 (HMAC-SHA:256) 必須使用 data 產生,並以共用密鑰簽署。產生簽章前,資料的物件鍵必須依字母順序排序,且應將相同的 data 傳送至 SDK。
工作階段轉移後
您可以新增會後 VA 自訂項目,以及自訂對話。
您可以使用 JSON 檔案 (請參閱 post_session
屬性),或使用 UJETChatPostSessionVaTheme 類別完成這項操作。框線寬度只能是 0 或 1,如果不想區分會後 VA 體驗,可以將 containerColor 設為白色,並將框線設為 0。
func customizeChatTheme() throws {
    guard let file = Bundle.main.path(forResource: "chat-theme-custom", ofType: "json") else { return }
    let json = try String.init(contentsOfFile: file, encoding: .utf8)

    let chatTheme = UJETChatTheme.init(jsonString: json)

    let postSessionVaTheme = UJETChatPostSessionVaTheme()
    postSessionVaTheme.containerColor = UJETColorRef(assetName: "white_color")

    let postSessionVaBorder = UJETBorderTheme()
    postSessionVaBorder.width =  0
    postSessionVaBorder.color = UJETColorRef(assetName: "white_color")
    containerColor.border = postSessionVaBorder

    chatTheme?.postSessionVaTheme = postSessionVaTheme

    let globalTheme = UJETGlobalTheme()
    globalTheme.chatTheme = chatTheme

    UJET.setGlobalTheme(globalTheme)
}
即時通訊動作選單
你可以同時自訂對話動作選單和對話。您可以透過 JSON 檔案 (請參閱 form_card 屬性) 或 UJETChatActionMenuTheme 類別完成這項操作。
func customizeChatTheme() throws {
    guard let file = Bundle.main.path(forResource: "chat-theme-custom", ofType: "json") else { return }
    let json = try String.init(contentsOfFile: file, encoding: .utf8)

    let chatTheme = UJETChatTheme.init(jsonString: json)

    let actionMenuTheme = UJETChatActionMenuTheme()

    let photoLibraryIcon = UJETChatUserInputIconTheme()
    photoLibraryIcon.visible = true
    photoLibraryIcon.image = UJETImageRef(assetName: "library_button_asset")

    let cameraIcon = UJETChatUserInputIconTheme()
    cameraIcon.visible = true
    cameraIcon.image = UJETImageRef(assetName: "camera_button_asset")

    let cobrowseIcon = UJETChatUserInputIconTheme()
    cobrowseIcon.visible = true
    cobrowseIcon.image = UJETImageRef(assetName: "cobrowse_button_asset")

    actionMenuTheme.libraryIcon = photoLibraryIcon
    actionMenuTheme.cameraIcon = cameraIcon
    actionMenuTheme.cobrowseIcon = cobrowseIcon

    chatTheme?.actionMenu = actionMenuTheme

    let globalTheme = UJETGlobalTheme()
    globalTheme.chatTheme = chatTheme

    UJET.setGlobalTheme(globalTheme)
}
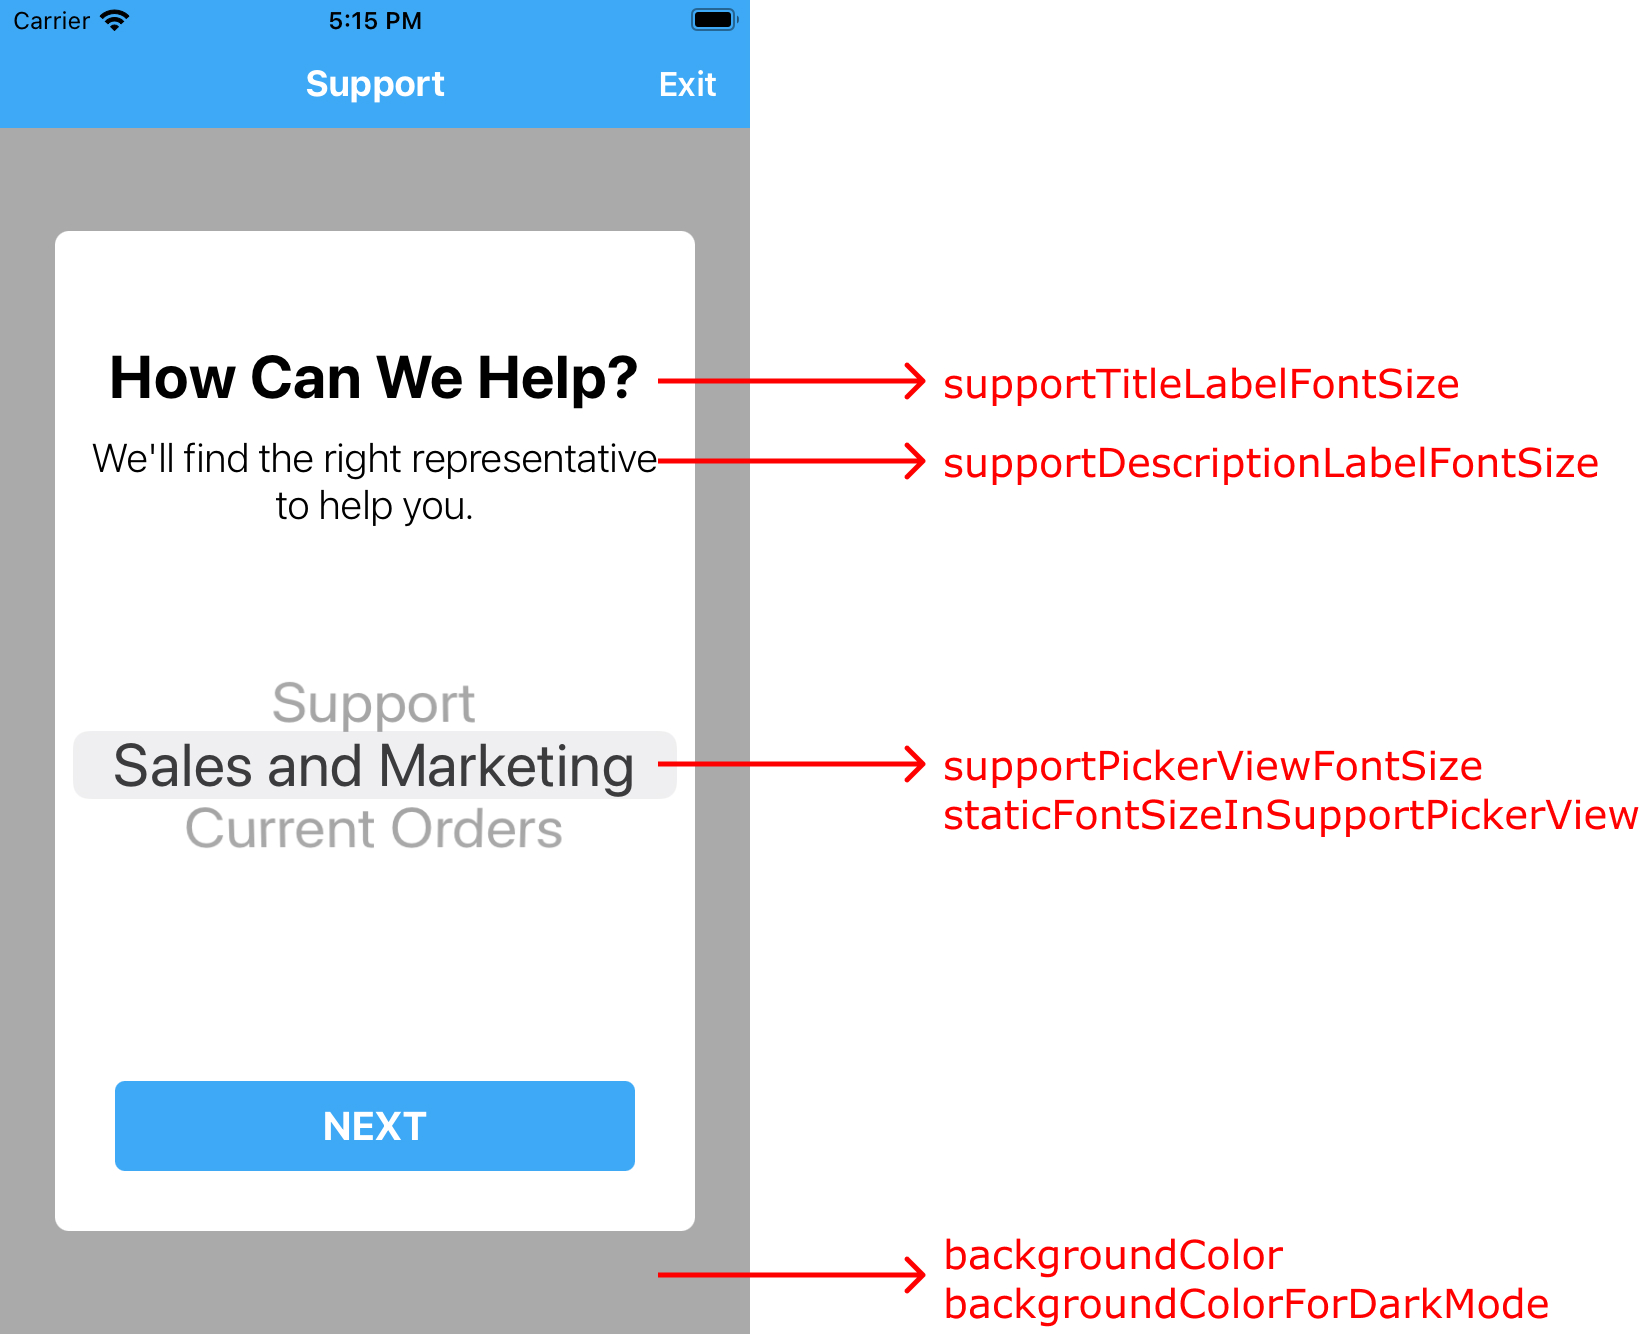
其他登場節目
你也可以自訂其他外觀,例如字型大小和背景顏色。
theme.supportTitleLabelFontSize = 30;
theme.supportDescriptionLabelFontSize = 20;
theme.supportPickerViewFontSize = 30;
theme.staticFontSizeInSupportPickerView = YES;

theme.backgroundColor = UIColor.darkGrayColor;
theme.backgroundColorForDarkMode = UIColor.lightGrayColor;
CallKit
在 iOS 10.0 以上版本中,所有通話都會啟用 CallKit。
透過 CallKit,系統會顯示應用程式內來電的通話畫面,並將通話記錄顯示在手機的通話記錄中。
如要從通話記錄啟動新的 CCAI Platform 支援工作階段,請在 AppDelegate.m 中新增下列區塊:
AppDelegate.m:
- (BOOL)application:(UIApplication *)app continueUserActivity:(nonnull NSUserActivity *)userActivity restorationHandler:(nonnull void (^)(NSArray * _Nullable))restorationHandler {
    if ([userActivity.activityType isEqualToString:@"INStartAudioCallIntent"]) {
        // Open app from Call history
        [UJET startWithOptions:nil];
    }

    return YES;
}
裝置鎖定時收到來電時,CallKit 會在鎖定畫面上顯示 40x40 的圖示。將圖片放在名為「icon-call-kit」的 Xcassets 中。
設定 SDK
啟動 SDK 前,您可以設定多個選項。
詳情請參閱 UJETGlobalOptions 類別。
UJETGlobalOptions *options = [UJETGlobalOptions new];
options.fallbackPhoneNumber = @"+18001112222";
options.preferredLanguage = @"en";

[UJET setGlobalOptions:options];
顯示或隱藏「下載轉錄稿」按鈕
您可以設定 SDK,在對話選項選單和對話後畫面中顯示或隱藏「下載轉錄稿」按鈕。
下列程式碼說明如何設定下載轉錄稿按鈕:
typedef NS_OPTIONS(NSUInteger, UJETChatDownloadTranscriptVisibilityOptions) {
    UJETChatDownloadTranscriptVisibilityOptionsShowAll = 0,
    UJETChatDownloadTranscriptVisibilityOptionsHideFromOptionsMenu = 1 << 0,
    UJETChatDownloadTranscriptVisibilityOptionsHideFromPostChatScreen = 1 << 1,
    UJETChatDownloadTranscriptVisibilityOptionsHideAll = UJETChatDownloadTranscriptVisibilityOptionsHideFromOptionsMenu | UJETChatDownloadTranscriptVisibilityOptionsHideFromPostChatScreen
};

@property (nonatomic, assign) UJETChatDownloadTranscriptVisibilityOptions transcriptVisibilityOptions;
PSTN 備援
我們在下列情況提供 PSTN 備援:
行動網路處於離線狀態。
無法連上應用程式後端。
無法使用 VoIP
網路狀況不佳,無法連線。詳情請參閱 UJETGlobalOptions.pstnFallbackSensitivity 屬性。
由於防火牆設定或供應商問題,連線時發生錯誤。
建議您在 UJETGlobalOptions.fallbackPhoneNumber 中設定公司 IVR 號碼。建議格式為「+」加上國家/地區代碼和電話號碼,例如 +18001112222。
PSTN 備援敏感度
您可以調整檢查網路狀況的敏感度,以決定是否要改用 PSTN。
@property (nonatomic, assign) float pstnFallbackSensitivity;
值必須介於 0.0 至 1.0 之間。如果設為 1,系統一律會透過 PSTN 而非 VoIP 連線通話。如果值為 0,延遲時間上限和頻寬下限分別為 10000 毫秒和 10 KB/秒。舉例來說,如果值為 0.5,表示最低延遲和頻寬分別為 5000 毫秒和 15KB/s。
如要設定這個值,請按照下列步驟操作:
以管理員身分登入 CCAI Platform 入口網站。
依序前往「設定」>「開發人員設定」>「行動應用程式」。
找到「備用電話號碼門檻」部分。預設值為 0.85。
指定新的門檻值。
按一下「儲存」。
在全域層級關閉推播通知
你可以在全域層級關閉推送通知。設定下列屬性會略過所有推播通知依附元件,並防止推播通知傳送給使用者:false
@property (nonatomic, assign) BOOL allowsPushNotifications;
忽略深色模式
您可以使用這項屬性,在 CCAI Platform SDK 中忽略深色模式:
@property (nonatomic, assign) BOOL ignoreDarkMode;
隱藏狀態列
您可以使用這個屬性控管狀態列的顯示設定:
@property (nonatomic, assign) BOOL hideStatusBar;
根據預設,hideStatusBar 會設為 false 和 visible。
略過顧客滿意度問卷調查
您可以新增按鈕,讓使用者略過 CSAT 問卷調查。下列程式碼範例說明如何新增按鈕:
let options = UJETGlobalOptions()
options.skipCsat = true
自訂活動指標
您可以將自己的載入器動畫 (位於 UIView 內) 新增至 SDK,並覆寫預設的 UIActivityIndicatorView。實作 UJETDelegate 的 ujet_activityIndicator 方法,並傳回自訂檢視畫面。
public func ujet_activityIndicator() -> UIView! {
    let loader = UIView.init()
    let animation = CABasicAnimation()
    loader.backgroundColor = .blue
    loader.layer.cornerRadius = 15
    animation.timingFunction = CAMediaTimingFunction.init(name: CAMediaTimingFunctionName.easeOut)
    animation.keyPath = "transform.scale"
    animation.duration = 1.0
    animation.fromValue = 0.0
    animation.toValue = 1.0
    animation.repeatCount = Float.infinity
    animation.isRemovedOnCompletion = false
    loader.layer.add(animation, forKey: "Load")

    return loader
}
如果您已在應用程式的 Info.plist 中將 UIUserInterfaceStyle 設為 Light,完全停用深色模式,則可忽略這項屬性。
偏好語言
CCAI Platform SDK 會依下列優先順序決定偏好語言。
在應用程式的啟動畫面中選取的語言。
已從
UJETGlobalOptions選取預設語言。您可以使用preferredLanguage屬性設定預設語言。支援的語言代碼位於UJETGlobalOptions.h檔案中。如果應用程式支援,就會使用裝置中選取的裝置語言 (依序前往「設定」>「一般」>「語言與地區」)。
如果應用程式不支援裝置語言,但支援最接近的父方言,系統就會使用最接近的裝置語言方言。舉例來說,如果使用者在裝置中選取古巴西班牙文,但應用程式不支援古巴西班牙文,卻支援母方言西班牙文,系統就會使用西班牙文。
如果應用程式不支援裝置語言,系統會使用英文。
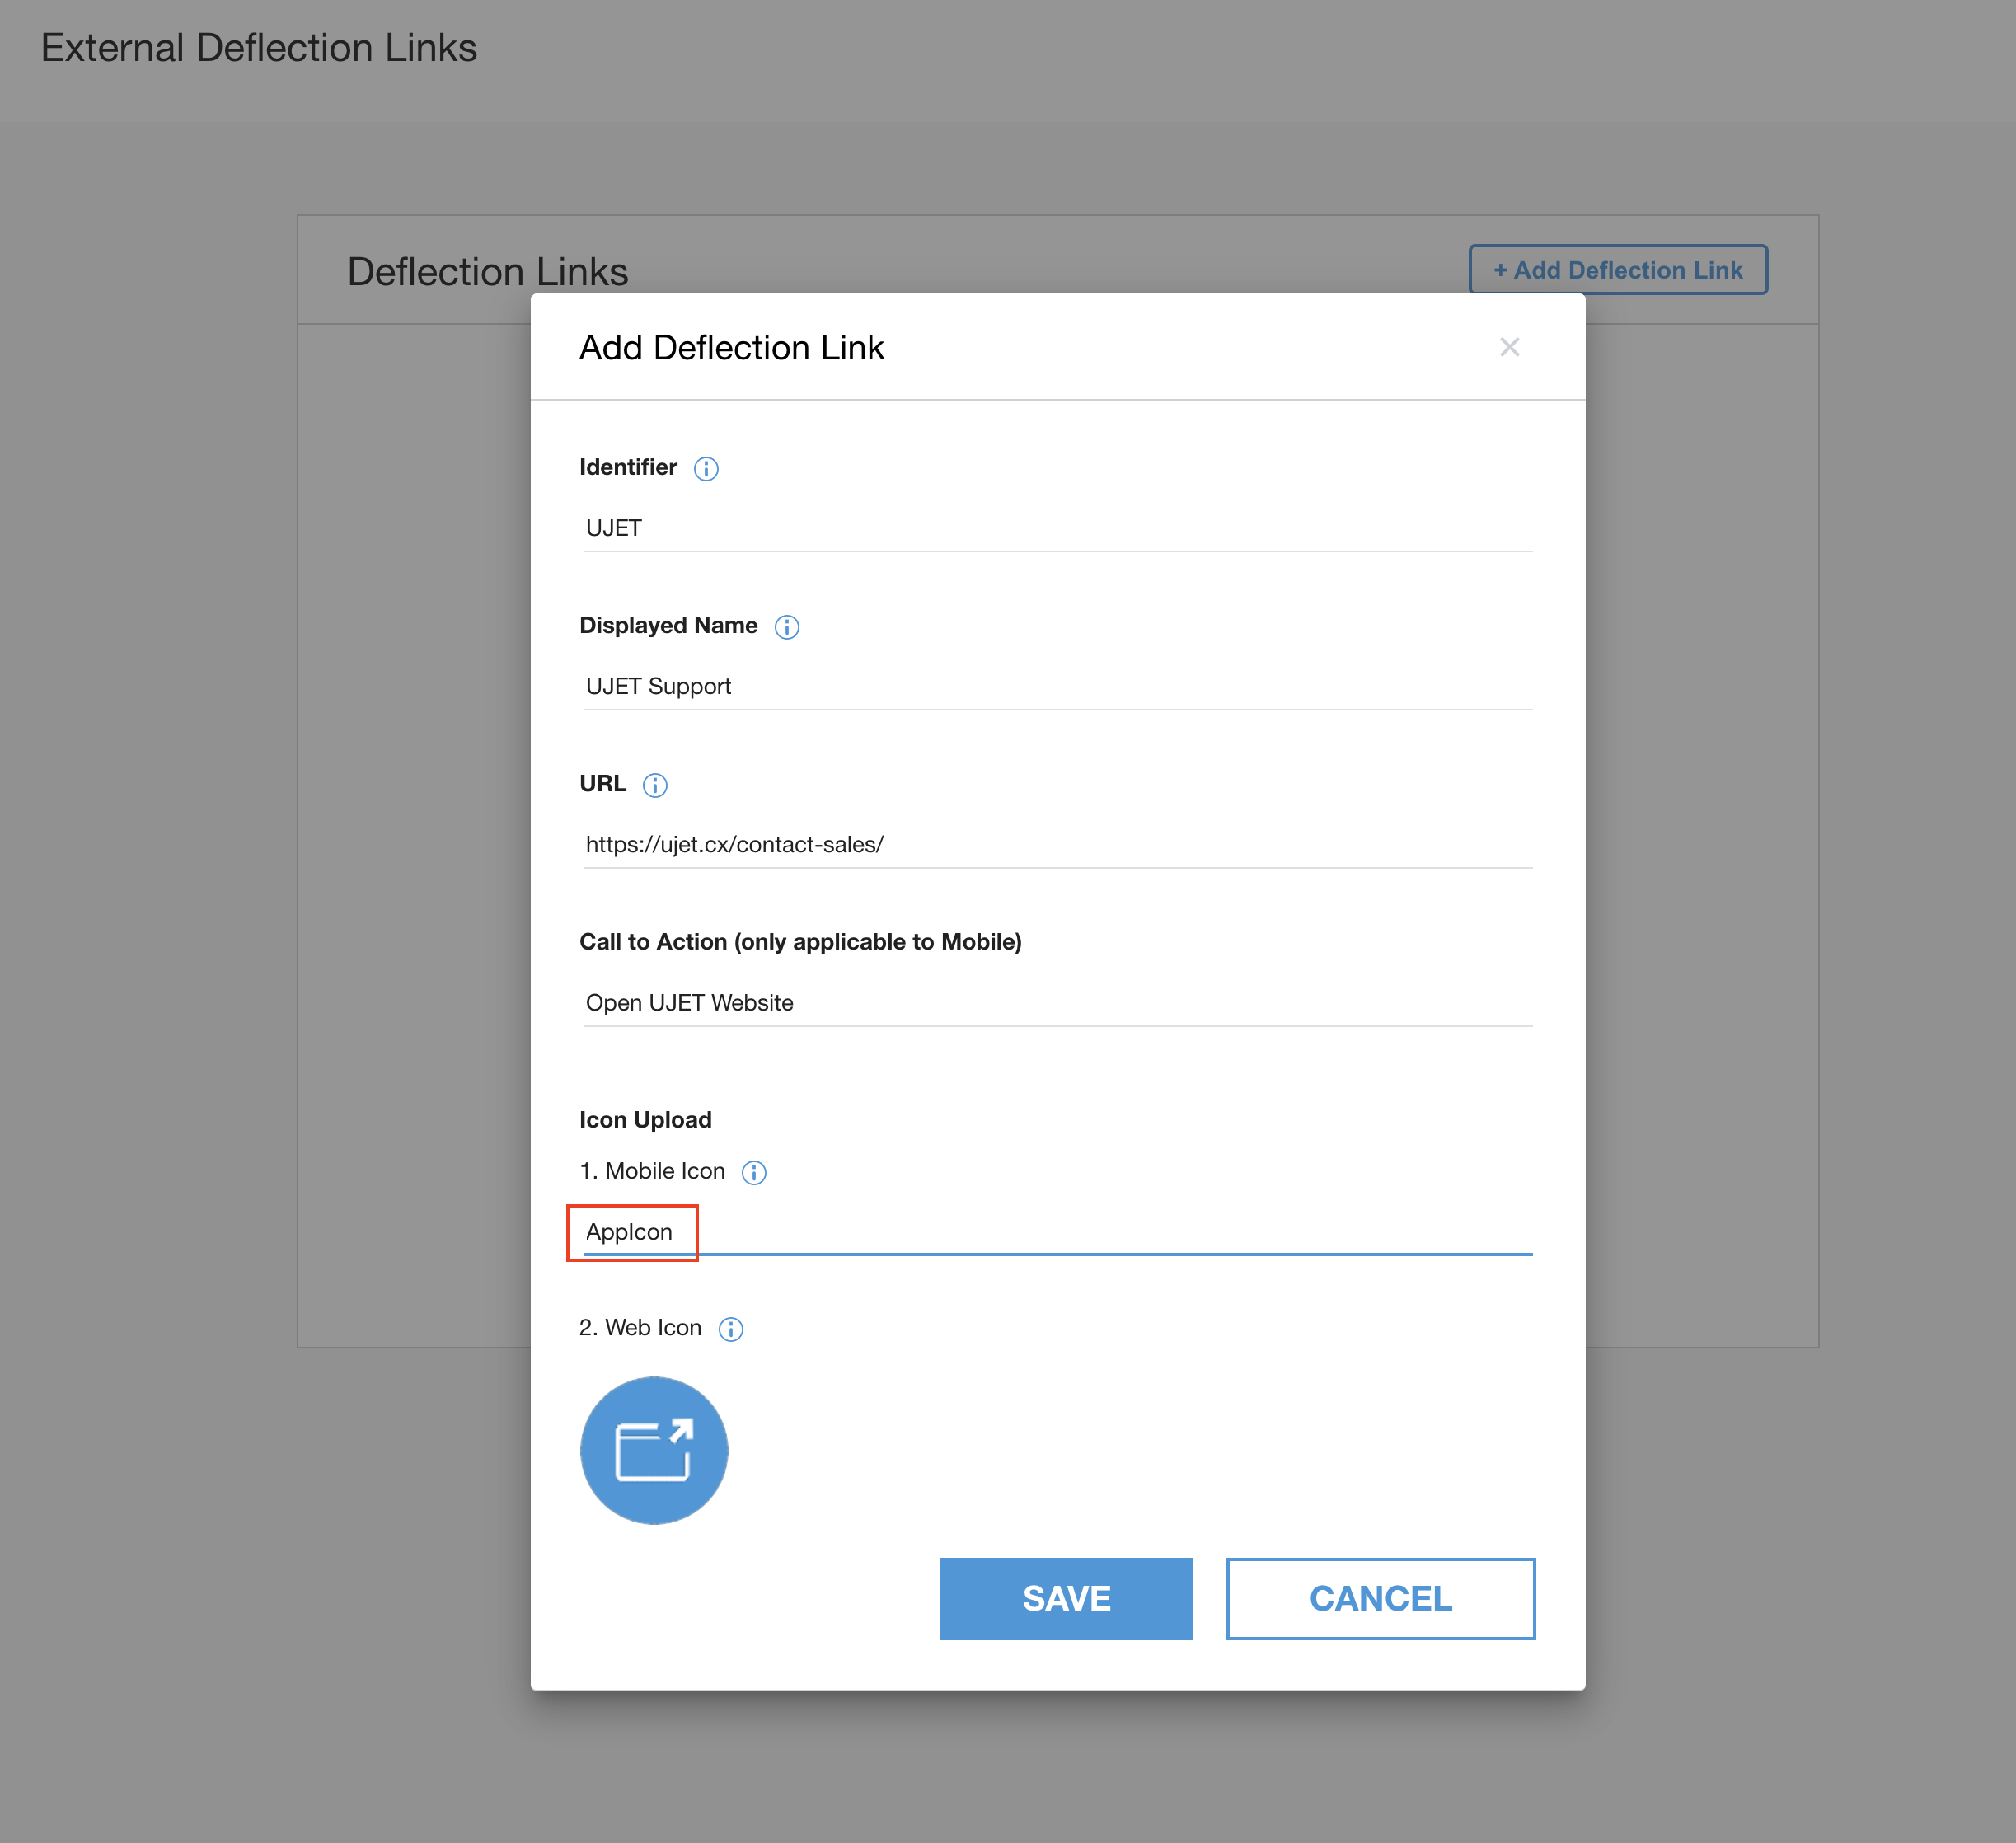
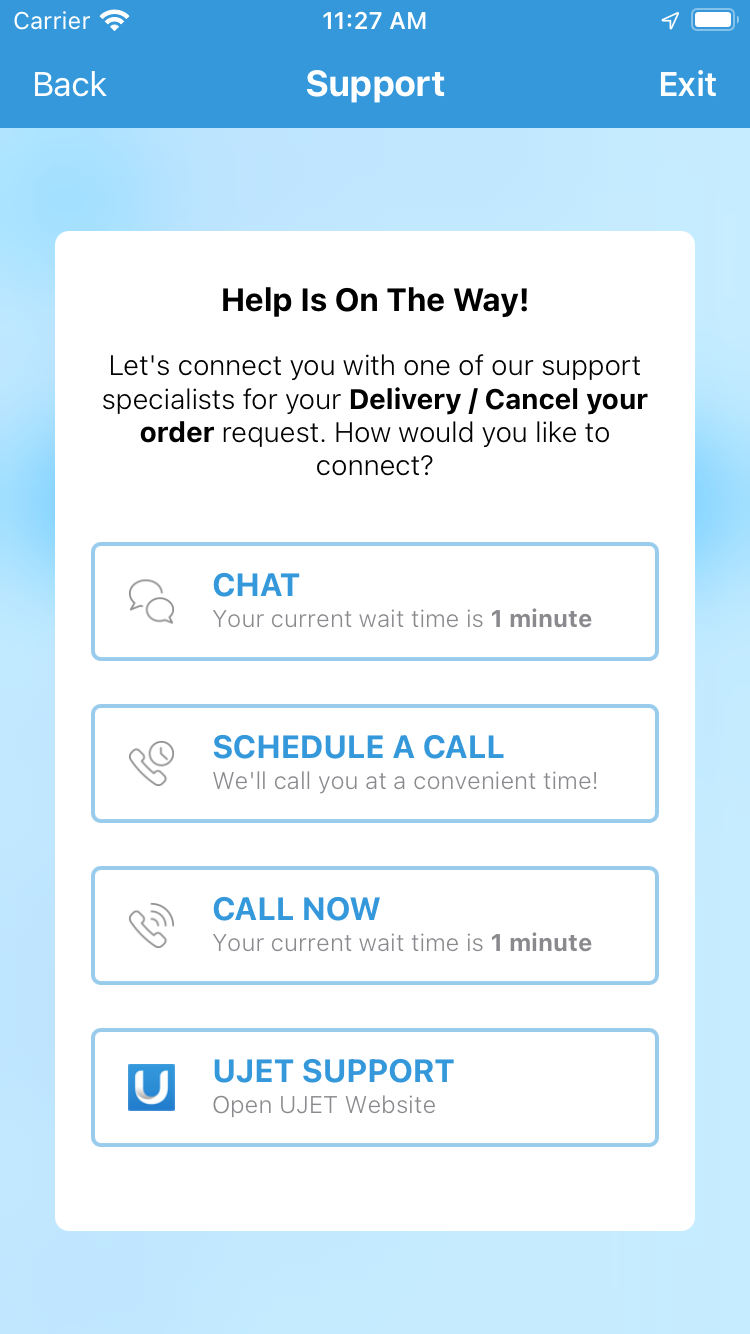
設定外部轉向連結圖示
如要自訂外部轉導連結管道中的圖示,請將圖示上傳至應用程式的資產目錄,並確保在管理入口網站中依序前往「設定」>「即時通訊」>「外部轉導連結」>「查看連結」>「新增轉導連結」建立外部轉導連結時,使用相同的圖示名稱。如果管理入口網站中的圖示名稱與上傳至應用程式的圖示不符,SDK 會使用預設圖示。如要瞭解如何將圖片新增至素材資源目錄,請參閱這篇連結。
備用
您可以將 didHandleUjetError 函式用於非預期的錯誤回溯。如果您未使用這個函式或函式傳回 false,iOS SDK 會處理錯誤。
下表列出 didHandleUjetError 函式監聽的錯誤:
| 錯誤類型 | 錯誤代碼 | 說明 |
|---|---|---|
networkError |
1 | 無法連上網路。 注意:如果網路在即時通訊或通話工作階段或評分畫面中無法使用,系統不會觸發這項錯誤。 |
authenticationError |
100 | 驗證期間發生未預期的錯誤。 |
authenticationJwtError |
101 | JWT 驗證期間發生未預期的錯誤,例如剖析錯誤。 |
voipConnectionError |
1000 | 無法與 VoIP 供應商建立連線。VoIP SDK 回呼會處理這項作業。 |
voipLibraryNotFound |
1001 | 系統預期通話會透過 VoIP 供應商連線,但找不到供應商。如果整合的 SDK 有誤,或是未將 VoIP 供應商程式庫新增至依附元件,就可能發生這種情況。 |
chatLibraryNotFound |
1100 | 系統找不到即時通訊程式庫時,就會發生這種情況。如果整合的 SDK 錯誤,或未將 Twilio 即時通訊程式庫新增至依附元件,就可能發生這種情況。 |
以下程式碼範例說明如何使用 didHandleUjetError 函式:
public func didHandleUjetError(_ errorCode: Int32) -> Bool {
    guard let ujetError = UjetErrorCode(rawValue: Int(errorCode)) else {
        return false // Let the SDK handle unknown integer codes.
    }

    switch ujetError {
    case .networkError:
        // Example for if you have a custom UI for network errors. You can
        // handle the error and prevent the SDK from showing its own alert.
        showCustomNetworkAlert() // Your custom UI for this type of error.
        return true

    case .authenticationError, .voipConnectionError:
        // For all other errors, use the default SDK behavior.
        return false

    @unknown default:
        // Let the SDK handle future errors.
        return false
    }
}
將自訂資料傳送至 CRM
您可以將自訂資料傳送至 CRM 服務單。
傳送自訂資料的方法有兩種:
安全方法:使用 JWT 預先定義資料簽章。
不安全的方法:使用純 JSON 預先定義資料 (不建議)。
使用安全方法傳送自訂資料
您必須實作簽署方法。首先,您可以在用戶端放置自訂資料,然後傳送至伺服器進行簽署。您可以在伺服器上新增其他資料 (以定義的表單形式),並使用公司密碼簽署,然後以 JWT 形式傳回。
- (void)signPayload:(NSDictionary *)payload payloadType:(UjetPayloadType)payloadType success:(void (^)(NSString *))success failure:(void (^)(NSError *))failure
{
    if (payloadType == UjetPayloadCustomData) {
      // sign custom data using UJET_COMPANY_SECRET on your server.

      NSURLSessionConfiguration *sessionConfiguration = [NSURLSessionConfiguration defaultSessionConfiguration];
      NSURLSession *session = [NSURLSession sessionWithConfiguration:sessionConfiguration];

      NSMutableURLRequest *mutableRequest = [[NSMutableURLRequest alloc] init];
      mutableRequest.URL = [NSURL URLWithString:@"https://your.company.com/api/ujet/sign/custom_data"];
      mutableRequest.HTTPMethod = @"POST";
      NSError *error;

      // Make client's custom data
      UJETCustomData *customData = [[UJETCustomData alloc] init];
      [customData set:@"name" label:@"Name" stringValue:@"USER_NAME"];
      [customData set:@"os_version" label:@"OS Version" stringValue:[[UIDevice currentDevice] systemVersion]];
      [customData set:@"model" label:@"Model number" numberValue:[NSNumber numberWithInteger:1234]];
      [customData set:@"temperature" label:@"Temperature" numberValue:[NSNumber numberWithFloat:70.5]];
      [customData set:@"purchase_date" label:@"Purchase Date" dateValue:[NSDate date]];
      [customData set:@"dashboard_url" label:@"Dashboard" urlValue:[NSURL URLWithString:@"http://internal.dashboard.com/1234"]];

      NSDictionary *data = @{@"custom_data": [customData getData]};
      mutableRequest.HTTPBody = [NSJSONSerialization dataWithJSONObject:data options:0 error:&error];
      NSURLSessionDataTask *task = [session dataTaskWithRequest:mutableRequest completionHandler:^(NSData *data, NSURLResponse *response, NSError *error) {
          if(error) {
              failure(error);
          }
          else {
              NSDictionary *json = [NSJSONSerialization JSONObjectWithData:data options:0 error:nil];
              success(json[@"jwt"]);
          }
      }];

      [task resume];
    }
}
使用不安全的方法傳送自訂資料
這種方法會產生潛在的安全性漏洞,可能導致應用程式遭到中間人攻擊,因此不建議使用。如果您選擇使用這種方法,我們對可能發生的安全風險和潛在損害概不負責。建議您使用先前所述的安全方法,在應用程式中傳送自訂資料。或者,您也可以直接啟動 iOS SDK UJETCustomData 例項。在這種情況下,signPayload UJETPayloadCustomData 的委派應只呼叫 success(nil);。
- (void)signPayload:(NSDictionary *)payload payloadType:(UjetPayloadType)payloadType success:(void (^)(NSString *))success failure:(void (^)(NSError *))failure {
    if (payloadType == UjetPayloadCustomData) {
      success(nil);
    }
}
UJETStartOptions *options = [UJETStartOptions new];
options.unsignedCustomData = customData;

[UJET startWithOptions:options];
使用未簽署的自訂資料傳送外部對話記錄
如果 SDK 是以未簽署的自訂資料啟動,您可以呼叫 setExternalChatTransfer: 或 setExternalChatTransferWithDictionary: 方法,分別使用 NSString 或 NSDictionary 設定 JSON 資料,在啟動時將對話記錄傳送至 SDK。
UJETCustomData *customData = [UJETCustomData new];
[customData setExternalChatTransfer:jsonString];

UJETStartOptions *options = [UJETStartOptions new];
options.unsignedCustomData = customData;

[UJET startWithOptions:options];
JSON 格式:
greeting_override: string
代理程式:字典
name:字串
avatar:字串 [代理程式顯示圖片的網址,選填]
transcript:陣列
傳送者:字串 ["end_user" 或 "agent"]
時間戳記:字串 [即「2021-03-15 12:00:00Z」]
content:陣列
類型:字串 [text、media 其中之一]
text:字串 [文字類型為必填]
media:字典 [媒體類型必填]
類型:字串 [image、video 其中之一]
url:字串 [指向媒體檔案的公開網址]
JSON 範例:
{
  "greeting_override": "Please hold while we connect you with a human agent.",
  "agent": {
    "name": "Name",
    "avatar": "avatar url"
  },
  "transcript": [
    {
      "sender": "agent",
      "timestamp": "2021-03-15 12:00:15Z",
      "content": [
        {
          "type": "text",
          "text": "**Suggestions shown:**\n\n* Help with batch or delivery\n* Help with metrics or order feedback\n* Help with Instant Cashout"
        }
      ]
    },
    {
      "sender": "end_user",
      "timestamp": "2021-03-15 12:00:16Z",
      "content": [
        {
          "type": "text",
          "text": "Help with batch or delivery"
        }
      ]
    }
  ]
}
您可以在文字類型中使用 Markdown。支援的語法包括斜體、粗體、項目符號清單、超連結和底線 (--text--)。
自訂資料範例 { :#example-of-custom-data }
以 JWT 編碼的 JSON
JSON 檔案應驗證 JWT。自訂資料的物件是 custom_data 鍵的值。
{
  "iat" : 1537399656,
  "exp" : 1537400256,
  "custom_data" : {
    "location" : {
      "label" : "Location",
      "value" : "1000 Stockton St, San Francisco, CA, United States",
      "type" : "string"
    },
    "dashboard_url" : {
      "label" : "Dashboard URL",
      "value" : "http://(company_name)/dashboard/device_user_ID",
      "type" : "url"
    },
    "contact_date" : {
      "label" : "Contact Date",
      "value" : 1537399655992,
      "type" : "date"
    },
    "membership_number" : {
      "label" : "Membership Number",
      "value" : 62303,
      "type" : "number"
    },
    "model" : {
      "label" : "Model",
      "value" : "iPhone",
      "type" : "string"
    },
    "os_version" : {
      "label" : "OS Version",
      "value" : "12.0",
      "type" : "string"
    },
    "last_transaction_id" : {
      "label" : "Last Transaction ID",
      "value" : "243324DE-01A1-4F71-BABC-3572B77AC487",
      "type" : "string"
    },
    "battery" : {
      "label" : "Battery",
      "value" : "-100%",
      "type" : "string"
    },
    "bluetooth" : {
      "label" : "Bluetooth",
      "value" : "Bluetooth not supported",
      "type" : "string"
    },
    "wifi" : {
      "label" : "Wi-Fi",
      "value" : "Wi-Fi not connected",
      "type" : "string"
    },
    "ssn" : {
      "invisible_to_agent" : true,
      "label" : "Social Security Number",
      "value" : "102-186-1837",
      "type" : "string"
    }
  }
}
每項資料都類似於 JSON 物件格式,且應包含鍵、值、類型和標籤。
鍵是資料的專屬 ID,標籤是 CRM 頁面上的顯示名稱,類型則是值的類型。
字串
- JSON 字串
數字
- 整數、浮點數
日期
- 世界標準時間 Unix 時間戳記格式,長度為 13 位數。(包含毫秒)
網址
- HTTP 網址格式
客戶關係管理範例

位置
使用 CoreLocation 架構。詳情請參閱 AppDelegate.m。
裝置 OS 版本
[customData set:@"os_version" label:@"OS Version" stringValue:[[UIDevice currentDevice] systemVersion]];
禁止顯示自訂資料
您可以搭配自訂資料物件使用 invisible_to_agent 屬性,防止簽署或未簽署的自訂資料顯示在代理程式介面卡中。在上一個範例中,由於 "invisible_to_agent" : true 包含在 ssn 物件中,因此代理程式介面卡不會顯示使用者的身分證字號。
如果您在自訂資料物件中加入 "invisible_to_agent" : true 屬性,可能會發生下列情況:
- 自訂資料會納入工作階段中繼資料檔案。
- 自訂資料不會納入 CRM 記錄。
詳情請參閱「在代理程式轉接程式中查看工作階段資料」。
保留資料屬性
工作階段開始時,您可以將預留的資料屬性以簽署的自訂資料形式,傳送至 Contact Center AI 平台 (CCAI 平台)。詳情請參閱傳送保留的資料屬性。
以下是自訂資料中保留的資料屬性範例:
  {
    "custom_data": {
      "reserved_verified_customer": {
        "label": "Verified Customer",
        "value": "VERIFIED_CUSTOMER_BOOLEAN": ,
        "type": "boolean"
      },
      "reserved_bad_actor": {
        "label": "Bad Actor",
        "value": "VERIFIED_BAD_ACTOR_BOOLEAN": ,
        "type": "boolean"
      },
      "reserved_repeat_customer": {
        "label": "Repeat Customer",
        "value": "REPEAT_CUSTOMER_BOOLEAN": ,
        "type": "boolean"
      }
    }
  }
更改下列內容:
VERIFIED_CUSTOMER_BOOLEAN:如果您認為這個使用者是正當客戶,則為 True。VERIFIED_BAD_ACTOR_BOOLEAN:如果您認為這個使用者可能是惡意行為人,請設為 True。REPEAT_CUSTOMER_BOOLEAN:如果您判斷這位使用者先前曾與聯絡中心聯絡,則為 True。
自訂流程
中斷 CCAI 平台連線,處理主機應用程式事件
// CCAI Platform is connected
...
// An event has come
[UJET disconnect:^{
  // Handle an event
}];
延後接聽 CCAI 平台來電或回覆即時通訊
實作委派方法來處理傳入事件
- (BOOL)shouldConnectUjetIncoming:(NSString *)identifier forType:(UjetIncomingType)type {
  if (weDoingSomething) {
    // save identifier and type
    return NO; // postpone
  } else {
    return YES;
  }
}
連結延期活動
[UJET connect:identifier forType:UjetIncomingTypeCall];
設定深層連結
這樣一來,無論終端使用者是否安裝應用程式,PSTN 電話的服務專員都能透過簡訊使用智慧動作。
在 CCAI Platform 入口網站中,依序前往「設定」>「作業管理」>「啟用傳送簡訊下載應用程式」。
設定通用連結或自訂網址架構後,即可使用網頁設定應用程式網址 (例如 https://your-company.com/support)。你可以選擇其中一種方式。
實作委派方法來處理深層連結
通用連結和自訂網址分別類似 https://your-company.com/support?call_id=x&nonce=y 和 your-company://support?call_id=x&nonce=y。在管理入口網站的「應用程式網址」下方,輸入其中一個不含查詢參數的連結。舉例來說,如果使用自訂網址通訊協定,請輸入 your-company://support。
在委派方法中,請務必只在通用連結或自訂網址中的網址路徑和參數專屬於 CCAI Platform 時呼叫 [UJET start]。
- (BOOL)application:(UIApplication *)app continueUserActivity:(nonnull NSUserActivity *)userActivity restorationHandler:(nonnull void (^)(NSArray * _Nullable))restorationHandler {
  ...
  if ([NSUserActivityTypeBrowsingWeb isEqualToString:userActivity.activityType]) {
    NSURL *url = userActivity.webpageURL;

    NSArray *availableSchema = @[
                                  @"your-company",   // custom URL scheme
                                  @"https"           // universal link
                                  ];

    NSArray *availableHostAndPath = @[
                                      @"ujet",                  // custom URL scheme
                                      @"your-comany.com/ujet"   // universal link
                                      ];

    if (![availableSchema containsObject:url.scheme]) {
      return NO;
    }

    NSString *hostAndPath = [NSString stringWithFormat:@"%@%@", url.host, url.path];
    if (![availableHostAndPath containsObject:hostAndPath]) {
      return NO;
    }

    // your-company://ujet?call_id={call_id}&nonce={nonce}
    // https://your-company.com/ujet?call_id={call_id}&nonce={nonce}
    NSURLComponents *urlComponents = [NSURLComponents componentsWithURL:url
                                                resolvingAgainstBaseURL:NO];
    NSArray *queryItems = urlComponents.queryItems;
    NSString *callId = [self valueForKey:@"call_id" fromQueryItems:queryItems];
    // validate call id
    if (![self isValidCallId:callId]) {
      return NO;
    }
    NSString *nonce = [self valueForKey:@"nonce" fromQueryItems:queryItems];

    UJETStartOptions *options = [[UJETStartOptions alloc] initWithCallId:callId nonce:nonce];

    [UJET startWithOptions:options];
  }
  ...
}
如果應用程式採用 UIWindowSceneDelegate,請新增下列程式碼片段:
class SceneDelegate: UIResponder, UIWindowSceneDelegate {

    var window: UIWindow?

    func scene(_ scene: UIScene, willConnectTo session: UISceneSession, options connectionOptions: UIScene.ConnectionOptions) {

        //if app is called with universal Link and started from cold
        if connectionOptions.urlContexts.first != nil  {
            self.scene(scene, openURLContexts: connectionOptions.urlContexts)
        }

        guard let _ = (scene as? UIWindowScene) else { return }
    }

    func scene(_ scene: UIScene, willContinueUserActivityWithType userActivityType: String) {
        guard let appDelegate = UIApplication.shared.delegate as? AppDelegate else { return }
        let _ = appDelegate.application(UIApplication.shared,
                                        continue: NSUserActivity(activityType: userActivityType)) { _ in

        }
    }

    func scene(_ scene: UIScene, openURLContexts URLContexts: Set<UIOpenURLContext>) {
        guard let url = URLContexts.first?.url else {
            return
        }

        guard let appDelegate = UIApplication.shared.delegate as? AppDelegate else { return }
        let _ = appDelegate.application(UIApplication.shared,
                                        open: url,
                                        options: [:])
    }
}
詳情請參閱 UJETObject+DeepLink 檔案中的程式碼範例。
觀察 CCAI 平台事件
我們會透過 NSNotificationCenter.defaultCenter 發布下列事件。您可以聆聽這些語音,並視用途自訂流程,例如自訂鍵盤配置。
UJETEventEmailDidClick
- 佇列選單資料
UJETEventEmailDidSubmit
佇列選單資料
has_attachment: (NSNumber) @YES, @NO
UJETEventSessionViewDidAppear
type: @"call", @"chat"
時間戳記:(NSString) ISO 8601
UJETEventSessionViewDidDisappear
type: @"call", @"chat"
時間戳記:(NSString) ISO 8601
UJETEventSessionDidCreate
- 工作階段資料
UJETEventSessionDidEnd
工作階段資料
agent_name:(NSString) 如果代理人未加入,則為空值
duration:(NSNumber) 僅限通話
ended_by:(NSString)
type=call: @"agent", @"end_user"
type=chat: @"agent", @"end_user", @"timeout", @"dismissed"
UJETEventSdkDidTerminate
UJETEventPostSessionOptInDidSelected
- opt_in_selected: (NSString) @"Yes", @"No"
事件資料
中繼資料
application: @"iOS"
app_id:(NSString) 軟體包 ID
app_version:(NSString)
公司:(NSString) 子網域
device_model:(NSString)
device_version:(NSString)
sdk_version:(NSString)
時間戳記:(NSString) ISO 8601
佇列選單資料
中繼資料
menu_id:NSString
menu_key: NSString, nullable
menu_name:NSString
menu_path : NSString
工作階段資料
佇列選單資料
session_id:NSString
type: @"call", @"chat"
end_user_identifier: NSString
設定螢幕分享
如要使用分享螢幕畫面功能,請整合 UJETCobrowseKit.xcframework。
CocoaPods:將下列子規格新增至應用程式目標。
    ruby
target 'MyApp' do
  pod 'UJET'
  pod 'UJET/Cobrowse'
end
Carthage:在 Cartfile 中新增下列程式碼:
binary "https://sdk.ujet.co/ios/UJETKit.json"
SwiftPM:選取 UJET 和 UJETCobrowse 產品,然後新增至應用程式目標。
並設定 UJETGlobalOptions.cobrowseKey 屬性。
swift
let options = UJETGlobal
Options()options.cobrowseKey = cobrowseKey

UJET.setGlobalOptions(options)
分享整個裝置的畫面 (選用)
分享完整裝置畫面後,支援服務專員就能查看您裝置上其他應用程式的畫面。如果支援服務專員需要檢查系統設定的狀態,或是查看使用者在多個應用程式之間切換,這項功能就非常實用。如不需要這項功能,可以略過本節。
自訂分享螢幕畫面同意對話方塊
如要自訂螢幕分享同意對話方塊,您需要在供應商類別中實作 UJETCobrowseAlertProvider 通訊協定。在這個實作項目中,請透過相應的通訊協定方法,傳回自訂 UIViewController 或任何其他繼承 UIViewController 的物件。UIViewController 應有兩個按鈕,一個用於接受,另一個用於拒絕。
取得同意聲明後,請呼叫閉包 consentStatus,將同意聲明傳遞至 SDK。UIViewController,cobrowseFullDeviceRequestAlert。委派應包含附有標題的 RPSystemBroadcastPickerView (請參閱下方的程式碼範例),且應有另一個拒絕按鈕。在點選「拒絕」按鈕時,叫用已關閉的關閉動作。
class CobrowseAlertProvider: NSObject, UJETCobrowseAlertProvider {
    func cobrowseSessionInitializationAlert(consentStatus: @escaping (Bool) -> Void) -> UIViewController? {
        let customAlertViewController = CustomAlertViewController()
        customAlertViewController.consentStatus = consentStatus
        return customAlertViewController
    }

    func cobrowseSessionRequestAlert(consentStatus: @escaping (Bool) -> Void) -> UIViewController? {
        // Same as cobrowseSessionInitializationAlert
    }

    func cobrowseRemoteRequestAlert(consentStatus: @escaping (Bool) -> Void) -> UIViewController? {
        // Same as cobrowseSessionInitializationAlert
    }

    func cobrowseFullDeviceRequestAlert(dismissed: @escaping () -> Void) -> UIViewController? {
        let customAlertViewController = CustomFullDeviceAlertViewController()
        cobrowseSessionAlertViewController.dismissed = dismissed
        return customAlertViewController
    }

    func cobrowseSessionEndAlert(consentStatus: @escaping (Bool) -> Void) -> UIViewController? {
        // Same as cobrowseSessionInitializationAlert
    }
}
自訂檢視畫面控制器應有閉包,可將同意聲明狀態傳遞至 SDK。
class CustomAlertViewController: UIViewController {
    var consentStatus: ((Bool) -> Void)?

    @IBAction func allowButtonClicked(_ sender: Any) {
        dismiss(animated: true) {[weak self] in
            self?.consentStatus?(true)
        }
    }

    @IBAction func denyButtonClicked(_ sender: Any) {
        dismiss(animated: true) {[weak self] in
            self?.consentStatus?(false)
        }
    }
}
完整裝置要求快訊的自訂檢視畫面控制器應具備 RPSystemBroadcastPickerView 和閉包,可將 dismiss 狀態傳遞至 SDK。
class CustomFullDeviceAlertViewController: UIViewController {
    var broadcastPickerView: RPSystemBroadcastPickerView!
    var dismissed: (() -> Void)?

    override func viewDidLoad() {
        super.viewDidLoad()

        let frame = CGRect(x: x, y: y, width: 50, height: 50) // Set your own value
        broadcastPickerView = RPSystemBroadcastPickerView(frame: frame)
        broadcastPickerView.preferredExtension = Bundle.main.object(forInfoDictionaryKey: "CBIOBroadcastExtension") as? String // Should have this value as it is
        view.addSubview(broadcastPickerView)
    }

    @IBAction func denyButtonClicked(_ sender: Any) {
        dismiss(animated: true) {[weak self] in
            self?.dismissed?()
        }
    }
}
請務必透過下列 API 將這個供應商傳遞至 SDK:
let provider = CobrowseAlertProvider()
UJET.setCobrowseAlertProvider(provider)
廣播擴充功能
這項功能需要新增廣播擴充功能。
開啟 Xcode 專案。
依序前往「File」>「Target」。
選取「Broadcast Upload Extension」。
輸入目標的「名稱」。
取消勾選「Include UI Extension」(包含 UI 擴充功能)。
建立目標,並記下其套件組合 ID。
將 Broadcast Extension 的目標 SDK 變更為 iOS 12.0 以上版本。
整合 SDK
CocoaPods:在擴充功能目標中加入下列子規格:
target 'MyApp' do
  pod 'UJET'
  pod 'UJET/Cobrowse'
end
target 'MyAppExtension' do
  pod 'UJET/CobrowseExtension'
end
如果您使用 SwiftPM,請選取 UJETCobrowseExtension 產品並加入擴充功能目標。
設定鑰匙圈共享功能
您先前建立的應用程式和應用程式擴充功能,必須透過 iOS 鑰匙圈共用某些密碼。他們會使用自己的鑰匙圈群組,因此不會與其他應用程式的鑰匙圈混用。
在應用程式目標和擴充功能目標中,為 io.cobrowse 金鑰鏈群組新增金鑰鏈共用授權。
將軟體包 ID 新增至 plist
取得先前建立的擴充功能套件 ID,並在應用程式的 Info.plist 中新增下列項目 (注意:不是在擴充功能的 Info.plist 中),然後將下列套件 ID 替換為您自己的 ID:
xml
<key>CBIOBroadcastExtension</key>
<string>your.app.extension.bundle.ID.here</string>
實作擴充功能
Xcode 會將 SampleHandler.m 和 SampleHandler.h (或 SampleHander.swift) 檔案新增為您先前建立目標的一部分。將檔案內容替換為下列內容:
Swift:選取 UJETCobrowseExtension 產品並新增至擴充功能目標:
import CobrowseIOAppExtension
class SampleHandler: CobrowseIOReplayKitExtension {
}
ObjC
objc// SampleHandler.h
@import CobrowseIOAppExtension;
@interface SampleHandler : CobrowseIOReplayKitExtension
@end// SampleHandler.m
#import "SampleHandler.h"
@implementation SampleHandler
@end
打造並執行您的應用程式
現在可以建構及執行應用程式了。完整裝置功能僅適用於實體裝置,無法在 iOS 模擬器中運作。
將 SDK 縮到最小
如果聊天工作階段或通話正在進行中,可以將 Contact Center AI 平台 SDK 縮到最小。收到 SDK 事件 (例如使用者點選內容資訊卡) 後,如果想將使用者帶回應用程式,這項功能就非常實用。如要縮小 SDK 並將使用者帶回應用程式,請使用:
UJET.minimize(nil)
 // Or if you want to take some action once the SDK has been minimized:

UJET.minimize {
  // Add the code you want to run once the SDK has been minimized here
}
疑難排解
應用程式遭拒
由於您在中國境內提交的應用程式包含 CallKit 架構,因此遭到拒絕。
如果 Apple 因此拒絕您的應用程式,請直接留言,因為系統會在 VoIP 通話中停用中國地區的 CallKit 架構。這項異動自 SDK 0.31.1 版起生效。
SDK 過大
SDK 大小過大,難以在 GitHub 上追蹤
如果未使用 Bitcode,可以選擇從二進位檔中移除 Bitcode。在 UJETKit.xcframework 資料夾下執行這項指令。
xcrun bitcode_strip -r UJET -o UJET
dyld:Library not loaded 錯誤
在「Target」>「Build Settings」>「Linking」 中,將 @executable_path/Frameworks 新增至 Runpath Search Paths。
在 iTunes Connect 上提交應用程式
由於啟用網際網路通訊協定語音 (VoIP) 背景模式,Apple 可能會在審查程序中提出下列問題:
使用者可以在您的應用程式中接聽 VoIP 電話嗎?
針對問題回答「是」。
啟動 SDK 時「快訊通知」無法使用
請確認下列事項:
使用實體裝置,而非模擬器。
啟用推播通知和「背景模式」>「網際網路通訊協定語音」功能。
如果上述方法無法解決問題,請嘗試使用發布佈建設定檔 (臨時或 Apple Store) 建構。
針對測試應用程式測試推播通知
準備 VoIP 憑證和裝置的裝置權杖。
在 CCAI Platform 入口網站中,請參閱「設定」>「開發人員設定」選單中的「推播通知偵錯」部分。
如果您已設定 APNS 憑證,就不必再次輸入憑證。
輸入憑證 (選用) 並檢查是否為沙箱 (選用),然後輸入測試應用程式的推播通知裝置權杖。
發起新對話的時間超過 30 秒
檢查您是否正在回應自訂資料的委派方法。您應在要求時傳回有效的自訂資料,或在成功區塊中只傳回 nil。
請使用以下程式碼片段做為設定範例:
public func signPayload(_ payload: [AnyHashable: Any]?, payloadType: UjetPayloadType, success: (String?) -> Void, failure: (Error?) -> Void)
{
    if payloadType == .customData {
        success(nil)
    }
}