


建立及使用資料表
本文說明如何在 BigQuery 中建立及使用標準 (內建) 資料表。如要瞭解如何建立其他類型的資料表,請參閱下列文章:
建立資料表後,您可以執行下列作業:
- 控管資料表資料的存取權。
- 取得資料表的相關資訊。
- 列出資料集中的資料表。
- 取得資料表中繼資料。
如要進一步瞭解如何管理資料表,包括更新資料表屬性、複製資料表及刪除資料表,請參閱「管理資料表」一文。
事前準備
授予身分與存取權管理 (IAM) 角色,讓使用者取得必要權限,執行本文中的各項工作。
必要的角色
如要取得建立表格所需的權限,請要求管理員授予您下列 IAM 角色:
- BigQuery 作業使用者 (
roles/bigquery.jobUser) (如果您要透過載入資料或將查詢結果儲存至資料表的方式建立資料表,則需要專案的這項權限)。 - 資料集的「BigQuery 資料編輯者」 (
roles/bigquery.dataEditor),您要在該資料集建立資料表。
如要進一步瞭解如何授予角色,請參閱「管理專案、資料夾和組織的存取權」。
這些預先定義的角色具備建立表格所需的權限。如要查看確切的必要權限,請展開「Required permissions」(必要權限) 部分:
所需權限
如要建立資料表,您必須具備下列權限:
-
bigquery.tables.create在要建立資料表的資料集上。 -
bigquery.tables.getData如果您要將查詢結果儲存為資料表,請在查詢參照的所有資料表和檢視區塊上執行這項操作。 -
bigquery.jobs.create專案,前提是您要透過載入資料或將查詢結果儲存至資料表的方式建立資料表。 -
bigquery.tables.updateData如果您要使用查詢結果附加或覆寫資料表,就需要這個權限。
資料表命名
在 BigQuery 中建立資料表時,每個資料集裡的資料表名稱不得重複。資料表名稱可以:
- 包含的字元總計最多 1,024 個 UTF-8 位元組。
- 包含類別 L (字母)、M (標記)、N (數字)、Pc (連接符,包括底線)、Pd (破折號)、Zs (空格) 的 Unicode 字元。詳情請參閱「一般類別」。
以下都是有效的資料表名稱範例:table 01、ग्राहक、00_お客様、étudiant-01。
注意事項:
- 根據預設,資料表名稱會區分大小寫。
mytable和MyTable可以共存在同一個資料集中,除非是已關閉大小寫區分功能的資料集。 - 部分資料表名稱和資料表名稱前置字串已保留。如果收到錯誤訊息,指出資料表名稱或前置字元已保留,請選取其他名稱,然後再試一次。
如果您在序列中加入多個點運算子 (
.),系統會自動移除重複的運算子。例如:
project_name....dataset_name..table_name變成這樣:
project_name.dataset_name.table_name
製作表格
您可以在 BigQuery 中透過下列方式建立資料表:
- 手動使用 Google Cloud 控制台或 bq 指令列工具
bq mk指令。 - 呼叫
tables.insertAPI 方法,透過程式建立。 - 使用用戶端程式庫。
- 從查詢結果建立。
- 定義參照外部資料來源的資料表。
- 在載入資料時建立。
- 使用
CREATE TABLE資料定義語言 (DDL) 陳述式。
建立具有結構定義的空白資料表
您可以透過下列方式,建立具有結構定義的空白資料表:
- 使用 Google Cloud 控制台輸入結構定義。
- 使用 bq 指令列工具以內嵌方式提供結構定義。
- 使用 bq 指令列工具提交 JSON 結構定義檔案。
- 呼叫 API 的
tables.insert方法時,在資料表資源中提供結構定義。
如要進一步瞭解如何指定資料表結構定義,請參閱指定結構定義。
您可以在建立資料表後於其中載入資料,或透過寫入查詢結果填入資料。
如何建立含結構定義的空白資料表:
控制台
前往 Google Cloud 控制台的「BigQuery」頁面。
- 點選左側窗格中的 「Explorer」。
- 在「Explorer」窗格中展開專案,按一下「Datasets」(資料集),然後選取資料集。
- 在「資料集資訊」部分,按一下 「建立資料表」。
- 在「建立資料表」窗格中,指定下列詳細資料:
- 在「來源」部分,從「使用下列資料建立資料表」清單中選取「空白資料表」。
- 在「目的地」部分,指定下列詳細資料:
- 在「Dataset」(資料集) 部分,選取要建立資料表的資料集。
- 在「Table」(資料表) 欄位中,輸入要建立的資料表名稱。
- 確認「Table type」(資料表類型) 欄位已設為「Native table」(原生資料表)。
- 在「Schema」(結構定義) 部分輸入結構定義。你可以使用下列任一方法手動輸入結構定義資訊:
- 選項 1:按一下「以文字形式編輯」,然後以 JSON 陣列的形式貼上結構定義。如果您使用 JSON 陣列,可透過與建立 JSON 結構定義檔一樣的程序產生結構定義。您可以輸入下列指令,查看現有資料表的 JSON 格式結構定義:
bq show --format=prettyjson dataset.table
- 選項 2:按一下 「新增欄位」,然後輸入表格結構定義。指定每個欄位的「Name」(名稱)、「Type」(類型) 和「Mode」(模式)。
- 選項 1:按一下「以文字形式編輯」,然後以 JSON 陣列的形式貼上結構定義。如果您使用 JSON 陣列,可透過與建立 JSON 結構定義檔一樣的程序產生結構定義。您可以輸入下列指令,查看現有資料表的 JSON 格式結構定義:
- 選用:指定「分區與叢集設定」。詳情請參閱「建立分區資料表」和「建立及使用叢集資料表」。
- 選用步驟:如要在「Advanced options」(進階選項) 部分使用客戶自行管理的加密金鑰,請選取「Use a customer-managed encryption key (CMEK)」(使用客戶自行管理的加密金鑰 (CMEK)) 選項。根據預設,BigQuery 會使用 Google-owned and Google-managed encryption key加密靜態儲存的客戶內容。
- 點選「建立資料表」。
SQL
下列範例會建立名為 newtable 的資料表,並將到期日設為 2023 年 1 月 1 日:
前往 Google Cloud 控制台的「BigQuery」頁面。
在查詢編輯器中輸入下列陳述式:
CREATE TABLE mydataset.newtable (
  x INT64 OPTIONS (description = 'An optional INTEGER field'),
  y STRUCT <
    a ARRAY <STRING> OPTIONS (description = 'A repeated STRING field'),
    b BOOL
  >
) OPTIONS (
    expiration_timestamp = TIMESTAMP '2023-01-01 00:00:00 UTC',
    description = 'a table that expires in 2023',
    labels = [('org_unit', 'development')]);
按一下「執行」。
如要進一步瞭解如何執行查詢,請參閱「執行互動式查詢」。
bq
-
在 Google Cloud 控制台中啟用 Cloud Shell。
控制台底部會開啟 Cloud Shell 工作階段,並顯示指令列提示。 Google Cloud Cloud Shell 是已安裝 Google Cloud CLI 的殼層環境,並已針對您目前的專案設定好相關值。工作階段可能要幾秒鐘的時間才能初始化。
請使用
bq mk指令,並加上--table或-t旗標。您可以透過內嵌方式或 JSON 結構定義檔提供資料表結構定義資訊。如需完整的參數清單,請參閱bq mk --table參考資料。部分選用參數包括:--expiration--description--time_partitioning_field--time_partitioning_type--range_partitioning--clustering_fields--destination_kms_key--label
--time_partitioning_field、--time_partitioning_type、--range_partitioning、--clustering_fields和--destination_kms_key不在此處示範。如要進一步瞭解這些選用參數,請參閱下列連結:- 如要進一步瞭解
--time_partitioning_field、--time_partitioning_type和--range_partitioning,請參閱分區資料表。 - 如要進一步瞭解
--clustering_fields,請參閱叢集資料表。 - 如要進一步瞭解
--destination_kms_key,請參閱客戶自行管理的加密金鑰。
如要建立非預設專案中的資料表,請使用下列格式將專案 ID 新增至資料集:
project_id:dataset。如要在具有結構定義的現有資料集中建立空白資料表,請輸入下列內容:
bq mk \
--table \
--expiration=integer \
--description=description \
--label=key_1:value_1 \
--label=key_2:value_2 \
--add_tags=key_3:value_3[,...] \
project_id:dataset.table \
schema
更改下列內容:
- integer 是資料表的預設生命週期 (以秒為單位),最小值是 3600 秒 (1 小時)。到期時間為目前世界標準時間加上 [INTEGER] 中的整數值。如果您在建立資料表時設定了資料表的到期時間,則系統會忽略資料集的預設資料表到期時間設定。
- description 是置於括號中的資料表說明。
- key_1:value_1 和 key_2:value_2 是指定標籤的鍵/值組合。
- key_3:value_3 是指定標記的鍵值組。在相同旗標下新增多個標記,並以逗號分隔鍵/值組合。
- project_id 是您的專案 ID。
- dataset 是專案中的資料集。
- table 是您所建立的資料表名稱。
- schema 是格式為 field:data_type,field:data_type 的內嵌結構定義,或本機上 JSON 結構定義檔的路徑。
在指令列中指定結構定義時,無法加入
RECORD(STRUCT) 類型和資料欄說明,也不能指定資料欄模式。所有模式均會使用預設設定NULLABLE。如要加入說明、模式和RECORD類型,請改為提供 JSON 結構定義檔。範例:
輸入以下指令,使用內嵌結構定義建立資料表。這個指令會在預設專案的
mydataset中建立名為mytable的資料表。資料表的到期時間設為 3600 秒 (一小時)、說明設為This is my table,標籤則設為organization:development。此指令使用-t捷徑,而非--table。結構定義以內嵌方式指定為:qtr:STRING,sales:FLOAT,year:STRING。bq mk \ -t \ --expiration 3600 \ --description "This is my table" \ --label organization:development \ mydataset.mytable \ qtr:STRING,sales:FLOAT,year:STRING
輸入下列指令,使用 JSON 結構定義檔建立資料表。這個指令會在預設專案的
mydataset中建立名為mytable的資料表。資料表的到期時間設為 3600 秒 (一小時)、說明設為This is my table,標籤則設為organization:development。結構定義檔的路徑為/tmp/myschema.json。bq mk \ --table \ --expiration 3600 \ --description "This is my table" \ --label organization:development \ mydataset.mytable \ /tmp/myschema.json
輸入下列指令,使用 JSON 結構定義檔建立資料表。這個指令會在
myotherproject的mydataset中建立名為mytable的資料表。資料表的到期時間設為 3600 秒 (一小時)、說明設為This is my table,標籤則設為organization:development。結構定義檔的路徑為/tmp/myschema.json。bq mk \ --table \ --expiration 3600 \ --description "This is my table" \ --label organization:development \ myotherproject:mydataset.mytable \ /tmp/myschema.json
Terraform
請使用 google_bigquery_table 資源。
如要向 BigQuery 進行驗證,請設定應用程式預設憑證。詳情請參閱「設定用戶端程式庫的驗證作業」。
建立表格
以下範例會建立名為 mytable 的資料表:
建立資料表並授予存取權
下列範例會建立名為 mytable 的資料表,然後使用 google_bigquery_table_iam_policy 資源授予存取權。只有在您想將資料表存取權授予給無權存取資料表所屬資料集的主體時,才需要執行這個步驟。
使用客戶管理的加密金鑰建立資料表
下列範例會建立名為 mytable 的資料表,並使用 google_kms_crypto_key 和 google_kms_key_ring 資源,為資料表指定 Cloud Key Management Service 金鑰。您必須先啟用 Cloud Key Management Service API,才能執行這個範例。
如要在 Google Cloud 專案中套用 Terraform 設定,請完成下列各節的步驟。
準備 Cloud Shell
- 啟動 Cloud Shell。
-
設定要套用 Terraform 設定的預設 Google Cloud 專案。
每項專案只需要執行一次這個指令,且可以在任何目錄中執行。
export GOOGLE_CLOUD_PROJECT=PROJECT_ID
如果您在 Terraform 設定檔中設定明確值,環境變數就會遭到覆寫。
準備目錄
每個 Terraform 設定檔都必須有自己的目錄 (也稱為根模組)。
-
在 Cloud Shell 中建立目錄,並在該目錄中建立新檔案。檔案名稱的副檔名必須是
.tf,例如main.tf。在本教學課程中,這個檔案稱為main.tf。mkdir DIRECTORY && cd DIRECTORY && touch main.tf
-
如果您正在學習教學課程,可以複製每個章節或步驟中的程式碼範例。
將程式碼範例複製到新建立的
main.tf中。視需要從 GitHub 複製程式碼。如果 Terraform 程式碼片段是端對端解決方案的一部分,建議您使用這個方法。
- 查看並修改範例參數,套用至您的環境。
- 儲存變更。
-
初始化 Terraform。每個目錄只需執行一次這項操作。
terraform init
如要使用最新版 Google 供應商,請加入
-upgrade選項:terraform init -upgrade
套用變更
-
查看設定,確認 Terraform 即將建立或更新的資源符合您的預期:
terraform plan
視需要修正設定。
-
執行下列指令並在提示中輸入
yes,套用 Terraform 設定:terraform apply
等待 Terraform 顯示「Apply complete!」訊息。
- 開啟 Google Cloud 專案即可查看結果。在 Google Cloud 控制台中,前往 UI 中的資源,確認 Terraform 已建立或更新這些資源。
API
使用已定義的資料表資源呼叫 tables.insert 方法。
C#
在試用這個範例之前,請先按照「使用用戶端程式庫的 BigQuery 快速入門導覽課程」中的 C# 設定說明操作。詳情請參閱 BigQuery C# API 參考說明文件。
如要向 BigQuery 進行驗證,請設定應用程式預設憑證。詳情請參閱「設定用戶端程式庫的驗證作業」。
Go
在試用這個範例之前,請先按照「使用用戶端程式庫的 BigQuery 快速入門導覽課程」中的 Go 設定說明操作。詳情請參閱 BigQuery Go API 參考說明文件。
如要向 BigQuery 進行驗證,請設定應用程式預設憑證。詳情請參閱「設定用戶端程式庫的驗證作業」。
Java
在試用這個範例之前,請先按照「使用用戶端程式庫的 BigQuery 快速入門導覽課程」中的 Java 設定說明操作。詳情請參閱 BigQuery Java API 參考說明文件。
如要向 BigQuery 進行驗證,請設定應用程式預設憑證。詳情請參閱「設定用戶端程式庫的驗證作業」。
Node.js
在試用這個範例之前,請先按照「使用用戶端程式庫的 BigQuery 快速入門導覽課程」中的 Node.js 設定說明操作。詳情請參閱 BigQuery Node.js API 參考說明文件。
如要向 BigQuery 進行驗證,請設定應用程式預設憑證。詳情請參閱「設定用戶端程式庫的驗證作業」。
PHP
在試用這個範例之前,請先按照「使用用戶端程式庫的 BigQuery 快速入門導覽課程」中的 PHP 設定說明操作。詳情請參閱 BigQuery PHP API 參考說明文件。
如要向 BigQuery 進行驗證,請設定應用程式預設憑證。詳情請參閱「設定用戶端程式庫的驗證作業」。
Python
在試用這個範例之前,請先按照「使用用戶端程式庫的 BigQuery 快速入門導覽課程」中的 Python 設定說明操作。詳情請參閱 BigQuery Python API 參考說明文件。
如要向 BigQuery 進行驗證,請設定應用程式預設憑證。詳情請參閱「設定用戶端程式庫的驗證作業」。
Ruby
在試用這個範例之前,請先按照「使用用戶端程式庫的 BigQuery 快速入門導覽課程」中的 Ruby 設定說明操作。詳情請參閱 BigQuery Ruby API 參考說明文件。
如要向 BigQuery 進行驗證,請設定應用程式預設憑證。詳情請參閱「設定用戶端程式庫的驗證作業」。
建立不含結構定義的空白資料表
Java
在試用這個範例之前,請先按照「使用用戶端程式庫的 BigQuery 快速入門導覽課程」中的 Java 設定說明操作。詳情請參閱 BigQuery Java API 參考說明文件。
如要向 BigQuery 進行驗證,請設定應用程式預設憑證。詳情請參閱「設定用戶端程式庫的驗證作業」。
從查詢結果建立資料表
如要從查詢結果建立資料表,請將結果寫入目標資料表。
控制台
在 Google Cloud 控制台開啟 BigQuery 頁面。
點選左側窗格中的 「Explorer」。

如果沒有看到左側窗格,請按一下 「Expand left pane」(展開左側窗格),開啟窗格。
在「Explorer」窗格中展開專案,按一下「Datasets」(資料集),然後選取資料集。
在查詢編輯器中輸入有效的 SQL 查詢。
依序點選「編輯」>「查詢設定」。
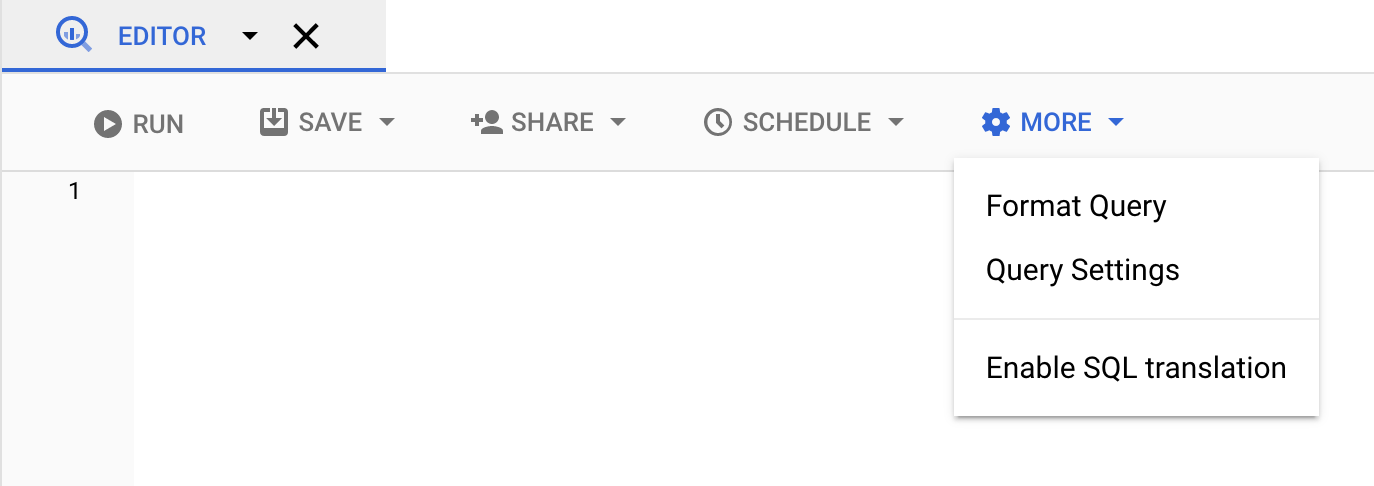
選取「為查詢結果設定目標資料表」選項。
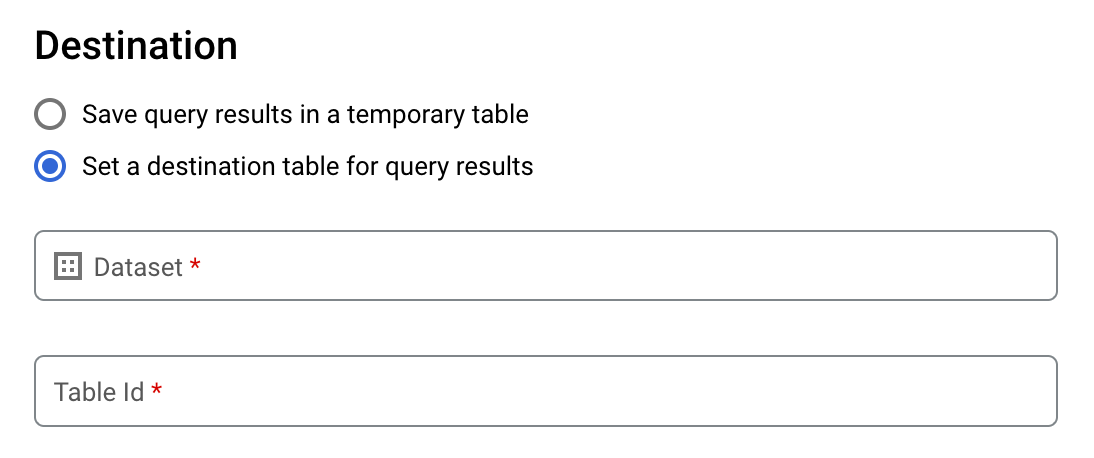
在「Destination」(目的地) 區段中,選取要建立資料表的「Dataset」(資料集),然後選擇「Table Id」(資料表 ID)。
在「Destination table write preference」(目標資料表寫入偏好設定) 區段,選擇下列其中一項:
- [Write if empty] (空白時寫入):僅在資料表空白時將查詢結果寫入資料表。
- [Append to table] (附加到資料表中):將查詢結果附加到現有的資料表。
- [Overwrite table] (覆寫資料表):使用查詢結果覆寫名稱相同的現有資料表。
選用:針對「Data location」(資料位置),選擇您的位置。
如要更新查詢設定,請按一下「儲存」。
按一下「執行」。這會建立一個查詢工作,將查詢結果寫入您指定的資料表。
如果您在執行查詢前忘記指定目的地資料表,也可以按一下編輯器上方的 [Save Results] (儲存結果) 按鈕,將快取結果資料表複製至永久資料表。
SQL
以下範例使用 CREATE TABLE 陳述式,從公開 bikeshare_trips 資料表中的資料建立 trips 資料表:
前往 Google Cloud 控制台的「BigQuery」頁面。
在查詢編輯器中輸入下列陳述式:
CREATE TABLE mydataset.trips AS (
  SELECT
    bike_id,
    start_time,
    duration_minutes
  FROM
    bigquery-public-data.austin_bikeshare.bikeshare_trips
);
按一下「執行」。
如要進一步瞭解如何執行查詢,請參閱「執行互動式查詢」。
詳情請參閱「從現有資料表建立新資料表」。
bq
-
在 Google Cloud 控制台中啟用 Cloud Shell。
控制台底部會開啟 Cloud Shell 工作階段,並顯示指令列提示。 Google Cloud Cloud Shell 是已安裝 Google Cloud CLI 的殼層環境,並已針對您目前的專案設定好相關值。工作階段可能要幾秒鐘的時間才能初始化。
輸入
bq query指令並指定--destination_table旗標,根據查詢結果建立永久資料表。指定use_legacy_sql=false旗標以使用 GoogleSQL 語法。如要將查詢結果寫入不在預設專案內的資料表,請使用下列格式將專案 ID 新增至資料集名稱:project_id:dataset。選用:提供
--location旗標,並將值設為您的位置。如要控管現有目的地資料表的寫入配置,請指定以下其中一種選用旗標:
--append_table:如果目的地資料表已存在,查詢結果會附加至該資料表。--replace:如果目的地資料表已存在,查詢結果會覆寫該資料表。bq --location=location query \ --destination_table project_id:dataset.table \ --use_legacy_sql=false 'query'
更改下列內容:
location是用於處理查詢的位置名稱,--location是選用旗標。舉例來說,如果您在東京地區使用 BigQuery,就可以將該旗標的值設定為asia-northeast1。您可以使用.bigqueryrc檔案設定位置的預設值。project_id是您的專案 ID。dataset是包含您要寫入查詢結果之資料表的資料集名稱。table是您要寫入查詢結果的資料表名稱。query是採用 GoogleSQL 語法的查詢。如未指定任何寫入配置旗標,預設動作是僅在資料表空白時,才將結果寫入資料表。如果資料表存在但並非空白,系統會傳回下列錯誤:
BigQuery error in query operation: Error processing job project_id:bqjob_123abc456789_00000e1234f_1: Already Exists: Table project_id:dataset.table。範例:
輸入下列指令,將查詢結果寫入
mydataset中名為mytable的目標資料表。該資料集位於預設專案中。由於您未在指令中指定任何寫入配置旗標,因此資料表必須為新資料表或空白資料表。否則,系統會傳回Already exists錯誤。查詢會從美國人名資料公開資料集擷取資料。bq query \ --destination_table mydataset.mytable \ --use_legacy_sql=false \ 'SELECT name, number FROM `bigquery-public-data`.usa_names.usa_1910_current WHERE gender = "M" ORDER BY number DESC'
輸入下列指令,使用查詢結果覆寫
mydataset中名為mytable的目標資料表。該資料集位於預設專案中。該指令使用--replace旗標來覆寫目標資料表。bq query \ --destination_table mydataset.mytable \ --replace \ --use_legacy_sql=false \ 'SELECT name, number FROM `bigquery-public-data`.usa_names.usa_1910_current WHERE gender = "M" ORDER BY number DESC'
輸入下列指令,將查詢結果附加至
mydataset中名為mytable的目標資料表。該資料集位於my-other-project,而非預設專案。指令使用--append_table旗標將查詢結果附加至目的地資料表。bq query \ --append_table \ --use_legacy_sql=false \ --destination_table my-other-project:mydataset.mytable \ 'SELECT name, number FROM `bigquery-public-data`.usa_names.usa_1910_current WHERE gender = "M" ORDER BY number DESC'
各範例的輸出內容如下。為了方便閱讀,以下僅顯示部分輸出內容。
Waiting on bqjob_r123abc456_000001234567_1 ... (2s) Current status: DONE
+---------+--------+
|  name   | number |
+---------+--------+
| Robert  |  10021 |
| John    |   9636 |
| Robert  |   9297 |
| ...              |
+---------+--------+
API
如要將查詢結果儲存至永久資料表,請呼叫 jobs.insert 方法,設定 query 工作,然後加入 destinationTable 屬性的值。如要控管現有目標資料表的寫入配置,請設定 writeDisposition 屬性。
如要控管查詢工作的處理位置,請在工作資源的 jobReference 區段中指定 location 屬性。
Go
在試用這個範例之前,請先按照「使用用戶端程式庫的 BigQuery 快速入門導覽課程」中的 Go 設定說明操作。詳情請參閱 BigQuery Go API 參考說明文件。
如要向 BigQuery 進行驗證,請設定應用程式預設憑證。詳情請參閱「設定用戶端程式庫的驗證作業」。
Java
在試用這個範例之前,請先按照「使用用戶端程式庫的 BigQuery 快速入門導覽課程」中的 Java 設定說明操作。詳情請參閱 BigQuery Java API 參考說明文件。
如要向 BigQuery 進行驗證,請設定應用程式預設憑證。詳情請參閱「設定用戶端程式庫的驗證作業」。
如要將查詢結果儲存至永久資料表,請在 QueryJobConfiguration 中將目標資料表設為所要的 TableId。
Node.js
在試用這個範例之前,請先按照「使用用戶端程式庫的 BigQuery 快速入門導覽課程」中的 Node.js 設定說明操作。詳情請參閱 BigQuery Node.js API 參考說明文件。
如要向 BigQuery 進行驗證,請設定應用程式預設憑證。詳情請參閱「設定用戶端程式庫的驗證作業」。
Python
在試用這個範例之前,請先按照「使用用戶端程式庫的 BigQuery 快速入門導覽課程」中的 Python 設定說明操作。詳情請參閱 BigQuery Python API 參考說明文件。
如要向 BigQuery 進行驗證,請設定應用程式預設憑證。詳情請參閱「設定用戶端程式庫的驗證作業」。
如要將查詢結果儲存至永久資料表,請建立 QueryJobConfig,並將目的地設為所要的 TableReference。接著,將工作設定傳送至查詢方法。建立參照外部資料來源的資料表
「外部資料來源」是指可以直接透過 BigQuery 查詢的資料來源,即使資料未儲存在 BigQuery 儲存空間中也一樣。舉例來說,您可能有資料在其他 Google Cloud 資料庫、Cloud Storage 的檔案或其他雲端產品中,而且想在不遷移資料的狀況下,在 BigQuery 中進行分析。
詳情請參閱外部資料來源簡介。
在載入資料時建立資料表
將資料載入 BigQuery 時,您可將資料載入新的資料表或分區、將資料附加至現有的資料表或分區,或是覆寫資料表或分區。您不必在載入資料前先建立空白的資料表,因為系統可讓您在建立新資料表時一併載入資料。
將資料載入 BigQuery 時,您可以提供資料表或分區結構定義,或是將結構定義自動偵測用於支援此功能的資料格式。
有關如何載入資料的詳情,請參閱將資料載入 BigQuery 的簡介。
建立多模態資料表
您可以建立含有一個或多個 ObjectRef 資料欄的資料表,以便儲存與資料表中其他結構化資料相關的非結構化資料中繼資料。舉例來說,在產品資料表中,您可以建立 ObjectRef 欄,儲存產品圖片資訊和其他產品資料。非結構化資料本身會儲存在 Cloud Storage 中,並透過物件資料表在 BigQuery 中提供。
如要瞭解如何建立多模態資料表,請參閱「使用 SQL 和 BigQuery DataFrames 分析多模態資料」。
控管資料表的存取權
如要設定資料表和檢視表的存取權,您可以在下列層級為實體授予 IAM 角色,這些層級會依允許的資源範圍列出 (從最大到最小):
- Google Cloud 資源階層中的較高層級,例如專案、資料夾或機構層級
- 資料集層級
- 資料表或檢視畫面層級
您也可以使用下列方法,限制資料表中的資料存取權:
凡是受 IAM 保護的資源,存取權都是累加的。舉例來說,如果實體沒有專案等高層級的存取權,您可以在資料集層級授予實體存取權,這樣實體就能存取資料集中的資料表和檢視區塊。同樣地,如果實體沒有高層級或資料集層級的存取權,您可以在資料表或檢視區塊層級授予實體存取權。
在Google Cloud資源階層中的較高層級 (例如專案、資料夾或機構層級) 授予 IAM 角色,可讓實體存取更多資源。舉例來說,在專案層級將特定角色授予實體,可讓該實體擁有適用於專案中所有資料集的權限。
在資料集層級授予角色,即可讓實體對特定資料集裡的資料表和檢視表執行指定作業,即使實體不具備更高層級的存取權也是如此。如要瞭解如何設定資料集層級的存取權控管設定,請參閱控管資料集存取權一文。
在資料表或檢視表層級授予角色,即可讓實體對特定資料表和檢視表執行指定作業,即使實體沒有較高層級的存取權也一樣。如要瞭解如何設定資料表層級的存取權控管設定,請參閱控管資料表和檢視區塊的存取權一文。
您也可以建立 IAM 自訂角色。建立自訂角色之後,您就能依據要讓實體執行的特定作業授予權限。
您無法對受 IAM 保護的任何資源設定「拒絕」權限。
如要進一步瞭解角色和權限,請參閱 IAM 說明文件中的「瞭解角色」和 BigQuery 的「IAM 角色和權限」。
取得資料表相關資訊
您可以透過下列方式取得資料表的相關資訊或中繼資料:
- 使用 Google Cloud 控制台。
- 使用 bq 指令列工具的
bq show指令。 - 呼叫
tables.getAPI 方法 - 使用用戶端程式庫。
- 查詢
INFORMATION_SCHEMA.VIEWS檢視畫面。
所需權限
您至少要具備 bigquery.tables.get 權限,才能取得資料表相關資訊。以下是具有 bigquery.tables.get 權限的預先定義 IAM 角色:
bigquery.metadataViewerbigquery.dataViewerbigquery.dataOwnerbigquery.dataEditorbigquery.admin
此外,當具備 bigquery.datasets.create 權限的使用者建立資料集時,會獲得該資料集的 bigquery.dataOwner 存取權。bigquery.dataOwner 存取權可讓使用者擷取資料表的中繼資料。
如要進一步瞭解 BigQuery 中的身分與存取權管理角色和權限,請參閱存取權控管。
取得資料表資訊
如何取得資料表的相關資訊:
控制台
在導覽面板的「Resources」(資源) 區段中,展開您的專案,然後選取資料集。
按一下資料集名稱來展開資料集,畫面上會顯示資料集中的資料表和檢視表。
按一下資料表名稱。
在「詳細資料」面板中,按一下「詳細資料」,即可顯示資料表的說明和相關資訊。
您也可以切換至「結構定義」分頁標籤,查看資料表的結構定義。
bq
-
在 Google Cloud 控制台中啟用 Cloud Shell。
控制台底部會開啟 Cloud Shell 工作階段,並顯示指令列提示。 Google Cloud Cloud Shell 是已安裝 Google Cloud CLI 的殼層環境,並已針對您目前的專案設定好相關值。工作階段可能要幾秒鐘的時間才能初始化。
發出
bq show指令,即可顯示所有資料表資訊。使用--schema旗標可以只顯示資料表結構定義資訊。--format旗標可用來控制輸出內容。如果您要取得非預設專案中之資料表的相關資訊,請使用下列格式將專案 ID 新增至資料集:
project_id:dataset。bq show \ --schema \ --format=prettyjson \ project_id:dataset.table
其中:
- project_id 是您的專案 ID。
- dataset 是資料集名稱。
- table 是資料表名稱。
範例:
輸入下列指令,顯示
mydataset中mytable的所有相關資訊。mydataset在您的預設專案中。bq show --format=prettyjson mydataset.mytable
輸入下列指令,顯示
mydataset中mytable的所有相關資訊。mydataset在myotherproject中,而不是在您的預設專案中。bq show --format=prettyjson myotherproject:mydataset.mytable
輸入下列指令,系統即會單獨顯示
mydataset中mytable的結構定義資訊。mydataset在myotherproject中,而不是在您的預設專案中。bq show --schema --format=prettyjson myotherproject:mydataset.mytable
API
呼叫 tables.get 方法,並提供所有相關參數。
Go
在試用這個範例之前,請先按照「使用用戶端程式庫的 BigQuery 快速入門導覽課程」中的 Go 設定說明操作。詳情請參閱 BigQuery Go API 參考說明文件。
如要向 BigQuery 進行驗證,請設定應用程式預設憑證。詳情請參閱「設定用戶端程式庫的驗證作業」。
Java
在試用這個範例之前,請先按照「使用用戶端程式庫的 BigQuery 快速入門導覽課程」中的 Java 設定說明操作。詳情請參閱 BigQuery Java API 參考說明文件。
如要向 BigQuery 進行驗證,請設定應用程式預設憑證。詳情請參閱「設定用戶端程式庫的驗證作業」。
Node.js
在試用這個範例之前,請先按照「使用用戶端程式庫的 BigQuery 快速入門導覽課程」中的 Node.js 設定說明操作。詳情請參閱 BigQuery Node.js API 參考說明文件。
如要向 BigQuery 進行驗證,請設定應用程式預設憑證。詳情請參閱「設定用戶端程式庫的驗證作業」。
PHP
在試用這個範例之前,請先按照「使用用戶端程式庫的 BigQuery 快速入門導覽課程」中的 PHP 設定說明操作。詳情請參閱 BigQuery PHP API 參考說明文件。
如要向 BigQuery 進行驗證,請設定應用程式預設憑證。詳情請參閱「設定用戶端程式庫的驗證作業」。
Python
在試用這個範例之前,請先按照「使用用戶端程式庫的 BigQuery 快速入門導覽課程」中的 Python 設定說明操作。詳情請參閱 BigQuery Python API 參考說明文件。
如要向 BigQuery 進行驗證,請設定應用程式預設憑證。詳情請參閱「設定用戶端程式庫的驗證作業」。
使用 INFORMATION_SCHEMA 取得資料表資訊
INFORMATION_SCHEMA 是一系列的檢視表,可提供資料集、處理常式、資料表、檢視表、工作、保留項目和串流資料相關中繼資料的存取權。
您可以查詢下列檢視區塊,取得資料表資訊:
- 使用
INFORMATION_SCHEMA.TABLES和INFORMATION_SCHEMA.TABLE_OPTIONS檢視表,擷取專案中資料表和檢視表的相關中繼資料。 - 使用
INFORMATION_SCHEMA.COLUMNS和INFORMATION_SCHEMA.COLUMN_FIELD_PATHS檢視表,擷取資料表中資料欄 (欄位) 的相關中繼資料。 - 使用
INFORMATION_SCHEMA.TABLE_STORAGE檢視表,擷取資料表目前和過往的儲存空間用量中繼資料。
TABLES 與 TABLE_OPTIONS 檢視表也包含檢視表的相關高階資訊。如需詳細資訊,請改為查詢 INFORMATION_SCHEMA.VIEWS 檢視表。
TABLES 個檢視表
查詢 INFORMATION_SCHEMA.TABLES 檢視表時,查詢結果會為資料集中的每個資料表或檢視表包含一個資料列。如要取得檢視區塊的詳細資訊,請改為查詢 INFORMATION_SCHEMA.VIEWS 檢視區塊。
INFORMATION_SCHEMA.TABLES 檢視表具有下列結構定義:
| 資料欄名稱 | 資料類型 | 值 |
|---|---|---|
table_catalog |
STRING |
資料集所屬專案的專案 ID。 |
table_schema |
STRING |
資料表或檢視表所屬資料集的名稱。也稱為「datasetId」。 |
table_name |
STRING |
資料表或檢視表的名稱。也稱為「tableId」。 |
table_type |
STRING |
資料表類型,可能是下列其中一個值: |
managed_table_type |
STRING |
這一欄目前為預先發布版。受管理資料表類型,可以是下列其中一種:
|
is_insertable_into |
STRING |
YES 或 NO,視資料表是否支援 DML INSERT 陳述式而定 |
is_fine_grained_mutations_enabled |
STRING |
YES 或 NO,視資料表是否啟用細微 DML 突變而定 |
is_typed |
STRING |
此值一律為 NO |
is_change_history_enabled |
STRING |
YES 或 NO,視變更記錄是否已啟用而定 |
creation_time |
TIMESTAMP |
資料表的建立時間 |
base_table_catalog |
STRING |
如果是資料表本機副本和資料表快照,則為基本資料表的專案。僅適用於 table_type 設為 CLONE 或 SNAPSHOT 的資料表。 |
base_table_schema |
STRING |
如果是資料表副本和資料表快照,則為基礎資料表的資料集。僅適用於「table_type」設為「CLONE」或「SNAPSHOT」的資料表。 |
base_table_name |
STRING |
如果是資料表副本和資料表快照,則為基礎資料表的名稱。僅適用於「table_type」設為「CLONE」或「SNAPSHOT」的資料表。 |
snapshot_time_ms |
TIMESTAMP |
如果是資料表本機副本和資料表快照,這是指在基礎資料表上執行本機副本或快照作業,以建立這個資料表的時間。如果使用時空旅行,這個欄位會包含時空旅行時間戳記。否則,snapshot_time_ms 欄位與 creation_time 欄位相同。僅適用於 table_type 設為 CLONE 或 SNAPSHOT 的資料表。 |
replica_source_catalog |
STRING |
如果是 materialized view 副本,則為基礎 materialized view 的專案。 |
replica_source_schema |
STRING |
如果是具體化檢視表副本,則為基礎具體化檢視表的資料集。 |
replica_source_name |
STRING |
如果是具體化檢視表副本,則為基礎具體化檢視表的名稱。 |
replication_status |
STRING |
如果是具體化檢視表副本,則為從基礎具體化檢視表複製到具體化檢視表副本的狀態,可能為下列其中一種: |
replication_error |
STRING |
如果 replication_status 表示具體化檢視副本有複寫問題,replication_error 會提供問題的詳細資訊。 |
ddl |
STRING |
可用於重新建立資料表的 DDL 陳述式,例如 CREATE TABLE 或 CREATE VIEW |
default_collation_name |
STRING |
預設排序規格的名稱 (如有),否則為 NULL。
|
sync_status |
JSON |
主要和次要副本之間的同步狀態,適用於跨區域複製和災難復原資料集。如果副本是主要副本,或資料集未使用複製功能,則傳回 NULL。 |
upsert_stream_apply_watermark |
TIMESTAMP |
如果資料表使用變更資料擷取 (CDC),則為上次套用資料列修改的時間。詳情請參閱「監控資料表 upsert 作業進度」。 |
範例
範例 1:
以下範例會擷取名為 mydataset 的資料集中所有資料表的資料表中繼資料。系統傳回的是預設專案中 mydataset 內所有類型的資料表中繼資料。
mydataset 包含下列資料表:
mytable1:標準的 BigQuery 資料表myview1:BigQuery 檢視表
如要對預設專案以外的專案執行查詢,請使用以下格式將專案 ID 新增至資料集:`project_id`.dataset.INFORMATION_SCHEMA.view;例如 `myproject`.mydataset.INFORMATION_SCHEMA.TABLES。
SELECT
  table_catalog, table_schema, table_name, table_type,
  is_insertable_into, creation_time, ddl
FROM
  mydataset.INFORMATION_SCHEMA.TABLES;
結果大致如下。為了方便閱讀,部分資料欄已從結果中排除。
+----------------+---------------+----------------+------------+--------------------+---------------------+---------------------------------------------+
| table_catalog  | table_schema  |   table_name   | table_type | is_insertable_into |    creation_time    |                     ddl                     |
+----------------+---------------+----------------+------------+--------------------+---------------------+---------------------------------------------+
| myproject      | mydataset     | mytable1       | BASE TABLE | YES                | 2018-10-29 20:34:44 | CREATE TABLE `myproject.mydataset.mytable1` |
|                |               |                |            |                    |                     | (                                           |
|                |               |                |            |                    |                     |   id INT64                                  |
|                |               |                |            |                    |                     | );                                          |
| myproject      | mydataset     | myview1        | VIEW       | NO                 | 2018-12-29 00:19:20 | CREATE VIEW `myproject.mydataset.myview1`   |
|                |               |                |            |                    |                     | AS SELECT 100 as id;                        |
+----------------+---------------+----------------+------------+--------------------+---------------------+---------------------------------------------+
範例 2:
以下範例會從 INFORMATION_SCHEMA.TABLES 檢視表,擷取 CLONE 或 SNAPSHOT 類型所有資料表的資料表中繼資料。系統傳回的是預設專案中 mydataset 內的資料表中繼資料。
如要對預設專案以外的專案執行查詢,請使用以下格式將專案 ID 新增至資料集:`project_id`.dataset.INFORMATION_SCHEMA.view;例如 `myproject`.mydataset.INFORMATION_SCHEMA.TABLES。
  SELECT
    table_name, table_type, base_table_catalog,
    base_table_schema, base_table_name, snapshot_time_ms
  FROM
    mydataset.INFORMATION_SCHEMA.TABLES
  WHERE
    table_type = 'CLONE'
  OR
    table_type = 'SNAPSHOT';
結果大致如下。為了方便閱讀,部分資料欄已從結果中排除。
  +--------------+------------+--------------------+-------------------+-----------------+---------------------+
  | table_name   | table_type | base_table_catalog | base_table_schema | base_table_name | snapshot_time_ms    |
  +--------------+------------+--------------------+-------------------+-----------------+---------------------+
  | items_clone  | CLONE      | myproject          | mydataset         | items           | 2018-10-31 22:40:05 |
  | orders_bk    | SNAPSHOT   | myproject          | mydataset         | orders          | 2018-11-01 08:22:39 |
  +--------------+------------+--------------------+-------------------+-----------------+---------------------+
範例 3:
以下範例會從 census_bureau_usa 資料集中的 population_by_zip_2010 資料表,擷取 INFORMATION_SCHEMA.TABLES 檢視表的 table_name 和 ddl 資料欄。這個資料集是 BigQuery 公開資料集方案的一部分。
由於您要查詢的資料表位於另一個專案中,因此您應使用下列格式將專案 ID 新增至資料集:`project_id`.dataset.INFORMATION_SCHEMA.view。在本範例中,這個值為 `bigquery-public-data`.census_bureau_usa.INFORMATION_SCHEMA.TABLES。
SELECT
  table_name, ddl
FROM
  `bigquery-public-data`.census_bureau_usa.INFORMATION_SCHEMA.TABLES
WHERE
  table_name = 'population_by_zip_2010';
結果大致如下:
+------------------------+----------------------------------------------------------------------------------------------------------------------------------------------------------------------------------------------------------------------------+
|       table_name       |                                                                                                            ddl                                                                                                             |
+------------------------+----------------------------------------------------------------------------------------------------------------------------------------------------------------------------------------------------------------------------+
| population_by_zip_2010 | CREATE TABLE `bigquery-public-data.census_bureau_usa.population_by_zip_2010`                                                                                                                                               |
|                        | (                                                                                                                                                                                                                          |
|                        |   geo_id STRING OPTIONS(description="Geo code"),                                                                                                                                                                           |
|                        |   zipcode STRING NOT NULL OPTIONS(description="Five digit ZIP Code Tabulation Area Census Code"),                                                                                                                          |
|                        |   population INT64 OPTIONS(description="The total count of the population for this segment."),                                                                                                                             |
|                        |   minimum_age INT64 OPTIONS(description="The minimum age in the age range. If null, this indicates the row as a total for male, female, or overall population."),                                                          |
|                        |   maximum_age INT64 OPTIONS(description="The maximum age in the age range. If null, this indicates the row as having no maximum (such as 85 and over) or the row is a total of the male, female, or overall population."), |
|                        |   gender STRING OPTIONS(description="male or female. If empty, the row is a total population summary.")                                                                                                                    |
|                        | )                                                                                                                                                                                                                          |
|                        | OPTIONS(                                                                                                                                                                                                                   |
|                        |   labels=[("freebqcovid", "")]                                                                                                                                                                                             |
|                        | );                                                                                                                                                                                                                         |
+------------------------+----------------------------------------------------------------------------------------------------------------------------------------------------------------------------------------------------------------------------+
TABLE_OPTIONS 個檢視表
查詢 INFORMATION_SCHEMA.TABLE_OPTIONS 檢視表時,資料集中每個資料表或檢視表的每個選項在查詢結果都會有一個資料列。如要進一步瞭解檢視區塊,請改為查詢 INFORMATION_SCHEMA.VIEWS 檢視區塊。
INFORMATION_SCHEMA.TABLE_OPTIONS 檢視表具有下列結構定義:
| 資料欄名稱 | 資料類型 | 值 |
|---|---|---|
table_catalog |
STRING |
資料集所屬專案的專案 ID |
table_schema |
STRING |
資料表或檢視表所屬資料集的名稱 (又稱為 datasetId) |
table_name |
STRING |
資料表或檢視表的名稱 (又稱為 tableId) |
option_name |
STRING |
選項表格中的其中一個名稱值 |
option_type |
STRING |
選項表格中的其中一個資料類型值 |
option_value |
STRING |
選項表格中的其中一個值選項 |
選項表格
|
|
|
|---|---|---|
|
|
資料表的說明 |
|
|
materialized view 是否啟用自動重新整理功能 |
|
|
這個資料表的到期時間 |
|
|
資料表的描述性名稱 |
|
|
用來加密資料表的 Cloud KMS 金鑰名稱 |
|
|
代表資料表標籤的 STRUCT 陣列 |
|
|
設定資料表的最大延遲時間,適用於 BigQuery 變更資料擷取 (CDC) upsert 作業 |
|
|
分區資料表中所有分區的預設生命週期 (以天為單位) |
|
|
具體化檢視表的重新整理頻率 |
|
|
查詢資料表時是否需要分區篩選器 |
|
|
以命名空間限定的 <鍵, 值> 語法附加至資料表的標記。詳情請參閱「標記和條件式存取權」一文。 |
如果是外部資料表,則可選擇下列選項:
| 選項 | |
|---|---|
allow_jagged_rows |
如果 適用於 CSV 資料。 |
allow_quoted_newlines |
如果為 適用於 CSV 資料。 |
bigtable_options |
建立 Bigtable 外部資料表時才需要。 以 JSON 格式指定 Bigtable 外部資料表的結構定義。 如需 Bigtable 資料表定義選項清單,請參閱 REST API 參考資料中的 |
column_name_character_map |
定義支援的資料欄名稱字元範圍,以及如何處理不支援的字元。預設設定為 支援的值包括:
適用於 CSV 和 Parquet 資料。 |
compression |
資料來源的壓縮類型。支援的值包括:
適用於 CSV 和 JSON 資料。 |
decimal_target_types |
決定如何轉換 範例: |
description |
這個表格的說明。 |
enable_list_inference |
如果是 適用於 Parquet 資料。 |
enable_logical_types |
如果為 適用於 Avro 資料。 |
encoding |
資料的字元編碼。支援的值包括:
適用於 CSV 資料。 |
enum_as_string |
如果 適用於 Parquet 資料。 |
expiration_timestamp |
這個資料表的到期時間。如未指定,資料表就不會過期。 範例: |
field_delimiter |
CSV 檔案中的欄位分隔符。 適用於 CSV 資料。 |
format |
外部資料的格式。
值 |
hive_partition_uri_prefix |
所有來源 URI 的通用前置字串,位於分區索引鍵編碼開始之前。僅適用於 Hive 分區外部資料表。 適用於 Avro、CSV、JSON、Parquet 和 ORC 資料。 範例: |
file_set_spec_type |
指定如何解讀載入工作和外部資料表的來源 URI。 支援的值包括:
舉例來說,如果來源 URI 為 |
ignore_unknown_values |
如果 適用於 CSV 和 JSON 資料。 |
json_extension |
如果是 JSON 資料,則表示特定的 JSON 交換格式。如果未指定,BigQuery 會將資料讀取為一般 JSON 記錄。 支援的值包括: |
max_bad_records |
讀取資料時可忽略的損壞記錄數量上限。 適用於:CSV、JSON 和 Google 試算表資料。 |
max_staleness |
適用於 BigLake 資料表和物件資料表。 指定對資料表執行的作業是否使用快取中繼資料,以及作業必須使用多新的快取中繼資料。 如要停用中繼資料快取功能,請指定 0。這是目前的預設做法。 如要啟用中繼資料快取功能,請指定介於 30 分鐘至 7 天之間的間隔常值。舉例來說,如要指定 4 小時的過時間隔,請輸入 |
null_marker |
代表 CSV 檔案中 適用於 CSV 資料。 |
null_markers |
代表 CSV 檔案中 這個選項無法與 適用於 CSV 資料。 |
object_metadata |
只有在建立物件資料表時才需要。 建立物件資料表時,請將這個選項的值設為 |
preserve_ascii_control_characters |
如果 適用於 CSV 資料。 |
projection_fields |
要載入的實體屬性清單。 適用於 Datastore 資料。 |
quote |
在 CSV 檔案中用來引用資料區段的字串。如果資料包含引用的換行符號字元,請將 適用於 CSV 資料。 |
reference_file_schema_uri |
使用者提供的參考檔案,內含資料表結構定義。 適用於 Parquet/ORC/AVRO 資料。 範例: |
require_hive_partition_filter |
如果 適用於 Avro、CSV、JSON、Parquet 和 ORC 資料。 |
sheet_range |
要查詢的 Google 試算表範圍。 適用於 Google 試算表資料。 範例: |
skip_leading_rows |
讀取資料時要略過檔案開頭的列數。 適用於 CSV 和 Google 試算表資料。 |
source_column_match |
這項設定可控管策略,以便比對載入的資料欄與結構定義。 如未指定這個值,預設值會根據結構定義的提供方式而定。如果啟用自動偵測功能,預設行為是依名稱比對資料欄。否則,系統預設會依位置比對資料欄。這是為了確保行為回溯相容。 支援的值包括:
|
tags |
<ARRAY<STRUCT<STRING, STRING>>>
|
time_zone |
如果剖析的時間戳記值未指定時區,就會採用這個預設時區。 查看有效的時區名稱。 如果沒有這個值,系統會使用預設時區 (世界標準時間) 剖析未指定時區的時間戳記值。 適用於 CSV 和 JSON 資料。 |
date_format |
格式元素,可以定義輸入檔案中的 DATE 值格式 (例如 如果存在這個值,則只有這個格式與 DATE 相容。結構定義自動偵測也會根據這個格式決定 DATE 資料欄類型,而非現有格式。 如果沒有這個值,系統會使用預設格式剖析 DATE 欄位。 適用於 CSV 和 JSON 資料。 |
datetime_format |
格式元素,可以定義輸入檔案中的 DATETIME 值格式 (例如 如果存在這個值,則只有這個格式與 DATETIME 相容。結構定義自動偵測也會根據這個格式決定 DATETIME 資料欄類型,而非現有格式。 如果沒有這個值,系統會使用預設格式剖析 DATETIME 欄位。 適用於 CSV 和 JSON 資料。 |
time_format |
格式元素,可以定義輸入檔案中的 TIME 值格式 (例如 如果存在這個值,這個格式就是唯一相容的 TIME 格式。結構定義自動偵測也會根據這個格式決定 TIME 資料欄類型,而非現有格式。 如果沒有這個值,系統會使用預設格式剖析 TIME 欄位。 適用於 CSV 和 JSON 資料。 |
timestamp_format |
格式元素,可以定義輸入檔案中的 TIMESTAMP 值格式,例如 如果存在這個值,這個格式就是唯一相容的 TIMESTAMP 格式。結構定義自動偵測也會根據這個格式 (而非現有格式) 決定 TIMESTAMP 欄類型。 如果沒有這個值,系統會使用預設格式剖析 TIMESTAMP 欄位。 適用於 CSV 和 JSON 資料。 |
uris |
如果是外部資料表 (包括物件資料表),但不是 Bigtable 資料表:
外部資料位置的完整 URI 陣列。
每個 URI 可包含一個星號 ( 以下範例顯示有效的
Bigtable 資料表:
URI,用於識別要當做資料來源的 Bigtable 資料表。您只能指定一個 Bigtable URI。 範例:
如要進一步瞭解如何建構 Bigtable URI,請參閱「擷取 Bigtable URI」。 |
範例
範例 1:
下列範例會透過查詢 INFORMATION_SCHEMA.TABLE_OPTIONS 檢視表,擷取預設專案 (myproject) 中 mydataset 內所有資料表的預設資料表到期時間。
如要對預設專案以外的專案執行查詢,請使用以下格式將專案 ID 新增至資料集:`project_id`.dataset.INFORMATION_SCHEMA.view;例如 `myproject`.mydataset.INFORMATION_SCHEMA.TABLE_OPTIONS。
  SELECT
    *
  FROM
    mydataset.INFORMATION_SCHEMA.TABLE_OPTIONS
  WHERE
    option_name = 'expiration_timestamp';
結果大致如下:
  +----------------+---------------+------------+----------------------+-------------+--------------------------------------+
  | table_catalog  | table_schema  | table_name |     option_name      | option_type |             option_value             |
  +----------------+---------------+------------+----------------------+-------------+--------------------------------------+
  | myproject      | mydataset     | mytable1   | expiration_timestamp | TIMESTAMP   | TIMESTAMP "2020-01-16T21:12:28.000Z" |
  | myproject      | mydataset     | mytable2   | expiration_timestamp | TIMESTAMP   | TIMESTAMP "2021-01-01T21:12:28.000Z" |
  +----------------+---------------+------------+----------------------+-------------+--------------------------------------+
範例 2:
以下範例會擷取 mydataset 中包含測試資料的所有資料表相關中繼資料。此查詢使用 description 選項中的值來尋找說明中的任意位置包含「test」的資料表。mydataset 在您的預設專案 (myproject) 中。
如要對預設專案以外的專案執行查詢,請使用以下格式將專案 ID 新增至資料集:`project_id`.dataset.INFORMATION_SCHEMA.view;例如 `myproject`.mydataset.INFORMATION_SCHEMA.TABLE_OPTIONS。
  SELECT
    *
  FROM
    mydataset.INFORMATION_SCHEMA.TABLE_OPTIONS
  WHERE
    option_name = 'description'
    AND option_value LIKE '%test%';
結果大致如下:
  +----------------+---------------+------------+-------------+-------------+--------------+
  | table_catalog  | table_schema  | table_name | option_name | option_type | option_value |
  +----------------+---------------+------------+-------------+-------------+--------------+
  | myproject      | mydataset     | mytable1   | description | STRING      | "test data"  |
  | myproject      | mydataset     | mytable2   | description | STRING      | "test data"  |
  +----------------+---------------+------------+-------------+-------------+--------------+
COLUMNS 個檢視表
當您查詢 INFORMATION_SCHEMA.COLUMNS 檢視表時,系統會在查詢結果中,針對資料表中的每個資料欄 (欄位),分別列出一個相對應的資料列。
INFORMATION_SCHEMA.COLUMNS 檢視表具有下列結構定義:
| 資料欄名稱 | 資料類型 | 值 |
|---|---|---|
table_catalog |
STRING |
資料集所屬專案的專案 ID。 |
table_schema |
STRING |
資料表所屬資料集的名稱 (又稱為 datasetId)。 |
table_name |
STRING |
資料表或檢視表的名稱 (又稱為 tableId)。 |
column_name |
STRING |
資料欄的名稱。 |
ordinal_position |
INT64 |
資料表中資料欄的 1 索引偏移;如果是虛擬資料欄 (例如 _PARTITIONTIME 或 _PARTITIONDATE),則值為 NULL。 |
is_nullable |
STRING |
YES 或 NO,視資料欄的模式是否允許使用 NULL 值而定。 |
data_type |
STRING |
資料欄的 GoogleSQL 資料類型。 |
is_generated |
STRING |
如果資料欄是自動產生的嵌入資料欄,值為 ALWAYS;否則值為 NEVER。 |
generation_expression |
STRING |
如果資料欄是自動產生的嵌入資料欄,這個值就是用於定義資料欄的產生運算式;否則這個值為 NULL。 |
is_stored |
STRING |
如果資料欄是自動產生的嵌入資料欄,值為 YES;否則值為 NULL。 |
async_generation_status |
STRUCT |
如果資料欄是自動產生的嵌入資料欄,則包含背景嵌入生成作業的封鎖錯誤;否則值為 NULL。如要瞭解封鎖錯誤,請參閱 async_generation_status.blocking_error.message 欄位。封鎖錯誤可能包括:
async_generation_status 欄。
|
is_hidden |
STRING |
YES 或 NO,視資料欄是否為虛擬資料欄 (例如 _PARTITIONTIME 或 _PARTITIONDATE) 而定。 |
is_updatable |
STRING |
此值一律為 NULL。 |
is_system_defined |
STRING |
YES 或 NO,視資料欄是否為虛擬資料欄 (例如 _PARTITIONTIME 或 _PARTITIONDATE) 而定。 |
is_partitioning_column |
STRING |
YES 或 NO,視資料欄是否為分區資料欄而定。 |
clustering_ordinal_position |
INT64 |
在資料表的叢集資料欄中,資料欄的 1 索引偏移。如果資料表不是叢集資料表,則此值為 NULL。 |
collation_name |
STRING |
排序規則規格的名稱 (如有),否則為 NULL。如果傳入 STRING 或 ARRAY<STRING>,則會傳回排序規則規格 (如有),否則會傳回 NULL。
|
column_default |
STRING |
如果資料欄存在,則為該資料欄的預設值;否則值為 NULL。
|
rounding_mode |
STRING |
如果欄位類型是參數化 NUMERIC 或 BIGNUMERIC,則寫入欄位的值會使用此捨入模式;否則值為 NULL。 |
data_policies.name |
STRING |
附加至資料欄的資料政策清單,用於控管存取權和遮蓋。這個欄位為 (預先發布版)。 |
policy_tags |
ARRAY<STRING> |
附加至資料欄的政策標記清單。 |
範例
以下範例會從 census_bureau_usa 資料集中的 population_by_zip_2010 資料表,擷取 INFORMATION_SCHEMA.COLUMNS 檢視表的中繼資料。這個資料集是 BigQuery 公開資料集方案的一部分。
由於您要查詢的資料表位於另一個專案 (bigquery-public-data) 中,因此您應使用以下格式將專案 ID 新增至資料集:`project_id`.dataset.INFORMATION_SCHEMA.view;例如 `bigquery-public-data`.census_bureau_usa.INFORMATION_SCHEMA.TABLES。
查詢結果會排除下列資料欄:
IS_UPDATABLE
  SELECT
    * EXCEPT(is_updatable)
  FROM
    `bigquery-public-data`.census_bureau_usa.INFORMATION_SCHEMA.COLUMNS
  WHERE
    table_name = 'population_by_zip_2010';
結果大致如下。為了方便閱讀,部分資料欄已從結果中排除。
+------------------------+-------------+------------------+-------------+-----------+-----------+-------------------+------------------------+-----------------------------+-------------+
|       table_name       | column_name | ordinal_position | is_nullable | data_type | is_hidden | is_system_defined | is_partitioning_column | clustering_ordinal_position | policy_tags |
+------------------------+-------------+------------------+-------------+-----------+-----------+-------------------+------------------------+-----------------------------+-------------+
| population_by_zip_2010 | zipcode     |                1 | NO          | STRING    | NO        | NO                | NO                     |                        NULL | 0 rows      |
| population_by_zip_2010 | geo_id      |                2 | YES         | STRING    | NO        | NO                | NO                     |                        NULL | 0 rows      |
| population_by_zip_2010 | minimum_age |                3 | YES         | INT64     | NO        | NO                | NO                     |                        NULL | 0 rows      |
| population_by_zip_2010 | maximum_age |                4 | YES         | INT64     | NO        | NO                | NO                     |                        NULL | 0 rows      |
| population_by_zip_2010 | gender      |                5 | YES         | STRING    | NO        | NO                | NO                     |                        NULL | 0 rows      |
| population_by_zip_2010 | population  |                6 | YES         | INT64     | NO        | NO                | NO                     |                        NULL | 0 rows      |
+------------------------+-------------+------------------+-------------+-----------+-----------+-------------------+------------------------+-----------------------------+-------------+
COLUMN_FIELD_PATHS 個檢視表
查詢 INFORMATION_SCHEMA.COLUMN_FIELD_PATHS 檢視表時,以巢狀結構形式放置在 RECORD (或 STRUCT) 資料欄中的每個資料欄,在查詢結果中都會有一個相對應的資料列。
INFORMATION_SCHEMA.COLUMN_FIELD_PATHS 檢視表具有下列結構定義:
| 資料欄名稱 | 資料類型 | 值 |
|---|---|---|
table_catalog |
STRING |
資料集所屬專案的專案 ID。 |
table_schema |
STRING |
資料表所屬資料集的名稱 (又稱為 datasetId)。 |
table_name |
STRING |
資料表或檢視表的名稱 (又稱為 tableId)。 |
column_name |
STRING |
頂層資料欄的名稱。 |
field_path |
STRING |
頂層資料欄的名稱,或是 RECORD 或 STRUCT 資料欄中巢狀結構資料欄的路徑。 |
data_type |
STRING |
資料欄的 GoogleSQL 資料類型。 |
description |
STRING |
資料欄的說明。 |
collation_name |
STRING |
排序規則規格的名稱 (如有),否則為 NULL。如果傳入 STRUCT 中的 STRING、ARRAY<STRING> 或 STRING 欄位,則會傳回排序規則規格 (如有),否則會傳回 NULL。
|
rounding_mode |
STRING |
將精確度和比例套用至參數化 NUMERIC 或 BIGNUMERIC 值時使用的捨入模式;否則值為 NULL。 |
data_policies.name |
STRING |
附加至資料欄的資料政策清單,用於控管存取權和遮蓋。這個欄位為 (預先發布版)。 |
policy_tags |
ARRAY<STRING> |
附加至資料欄的政策標記清單。 |
範例
以下範例會從 github_repos 資料集中的 commits 資料表,擷取 INFORMATION_SCHEMA.COLUMN_FIELD_PATHS 檢視表的中繼資料。這個資料集是 BigQuery 公開資料集方案的一部分。
由於您要查詢的資料表位於另一個專案 (bigquery-public-data) 中,因此您應使用以下格式將專案 ID 新增至資料集:`project_id`.dataset.INFORMATION_SCHEMA.view;例如 `bigquery-public-data`.github_repos.INFORMATION_SCHEMA.COLUMN_FIELD_PATHS。
commits 資料表中包含下列巢狀結構資料欄及巢狀與重複的資料欄:
author:巢狀結構RECORD資料欄committer:巢狀結構RECORD資料欄trailer:巢狀與重複的RECORD資料欄difference:巢狀與重複的RECORD資料欄
如要查看 author 和 difference 資料欄的中繼資料,請執行下列查詢。
SELECT
  *
FROM
  `bigquery-public-data`.github_repos.INFORMATION_SCHEMA.COLUMN_FIELD_PATHS
WHERE
  table_name = 'commits'
  AND (column_name = 'author' OR column_name = 'difference');
結果大致如下。為了方便閱讀,部分資料欄已從結果中排除。
  +------------+-------------+---------------------+-----------------------------------------------------------------------------------------------------------------------------------------------------+-------------+-------------+
  | table_name | column_name |     field_path      |                                                                      data_type                                                                      | description | policy_tags |
  +------------+-------------+---------------------+-----------------------------------------------------------------------------------------------------------------------------------------------------+-------------+-------------+
  | commits    | author      | author              | STRUCT<name STRING, email STRING, time_sec INT64, tz_offset INT64, date TIMESTAMP>                                                                  | NULL        | 0 rows      |
  | commits    | author      | author.name         | STRING                                                                                                                                              | NULL        | 0 rows      |
  | commits    | author      | author.email        | STRING                                                                                                                                              | NULL        | 0 rows      |
  | commits    | author      | author.time_sec     | INT64                                                                                                                                               | NULL        | 0 rows      |
  | commits    | author      | author.tz_offset    | INT64                                                                                                                                               | NULL        | 0 rows      |
  | commits    | author      | author.date         | TIMESTAMP                                                                                                                                           | NULL        | 0 rows      |
  | commits    | difference  | difference          | ARRAY<STRUCT<old_mode INT64, new_mode INT64, old_path STRING, new_path STRING, old_sha1 STRING, new_sha1 STRING, old_repo STRING, new_repo STRING>> | NULL        | 0 rows      |
  | commits    | difference  | difference.old_mode | INT64                                                                                                                                               | NULL        | 0 rows      |
  | commits    | difference  | difference.new_mode | INT64                                                                                                                                               | NULL        | 0 rows      |
  | commits    | difference  | difference.old_path | STRING                                                                                                                                              | NULL        | 0 rows      |
  | commits    | difference  | difference.new_path | STRING                                                                                                                                              | NULL        | 0 rows      |
  | commits    | difference  | difference.old_sha1 | STRING                                                                                                                                              | NULL        | 0 rows      |
  | commits    | difference  | difference.new_sha1 | STRING                                                                                                                                              | NULL        | 0 rows      |
  | commits    | difference  | difference.old_repo | STRING                                                                                                                                              | NULL        | 0 rows      |
  | commits    | difference  | difference.new_repo | STRING                                                                                                                                              | NULL        | 0 rows      |
  +------------+-------------+---------------------+-----------------------------------------------------------------------------------------------------------------------------------------------------+-------------+-------------+
TABLE_STORAGE 個檢視表
TABLE_STORAGE 和 TABLE_STORAGE_BY_ORGANIZATION 檢視表具有下列結構定義:
| 資料欄名稱 | 資料類型 | 值 |
|---|---|---|
project_id |
STRING |
資料集所屬專案的專案 ID。 |
project_number |
INT64 |
資料集所屬專案的專案編號。 |
table_catalog |
STRING |
資料集所屬專案的專案 ID。 |
table_schema |
STRING |
包含資料表或具體化檢視區塊的資料集名稱,又稱為 datasetId。 |
table_name |
STRING |
資料表或具體化檢視表的名稱,又稱為 tableId。 |
creation_time |
TIMESTAMP |
資料表的建立時間。 |
total_rows |
INT64 |
資料表或具體化檢視區塊中的資料列總數。 |
total_partitions |
INT64 |
資料表或具體化檢視區塊中的分割區數量。 未分區資料表會傳回 0。 |
total_logical_bytes |
INT64 |
資料表或具體化檢視區塊中的邏輯 (未壓縮) 位元組總數。 |
active_logical_bytes |
INT64 |
未滿 90 天的邏輯 (未壓縮) 位元組數。 |
long_term_logical_bytes |
INT64 |
超過 90 天的邏輯 (未壓縮) 位元組數。 |
current_physical_bytes |
INT64 |
目前資料表在所有分區的實際位元組總數。 |
total_physical_bytes |
INT64 |
儲存空間使用的實體 (壓縮) 位元組總數,包括使用中、長期和時空旅行 (已刪除或變更的資料) 位元組。不包括安全防護 (時間回溯期後保留的已刪除或變更資料) 位元組。 |
active_physical_bytes |
INT64 |
90 天內實體 (壓縮) 位元組的數量,包括時間旅行 (已刪除或變更的資料) 位元組。 |
long_term_physical_bytes |
INT64 |
超過 90 天的實體 (壓縮) 位元組數。 |
time_travel_physical_bytes |
INT64 |
時空旅行儲存空間 (已刪除或變更的資料) 使用的實體 (壓縮) 位元組數。 |
storage_last_modified_time |
TIMESTAMP |
資料最近一次寫入資料表的時間。如果沒有任何資料,則傳回 NULL。 |
deleted |
BOOLEAN |
指出表格是否已刪除。 |
table_type |
STRING |
資料表類型。例如 BASE TABLE。 |
managed_table_type |
STRING |
這一欄目前為預先發布版。資料表的管理類型。例如 NATIVE 或 BIGLAKE。 |
fail_safe_physical_bytes |
INT64 |
安全儲存空間使用的實體 (壓縮) 位元組數 (已刪除或變更的資料)。 |
last_metadata_index_refresh_time |
TIMESTAMP |
資料表上次重新整理中繼資料索引的時間。 |
table_deletion_reason |
STRING |
如果 deleted 欄位為 true,則為資料表刪除原因。可能的值如下:
|
table_deletion_time |
TIMESTAMP |
資料表的刪除時間。 |
範例
範例 1:
以下範例顯示目前專案的邏輯位元組總計費用。
SELECT
  SUM(total_logical_bytes) AS total_logical_bytes
FROM
  `region-REGION`.INFORMATION_SCHEMA.TABLE_STORAGE;
結果大致如下:
+---------------------+
| total_logical_bytes |
+---------------------+
| 971329178274633     |
+---------------------+
範例 2:
以下範例顯示目前專案中,資料集層級的不同儲存空間位元組(以 GiB 為單位)。
SELECT
  table_schema AS dataset_name,
  -- Logical
  SUM(total_logical_bytes) / power(1024, 3) AS total_logical_gib,
  SUM(active_logical_bytes) / power(1024, 3) AS active_logical_gib,
  SUM(long_term_logical_bytes) / power(1024, 3) AS long_term_logical_gib,
  -- Physical
  SUM(total_physical_bytes) / power(1024, 3) AS total_physical_gib,
  SUM(active_physical_bytes) / power(1024, 3) AS active_physical_gib,
  SUM(active_physical_bytes - time_travel_physical_bytes) / power(1024, 3) AS active_no_tt_physical_gib,
  SUM(long_term_physical_bytes) / power(1024, 3) AS long_term_physical_gib,
  SUM(time_travel_physical_bytes) / power(1024, 3) AS time_travel_physical_gib,
  SUM(fail_safe_physical_bytes) / power(1024, 3) AS fail_safe_physical_gib
FROM
  `region-REGION`.INFORMATION_SCHEMA.TABLE_STORAGE
WHERE
  table_type ='BASE TABLE'
GROUP BY
  table_schema
ORDER BY
  dataset_name
範例 3:
以下範例說明如何預測未來 30 天內,每個資料集在邏輯和實體帳單模型之間的價格差異。這個範例假設查詢執行後 30 天內,未來的儲存空間用量維持不變。請注意,預測僅限於基本資料表,不包括資料集內的所有其他類型資料表。
這項查詢的價格變數所用價格適用於 us-central1 區域。如要為其他區域執行這項查詢,請適當更新價格變數。如需價格資訊,請參閱「儲存空間價格」。
在 Google Cloud 控制台開啟 BigQuery 頁面。
在「Query editor」(查詢編輯器) 方塊中輸入下列 GoogleSQL 查詢。
INFORMATION_SCHEMA需要使用 GoogleSQL 語法。GoogleSQL 是 Google Cloud 控制台的預設語法。DECLARE active_logical_gib_price FLOAT64 DEFAULT 0.02; DECLARE long_term_logical_gib_price FLOAT64 DEFAULT 0.01; DECLARE active_physical_gib_price FLOAT64 DEFAULT 0.04; DECLARE long_term_physical_gib_price FLOAT64 DEFAULT 0.02; WITH storage_sizes AS ( SELECT table_schema AS dataset_name, -- Logical SUM(IF(deleted=false, active_logical_bytes, 0)) / power(1024, 3) AS active_logical_gib, SUM(IF(deleted=false, long_term_logical_bytes, 0)) / power(1024, 3) AS long_term_logical_gib, -- Physical SUM(active_physical_bytes) / power(1024, 3) AS active_physical_gib, SUM(active_physical_bytes - time_travel_physical_bytes) / power(1024, 3) AS active_no_tt_physical_gib, SUM(long_term_physical_bytes) / power(1024, 3) AS long_term_physical_gib, -- Restorable previously deleted physical SUM(time_travel_physical_bytes) / power(1024, 3) AS time_travel_physical_gib, SUM(fail_safe_physical_bytes) / power(1024, 3) AS fail_safe_physical_gib, FROM `region-REGION`.INFORMATION_SCHEMA.TABLE_STORAGE_BY_PROJECT WHERE total_physical_bytes + fail_safe_physical_bytes > 0 -- Base the forecast on base tables only for highest precision results AND table_type = 'BASE TABLE' GROUP BY 1 ) SELECT dataset_name, -- Logical ROUND(active_logical_gib, 2) AS active_logical_gib, ROUND(long_term_logical_gib, 2) AS long_term_logical_gib, -- Physical ROUND(active_physical_gib, 2) AS active_physical_gib, ROUND(long_term_physical_gib, 2) AS long_term_physical_gib, ROUND(time_travel_physical_gib, 2) AS time_travel_physical_gib, ROUND(fail_safe_physical_gib, 2) AS fail_safe_physical_gib, -- Compression ratio ROUND(SAFE_DIVIDE(active_logical_gib, active_no_tt_physical_gib), 2) AS active_compression_ratio, ROUND(SAFE_DIVIDE(long_term_logical_gib, long_term_physical_gib), 2) AS long_term_compression_ratio, -- Forecast costs logical ROUND(active_logical_gib * active_logical_gib_price, 2) AS forecast_active_logical_cost, ROUND(long_term_logical_gib * long_term_logical_gib_price, 2) AS forecast_long_term_logical_cost, -- Forecast costs physical ROUND((active_no_tt_physical_gib + time_travel_physical_gib + fail_safe_physical_gib) * active_physical_gib_price, 2) AS forecast_active_physical_cost, ROUND(long_term_physical_gib * long_term_physical_gib_price, 2) AS forecast_long_term_physical_cost, -- Forecast costs total ROUND(((active_logical_gib * active_logical_gib_price) + (long_term_logical_gib * long_term_logical_gib_price)) - (((active_no_tt_physical_gib + time_travel_physical_gib + fail_safe_physical_gib) * active_physical_gib_price) + (long_term_physical_gib * long_term_physical_gib_price)), 2) AS forecast_total_cost_difference FROM storage_sizes ORDER BY (forecast_active_logical_cost + forecast_active_physical_cost) DESC;
按一下「執行」。
結果大致如下:
+--------------+--------------------+-----------------------+---------------------+------------------------+--------------------------+-----------------------------+------------------------------+----------------------------------+-------------------------------+----------------------------------+--------------------------------+
| dataset_name | active_logical_gib | long_term_logical_gib | active_physical_gib | long_term_physical_gib | active_compression_ratio | long_term_compression_ratio | forecast_active_logical_cost | forecaset_long_term_logical_cost | forecast_active_physical_cost | forecast_long_term_physical_cost | forecast_total_cost_difference |
+--------------+--------------------+-----------------------+---------------------+------------------------+--------------------------+-----------------------------+------------------------------+----------------------------------+-------------------------------+----------------------------------+--------------------------------+
| dataset1     |               10.0 |                  10.0 |                 1.0 |                    1.0 |                     10.0 |                        10.0 |                          0.2 |                              0.1 |                          0.04 |                             0.02 |                           0.24 |
疑難排解
如要啟用這個檢視畫面,請在專案或機構中將 enable_info_schema_storage 的值設為 TRUE。如要進一步瞭解如何管理設定,請參閱「管理設定」。
如果尚未設定,您會看到下列錯誤訊息:
INFORMATION_SCHEMA.TABLE_STORAGE hasn't been enabled for project <myproject>.
Consider using one of the following SQL statements to enable data collection:
ALTER PROJECT `<myproject>`
SET OPTIONS (`region-<region>.enable_info_schema_storage` = TRUE)

Or to enable for the entire organization:
ALTER ORGANIZATION
SET OPTIONS (`region-<region>.enable_info_schema_storage` = TRUE)

After enabling, please allow around 1 day for the complete historical data to
become available.
執行錯誤訊息中說明的 SQL 陳述式,啟用檢視畫面。
列出資料集內的資料表
您可以透過下列方式列出資料集中的資料表:
- 使用 Google Cloud 控制台。
- 使用 bq 指令列工具的
bq ls指令。 - 呼叫
tables.listAPI 方法 - 使用用戶端程式庫。
所需權限
您至少必須具備 bigquery.tables.list 權限,才能列出資料集裡的資料表。以下是具有 bigquery.tables.list 權限的預先定義 IAM 角色:
bigquery.userbigquery.metadataViewerbigquery.dataViewerbigquery.dataEditorbigquery.dataOwnerbigquery.admin
如要進一步瞭解 BigQuery 中的身分與存取權管理角色和權限,請參閱存取權控管。
列出表格
如何列出資料集中的資料表:
控制台
在 Google Cloud 控制台的導覽窗格中,按一下資料集以將其展開。畫面便會顯示資料集裡的資料表和檢視表。
捲動清單來檢視該資料集中的資料表,資料表和檢視表會分別以不同的圖示呈現。
bq
-
在 Google Cloud 控制台中啟用 Cloud Shell。
控制台底部會開啟 Cloud Shell 工作階段,並顯示指令列提示。 Google Cloud Cloud Shell 是已安裝 Google Cloud CLI 的殼層環境,並已針對您目前的專案設定好相關值。工作階段可能要幾秒鐘的時間才能初始化。
發出
bq ls指令。--format旗標可用來控制輸出內容。如要列出非預設專案中的資料表,請使用下列格式將專案 ID 新增至資料集:project_id:dataset。其他標記包括:
--max_results或-n:用來表示結果數量上限的整數。預設值為50。
bq ls \
--format=pretty \
--max_results integer \
project_id:dataset
其中:
- integer 是整數,代表要列出的資料表數量。
- project_id 是您的專案 ID。
- dataset 是資料集名稱。
執行指令時,
Type欄位會顯示TABLE或VIEW,例如:+-------------------------+-------+----------------------+-------------------+ | tableId | Type | Labels | Time Partitioning | +-------------------------+-------+----------------------+-------------------+ | mytable | TABLE | department:shipping | | | myview | VIEW | | | +-------------------------+-------+----------------------+-------------------+
範例:
輸入下列指令,列出預設專案中資料集
mydataset內的資料表。bq ls --format=pretty mydataset
輸入下列指令,系統即會從
mydataset傳回超過 50 個資料集 (50 為預設輸出數量)。mydataset位於您的預設專案中。bq ls --format=pretty --max_results 60 mydataset
輸入下列指令,列出
myotherproject中資料集mydataset內的資料表。bq ls --format=pretty myotherproject:mydataset
API
如要使用 API 列出資料表,請呼叫 tables.list 方法。
C#
在試用這個範例之前,請先按照「使用用戶端程式庫的 BigQuery 快速入門導覽課程」中的 C# 設定說明操作。詳情請參閱 BigQuery C# API 參考說明文件。
如要向 BigQuery 進行驗證,請設定應用程式預設憑證。詳情請參閱「設定用戶端程式庫的驗證作業」。
Go
在試用這個範例之前,請先按照「使用用戶端程式庫的 BigQuery 快速入門導覽課程」中的 Go 設定說明操作。詳情請參閱 BigQuery Go API 參考說明文件。
如要向 BigQuery 進行驗證,請設定應用程式預設憑證。詳情請參閱「設定用戶端程式庫的驗證作業」。
Java
在試用這個範例之前,請先按照「使用用戶端程式庫的 BigQuery 快速入門導覽課程」中的 Java 設定說明操作。詳情請參閱 BigQuery Java API 參考說明文件。
如要向 BigQuery 進行驗證,請設定應用程式預設憑證。詳情請參閱「設定用戶端程式庫的驗證作業」。
Node.js
在試用這個範例之前,請先按照「使用用戶端程式庫的 BigQuery 快速入門導覽課程」中的 Node.js 設定說明操作。詳情請參閱 BigQuery Node.js API 參考說明文件。
如要向 BigQuery 進行驗證,請設定應用程式預設憑證。詳情請參閱「設定用戶端程式庫的驗證作業」。
PHP
在試用這個範例之前,請先按照「使用用戶端程式庫的 BigQuery 快速入門導覽課程」中的 PHP 設定說明操作。詳情請參閱 BigQuery PHP API 參考說明文件。
如要向 BigQuery 進行驗證,請設定應用程式預設憑證。詳情請參閱「設定用戶端程式庫的驗證作業」。
Python
在試用這個範例之前,請先按照「使用用戶端程式庫的 BigQuery 快速入門導覽課程」中的 Python 設定說明操作。詳情請參閱 BigQuery Python API 參考說明文件。
如要向 BigQuery 進行驗證,請設定應用程式預設憑證。詳情請參閱「設定用戶端程式庫的驗證作業」。
Ruby
在試用這個範例之前,請先按照「使用用戶端程式庫的 BigQuery 快速入門導覽課程」中的 Ruby 設定說明操作。詳情請參閱 BigQuery Ruby API 參考說明文件。
如要向 BigQuery 進行驗證,請設定應用程式預設憑證。詳情請參閱「設定用戶端程式庫的驗證作業」。
稽核資料表記錄
您可以在記錄檔探索工具中查詢 Cloud 稽核記錄,稽核 BigQuery 資料表的記錄。這些記錄檔可協助您追蹤表格的建立、更新或刪除時間,並找出進行變更的使用者或服務帳戶。
所需權限
如要瀏覽稽核記錄,您必須具備roles/logging.privateLogViewer角色。如要進一步瞭解 Cloud Logging 中的 IAM 角色和權限,請參閱「使用 IAM 控管存取」。
取得稽核資料
您可以透過 Google Cloud 控制台、gcloud指令列、REST API,以及使用用戶端程式庫的所有支援語言,存取稽核資訊。無論使用哪種方法,都可以使用下列範例中的記錄篩選器。
前往 Google Cloud 控制台的「Logging」頁面。
使用下列查詢存取稽核資料:
logName = "projects/PROJECT_ID/logs/cloudaudit.googleapis.com%2Factivity"
AND resource.type = "bigquery_dataset"
AND timestamp >= "STARTING_TIMESTAMP"
AND protoPayload.@type = "type.googleapis.com/google.cloud.audit.AuditLog"
AND (
  protoPayload.metadata.tableCreation :*
  OR protoPayload.metadata.tableChange :*
  OR protoPayload.metadata.tableDeletion :*
)
AND protoPayload.resourceName : "projects/PROJECT_ID/datasets/DATASET_ID/tables/"
更改下列內容:
PROJECT_ID:包含您感興趣的資料集和表格的專案。STARTING_TIMESTAMP:要查看的最舊記錄。請使用 ISO 8601 格式,例如2025-01-01或2025-02-03T04:05:06Z。DATASET_ID:要用來篩選的資料集。
解讀結果
在 Logs Explorer 結果窗格中,展開您感興趣的項目,然後按一下「展開巢狀欄位」,即可顯示完整訊息。
記錄項目只會包含下列其中一個物件,指出執行的作業:
protoPayload.metadata.tableCreation:已建立資料表。protoPayload.metadata.tableChange:資料表的中繼資料已變更,例如結構定義更新、說明變更或資料表取代。protoPayload.metadata.tableDeletion:資料表已刪除。
這些物件的內容會說明要求執行的動作。
如需詳細說明,請參閱 BigQueryAuditMetadata。
查詢說明
logName = "projects/PROJECT_ID/logs/cloudaudit.googleapis.com%2Factivity": 這行會篩選專案中的管理員活動稽核記錄。 Google Cloud這類記錄會記錄 API 呼叫,以及修改資源設定或中繼資料的動作。resource.type = "bigquery_dataset":這會將搜尋範圍縮小至與 BigQuery 資料集相關的事件,其中會記錄資料表作業。timestamp >= "STARTING_TIMESTAMP":篩選記錄項目,只顯示在指定時間戳記建立的項目。protoPayload.@type = "type.googleapis.com/google.cloud.audit.AuditLog": 確保記錄訊息符合標準的 Cloud 稽核記錄結構。( ... ):這個方塊會將條件分組,以找出不同類型的表格事件,如上一節所述。:*運算子表示必須提供金鑰。如果您只對一個事件感興趣 (例如建立表格),請從這個區塊中移除不必要的條件。protoPayload.resourceName : "projects/PROJECT_ID/datasets/DATASET_ID/tables/":選取與指定資料集所含資料表相符的記錄檔項目。冒號 (:) 運算子會執行子字串搜尋。- 如要篩選單一資料表的項目,請將條件替換為下列條件:
protoPayload.resourceName = "projects/PROJECT_ID/datasets/DATASET_ID/tables/TABLE_NAME"。 - 如要納入特定專案中所有資料集的所有資料表,請移除這項條件。
- 如要篩選單一資料表的項目,請將條件替換為下列條件:
如要進一步瞭解如何篩選記錄,請參閱「記錄查詢語言」。
資料表安全性
如要控管 BigQuery 資料表的存取權,請參閱「使用 IAM 控管資源存取權」。
後續步驟
- 如要進一步瞭解資料集,請參閱資料集簡介。
- 如要進一步瞭解如何處理資料表資料,請參閱管理資料表資料。
- 如要進一步瞭解如何指定資料表結構定義,請參閱指定結構定義。
- 如要進一步瞭解如何修改資料表結構定義,請參閱修改資料表結構定義一文。
- 如要進一步瞭解如何管理資料表,請參閱管理資料表。
- 如要查看
INFORMATION_SCHEMA的總覽,請前往 BigQueryINFORMATION_SCHEMA簡介頁面。
歡迎試用
如果您未曾使用過 Google Cloud,歡迎建立帳戶,親自體驗實際使用 BigQuery 的成效。新客戶還能獲得價值 $300 美元的免費抵免額,用於執行、測試及部署工作負載。
免費試用 BigQuery