


איך מתחילים להשתמש ב-Gemini Enterprise
Gemini Enterprise משלב את היכולות של אחזור מידע מעמיק, עיבוד שפה טבעית מתקדם ועיבוד שפה טבעית (NLP) מהדור האחרון, כדי להבין את כוונת המשתמש ולהציג לו את התוצאות הרלוונטיות ביותר.
לפני שממשיכים במדריך הזה, חשוב לוודא שביצעתם את השלבים שבקטע לפני שמתחילים.
לחצו על תראו לי איך כדי לקרוא הסבר מפורט על המשימה ישירות במסוף Google Cloud :
לפני שמתחילים
- נכנסים לחשבון Google Cloud . אם אתם משתמשים חדשים ב- Google Cloud, צרו חשבון כדי שתוכלו להעריך את הביצועים של המוצרים שלנו בתרחישים מהעולם האמיתי. לקוחות חדשים מקבלים בחינם גם קרדיט בשווי 300$ להרצה, לבדיקה ולפריסה של עומסי העבודה.
-
In the Google Cloud console, on the project selector page, select or create a Google Cloud project.
Roles required to select or create a project
- Select a project: Selecting a project doesn't require a specific IAM role—you can select any project that you've been granted a role on.
-
Create a project: To create a project, you need the Project Creator role
(
roles/resourcemanager.projectCreator), which contains theresourcemanager.projects.createpermission. Learn how to grant roles.
-
Verify that billing is enabled for your Google Cloud project.
Enable the Gemini Enterprise (Discovery Engine), Cloud Storage, Identity and Access Management APIs, if any are not already enabled.
Roles required to enable APIs
To enable APIs, you need the
serviceusage.services.enablepermission. If you created the project, then you likely already have this permission through the Owner role (roles/owner). Otherwise, you can get this permission through the Service Usage Admin role (roles/serviceusage.serviceUsageAdmin). Learn how to grant roles.-
Make sure that you have the following role or roles on the project: Gemini Enterprise Admin
Check for the roles
-
In the Google Cloud console, go to the IAM page.
Go to IAM - Select the project.
-
In the Principal column, find all rows that identify you or a group that you're included in. To learn which groups you're included in, contact your administrator.
- For all rows that specify or include you, check the Role column to see whether the list of roles includes the required roles.
Grant the roles
-
In the Google Cloud console, go to the IAM page.
Go to IAM - Select the project.
- Click Grant access.
-
In the New principals field, enter your user identifier. This is typically the email address for a Google Account.
- Click Select a role, then search for the role.
- To grant additional roles, click Add another role and add each additional role.
- Click Save.
-
-
In the Google Cloud console, on the project selector page, select or create a Google Cloud project.
Roles required to select or create a project
- Select a project: Selecting a project doesn't require a specific IAM role—you can select any project that you've been granted a role on.
-
Create a project: To create a project, you need the Project Creator role
(
roles/resourcemanager.projectCreator), which contains theresourcemanager.projects.createpermission. Learn how to grant roles.
-
Verify that billing is enabled for your Google Cloud project.
Enable the Gemini Enterprise (Discovery Engine), Cloud Storage, Identity and Access Management APIs, if any are not already enabled.
Roles required to enable APIs
To enable APIs, you need the
serviceusage.services.enablepermission. If you created the project, then you likely already have this permission through the Owner role (roles/owner). Otherwise, you can get this permission through the Service Usage Admin role (roles/serviceusage.serviceUsageAdmin). Learn how to grant roles.-
Make sure that you have the following role or roles on the project: Gemini Enterprise Admin
Check for the roles
-
In the Google Cloud console, go to the IAM page.
Go to IAM - Select the project.
-
In the Principal column, find all rows that identify you or a group that you're included in. To learn which groups you're included in, contact your administrator.
- For all rows that specify or include you, check the Role column to see whether the list of roles includes the required roles.
Grant the roles
-
In the Google Cloud console, go to the IAM page.
Go to IAM - Select the project.
- Click Grant access.
-
In the New principals field, enter your user identifier. This is typically the email address for a Google Account.
- Click Select a role, then search for the role.
- To grant additional roles, click Add another role and add each additional role.
- Click Save.
-
יצירת אפליקציית Gemini Enterprise
נכנסים לדף Gemini Enterprise במסוף Google Cloud .
לוחצים על יצירת אפליקציה.
בקטע Your app name, מזינים שם לאפליקציה. מזהה האפליקציה מופיע מתחת לשם האפליקציה.
בוחרים באפשרות גלובלי (Global) כמיקום של האפליקציה.
בקטע שם חיצוני של החברה או הארגון, מזינים את שם החברה או הארגון. במדריך הזה אפשר להשתמש ב-
Cymbal Bank.לוחצים על יצירה.
אחרי יצירת האפליקציה, תועברו לדף סקירה כללית של האפליקציה.
יצירת מאגר נתונים
בקטע השלמת ההגדרה, לוחצים על יצירת מאגר נתונים.
בקטע Cloud Storage, לוחצים על בחירה.
בקטע ייבוא נתונים לא מובנים (חיפוש מסמכים ו-RAG), מוודאים שהאפשרות מסמכים מסומנת.
בקטע תדירות הסנכרון, מוודאים שהאפשרות פעם אחת נבחרה.
בקטע בחירת תיקייה או קובץ לייבוא, מוודאים שהאפשרות תיקייה מסומנת.
מזינים את הערך הבא בשדה
gs://:cloud-samples-data/gen-app-builder/search/cymbal-bank-employee
קטגוריה של Cloud Storage זו מכילה קובצי PDF לשימוש פנימי של בנק פיקטיבי, Cymbal Bank.
לוחצים על Continue.
בקטע שם מאגר הנתונים, מזינים שם למאגר הנתונים ולוחצים על יצירה.
Google Cloud המסוף מפנה אתכם לדף 'מאגרי נתונים מקושרים', ובו מוצג מאגר הנתונים שיצרתם.
תצוגה מקדימה של האפליקציה
בתפריט הניווט, לוחצים על סקירה כללית כדי לחזור לדף הסקירה הכללית.
בקטע אפליקציית האינטרנט של Gemini Enterprise מוכנה, לוחצים על הקישור כדי להיכנס לאפליקציית האינטרנט.
כדי לבדוק את הנתונים המיובאים, לוחצים על Connectors ומוודאים שהאפשרות חיפוש Google לא מסומנת.
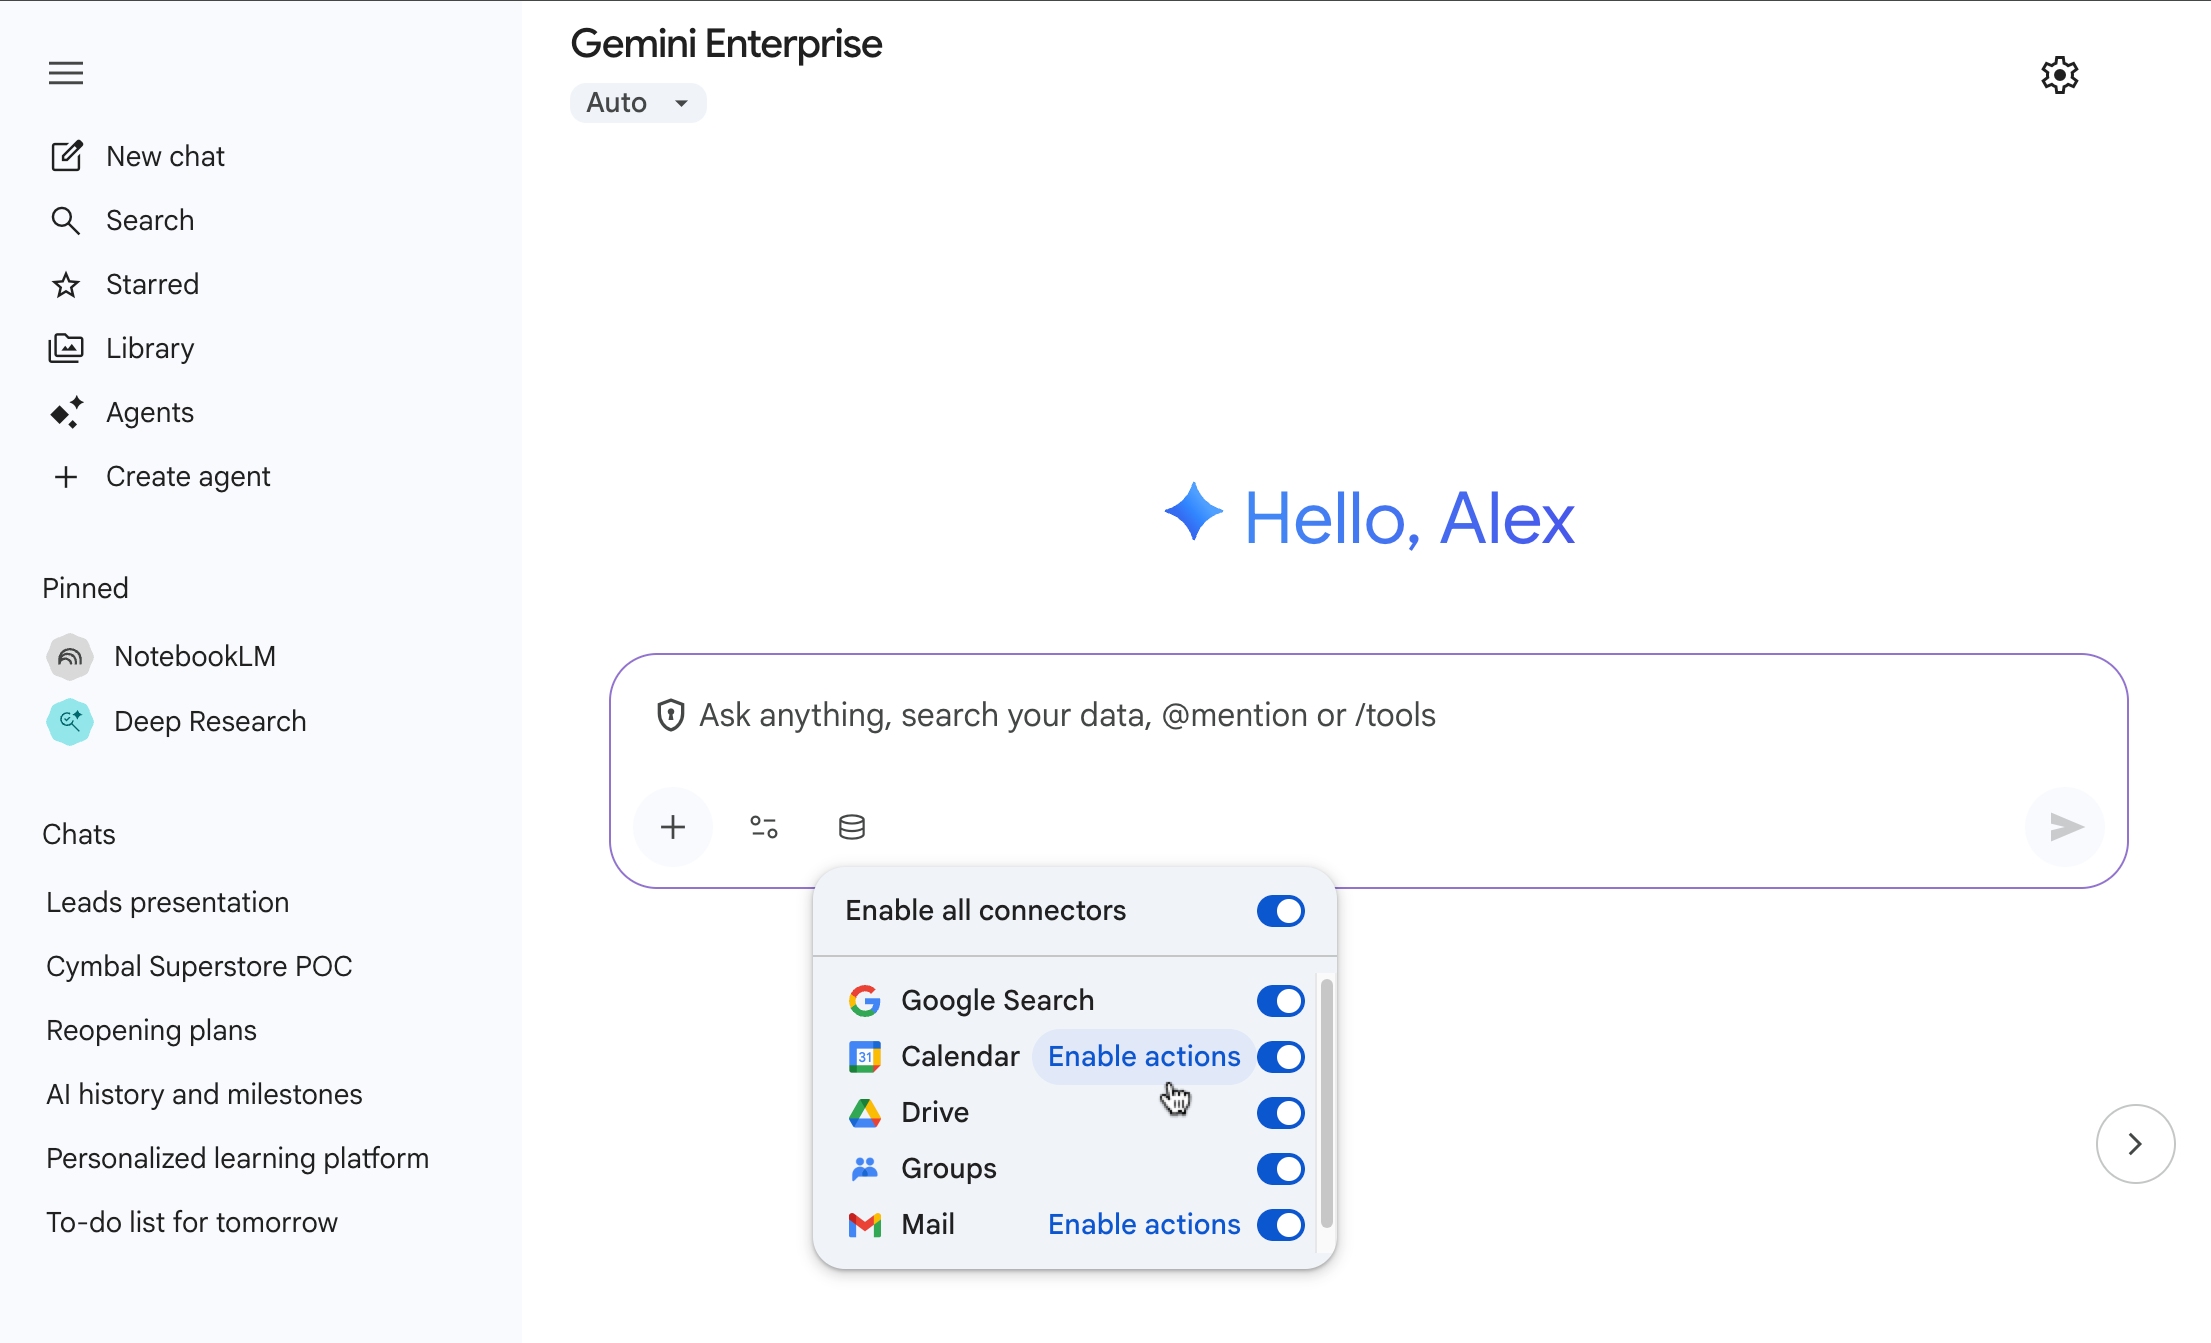
בסרגל החיפוש, שואלים שאלה לגבי הנתונים שיובאו. לדוגמה, שואלים
How do I book business travel?אם בתשובה לשאלה הזו לא מוזכר במפורש Cymbal Bank, כדאי להמתין כמה דקות ולנסות שוב.
שואלים שאלות נוספות כמו:
Who founded Cymbal Bank?אוWhere are the headquarters of Cymbal Bank?
הגדרת אפליקציית האינטרנט לחיפוש
חוזרים למסוף Google Cloud .
בתפריט הניווט, לוחצים על Configurations (הגדרות).
בכרטיסייה ממשק משתמש של חיפוש, מגדירים את ההגדרות של אפליקציית החיפוש.
בקטע אפשרויות מראה ומיתוג, משנים את הלוגו ללוגו הזה של Cymbal Bank.
https://storage.googleapis.com/cloud-samples-data/gen-app-builder/search/cymbal-bank-logo.pngאם משנים הגדרות בכרטיסייה ממשק משתמש, לוחצים על שמירה ופרסום.
עוברים לכרטיסייה השלמה אוטומטית כדי להגדיר הגדרות ספציפיות להשלמה אוטומטית.
מגדירים את האפשרות הפעלת השלמה אוטומטית לעכשיו. ההצעות להשלמה אוטומטית יופיעו תוך יום או יומיים.
עוברים לכרטיסייה Assistant כדי להגדיר את ההגדרות של החיפוש החכם.
בדף הזה אפשר להגדיר הוראות נוספות למערכת ה-LLM, להפעיל את הגנה מוגברת על המודל, את האפשרות 'עיגון מידע מהאינטרנט' והגדרות אחרות שקשורות לעוזר הדיגיטלי שמוגדר כברירת מחדל.
הצגת אפליקציית האינטרנט לחיפוש
כדי לראות את אפליקציית האינטרנט של Gemini Enterprise:
בתפריט הניווט, לוחצים על שילוב.
מוודאים שהאפשרות הפעלת אפליקציית האינטרנט מופעלת.
בקטע The link to your web app (הקישור לאפליקציית האינטרנט), לוחצים על Copy (העתקה) ופותחים את הקישור בדפדפן.
אופציונלי: מעתיקים את כתובת ה-URL של אפליקציית החיפוש ושולחים אותה למשתמשים כדי לשתף איתם את האפליקציה. המשתמשים יכולים להוסיף את כתובת ה-URL של אפליקציית האינטרנט לסימניות כדי לגשת אליה.
הסרת המשאבים
כדי לא לצבור חיובים לחשבון Google Cloud על המשאבים שבהם השתמשתם בדף הזה, פועלים לפי השלבים הבאים:
- כדי להימנע מחיובים מיותרים Google Cloud , כדאי להשתמש בGoogle Cloud console כדי למחוק את הפרויקט אם הוא לא נחוץ לכם.
- אם יצרתם פרויקט חדש כדי ללמוד על Gemini Enterprise ואתם כבר לא צריכים את הפרויקט, תמחקו אותו.
- אם השתמשתם בפרויקט קיים Google Cloud , מחקו את המשאבים שיצרתם כדי להימנע מחיובים בחשבון. מידע נוסף זמין במאמרים מחיקת אפליקציה ומחיקת מאגר נתונים.
- פועלים לפי השלבים במאמר השבתה של Gemini Enterprise.