

This page describes how to set up authentication and permissions before creating the Zendesk data store.
Enable token access
To allow the Zendesk to authenticate and interact with your Zendesk instance, you must enable token access. Follow these steps to enable token access:
- Navigate to your Zendesk instance and sign in with an administrator account.
- In the navigation menu, expand Apps and integrations, then select API configuration from APIs.
- Select the Allow API token access checkbox.
- Click Save.
Set up authentication and permissions
For secure integration using OAuth 2.0, you must register your application in Zendesk to obtain the necessary client ID and client secret.
Create an OAuth client and obtain authentication credentials
To create an OAuth client in Zendesk and obtain the authentication credentials, follow these steps:
Navigate to your Zendesk instance and sign in with an administrator account.
Click the Zendesk Products icon, then select Admin Center.
Zendesk Admin Center In the navigation menu, expand Apps and integrations and select OAuth clients from APIs.
Click Add OAuth client.
Enter the following client details:
- Name: Enter a descriptive name for your application.
- Optional: Description: Enter a short description.
- Optional: Company: Enter your company name.
- Optional: Logo: Provide a logo, which appears on the consent screen.
- Unique Identifier (Client ID): Provide a unique name for your client. You can edit the initial suggestion, but it must be unique.
- Client kind: Select Public for applications running in a browser or on a mobile device, or Confidential for applications running on secure servers.
- Redirect URLs (Required): Enter
https://vertexaisearch.cloud.google.com/oauth-redirect. This is the URL Zendesk redirects to after authorization, receiving the authorization code.
Click Save to obtain the client secret.
- Client ID: The value from the Unique Identifier field.
- Client secret: A new Secret field appears. Copy this secret and save it immediately in a secure location. For security, the full secret is shown only once. If you lose it, you must regenerate it.

Generated client credentials Click Save again to finalize the changes.
Set up permissions
To set up the required permissions, follow these steps:
- Navigate to your Zendesk instance and sign in with an administrator account.
- Click the Zendesk Products icon, then select Admin Center.
- In the navigation menu, expand Apps and integrations and select OAuth Clients from Connections.
- Click Add client.
Enter the following client details:
- Name: Enter a descriptive name. This cannot be changed.
- OAuth grant type: Select Authorization code.
- Client ID: Enter the client ID obtained from the Create an OAuth client in Zendesk section.
- Client Secret: Enter the client secret value obtained from the Create an OAuth client in Zendesk section.
- Authorize URL: The authorization endpoint is typically in the format
https://<var>your-subdomain</var>.zendesk.com/oauth/authorize. Replace<var>your-subdomain</var>with your actual Zendesk subdomain. - Token URL: The token endpoint is typically in the format
https://<var>your-subdomain</var>.zendesk.com/oauth/token. Replace<var>your-subdomain</var>with your actual Zendesk subdomain.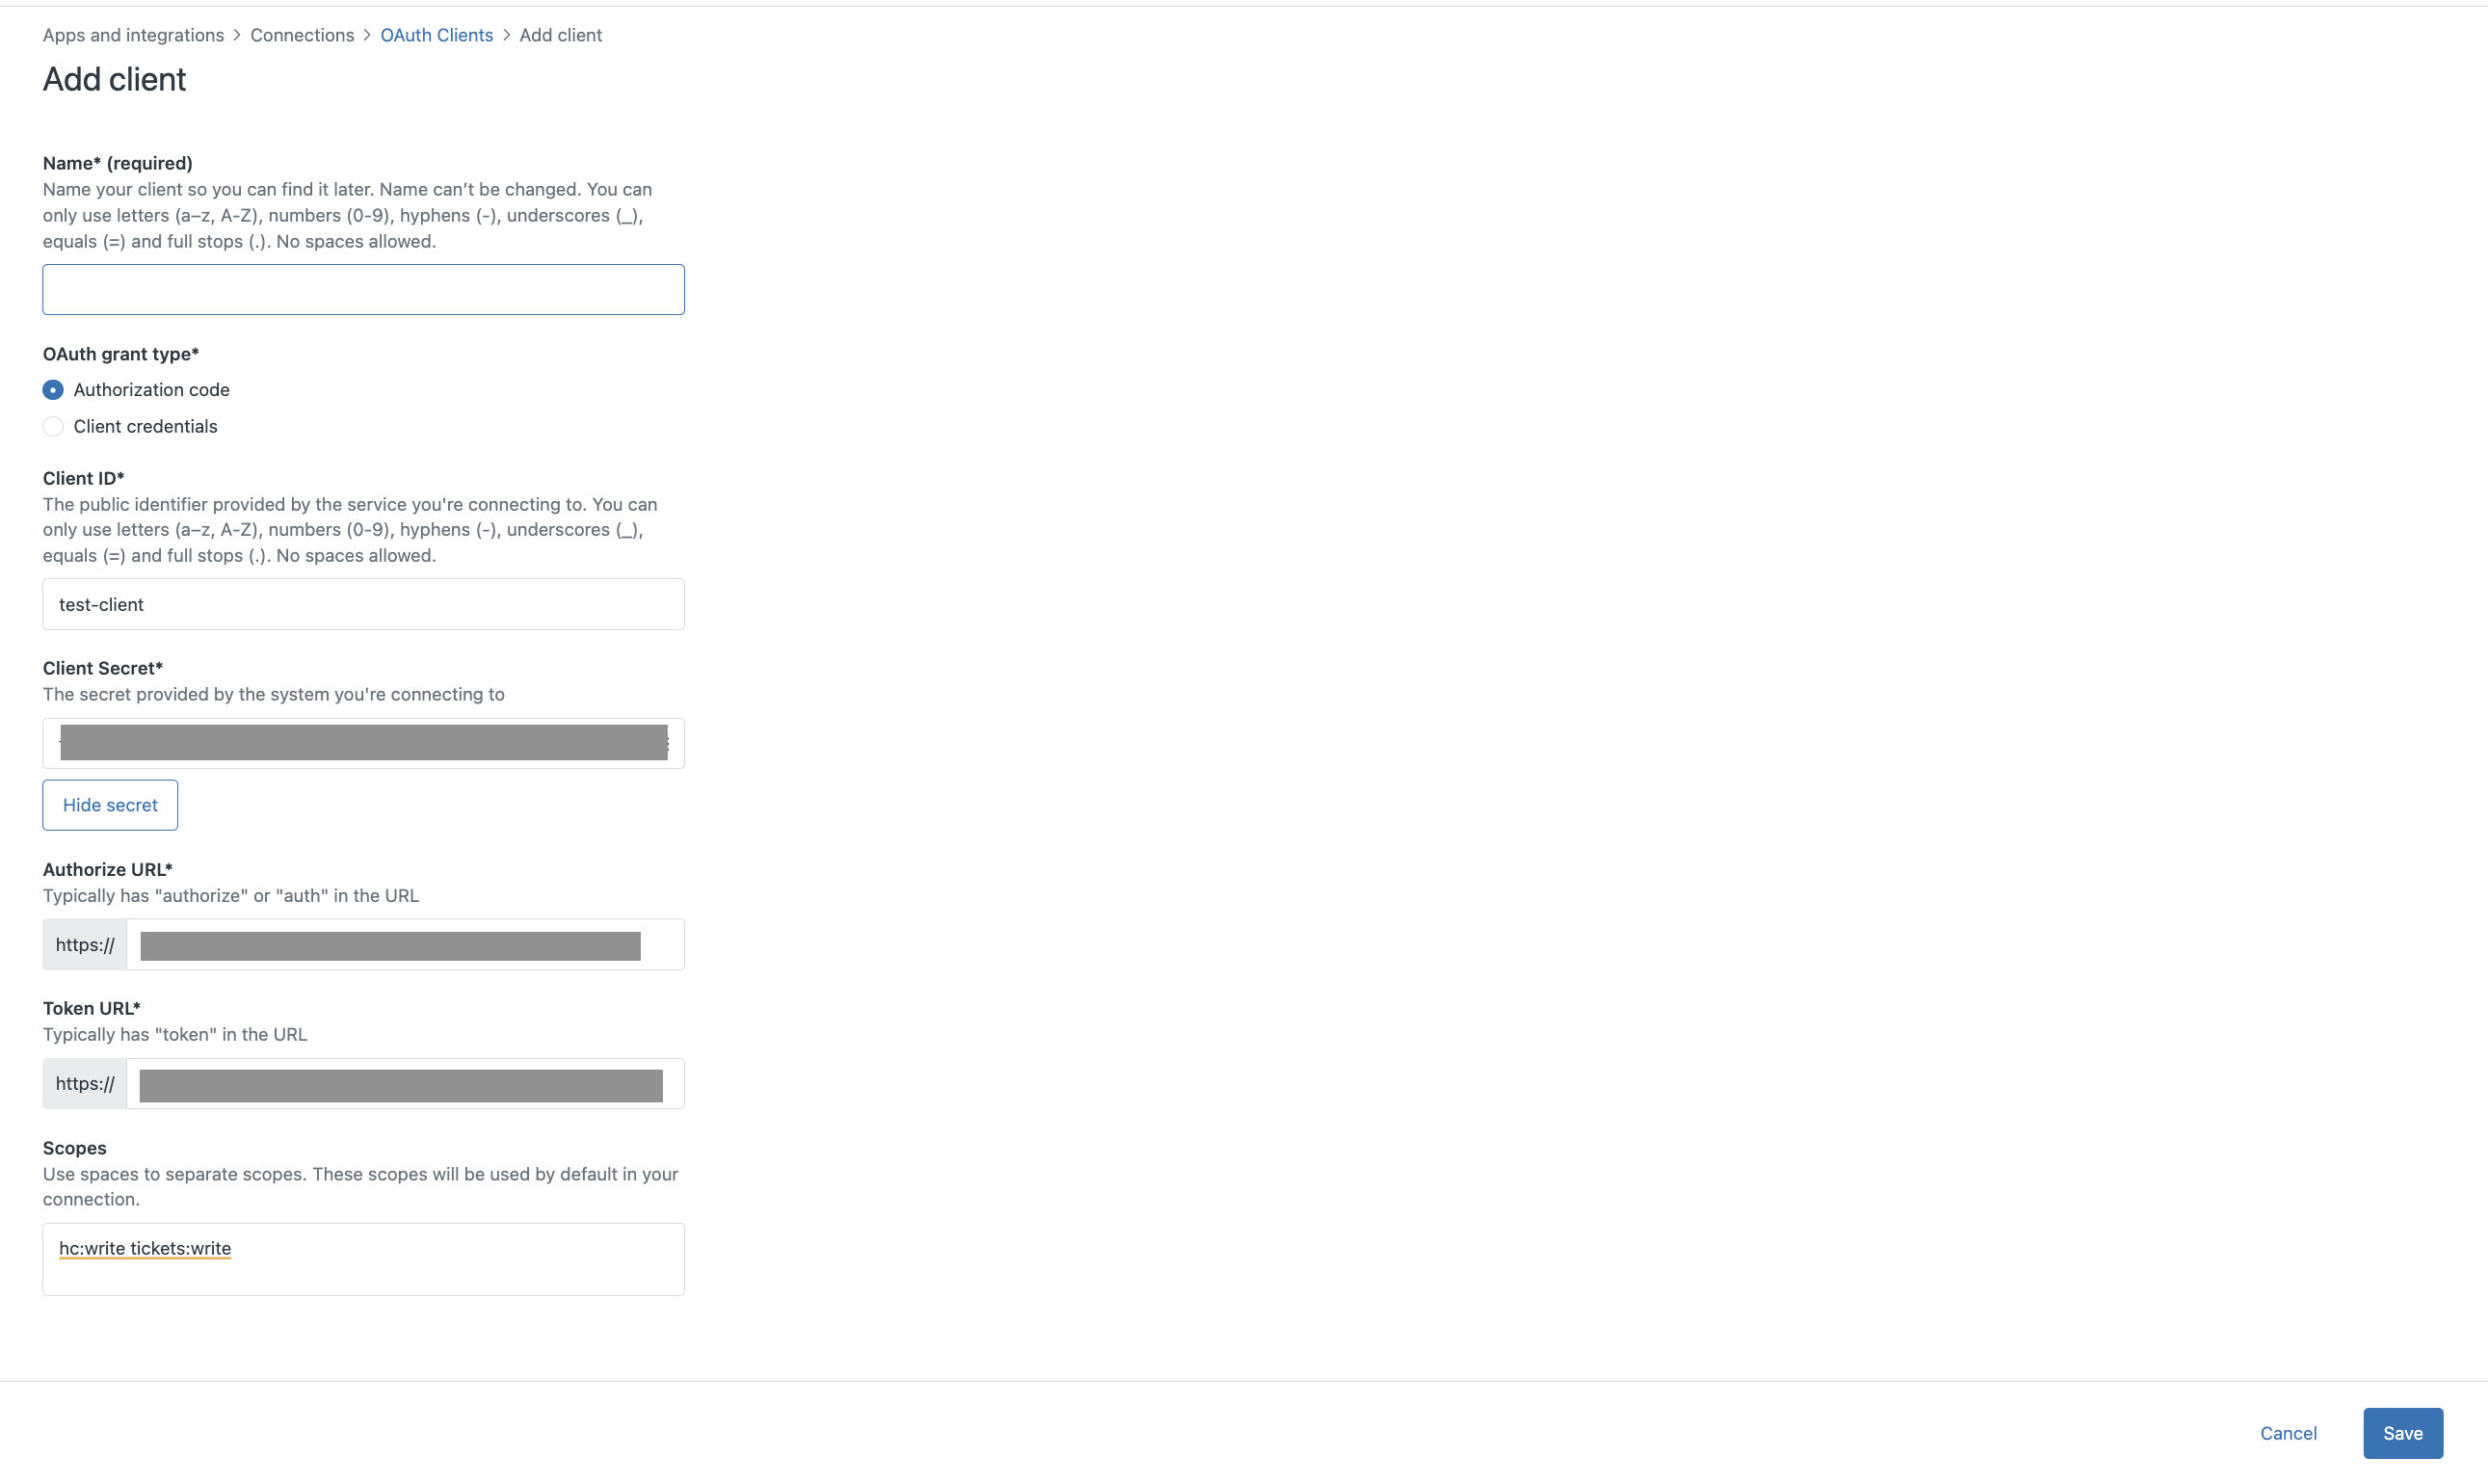
Add scopes - Scopes: Enter the following scopes separated by spaces, based on your connection mode:
Connection mode Scope Purpose Federated search read,users:readRequired to perform searching across Zendesk data. Federated search and actions tickets:writeRequired to perform search, create, update, and merge tickets. hc:writeRequired to create category and update post. Click Save.