

This page describes how to create a custom connector.
Before you begin
Before you start, make sure you have the following:
Check whether billing is enabled on your Google Cloud project.
Install and initialize the gcloud CLI. Ensure it is authenticated for your project.
Install the required Python libraries:
pip install google-cloud-discoveryengine requestsObtain Discovery Engine administrator access for your Google Cloud project.
Obtain access credentials for your third-party data source (such as API keys or database authentication).
Create a clear data mapping plan. This must include which fields to index and how to represent access control including third-party identities.
Create basic connector
This section demonstrates creating a custom connector in your chosen language. The principles and patterns shown here apply to any external system. Simply adapt the API calls and data transformations for your specific source in your chosen language to create a basic connector.
Fetch data
To get started, retrieve data from your third-party data source. In this example, we demonstrate how to fetch posts using pagination. For production environments, we recommend using a streaming approach for large datasets. This prevents memory issues that can occur when loading all the data at once.
Python
    from typing import List
    import requests

    def fetch_posts(base_url: str, per_page: int = 15) -> List[dict]:
        #Fetch all posts from the given site.#
        url = base_url.rstrip("/") + "/wp-json/wp/v2/posts"
        posts: List[dict] = []
        page = 1
        while True:
            resp = requests.get(
                url,
                params={"page": page, "per_page": per_page},
                # headers={"Authorization": "Bearer YOUR_API_KEY"}, # Add auth if needed
            )
            resp.raise_for_status()
            batch = resp.json()
            posts.extend(batch)
            if len(batch) < per_page:
                break
            page += 1
        return posts
Transform data
To convert your source data into the Discovery Engine document format, structure it as shown in the following example payload. You can include as many key-value pairs as needed. For example, you can include the full content for a comprehensive search. Alternatively, you can include structured fields for a faceted search, or a combination of both.
Python
    from typing import List
    import json
    from google.cloud import discoveryengine_v1 as discoveryengine

    def convert_posts_to_documents(posts: List[dict]) -> List[discoveryengine.Document]:
        # Convert WP posts into Discovery Engine Document messages.
        docs: List[discoveryengine.Document] = []
        for post in posts:
            payload = {
                "title": post.get("title", {}).get("rendered"),
                "body": post.get("content", {}).get("rendered"),
                "url": post.get("link"),
                "author": post.get("author"),
                "categories": post.get("categories"),
                "tags": post.get("tags"),
                "date": post.get("date"),
            }
            doc = discoveryengine.Document(
                id=str(post["id"]),
                json_data=json.dumps(payload),
            )
            docs.append(doc)
        return docs
Retrieve or create identity store
To manage user identities and groups for access control, you must retrieve or create an identity store. This function gets an existing identity store by its ID, project, and location. If the identity store doesn't exist, it creates and returns a new, empty identity store.
Python
    from google.cloud import discoveryengine_v1 as discoveryengine

    def get_or_create_ims_data_store(
        project_id: str,
        location: str,
        identity_mapping_store_id: str,
    ) -> discoveryengine.DataStore:
      """Get or create a DataStore."""
      # Initialize the client
      client_ims = discoveryengine.IdentityMappingStoreServiceClient()
      # Construct the parent resource name
      parent_ims = client_ims.location_path(project=project_id, location=location)

      try:
        # Create the request object
        name = f"projects/{project_id}/locations/{location}/identityMappingStores/{identity_mapping_store_id}"
        request = discoveryengine.GetIdentityMappingStoreRequest(
            name=name,
        )
        return client_ims.get_identity_mapping_store(request=request)
      except:
        # Create the IdentityMappingStore object (it can be empty for basic creation)
        identity_mapping_store = discoveryengine.IdentityMappingStore()
        # Create the request object
        request = discoveryengine.CreateIdentityMappingStoreRequest(
            parent=parent_ims,
            identity_mapping_store=identity_mapping_store,
            identity_mapping_store_id=identity_mapping_store_id,
        )
        return client_ims.create_identity_mapping_store(request=request)
The get_or_create_ims_data_store function uses the following key variables:
project_id: The ID of your Google Cloud project.location: The Google Cloud location for the identity mapping store.identity_mapping_store_id: A unique identifier for the identity store.client_ims: An instance of discoveryengine.IdentityMappingStoreServiceClient used to interact with the identity store API.parent_ims: The resource name of the parent location, constructed using client_ims.location_path.name: The full resource name of the identity mapping store, used for GetIdentityMappingStoreRequest.
Ingest identity mapping into identity store
To load identity mapping entries into the specified identity store, use this function. It takes a list of identity mapping entries and initiates an inline import operation. This is crucial for establishing the user, group, and external identity relationships needed for access control and personalization.
Python
Python
from google.cloud import discoveryengine_v1 as discoveryengine

def load_ims_data(
    ims_store: discoveryengine.DataStore,
    id_mapping_data: list[discoveryengine.IdentityMappingEntry],
) -> discoveryengine.DataStore:
  """Get the IMS data store."""
  # Initialize the client
  client_ims = discoveryengine.IdentityMappingStoreServiceClient()

  #  Create the InlineSource object
  inline_source = discoveryengine.ImportIdentityMappingsRequest.InlineSource(
      identity_mapping_entries=id_mapping_data
  )

  # Create the main request object
  request_ims = discoveryengine.ImportIdentityMappingsRequest(
      identity_mapping_store=ims_store.name,
      inline_source=inline_source,
  )

  try:
    # Create the InlineSource object, which holds your list of entries
    operation = client_ims.import_identity_mappings(
        request=request_ims,
    )
    result = operation.result()
    return result

  except Exception as e:
    print(f"IMS Load Error: {e}")
    return None
The load_ims_data function uses the following key variables:
ims_store: The discoveryengine.DataStore object representing the identity mapping store where data will be loaded.id_mapping_data: A list of discoveryengine.IdentityMappingEntry objects, each containing an external identity and its corresponding user or group ID.result: Return value of type discoveryengine.DataStore.
Create data store
To use a custom connector, you must initialize a data store for your content. Use the default_collection for custom connectors. The IndustryVertical parameter customizes the data store's behavior for specific use cases. GENERIC is suitable for most scenarios. However, you can choose a different value for a particular industry, such as MEDIA or HEALTHCARE_FHIR. Configure the display name and other properties to align with your project's naming conventions and requirements.
Python
from google.cloud import discoveryengine_v1 as discoveryengine

def get_or_create_data_store(
    project_id: str,
    location: str,
    display_name: str,
    data_store_id: str,
    identity_mapping_store: str,
) -> discoveryengine.DataStore:
  """Get or create a DataStore."""
  client = discoveryengine.DataStoreServiceClient()
  ds_name = client.data_store_path(project_id, location, data_store_id)
  try:
    result = client.get_data_store(request={"name": ds_name})
    return result
  except:
    parent = client.collection_path(project_id, location, "default_collection")
    operation = client.create_data_store(
        request={
            "parent": parent,
            "data_store": discoveryengine.DataStore(
                display_name=display_name,
                acl_enabled=True,
                industry_vertical=discoveryengine.IndustryVertical.GENERIC,
                identity_mapping_store=identity_mapping_store,
            ),
            "data_store_id": data_store_id,
        }
    )
    result = operation.result()
    return result
The get_or_create_data_store function uses the following key variables:
project_id: The ID of your Google Cloud project.location: The Google Cloud location for the data store.display_name: The human-readable display name for the data store.data_store_id: A unique identifier for the data store.identity_mapping_store: The resource name of the identity mapping store to bind.result: Return value of type discoveryengine.DataStore.
Upload documents inline
To directly send documents to Discovery Engine, use inline upload. This method uses incremental reconciliation mode by default and doesn't support full reconciliation mode. In incremental mode, new documents are added and existing ones are updated, but documents no longer in the source are not deleted. Full reconciliation mode synchronizes the data store with your source data, including deleting documents that are no longer present in the source.
Incremental reconciliation is ideal for systems like a CRM that handle frequent, small changes to data. Instead of syncing the entire database, only send specific changes, making the process faster and more efficient.
As a best practice, perform an initial full synchronization, followed by more frequent incremental synchronizations.
Python
    from typing import List
    from google.cloud import discoveryengine_v1 as discoveryengine

    def upload_documents_inline(
        project_id: str,
        location: str,
        data_store_id: str,
        branch_id: str,
        documents: List[discoveryengine.Document],
    ) -> discoveryengine.ImportDocumentsMetadata:
        """Inline import of Document messages."""
        client = discoveryengine.DocumentServiceClient()
        parent = client.branch_path(
            project=project_id,
            location=location,
            data_store=data_store_id,
            branch=branch_id,
        )
        request = discoveryengine.ImportDocumentsRequest(
            parent=parent,
            inline_source=discoveryengine.ImportDocumentsRequest.InlineSource(
                documents=documents,
            ),
        )
        operation = client.import_documents(request=request)
        operation.result()
        result = operation.metadata
        return result
The upload_documents_inline function uses the following key variables:
project_id: The ID of your Google Cloud project.location: The Google Cloud location for the data store.data_store_id: The ID of the data store.branch_id: The ID of the branch within the data store (typically "0").documents: A list of discoveryengine.Document objects to be uploaded.result: Return value of type discoveryengine.ImportDocumentsMetadata.
The uri field within the discoveryengine.Document object is used to point to the ingested content source itself, either as raw bytes or a URI in Google Cloud Storage. This is different from the URI of the third-party source content. The URI of the third-party source content should be defined as a field within the document's json_data payload. For example, in the convert_posts_to_documents function, the url field in the payload serves this purpose.
Validate your connector
To validate that your connector is working as expected, perform a test run to ensure proper data flow from the source to Discovery Engine.
Python
    from google.cloud import discoveryengine_v1 as discoveryengine
    from google.api_core import exceptions as gcp_exceptions

    SITE = "https://altostrat.com"
    PROJECT_ID = "ucs-3p-connectors-testing"
    LOCATION = "global"
    IDENTITY_MAPPING_STORE_ID = "your-unique-ims-id17" # A unique ID for your new store
    DATA_STORE_ID = "my-acl-ds-id1"
    BRANCH_ID = "0"

    posts = fetch_posts(SITE)
    docs = convert_posts_to_documents(posts)
    print(f"Fetched {len(posts)} posts and converted to {len(docs)} documents.")

    try:
      # Step #1: Retrieve an existing identity mapping store or create a new identity mapping store
      ims_store = get_or_create_ims_data_store(PROJECT_ID, LOCATION, IDENTITY_MAPPING_STORE_ID)
      print(f"STEP #1: IMS Store Retrieval/Creation: {ims_store}")

      RAW_IDENTITY_MAPPING_DATA = [
          discoveryengine.IdentityMappingEntry(
              external_identity="external_id_1",
              user_id="testuser1@example.com",
          ),
          discoveryengine.IdentityMappingEntry(
              external_identity="external_id_2",
              user_id="testuser2@example.com",
          ),
          discoveryengine.IdentityMappingEntry(
              external_identity="external_id_2",
              group_id="testgroup1@example.com",
          )
      ]

      # Step #2: Load IMS Data
      response = load_ims_data(ims_store, RAW_IDENTITY_MAPPING_DATA)
      print(
          "\nStep #2: Load Data in IMS Store successful.", response
      )

      # Step #3: Create Entity Data Store & Bind IMS Data Store
      data_store =  get_or_create_data_store(PROJECT_ID, LOCATION, "my-acl-datastore", DATA_STORE_ID, ims_store.name)
      print("\nStep #3: Entity Data Store Create Result: ", data_store)

      metadata = upload_documents_inline(
          PROJECT_ID, LOCATION, DATA_STORE_ID, BRANCH_ID, docs
      )
      print(f"Uploaded {metadata.success_count} documents inline.")

    except gcp_exceptions.GoogleAPICallError as e:
      print(f"\n--- API Call Failed ---")
      print(f"Server Error Message: {e.message}")
      print(f"Status Code: {e.code}")

    except Exception as e:
      print(f"An error occurred: {e}")
Validate your connector code uses the following key variables:
SITE: The base URL of the third-party data source.PROJECT_ID: Your Google Cloud project ID.LOCATION: The Google Cloud location for the resources.IDENTITY_MAPPING_STORE_ID: A unique ID for your Identity Mapping Store.DATA_STORE_ID: A unique ID for your data store.BRANCH_ID: The ID of the branch within the data store.posts: Stores the fetched posts from the third-party source.docs: Stores the converted documents in discoveryengine.Document format.ims_store: The retrieved or created discoveryengine.DataStore object for identity mapping.RAW_IDENTITY_MAPPING_DATA: A list of discoveryengine.IdentityMappingEntry objects.
Expected output:
Shell
  Fetched 20 posts and converted to 20 documents.
  STEP #1: IMS Store Retrieval/Creation: "projects/ <Project Number>/locations/global/identityMappingStores/your-unique-ims-id17"
  Step #2: Load Data in IMS Store successful.
  Step #3: Entity Data Store Create Result: "projects/ <Project Number>/locations/global/collections/default_collection/dataStores/my-acl-ds-id1"
  display_name: "my-acl-datastore"
  industry_vertical: GENERIC
  create_time {
    seconds: 1760906997
    nanos: 192641000
  }
  default_schema_id: "default_schema"
  acl_enabled: true
  identity_mapping_store: "projects/ <Project Number>/locations/global/identityMappingStores/your-unique-ims-id17".
  Uploaded 20 documents inline.
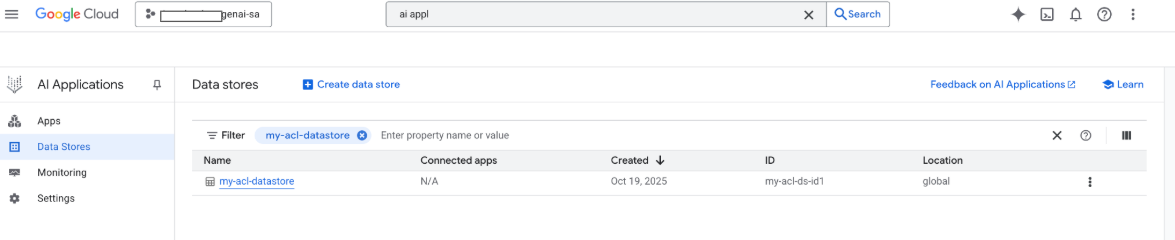
You can also see your data store in the Google Google Cloud console at this point:
When a search is performed, fields from the payload are used for the search, and the payload's URI field is used for citations. The three key property fields that Gemini Enterprise identifies are title, description, and uri. The corresponding document fields can have different names, and their mapping can be done by using the Schema -> Edit option in the Google Cloud console.
Create connector with Google Cloud Storage upload
While inline import works well for development, production connectors should use Google Cloud Storage for better scalability and to enable full reconciliation mode. This approach handles large datasets efficiently and supports automatic deletion of documents no longer present in the third-party data source.
Convert documents to JSONL
To prepare documents for bulk import into Discovery Engine, convert them to JSON Lines format.
Python
    from typing import List
    from google.cloud import discoveryengine_v1 as discoveryengine

    def convert_documents_to_jsonl(
        documents: List[discoveryengine.Document],
    ) -> str:
        """Serialize Document messages to JSONL."""
        return "\n".join(
            discoveryengine.Document.to_json(doc, indent=None)
            for doc in documents
        ) + "\n"
The convert_documents_to_jsonl function uses the following variable:
documents: A list of discoveryengine.Document objects to be converted.
Upload to Google Cloud Storage
To enable efficient bulk import, stage your data in Google Cloud Storage.
Python
    from google.cloud import storage

    def upload_jsonl_to_gcs(jsonl: str, bucket_name: str, blob_name: str) -> str:
        """Upload JSONL content to Google Cloud Storage."""
        client = storage.Client()
        bucket = client.bucket(bucket_name)
        blob = bucket.blob(blob_name)
        blob.upload_from_string(jsonl, content_type="application/json")
        return f"gs://{bucket_name}/{blob_name}"
The upload_jsonl_to_gcs function uses the following key variables:
jsonl: The JSONL formatted string content to be uploaded.bucket_name: The name of the Google Cloud Storage bucket.blob_name: The name of the blob (object) within the specified bucket.
Import from Google Cloud Storage with full reconciliation
To perform a complete data synchronization using full reconciliation mode, use this method. This ensures your data store mirrors the third-party data source exactly, automatically removing any documents that no longer exist.
When importing from Google Cloud Storage, be aware of the following limitations:
- A single import request can contain at most 100 files, or 100,000 files if the
dataSchemaparameter is set tocontent. Each file can be up to 2 GB, or 100 MB if the
dataSchemaparameter is set tocontent.
Python
    from google.cloud import discoveryengine_v1 as discoveryengine

    def import_documents_from_gcs(
        project_id: str,
        location: str,
        data_store_id: str,
        branch_id: str,
        gcs_uri: str,
    ) -> discoveryengine.ImportDocumentsMetadata:
        """Bulk-import documents from Google Cloud Storage with FULL reconciliation mode."""
        client = discoveryengine.DocumentServiceClient()
        parent = client.branch_path(
            project=project_id,
            location=location,
            data_store=data_store_id,
            branch=branch_id,
        )
        gcs_source = discoveryengine.GcsSource(input_uris=[gcs_uri])
        request = discoveryengine.ImportDocumentsRequest(
            parent=parent,
            gcs_source=gcs_source,
            reconciliation_mode=
                discoveryengine.ImportDocumentsRequest
                .ReconciliationMode.FULL,
        )
        operation = client.import_documents(request=request)
        operation.result()
        return operation.metadata
The import_documents_from_gcs function uses the following key variables:
project_id: The ID of your Google Cloud project.location: The Google Cloud location for the data store.data_store_id: The ID of the data store.branch_id: The ID of the branch within the data store (typically "0").gcs_uri: The Google Cloud Storage URI pointing to the JSONL file.
Test Google Cloud Storage upload
To verify the Google Cloud Storage-based import workflow, execute the following:
Python
  BUCKET = "your-existing-bucket"
  BLOB = "path-to-any-blob/wp/posts.jsonl"
  SITE = "https://altostrat.com"
  PROJECT_ID = "ucs-3p-connectors-testing"
  LOCATION = "global"
  IDENTITY_MAPPING_STORE_ID = "your-unique-ims-id17" # A unique ID for your new store
  DATA_STORE_ID = "your-data-store-id"
  BRANCH_ID = "0"
  posts = fetch_posts(SITE)
  docs = convert_posts_to_documents(posts)
  print(f"Fetched {len(posts)} posts and converted to {len(docs)} documents.")
  jsonl_payload = convert_documents_to_jsonl(docs)
  gcs_uri = upload_jsonl_to_gcs(jsonl_payload, BUCKET, BLOB)
  print("Uploaded to:", gcs_uri)

  metadata = import_documents_from_gcs(
      PROJECT_ID, LOCATION, DATA_STORE_ID, BRANCH_ID, gcs_uri
  )
  print(f"Imported: {metadata.success_count} documents")
The following key variables are used in testing the Google Cloud Storage upload:
BUCKET: The name of the Google Cloud Storage bucket.BLOB: The path to the blob within the bucket.SITE: The base URL of the third-party data source.PROJECT_ID: Your Google Cloud project ID.LOCATION: The Google Cloud location for the resources (e.g., "global").IDENTITY_MAPPING_STORE_ID: A unique ID for your Identity Mapping Store.DATA_STORE_ID: A unique ID for your data store.BRANCH_ID: The ID of the branch within the data store (typically "0").jsonl_payload: The documents converted to JSONL format.gcs_uri: The Google Cloud Storage URI of the uploaded JSONL file.
Expected output:
Shell
    Fetched 20 posts and converted to 20 documents.
    Uploaded to: gs://alex-de-bucket/wp/posts.jsonl
    Imported: 20 documents
Manage permissions
To manage document-level access in enterprise environments, Gemini Enterprise supports Access Control Lists (ACLs) and identity mapping, which help to limit what content users can see.
Enable ACLs in data store
To enable ACLs when creating your data store, execute the following:
Python
  # get_or_create_data_store()
  "data_store": discoveryengine.DataStore(
      display_name=data_store_id,
      industry_vertical=discoveryengine.IndustryVertical.GENERIC,
      acl_enabled=True, # ADDED
  )
Add ACLs to documents
To compute and include AclInfo when transforming the documents, execute the following:
Python
  # convert_posts_to_documents()
  doc = discoveryengine.Document(
      id=str(post["id"]),
      json_data=json.dumps(payload),
      acl_info=discoveryengine.Document.AclInfo(
          readers=[{
              "principals": [
                  {"user_id": "baklavainthebalkans@gmail.com"},
                  {"user_id": "cloudysanfrancisco@gmail.com"}
              ]
          }]
      ),
  )
Make content public
To make a document publicly accessible, set the readers field as follows:
Python
readers=[{"idp_wide": True}]
Validate ACLs
To validate that your ACL configurations are working as expected, consider the following:
Search as a user who doesn't have access to the document.
Inspect the uploaded document structure in Cloud Storage and compare it to a reference.
JSON
  {
    "id": "108",
    "jsonData": "{...}",
    "aclInfo": {
      "readers": [
        {
          "principals": [
            { "userId": "baklavainthebalkans@gmail.com" },
            { "userId": "cloudysanfrancisco@gmail.com" }
          ],
          "idpWide": false
        }
      ]
    }
  }
Use identity mapping
Use identity mapping for the following scenarios:
Your third-party data source uses non-Google identities
You want to reference custom groups (e.g., wp-admins) instead of individual users
Your API returns only group names
You need to manually group users for scale or consistency
Your third-party system implements ACLs using non-IDP based groups, and you want to honor those ACLs using the custom data store in Gemini Enterprise.
To map identities, follow these steps:
- Create and link the identity data store.
Import external identities (for example,
external_group:wp-admins). Don't include theexternal_group: prefixwhen importing, for example:JSON
  {
    "externalIdentity": "wp-admins",
    "userId": "user@example.com"
  }
In the ACL info of your document, define the external entity ID in the
principal identifier. When referencing custom groups, use theexternal_group:prefix in thegroupIdfield.The
external_group:prefix is required for group IDs within the document's ACL info during import, but it is not used when importing identities to the mapping store. Example document with identity mapping:JSON
  {
    "id": "108",
    "aclInfo": {
      "readers": [
        {
          "principals": [
            {
              "userId": "cloudysanfrancisco@gmail.com"
            },
            {
              "groupId": "external_group:wp-admins"
            }
          ]
        }
      ]
    },
    "structData": {
      "id": 108,
      "date": "2025-04-24T18:16:04",
      ...
    }
  }
What's next
- To provide a user interface for querying your data, create an app in Gemini Enterprise and connect it to the existing Custom connector data store.