

This page describes how to set up authentication and permissions before creating the Microsoft Teams data store.
Set up authentication and permissions
You must set up authentication and permissions in Microsoft 365, which is crucial to allow Gemini Enterprise to access Microsoft Teams data.
Entra app registration for Microsoft Teams data store
You must set up a Microsoft Entra application registration to enable secure access to Microsoft Teams before you create the Gemini Enterprise data store.
To register Gemini Enterprise as an OAuth 2.0 application in Microsoft Entra, do the following:
- Navigate to Microsoft Entra admin center.
- In the menu, expand the Entra ID section and select App registrations.
- On the App registrations page, select add New registration.
- On the Register an application page, create an app registration by doing the following:
- In the Name section, enter a display name for the application.
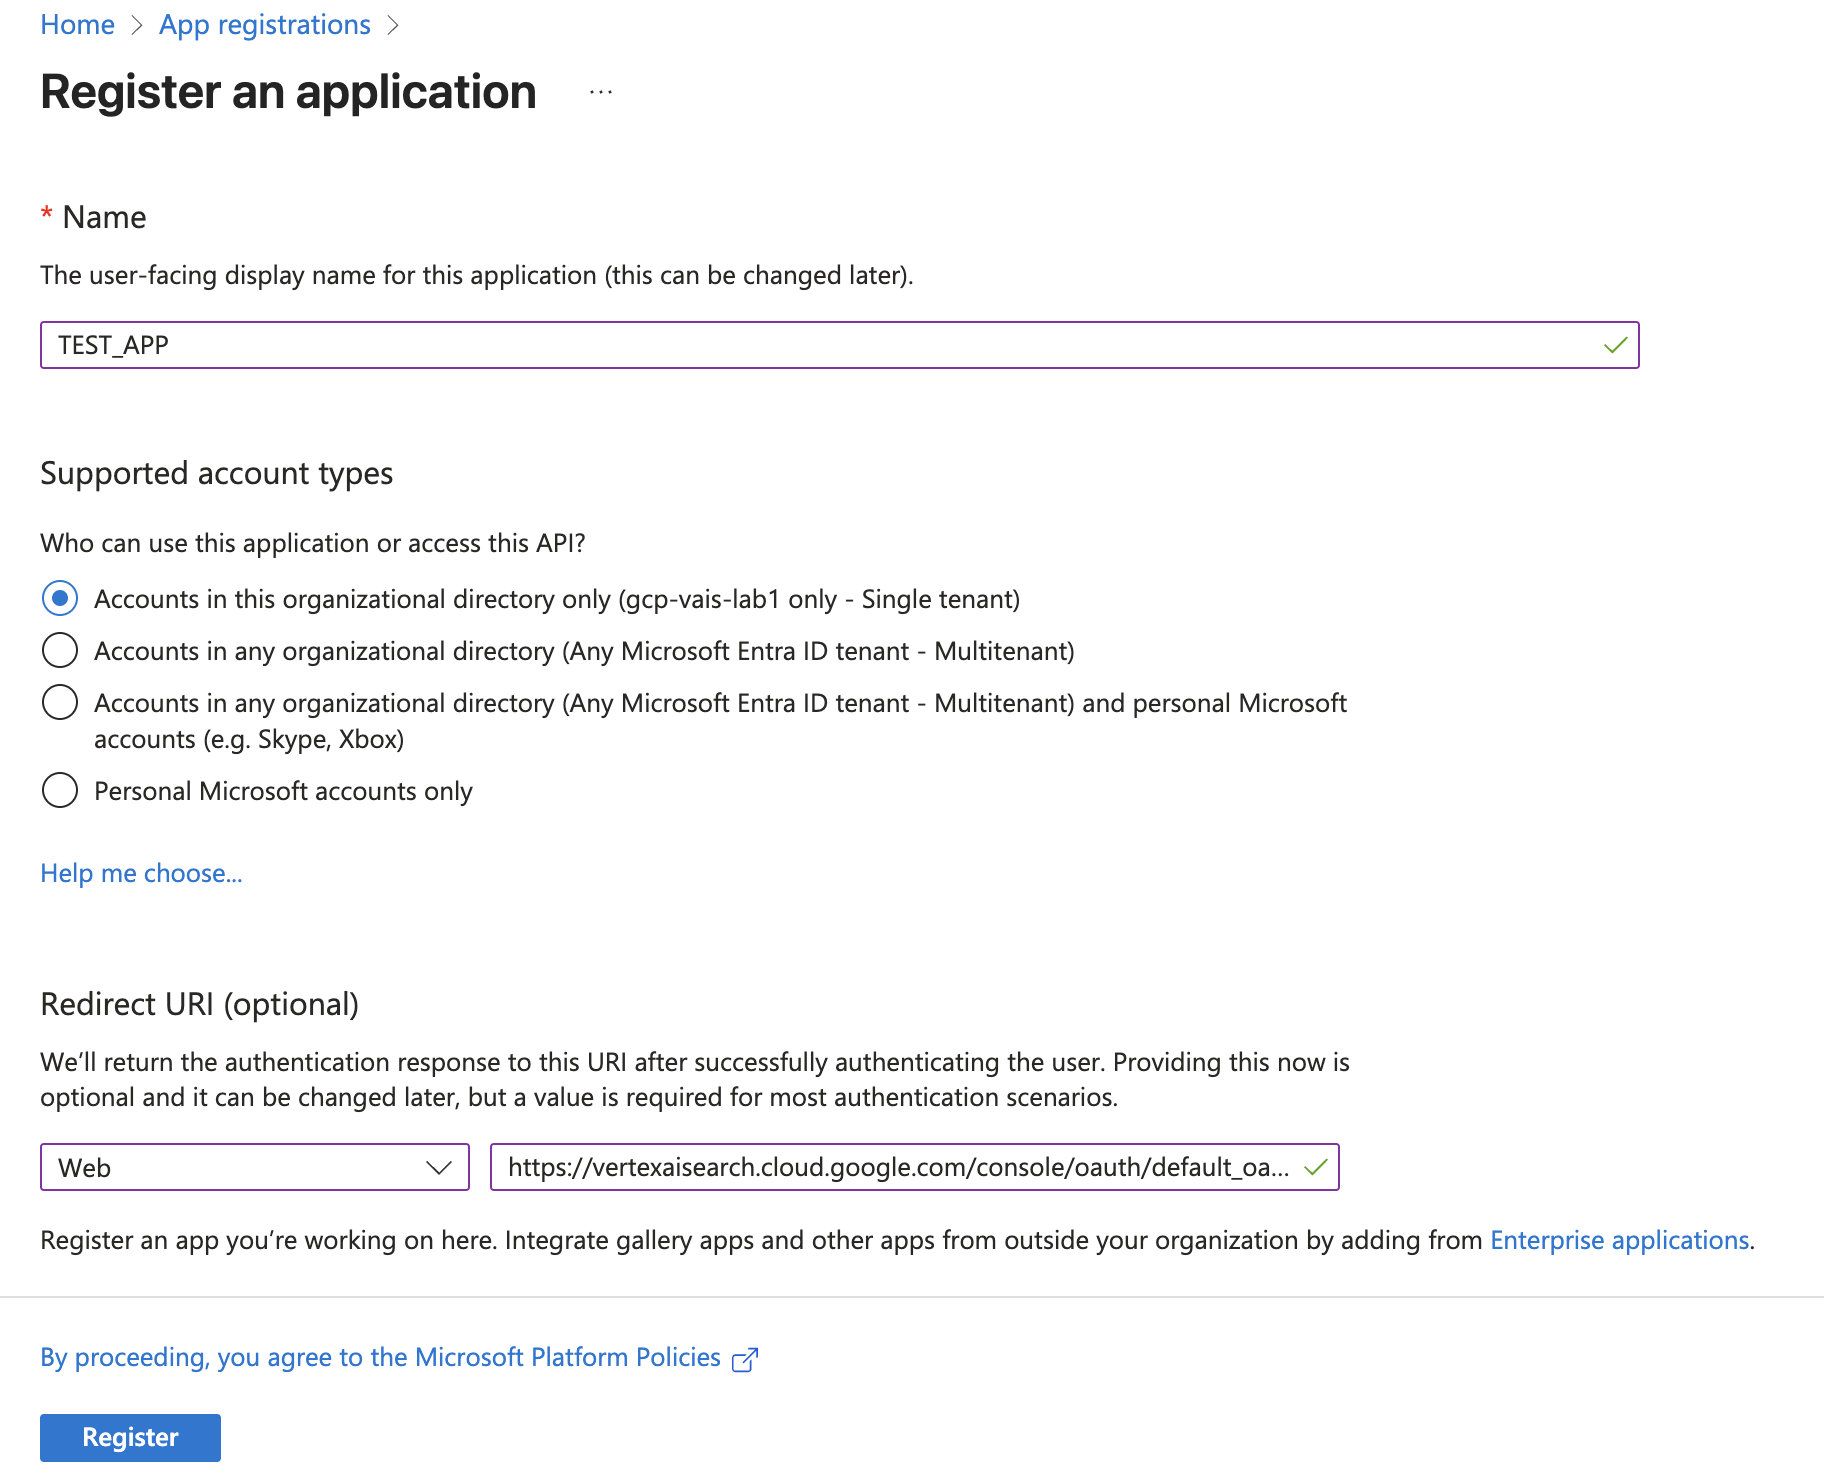
Register an application page - In the Supported account types section, select Accounts in the organizational directory only. This option restricts access to users within your organization's Microsoft Entra tenant, which is appropriate for an enterprise application.
- In the Redirect URI section, select Web and enter the following
URL as web callback URL (or redirect URL):
https://vertexaisearch.cloud.google.com/oauth-redirect
- Click Register. Microsoft Entra creates your app and displays it on the All applications page.
- In the Name section, enter a display name for the application.
Create an OAuth 2.0 configuration
To create a connection using the OAuth 2.0 authentication method, obtain a client ID, client secret, and tenant ID from your Microsoft Entra application registration page by following these steps.
Obtain client ID and client secret
To obtain the client ID and secret for the app, do the following:
- Navigate to Microsoft Entra admin center.
- In the menu, expand the Entra ID section and select App registrations.
- On the App registrations page, select All applications.
- Open the application you created.
- On the app page, select Certificates & secrets.
- Click add New client secret.
- To obtain the client secret, do the following in the Add a client secret dialog:
- Enter a description for the secret.
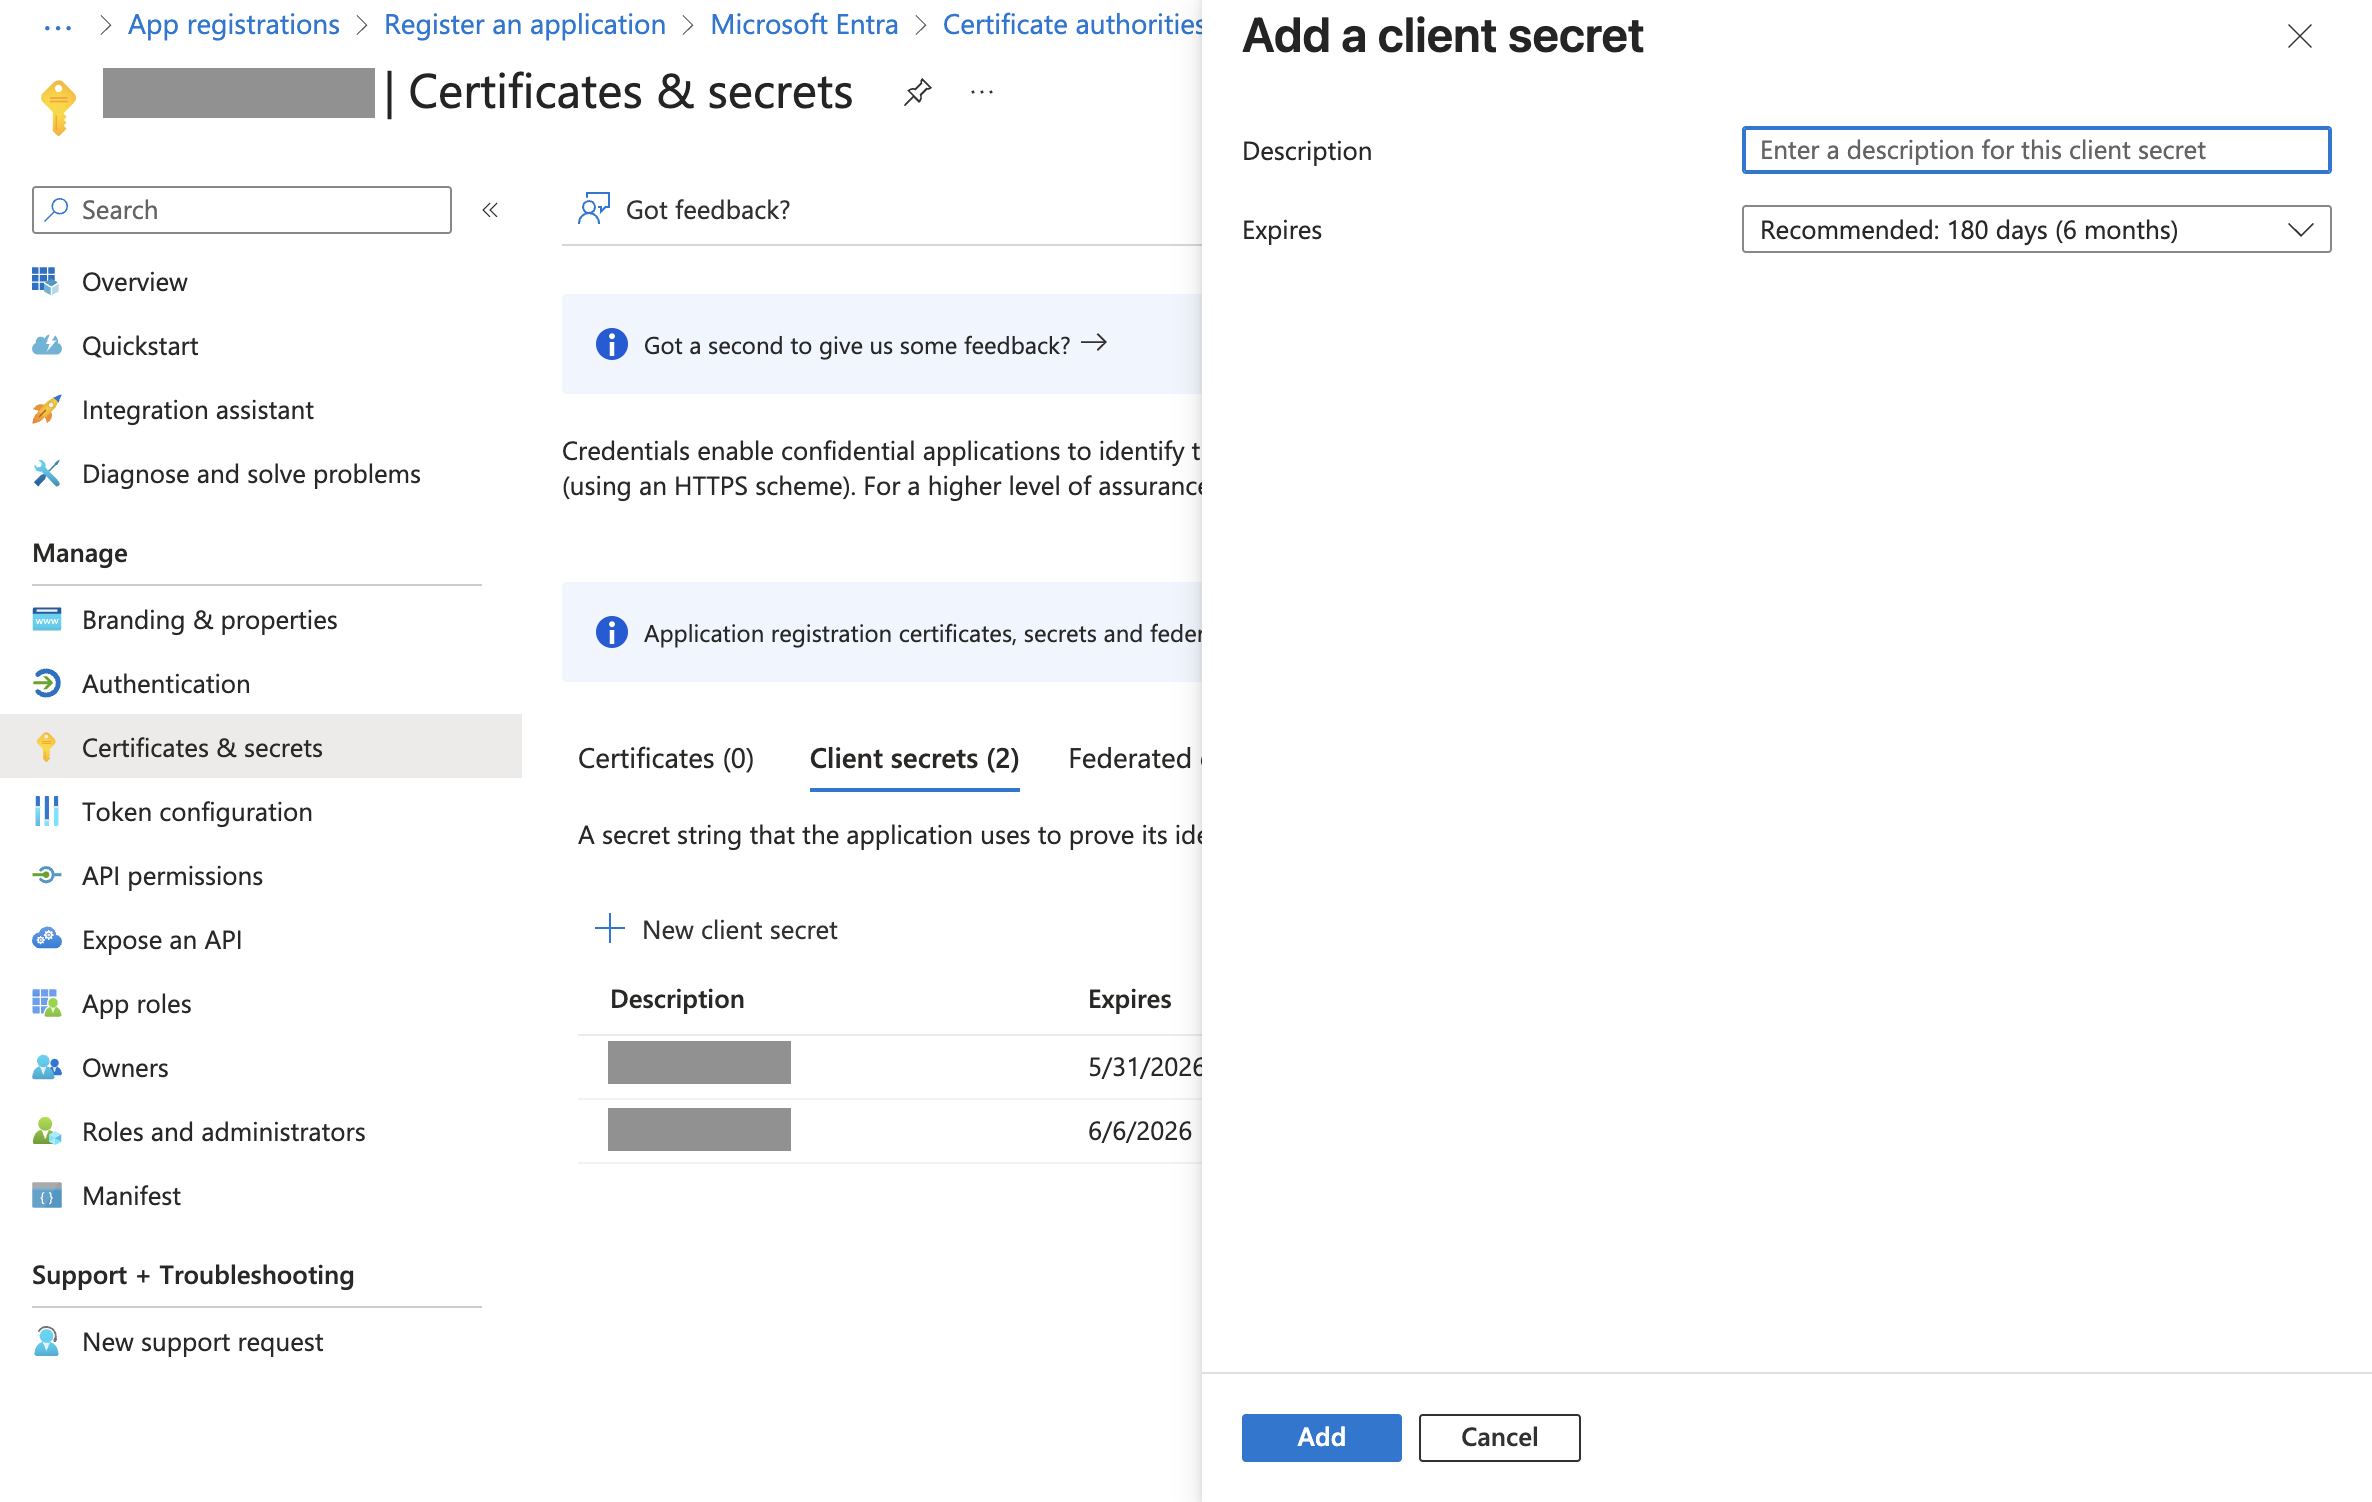
Add a client secret dialog - Select an expiry duration. It's recommended to select the default value.
- Click Add.
- Copy the client secret from the Value column.
- Enter a description for the secret.
- To obtain the client ID, do the following:
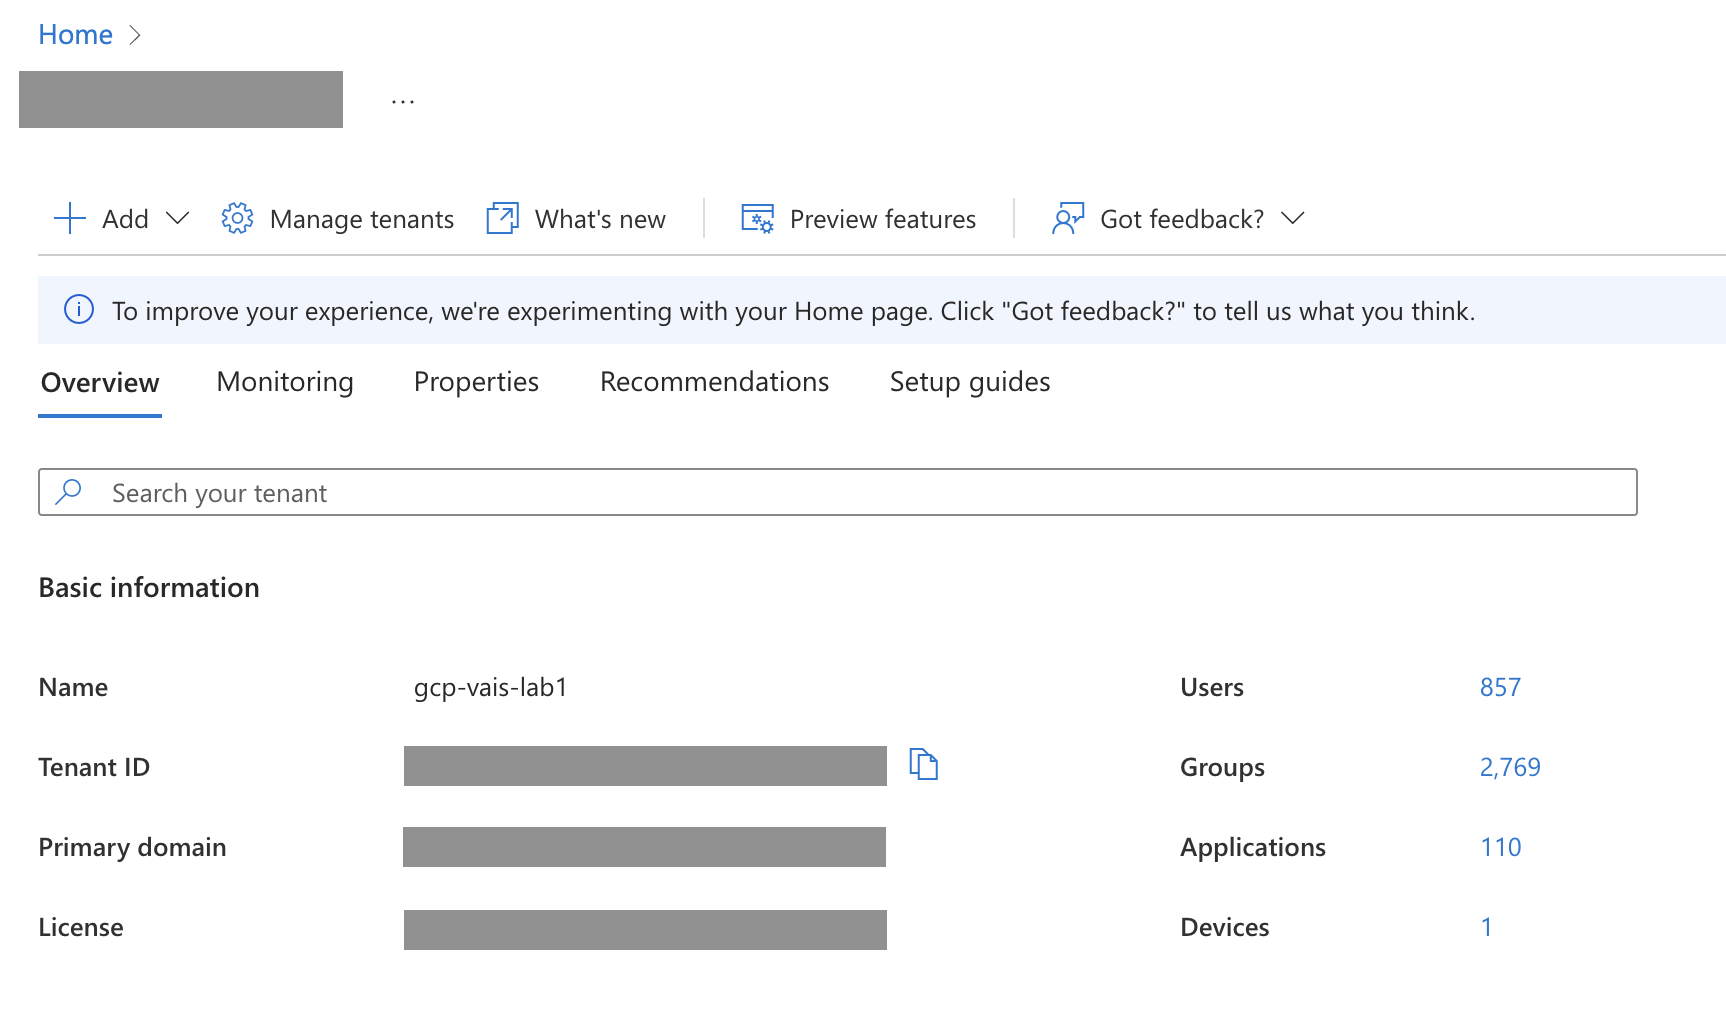
- On the app page, select Overview.
- Copy the Application (client) ID.
Obtain tenant ID
Your tenant ID can be found in the Tenant ID box on the overview page in the Microsoft Entra admin center.
Configure the Microsoft Graph permissions
To configure the required Microsoft Graph permissions for the app, do the following:
- Navigate to Microsoft Entra admin center.
- In the navigation menu, expand the Entra ID section and select App registrations.
- On the App registrations page, select All applications.
- Open the application you created.
- On the app page, select API permissions.
- Click Add a permission.
- In the Request API permissions page, select Microsoft Graph, and select Delegated permissions.
Search for and select the following permissions for your connection mode. Ensure that an administrator grants consent for all the delegated permissions listed in the following table. Once consent is granted, the Status column displays Granted with a green tick mark (✓).
Connection mode Permission Permission type Purpose Federated search Chat.ReadDelegated Allows the app to read all chats. Chat.ReadBasicDelegated Allows the app to read basic properties of chats. ChatMessage.ReadDelegated Allows the app to read all one-to-one and group chats messages. Channel.ReadBasic.AllDelegated Allows the app to read the names and descriptions of channels. ChannelMessage.Read.AllDelegated Allows the app to read user channel messages. Team.ReadBasic.AllDelegated Allows the app to read the names and description of teams. User.ReadDelegated Allows the app to sign in and read user profile. Federated search and actions Chat.ReadDelegated Allows the app to read all chats. Chat.ReadBasicDelegated Allows the app to read basic properties of chats. ChatMessage.ReadDelegated Allows the app to read all one-to-one and group chats messages. Channel.ReadBasic.AllDelegated Allows the app to read the names and descriptions of channels. ChannelMessage.Read.AllDelegated Allows the app to read user channel messages. Team.ReadBasic.AllDelegated Allows the app to read the names and description of teams. User.ReadDelegated Allows the app to sign in and read user profile. ChannelMessage.SendDelegated Allows the app to send messages in any channel. ChatMessage.SendDelegated Allows the app to send chat messages. Click Add Permissions.
Grant administrator consent for permissions
To grant administrator consent for permissions, do the following:
- Sign in to Microsoft Entra admin center as a global or application administrator.
- In the navigation menu, expand the Entra ID section and select App registrations.
- On the App registrations page, select All applications.
- Open the application you created.
- On the app page, select API permissions.
Click the Grant admin consent for button.

Grant admin consent Select Yes in the dialog to confirm the consent action.