

The Virtual Agent Assist feature follows a conversation and uses a Dialogflow virtual agent to provide workflow support to human agents and detect intents for data analysis.
While virtual agents interact with customers on their own to attempt to resolve issues before escalating to a human agent, the virtual Agent Assist feature involves human-human interactions only. The assistant works in the background to detect intents, automatically extract and save relevant numbers and other information, automatically look up customer information, and more. It displays this information to the human agent to assist with their interaction with the customer and reduce the need for the human agent to type their own responses and seek out information on their own.
This guide walks you through the process of enabling Virtual Agent Assist and testing your results in the simulator using the Agent Assist console. If you prefer, you can also perform all of the following actions by calling the API directly.
Before you begin
- If you are using the publicly-available conversation dataset, review the documentation that guides you through using these resources.
- If you are using your own data you must have completed one of the following
(you can use any combination of datasets or smart reply models with
Virtual Agent Assist):
- To implement FAQ assist or article suggestion you must create a knowledge base with documents in it.
- To implement smart reply you must train a smart reply model and manage its allowlist.
- Create a conversation profile that includes one or more knowledge bases or models. Leave the Virtual Agent Assist field unchecked for now, but set all other parameters that you'd like to test using the simulator.
Create a virtual agent
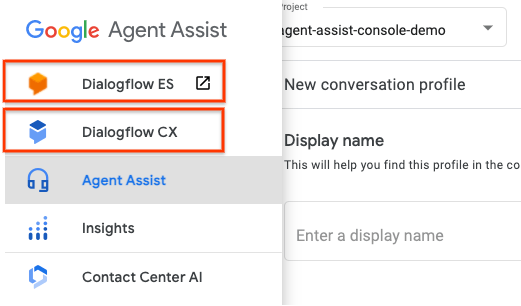
Navigate to either the Dialogflow ES or Dialogflow CX.
For simplicity, this tutorial outlines Agent Assist implementation using a Dialogflow CX agent. You can also access both consoles by navigating to the navigation menu icon at the top left of the Agent Assist console:
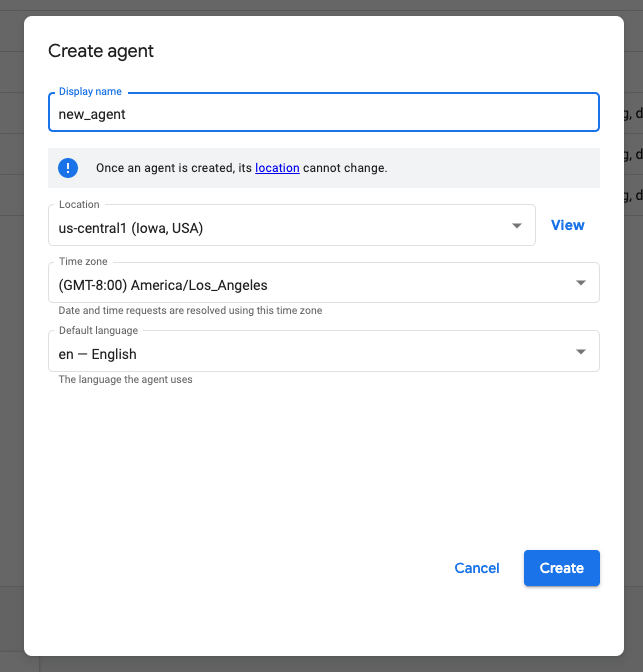
Choose the same project that you intend to use with your Agent Assist data. If you have already created agents for use with this project, they will appear in a list. To create a new agent, click the Create agent button at the top right of the page. In the window that appears, enter a new agent name:
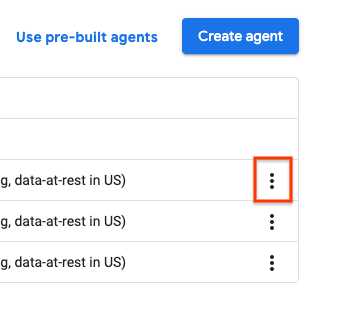
The new agent now appears in the list of virtual agents associated with that project. Click the three vertical dots to the right of the agent you'd like to use and click Copy name to copy the agent's name to your clipboard:
Associate your virtual agent with a conversation profile
Navigate back to the Agent Assist console and select the same project that you used to create your virtual agent. Click Conversation profiles and select the conversation profile that you created as part of the before you begin steps and would like to use to implement virtual Agent Assist. Check the Virtual Agent Assist field and paste the agent's name into the empty Dialogflow agent field that appears:

Make sure that you have selected the Inline suggestions option under Retrieval method and click Save.
Test your Virtual Agent Assist results using the simulator
On the conversation profiles page, click the three vertical dots to the right of your conversation profile and click Use simulator to test your Agent Assist performance.
The Simulator page appears:

The left column contains the chat transcript between the customer and agent, while the right column contains virtual Agent Assist suggestions. To select which features you'd like to test at any given time, check the box next to each feature to include in the simulation. For example, you might have created a conversation profile that configures smart reply, virtual Agent Assist and FAQ Assist. To test only smart reply and virtual Agent Assist, make sure only those two options are checked.

The following example walks through a scenario in which a customer is planning international travel. It uses a conversation profile with both virtual Agent Assist and smart reply configured.
If the customer types I'm traveling to Japan next Monday, a detected intent is identified. The intent is the virtual agent's best estimate of the customer's intention in each chat message. The agent clicks the intent and two input fields appear, destination and arrival_date:

The fields are already automatically filled in using data from the customer's message. The agent checks that both are correct and clicks Next to bring up a suggested reply to the customer:

The agent can click the blue arrow to the right of the text prompt to automatically copy it into the Agent reply box. After the message is sent additional follow-up questions appear in bubbles under the agent's reply box. Hovering the cursor over each bubble displays the replies confidence score.

When the customer replies with their phone number, that information is automatically populated into the Collect Customer Line field in the virtual Agent Assist column. When the agent clicks Next, a new prompt When do you plan to return? appears. The agent copies it to the chat, sends it to the customer, and the returned date is again automatically populated to the input field. The agent is next prompted to ask the customer whether they would like to purchase an international phone plan. When the customer responds Yes, a confirmation:yes button appears under the prompt. The agent clicks this button to move on to the next Agent Assist suggestion.
