


Mulai menggunakan Gemini Enterprise
Gemini Enterprise menyatukan kemampuan pengambilan informasi yang mendalam, natural language processing yang canggih, dan pemrosesan bahasa besar terbaru untuk memahami niat pengguna dan menampilkan hasil yang paling relevan bagi pengguna.
Sebelum mengikuti tutorial ini, pastikan Anda telah melakukan langkah-langkah di Sebelum memulai.
Untuk mengikuti panduan langkah demi langkah untuk tugas ini langsung di Google Cloud konsol, klik Pandu saya:
Sebelum memulai
- Login keakun Anda. Google Cloud Jika Anda baru menggunakan Google Cloud, buat akun untuk mengevaluasi performa produk kami dalam skenario dunia nyata. Pelanggan baru juga mendapatkan kredit gratis senilai $300 untuk menjalankan, menguji, dan men-deploy workload.
-
In the Google Cloud console, on the project selector page, select or create a Google Cloud project.
Roles required to select or create a project
- Select a project: Selecting a project doesn't require a specific IAM role—you can select any project that you've been granted a role on.
-
Create a project: To create a project, you need the Project Creator role
(
roles/resourcemanager.projectCreator), which contains theresourcemanager.projects.createpermission. Learn how to grant roles.
-
Verify that billing is enabled for your Google Cloud project.
Enable the Gemini Enterprise (Discovery Engine), Cloud Storage, Identity and Access Management APIs.
Roles required to enable APIs
To enable APIs, you need the
serviceusage.services.enablepermission. If you created the project, then you likely already have this permission through the Owner role (roles/owner). Otherwise, you can get this permission through the Service Usage Admin role (roles/serviceusage.serviceUsageAdmin). Learn how to grant roles.-
Make sure that you have the following role or roles on the project: Gemini Enterprise Admin
Check for the roles
-
In the Google Cloud console, go to the IAM page.
Go to IAM - Select the project.
-
In the Principal column, find all rows that identify you or a group that you're included in. To learn which groups you're included in, contact your administrator.
- For all rows that specify or include you, check the Role column to see whether the list of roles includes the required roles.
Grant the roles
-
In the Google Cloud console, go to the IAM page.
Go to IAM - Select the project.
- Click Grant access.
-
In the New principals field, enter your user identifier. This is typically the email address for a Google Account.
- Click Select a role, then search for the role.
- To grant additional roles, click Add another role and add each additional role.
- Click Save.
-
-
In the Google Cloud console, on the project selector page, select or create a Google Cloud project.
Roles required to select or create a project
- Select a project: Selecting a project doesn't require a specific IAM role—you can select any project that you've been granted a role on.
-
Create a project: To create a project, you need the Project Creator role
(
roles/resourcemanager.projectCreator), which contains theresourcemanager.projects.createpermission. Learn how to grant roles.
-
Verify that billing is enabled for your Google Cloud project.
Enable the Gemini Enterprise (Discovery Engine), Cloud Storage, Identity and Access Management APIs.
Roles required to enable APIs
To enable APIs, you need the
serviceusage.services.enablepermission. If you created the project, then you likely already have this permission through the Owner role (roles/owner). Otherwise, you can get this permission through the Service Usage Admin role (roles/serviceusage.serviceUsageAdmin). Learn how to grant roles.-
Make sure that you have the following role or roles on the project: Gemini Enterprise Admin
Check for the roles
-
In the Google Cloud console, go to the IAM page.
Go to IAM - Select the project.
-
In the Principal column, find all rows that identify you or a group that you're included in. To learn which groups you're included in, contact your administrator.
- For all rows that specify or include you, check the Role column to see whether the list of roles includes the required roles.
Grant the roles
-
In the Google Cloud console, go to the IAM page.
Go to IAM - Select the project.
- Click Grant access.
-
In the New principals field, enter your user identifier. This is typically the email address for a Google Account.
- Click Select a role, then search for the role.
- To grant additional roles, click Add another role and add each additional role.
- Click Save.
-
Membuat aplikasi Gemini Enterprise
Di Google Cloud konsol, buka halaman Gemini Enterprise.
Klik Create app.
Di bagian Your app name, masukkan nama untuk aplikasi Anda. ID aplikasi akan muncul di bawah nama aplikasi.
Pilih global (Global) sebagai lokasi untuk aplikasi Anda.
Di bagian External name of your company or organization, masukkan nama perusahaan atau organisasi. Untuk tutorial ini, Anda dapat menggunakan
Cymbal Bank.Klik Create.
Setelah aplikasi dibuat, Anda akan dialihkan ke halaman Overview aplikasi.
Membuat penyimpanan data
Di bagian Complete your setup, klik Create Data Store.
Di bagian Cloud Storage, klik Select.
Di bagian Unstructured Data Import (Document Search &RAG), pastikan Documents dipilih.
Di bagian Synchronization frequency, pastikan One time dipilih.
Di bagian Select a folder or a file you want to import, pastikan Folder dipilih.
Masukkan nilai berikut di kolom
gs://:cloud-samples-data/gen-app-builder/search/cymbal-bank-employee
Bucket Cloud Storage ini berisi file PDF untuk penggunaan internal oleh bank fiktif, Cymbal Bank.
Klik Continue.
Di bagian Your data store name, masukkan nama untuk penyimpanan data Anda, lalu klik Create.
Konsol akan mengalihkan Anda ke halaman Connected data stores, dan menampilkan penyimpanan data yang baru Anda buat. Google Cloud
Melihat pratinjau aplikasi Anda
Di menu navigasi, klik Overview untuk kembali ke halaman ringkasan.
Di bagian Your Gemini Enterprise webapp is ready, klik link untuk membuka aplikasi web.
Untuk menguji data yang diimpor, klik Connectors dan pastikan Google Penelusuran tidak dipilih.
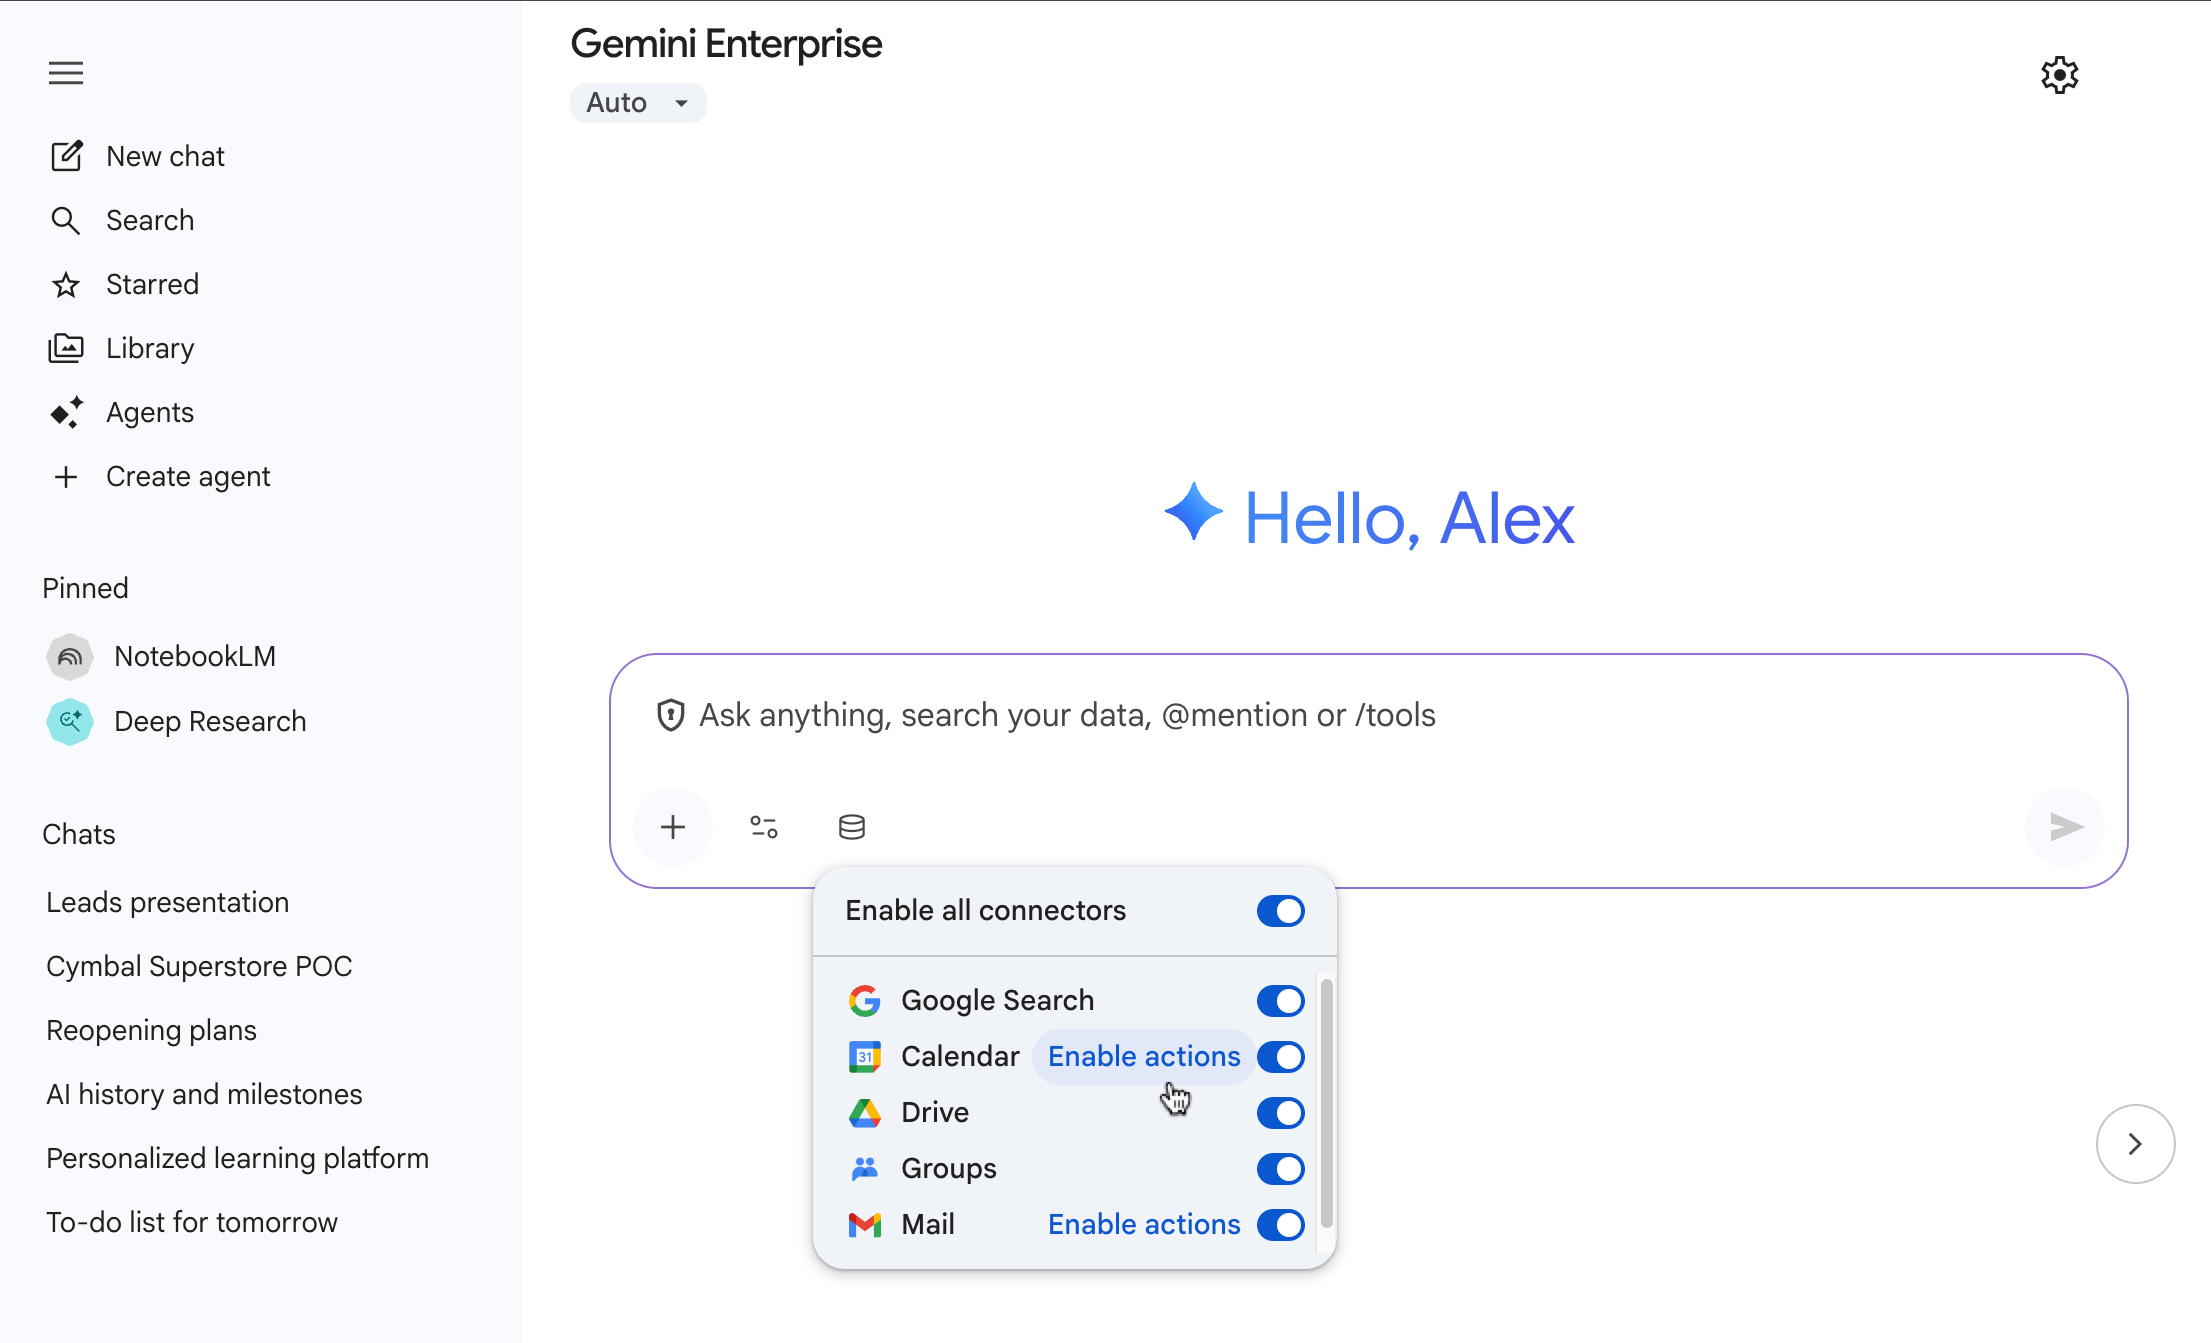
Di kotak penelusuran, ajukan pertanyaan tentang data yang kita impor; misalnya, ajukan pertanyaan
How do I book business travel?Jika jawaban atas pertanyaan ini tidak secara khusus merujuk ke Cymbal Bank, tunggu beberapa menit lagi dan coba lagi.
Ajukan pertanyaan tambahan seperti:
Who founded Cymbal Bank?atauWhere are the headquarters of Cymbal Bank?
Mengonfigurasi aplikasi web penelusuran
Kembali ke Google Cloud konsol.
Di menu navigasi, klik Configurations.
Di tab Search UI, konfigurasikan setelan untuk aplikasi penelusuran.
Di bagian Appearance and branding options , ubah logo menjadi logo ini untuk Cymbal Bank.
https://storage.googleapis.com/cloud-samples-data/gen-app-builder/search/cymbal-bank-logo.pngJika Anda mengubah konfigurasi di tab UI, klik Save and publish.
Buka tab Autocomplete untuk mengonfigurasi setelan tertentu untuk fitur pelengkapan otomatis.
Tetapkan Enable autocomplete ke Now dan tunggu satu atau dua hari sebelum Anda melihat saran pelengkapan otomatis.
Buka tab Assistant untuk mengonfigurasi setelan untuk asisten penelusuran.
Di halaman ini, Anda dapat menetapkan petunjuk sistem LLM tambahan, mengaktifkan Model Armor, grounding web, dan setelan lainnya yang terkait dengan asisten default.
Melihat aplikasi web penelusuran
Untuk melihat aplikasi web Gemini Enterprise, lakukan hal berikut:
Di menu navigasi, klik Integration.
Pastikan Enable the Web App diaktifkan.
Di bagian The link to your aplikasi web, klik Copy dan buka link di browser Anda.
Opsional: Bagikan aplikasi penelusuran kepada pengguna Anda dengan menyalin URL dan mengirimkannya kepada mereka. Pengguna dapat memberi bookmark pada URL aplikasi web untuk mengaksesnya.
Pembersihan
Agar akunAnda tidak dikenai biaya untuk resource yang digunakan pada halaman ini, ikuti langkah-langkah berikut. Google Cloud
- Untuk menghindari tagihan yang tidak perlu Google Cloud , gunakan Google Cloud console untuk menghapus project Anda jika tidak lagi diperlukan.
- Jika Anda membuat project baru untuk mempelajari Gemini Enterprise dan Anda tidak lagi memerlukan project tersebut, hapus project tersebut.
- Jika Anda menggunakanproject yang sudah ada Google Cloud , hapus resource yang Anda buat untuk menghindari tagihan pada akun Anda. Untuk mengetahui informasi selengkapnya, lihat Menghapus aplikasi dan menghapus penyimpanan data.
- Ikuti langkah-langkah di Menonaktifkan Gemini Enterprise.
Langkah berikutnya
- Pelajari lebih lanjut Gemini Enterprise.
- Pelajari lebih lanjut aplikasi dan penyimpanan data.