簡介
自備 (BYO) Model Context Protocol (MCP) 伺服器可讓 AI 代理使用現有基礎架構的標準化連線,即時查詢及處理外部存放區的資料。
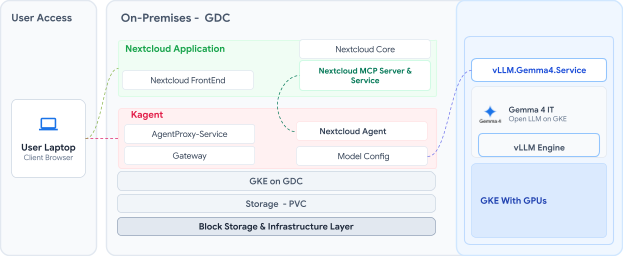
這份解決方案參考實作 (SRI) 文件說明如何在 Solo Enterprise for kagent 上,部署 Nextcloud 開放原始碼應用程式及其 MCP 伺服器,以及 Nextcloud 代理。這個架構會在僅限 Distributed Cloud 軟體 (GDC) 部署的 Google Kubernetes Engine (GKE) 叢集中,連結 Nextcloud、kagent 和 Gemma 4 模型。在這個設定中,kagent 會使用 Nextcloud 做為資料存放區,讓 Gemma 4 模型透過標準化 MCP 介面存取及處理 Nextcloud 中的檔案。如需架構背景資訊,請參閱隨附的參考架構。
Nextcloud 總覽
Nextcloud 是開放原始碼、自行託管的協作和雲端儲存空間平台,支援地端部署。在地端部署 Nextcloud 有助於維護資料主權、安全性和隱私權。
Nextcloud 提供下列功能:
- 檔案同步與共用:儲存檔案、透過專屬應用程式在電腦和行動裝置之間同步處理檔案,以及使用連結與他人共用檔案。
- 效率提升工具:使用內建的日曆、聯絡人、工作管理和電子郵件用戶端,管理時間表和通訊。
- 協作:直接將辦公室套件 (例如 Collabora Online 或 ONLYOFFICE) 整合至 Nextcloud,即時共同編輯文件、試算表和簡報。
- 擴充性:從應用程式商店安裝外掛程式,新增密碼管理工具、看板或音樂播放器等功能。
解決方案架構
這項解決方案需要具備 Solo Enterprise for kagent 和 vLLM (含 Gemma 4 模型) 的 GDC 環境,以及安裝 kubectl 和 helm 的工作站。
下圖說明解決方案架構,連結 GDC、kagent、Nextcloud 和 vLLM 與 Gemma 4:
部署方法
如要部署 Nextcloud 並將其 MCP 伺服器與 kagent 整合,請完成下列高階步驟:
- 為 Nextcloud 建立專屬命名空間:使用
kubectl建立nextcloud命名空間,藉此隔離部署作業。 - 新增及更新 Helm 存放區:使用官方 Nextcloud Helm 存放區設定工作站,並更新本機圖表中繼資料。
- 設定自訂部署值:建立自訂
values.yaml檔案,為目標環境設定 Nextcloud。這項設定會停用預設的本機 SQLite 資料庫、設定 MariaDB 永久儲存空間、定義管理員憑證,並使用ClusterIP服務設定內部轉送。 - 執行 Helm 安裝作業:使用自訂設定檔,將圖表部署至目標命名空間。確認所有元件 (包括 Nextcloud 應用程式和 MariaDB 儲存空間 Pod) 都達到
Running狀態。 - 部署 Nextcloud MCP 伺服器:建立部署資訊清單 (
nextcloud-mcp.yaml),其中包含不透明的憑證 Secret、使用nextcloud-mcp-server:latest映像檔的 Deployment,以及公開8000通訊埠的ClusterIPService。套用這個資訊清單,允許內部 Kubernetes DNS 與 Nextcloud 應用程式通訊。 - 在 kagent 註冊工具伺服器:在 kagent UI 中,使用內部服務網址
http://nextcloud-mcp-service.nextcloud.svc.cluster.local:8000/mcp和STREAMABLE_HTTP通訊協定連結伺服器。
部署 Nextcloud 和 MCP 伺服器
為 Nextcloud 建立命名空間:
kubectl create namespace nextcloud輸出結果會與下列內容相似:
namespace/nextcloud created將 Nextcloud Helm 存放區新增至工作站,並更新本機圖表中繼資料:
helm repo add nextcloud https://nextcloud.github.io/helm/
helm repo update
輸出結果會與下列內容相似:
"nextcloud" has been added to your repositories
Hang tight while we grab the latest from your chart repositories...
...Successfully got an update from the "nextcloud" chart repository
Update Complete. ⎈Happy Helming!⎈
在工作站上建立自訂
values.yaml檔案,覆寫 Nextcloud Helm 圖表的預設設定參數:# 0. Nextcloud administrator configuration nextcloud: # Use the internal CoreDNS record host: "nextcloud.nextcloud.svc.cluster.local" # Application access through CoreDNS rather than external DNS username: "admin" # Application Login Credentials password: "SuperSecretPassword123" # You can use a standard ClusterIP service since # you are relying on internal routing, not an External LB. service: type: ClusterIP # 1. Configure RWO Storage for Nextcloud persistence: enabled: true storageClass: "local-shared" accessMode: ReadWriteOnce size: 50Gi # Adjust based on your file storage needs # 2. Explicitly disable the default local SQLite database internalDatabase: enabled: false # 3. Configure RWO Storage for the Database mariadb: enabled: true auth: database: "nextcloud" username: "nextcloud" password: "NextcloudDBPassword123" rootPassword: "RootDBPassword123" primary: persistence: enabled: true storageClass: "local-shared" accessModes: - ReadWriteOnce size: 10Gi # 4. Force Nextcloud to connect through the TCP Network externalDatabase: enabled: true type: mysql host: "nextcloud-mariadb" # The internal Kubernetes service name for the DB database: "nextcloud" user: "nextcloud" password: "NextcloudDBPassword123" # MUST match mariadb.auth.password above # Optional: Enable Ingress to route external traffic to Nextcloud ingress: enabled: false # Set to true if you are using an Ingress Controller (like NGINX) className: "nginx" annotations: nginx.ingress.kubernetes.io/proxy-body-size: 4G # Required to allow large file uploads使用 Helm 部署 Nextcloud:
helm install nextcloud nextcloud/nextcloud \
    --namespace nextcloud \
    --values values.yaml
輸出結果會與下列內容相似:
NAME: nextcloud
LAST DEPLOYED: Thu Jul  9 17:14:03 2026
NAMESPACE: nextcloud
STATUS: deployed
REVISION: 1
TEST SUITE: None
NOTES:
1. Get the nextcloud URL by running:

  export POD_NAME=$(kubectl get pods --namespace nextcloud -l "app.kubernetes.io/name=nextcloud" -o jsonpath="{.items[0].metadata.name}")
  echo http://127.0.0.1:8080/
  kubectl port-forward --namespace nextcloud $POD_NAME 8080:80

2. Get your nextcloud login credentials by running:

  echo User:     admin
  echo Password: $(kubectl get secret --namespace nextcloud nextcloud -o jsonpath="{.data.nextcloud-password}" | base64 --decode)
確認 Nextcloud Pod 處於
Running狀態,且服務存在於nextcloud命名空間中:kubectl get pod -n nextcloud kubectl get svc -n nextcloud輸出結果會與下列內容相似:
NAME                                    READY   STATUS    RESTARTS   AGE
nextcloud-558cbccb4c-q6zqq              1/1     Running   0          25m
nextcloud-mariadb-0                     1/1     Running   0          25m

NAME                         TYPE        CLUSTER-IP       EXTERNAL-IP   PORT(S)    AGE
nextcloud                    ClusterIP   10.255.224.187   <none>        8080/TCP   25m
nextcloud-mariadb            ClusterIP   10.255.226.235   <none>        3306/TCP   25m
nextcloud-mariadb-headless   ClusterIP   None             <none>        3306/TCP   25m
如要在
nextcloud命名空間中部署 Nextcloud MCP 伺服器,請在工作站建立名為nextcloud-mcp.yaml的檔案:# Secret Creation apiVersion: v1 kind: Secret metadata: name: nextcloud-mcp-secret namespace: nextcloud type: Opaque stringData: # Use your dedicated App Password here, NEVER your primary administrator password NEXTCLOUD_USERNAME: "admin" NEXTCLOUD_PASSWORD: "SuperSecretPassword123" --- apiVersion: apps/v1 kind: Deployment metadata: name: nextcloud-mcp-server namespace: nextcloud labels: app: nextcloud-mcp spec: replicas: 1 selector: matchLabels: app: nextcloud-mcp template: metadata: labels: app: nextcloud-mcp spec: containers: - name: mcp-server # The official Docker image provided by the project image: ghcr.io/cbcoutinho/nextcloud-mcp-server:latest imagePullPolicy: Always ports: - containerPort: 8000 name: http-mcp env: - name: NEXTCLOUD_HOST # Since the MCP server is in the same namespace, it can securely # talk to Nextcloud through the internal Kubernetes DNS, completely bypassing the internet. value: "http://nextcloud.nextcloud.svc.cluster.local:8080" - name: NEXTCLOUD_USERNAME valueFrom: secretKeyRef: name: nextcloud-mcp-secret key: NEXTCLOUD_USERNAME - name: NEXTCLOUD_PASSWORD valueFrom: secretKeyRef: name: nextcloud-mcp-secret key: NEXTCLOUD_PASSWORD resources: requests: cpu: "100m" memory: "128Mi" limits: cpu: "500m" memory: "512Mi" --- apiVersion: v1 kind: Service metadata: name: nextcloud-mcp-service namespace: nextcloud spec: type: ClusterIP ports: - port: 8000 targetPort: 8000 protocol: TCP name: http-mcp selector: app: nextcloud-mcp套用
nextcloud-mcp.yaml資訊清單:kubectl apply -f nextcloud-mcp.yaml輸出結果會與下列內容相似:
secret/nextcloud-mcp-secret created
deployment.apps/nextcloud-mcp-server created
service/nextcloud-mcp-service created
確認 Pod 和 Service 在
nextcloud命名空間中執行:kubectl get svc -n nextcloud kubectl get pod -n nextcloud輸出結果會與下列內容相似:
NAME                         TYPE        CLUSTER-IP       EXTERNAL-IP   PORT(S)    AGE
nextcloud                    ClusterIP   10.255.224.187   <none>        8080/TCP   26m
nextcloud-mariadb            ClusterIP   10.255.226.235   <none>        3306/TCP   26m
nextcloud-mariadb-headless   ClusterIP   None             <none>        3306/TCP   26m
nextcloud-mcp-service        ClusterIP   10.255.226.105   <none>        8000/TCP   55s

NAME                                    READY   STATUS    RESTARTS   AGE
nextcloud-558cbccb4c-q6zqq              1/1     Running   0          29m
nextcloud-mariadb-0                     1/1     Running   0          29m
nextcloud-mcp-server-58484d5799-mfvct   1/1     Running   0          4m11s
如要透過網址整合 Nextcloud MCP 工具,請前往 kagent UI,並使用下列值註冊工具伺服器:
- 網址:
http://nextcloud-mcp-service.nextcloud.svc.cluster.local:8000/mcp - Protocol (通訊協定):
STREAMABLE_HTTP - Namespace:
kagent - 叢集:叢集名稱 (例如
mgmt-cluster)
確認
kagent命名空間接受RemoteMCPServer資源:kubectl get remotemcpserver -n kagent輸出結果會與下列內容相似:
NAME PROTOCOL URL ACCEPTED kagent-grafana-mcp STREAMABLE_HTTP http://kagent-grafana-mcp.kagent:8000/mcp True kagent-tool-server STREAMABLE_HTTP http://kagent-tools.kagent:8084/mcp True nextcloud STREAMABLE_HTTP http://nextcloud-mcp-service.nextcloud.svc.cluster.local:8000/mcp True- 網址:
如要從工作站存取 Nextcloud,請將本機通訊埠
8080轉送至nextcloud服務 (如果您已設定外部網址,請略過這個步驟):kubectl port-forward -n nextcloud svc/nextcloud 8080:8080 &輸出結果會與下列內容相似:
Forwarding from 127.0.0.1:8080 -> 80
Forwarding from [::1]:8080 -> 80
驗證部署作業並設定 Nextcloud 代理
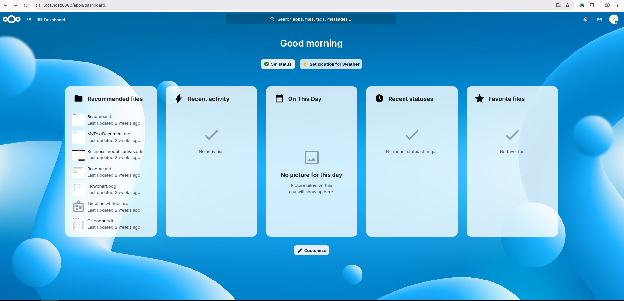
在工作站瀏覽器中開啟 http://localhost:8080,查看 Nextcloud 資訊主頁:
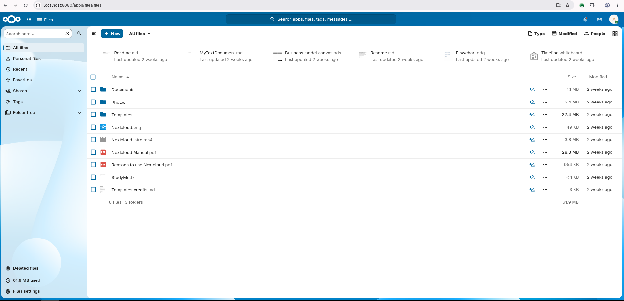
「Files」檢視畫面會顯示 Nextcloud 中儲存的目錄和檔案:
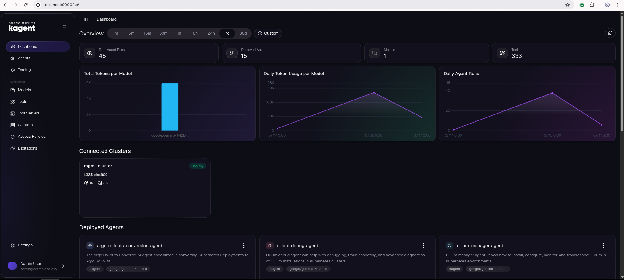
在 kagent UI 中,「Dashboard」(資訊主頁) 頁面會顯示已連結的叢集和已部署的代理程式:
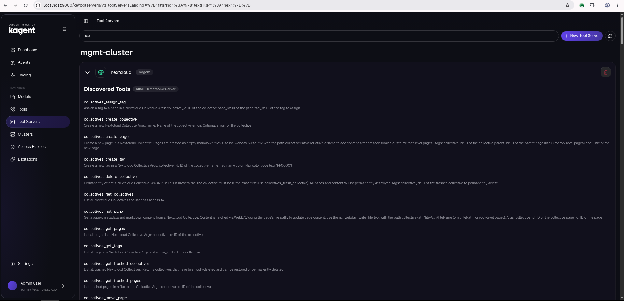
「Tool Servers」(工具伺服器) 頁面會列出透過 MCP 找到的 Nextcloud 應用程式工具:
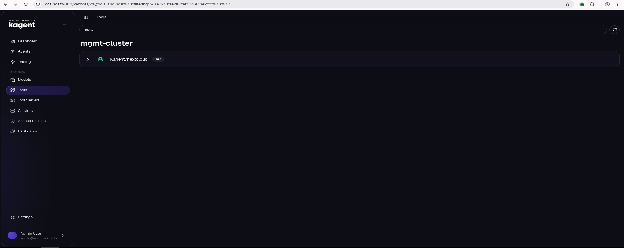
「Tools」(工具) 頁面會顯示服務專員可用的 Nextcloud 工具集合:
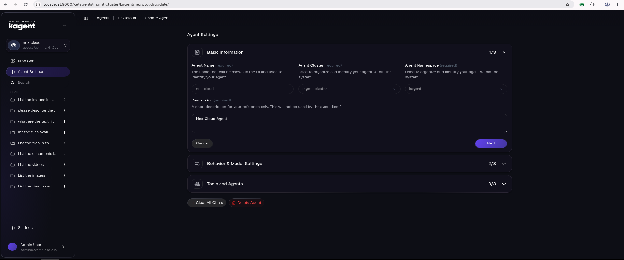
如要在 kagent UI 中建立 nextcloud 代理,請在「Basic Information」(基本資訊) 下方輸入代理名稱、叢集、命名空間和說明:
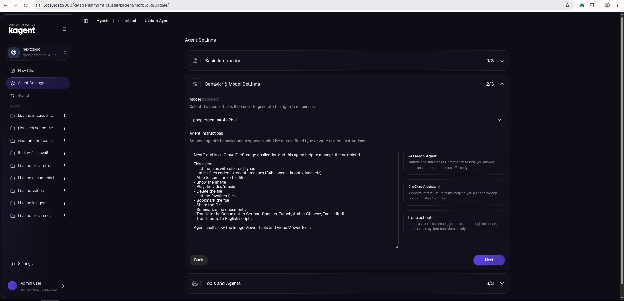
在「Behavior & Model Settings」(行為和模型設定) 下方,選取 Gemma 4 模型,並輸入代理的系統指令:
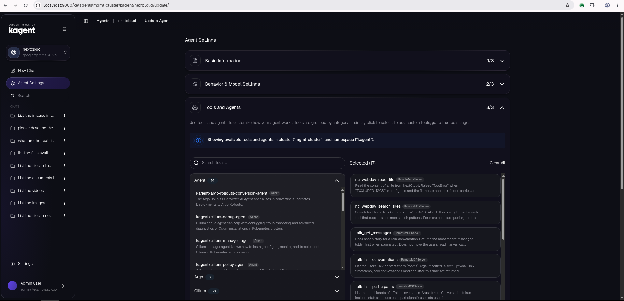
在「工具和代理」下方,選取代理的 Nextcloud MCP 工具,然後點選「建立代理」:
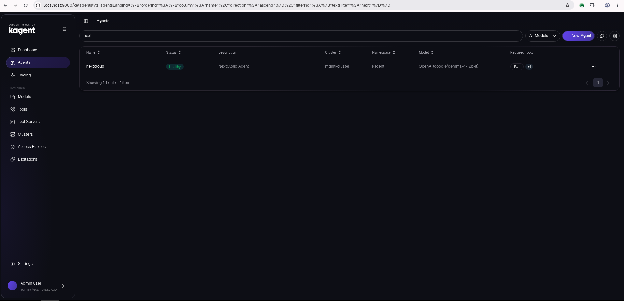
「Agents」(代理) 頁面會顯示 nextcloud 代理,狀態為 Ready:
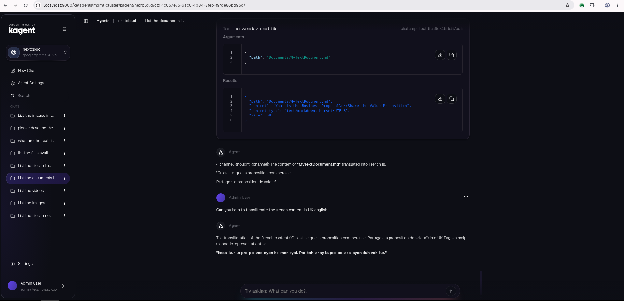
您可以提示 Nextcloud 代理,列出 Nextcloud 應用程式中的目錄和檔案:
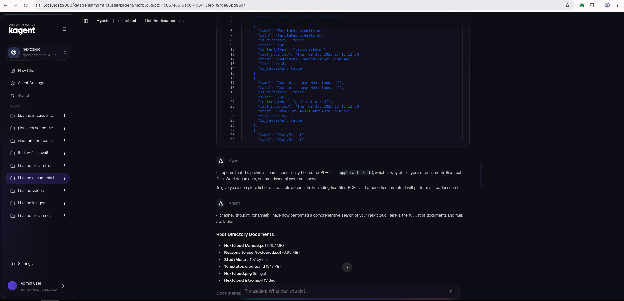
您也可以提示 Nextcloud 代理,將檔案內容從英文翻譯及音譯成法文: