


jobs.submit API HTTP 또는 프로그래매틱 요청을 통해, gcloud 명령줄 도구를 로컬 터미널 창 또는 Cloud Shell에서 사용하여, 또는
로컬 브라우저에 열린 Google Cloud 콘솔에서 작업을 기존 Managed Service for Apache Spark 클러스터에 제출할 수 있습니다. 클러스터에서 마스터
인스턴스에 SSH를 통해 연결한 후 Managed Service for Apache Spark를 사용하지 않고 인스턴스에서 바로 작업을
실행할 수도 있습니다.
작업 동시 실행:
클러스터를 만들 때
dataproc:dataproc.scheduler.max-concurrent-jobs
클러스터 속성을 사용하여 최대 동시 Managed Service for Apache Spark 작업 수를 구성할 수 있습니다. 이 속성 값이 설정되지 않은 경우 동시 작업의 상한은 max((masterMemoryMb - 3584) / masterMemoryMbPerJob, 5)로 계산됩니다.
masterMemoryMb는 마스터 VM의 머신 유형에 따라 결정됩니다.
masterMemoryMbPerJob은 기본적으로 1024이지만 클러스터 생성 시
dataproc:dataproc.scheduler.driver-size-mb 클러스터 속성으로 구성할 수 있습니다.
작업을 제출하는 방법
클래스 경로 격리 및 커스텀 JAR: 커스텀 'fat JAR' 또는 번들 JAR (예: Apache Iceberg 런타임 또는 Google Cloud 번들)을 /usr/lib/spark/jars/와 같은 클러스터 시스템 디렉터리에 직접 복사하지 마세요. 시스템 디렉터리에 커스텀 JAR을 배치하면 에이전트의 기본 제공 라이브러리와 충돌하는 전이 종속 항목 (예: Guava 또는 Hadoop 라이브러리)으로 Managed Service for Apache Spark 에이전트의 클래스 경로가 오염됩니다. 이 충돌로 인해 작업을 취소하는 것과 같은 작업 관리 작업을 실행할 때 클래스 확인 오류 (ClassNotFoundException 또는 NoClassDefFoundError 등)가 발생하여 에이전트가 비정상 종료되고 YARN 애플리케이션이 고아 상태로 남을 수 있습니다.
대신 다음 지원되는 방법 중 하나를 사용하세요.
- 작업별 종속 항목: Google Cloud CLI CLI의
--jars플래그, Google Cloud 콘솔의 Jar 파일 필드 또는 API의jarFileUris필드를 사용하여 작업을 제출할 때 JAR의 Cloud Storage 경로를 지정합니다. Spark는 에이전트의 클래스 경로를 오염시키지 않고 작업의 드라이버 및 실행기에 종속 항목을 배포합니다. - 클러스터 전체 종속 항목:
spark:spark.jars클러스터 속성을 사용하여 클러스터를 만드는 동안 종속 항목을 지정합니다.--properties="spark:spark.jars=gs://YOUR_BUCKET/jar-1.jar,gs://YOUR_BUCKET/jar-2.jar"
/etc/spark/conf/spark-defaults.conf를 구성하여 모든 작업의 Spark 드라이버 및 실행기 클래스 경로에 종속 항목을 자동으로 배포하는 동시에 노드 로컬 Managed Service for Apache Spark 에이전트를 완전히 격리하도록 지시합니다.
콘솔
브라우저의 Google Cloud 콘솔에서 Managed Service for Apache Spark 작업 제출 페이지를 엽니다.
Spark 작업 예시
샘플 Spark 작업을 제출하려면 작업 제출 페이지의 필드를 다음과 같이 채웁니다.
- 클러스터 목록에서 클러스터 이름을 선택합니다.
- 작업 유형을
Spark로 설정합니다. - 기본 클래스 또는 jar을
org.apache.spark.examples.SparkPi로 설정합니다. - 인수 를 단일 인수
1000으로 설정합니다. - Jar 파일 (또는 API
jarFileUris필드)에file:///usr/lib/spark/examples/jars/spark-examples.jar를 추가합니다.file:///는 Hadoop LocalFileSystem 스키마를 나타냅니다. 클러스터 생성 시 Managed Service for Apache Spark 는 클러스터의 마스터 노드에/usr/lib/spark/examples/jars/spark-examples.jar를 설치했습니다. 이 경로는 Managed Service for Apache Spark에서 제공하는 사전 설치된 예시에만 사용됩니다. 커스텀 JAR을 시스템 디렉터리에 복사하지 마세요 (작업 제출 방법의 주의사항 참고).- 또는 Cloud Storage 경로
(
gs://your-bucket/your-jarfile.jar)나 Hadoop 분산 파일 시스템 경로 (hdfs://path-to-jar.jar)를 jar 하나에 지정할 수 있습니다. (API를 사용하여 작업을 제출하는 경우jarFileUris필드에 이 경로를 지정합니다.)
제출을 클릭하여 작업을 시작합니다. 작업이 시작되면 작업 목록에 추가됩니다.
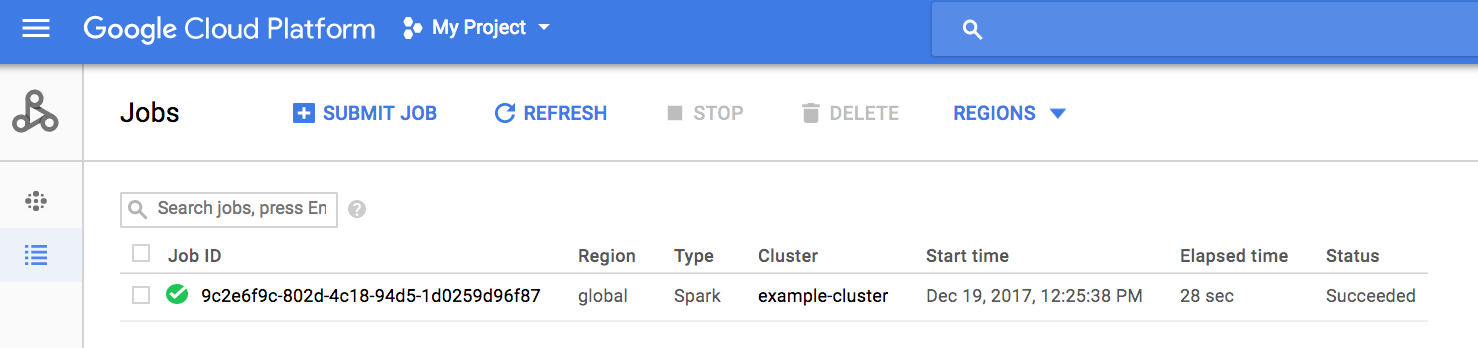
작업 ID를 클릭하여 작업 페이지를 엽니다. 이 페이지에서 작업의 드라이버 출력을 볼 수 있습니다. 이 작업은 브라우저 창 너비를 초과하는 긴 출력 줄을 생성하므로, pi에 대해 계산된 결과가 표시되도록 줄바꿈 상자를 선택하여 모든 출력 텍스트를 뷰 안에서 볼 수 있습니다.
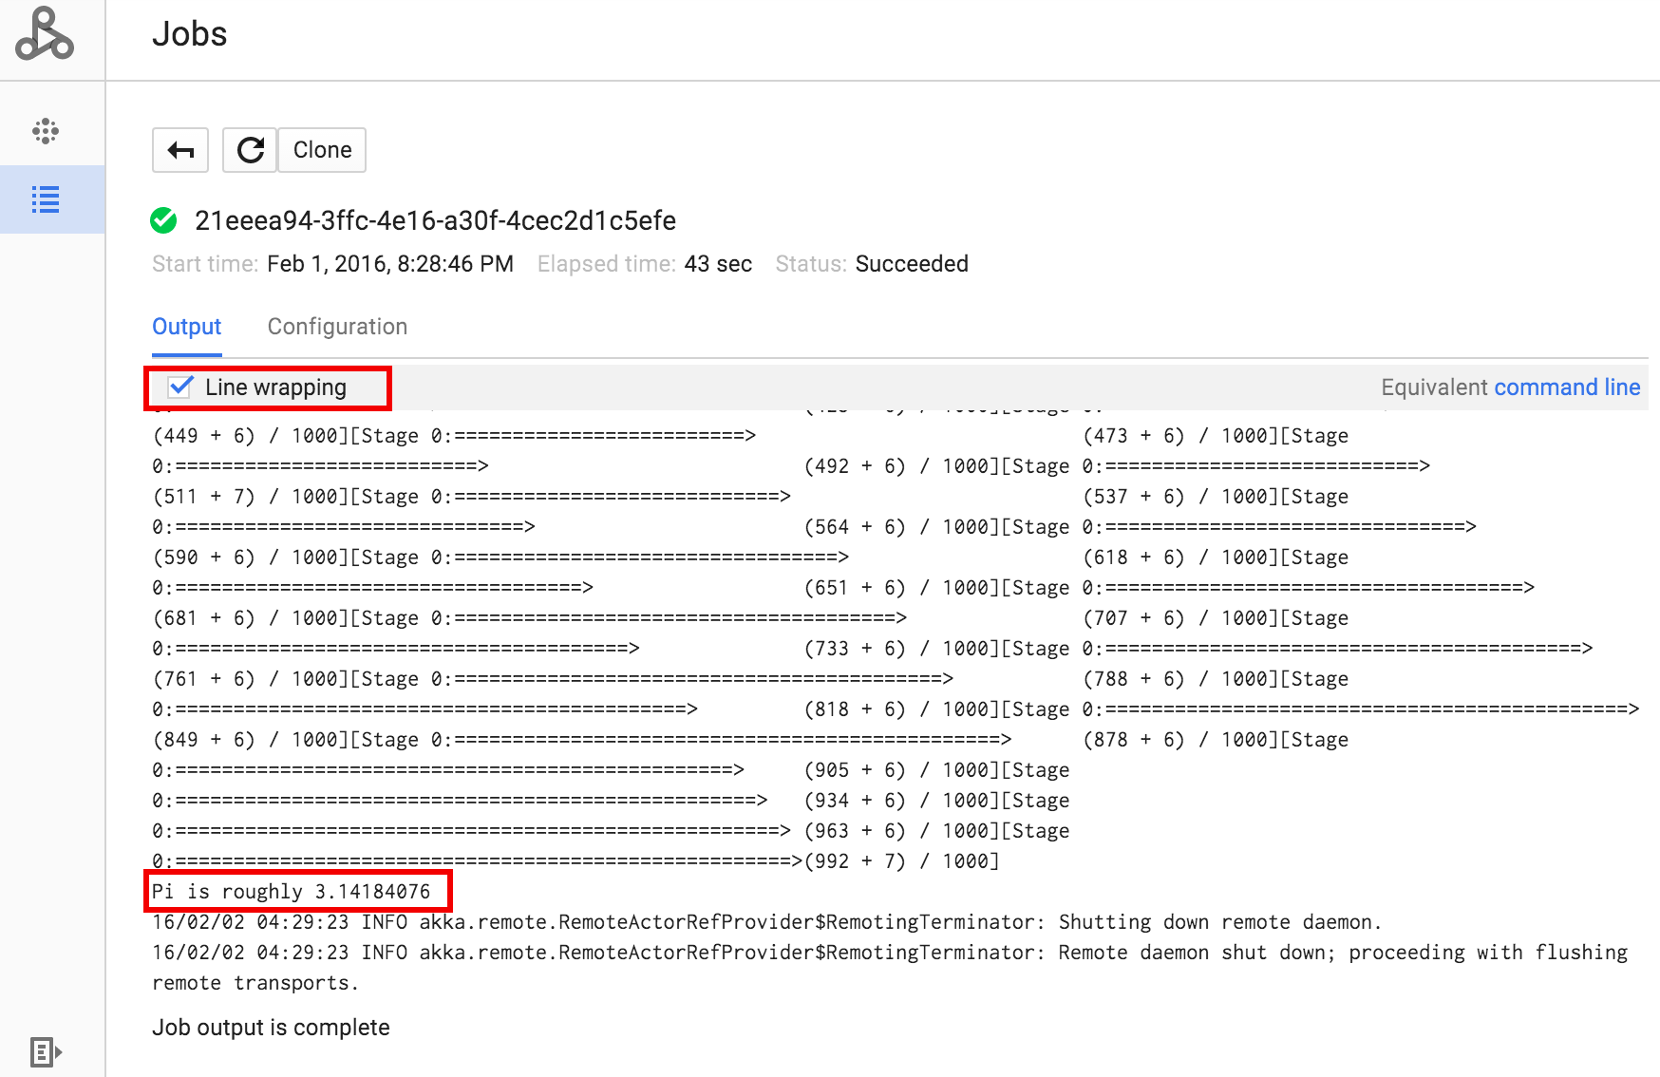
아래에 표시된 gcloud dataproc jobs wait 명령어를 사용하여 명령줄에서 작업의 드라이버 출력을 확인할 수 있습니다(자세한 내용은 작업 출력 보기–GCLOUD 명령어 참조).
프로젝트 ID를 복사하여 --project 플래그의 값으로 붙여넣고, 작업 ID (작업 목록에 표시됨)를 최종 인수로 붙여넣습니다.
gcloud dataproc jobs wait job-id \
    --project=project-id \
    --region=region
다음은 샘플 SparkPi 작업의 드라이버 출력에서 가져온 스니펫입니다.
...
2015-06-25 23:27:23,810 INFO [dag-scheduler-event-loop]
scheduler.DAGScheduler (Logging.scala:logInfo(59)) - Stage 0 (reduce at
SparkPi.scala:35) finished in 21.169 s

2015-06-25 23:27:23,810 INFO [task-result-getter-3] cluster.YarnScheduler
(Logging.scala:logInfo(59)) - Removed TaskSet 0.0, whose tasks have all
completed, from pool

2015-06-25 23:27:23,819 INFO [main] scheduler.DAGScheduler
(Logging.scala:logInfo(59)) - Job 0 finished: reduce at SparkPi.scala:35,
took 21.674931 s

Pi is roughly 3.14189648
...
Job [c556b47a-4b46-4a94-9ba2-2dcee31167b2] finished successfully.

driverOutputUri:
gs://sample-staging-bucket/google-cloud-dataproc-metainfo/cfeaa033-749e-48b9-...
...
gcloud
Managed Service for Apache Spark 클러스터에 작업을 제출하려면 터미널 창 또는 Cloud Shell에서 로컬로 gcloud CLI gcloud dataproc jobs submit 명령어를 실행합니다.
gcloud dataproc jobs submit job-command \
    --cluster=cluster-name \
    --region=region \
    other dataproc-flags \
    -- job-args
- Cloud Storage에 있으며 공개적으로 액세스 가능한
hello-world.py를 나열합니다.gcloud storage cat gs://dataproc-examples/pyspark/hello-world/hello-world.py
#!/usr/bin/python
import pyspark
sc = pyspark.SparkContext()
rdd = sc.parallelize(['Hello,', 'world!'])
words = sorted(rdd.collect())
print(words)
- Managed Service for Apache Spark에 PySpark 작업을 제출합니다.
gcloud dataproc jobs submit pyspark \
    gs://dataproc-examples/pyspark/hello-world/hello-world.py \
    --cluster=cluster-name  \
    --region=region
Waiting for job output...
…
['Hello,', 'world!']
Job finished successfully.
- Managed Service for Apache Spark 클러스터의
마스터 노드에 사전 설치된 SparkPi 예시를 실행합니다.
file:///usr/lib/spark/examples/jars/spark-examples.jar경로는 사전 설치된 예시에만 해당됩니다. 커스텀 JAR 종속 항목은 작업 제출 방법의 주의사항을 참고하세요.gcloud dataproc jobs submit spark \ --cluster=cluster-name \ --region=region \ --class=org.apache.spark.examples.SparkPi \ --jars=file:///usr/lib/spark/examples/jars/spark-examples.jar \ -- 1000
Job [54825071-ae28-4c5b-85a5-58fae6a597d6] submitted.
Waiting for job output…
…
Pi is roughly 3.14177148
…
Job finished successfully.
…
REST
이 섹션에서는 Spark 작업을 제출하여 Managed Service for Apache Spark
jobs.submit API를 사용하여 대략적인 값
pi을 계산하는 방법을 보여줍니다.
요청 데이터를 사용하기 전에 다음을 바꿉니다.
- project-id: Google Cloud 프로젝트 ID
- region: 클러스터 리전
- clusterName: 클러스터 이름
HTTP 메서드 및 URL:
POST https://dataproc.googleapis.com/v1/projects/project-id/regions/region/jobs:submit
JSON 요청 본문:
{
  "job": {
    "placement": {
      "clusterName": "cluster-name"
    },
    "sparkJob": {
      "args": [
        "1000"
      ],
      "mainClass": "org.apache.spark.examples.SparkPi",
      "jarFileUris": [
        "file:///usr/lib/spark/examples/jars/spark-examples.jar"
      ]
    }
  }
}
요청을 보내려면 다음 옵션 중 하나를 펼칩니다.
다음과 비슷한 JSON 응답이 표시됩니다.
{
  "reference": {
    "projectId": "project-id",
    "jobId": "job-id"
  },
  "placement": {
    "clusterName": "cluster-name",
    "clusterUuid": "cluster-Uuid"
  },
  "sparkJob": {
    "mainClass": "org.apache.spark.examples.SparkPi",
    "args": [
      "1000"
    ],
    "jarFileUris": [
      "file:///usr/lib/spark/examples/jars/spark-examples.jar"
    ]
  },
  "status": {
    "state": "PENDING",
    "stateStartTime": "2020-10-07T20:16:21.759Z"
  },
  "jobUuid": "job-Uuid"
}
Java
- 클라이언트 라이브러리 설치
- 애플리케이션 기본 사용자 인증 정보 설정
- 코드 실행 을 참조하세요.
Python
Go
Node.js
클러스터에서 바로 작업 제출
VM 마스터 인스턴스에 SSH 연결을 설정한 후에 클러스터의 마스터 노드에 있는 터미널 창에서 다음과 같은 명령어를 실행합니다.
- Spark 셸을 엽니다.
- Spark 작업을 실행하여 공개적으로 액세스할 수 있는 Cloud Storage 파일에 있는 (7줄짜리) Python 'hello-world' 파일에서 줄의 수를 셉니다.
셸을 종료합니다.
user@cluster-name-m:~$ spark-shell
...
scala> sc.textFile("gs://dataproc-examples"
+ "/pyspark/hello-world/hello-world.py").count
...
res0: Long = 7
scala> :quit
Managed Service for Apache Spark에서 bash 작업 실행
사용하는 엔진이 최상위 Managed Service for Apache Spark 작업 유형으로 지원되지 않거나 스크립트에서 hadoop 또는 spark-submit을 사용하여 작업을 시작하기 전에 인수 추가 설정 또는 계산을 해야 하므로 bash 스크립트를 Managed Service for Apache Spark 작업으로 실행할 수 있습니다.
Pig 예시
다음과 같이 hello.sh bash 스크립트를 Cloud Storage에 복사했다고 가정합니다.
gcloud storage cp hello.sh gs://${BUCKET}/hello.shpig fs 명령어는 Hadoop 경로를 사용하므로 Cloud Storage에서 file:///로 지정된 대상으로 스크립트를 복사하여 HDFS가 아닌 로컬 파일 시스템에 있는지 확인합니다. 후속 sh 명령어는 로컬 파일 시스템을 자동으로 참조하며 file:/// 프리픽스가 필요하지 않습니다.
gcloud dataproc jobs submit pig --cluster=${CLUSTER} --region=${REGION} \
    -e='fs -cp -f gs://${BUCKET}/hello.sh file:///tmp/hello.sh; sh chmod 750 /tmp/hello.sh; sh /tmp/hello.sh'
또는 Managed Service for Apache Spark 작업은 --jars 인수를 제출하여 작업 전체 기간 동안 생성된 임시 디렉터리로 파일을 스테이징하므로 Cloud Storage 셸 스크립트를 --jars 인수로 지정할 수 있습니다.
gcloud dataproc jobs submit pig --cluster=${CLUSTER} --region=${REGION} \
    --jars=gs://${BUCKET}/hello.sh \
    -e='sh chmod 750 ${PWD}/hello.sh; sh ${PWD}/hello.sh'
--jars 인수는 로컬 스크립트도 참조할 수 있습니다.
gcloud dataproc jobs submit pig --cluster=${CLUSTER} --region=${REGION} \
    --jars=hello.sh \
    -e='sh chmod 750 ${PWD}/hello.sh; sh ${PWD}/hello.sh'