
使用 Google Cloud 控制台建立代管型筆記本執行個體
瞭解如何使用 Google Cloud 控制台建立 Vertex AI Workbench 代管型筆記本執行個體,並開啟 JupyterLab。本頁面也會說明如何停止、啟動、重設或刪除代管筆記本執行個體。
事前準備
- 登入 Google Cloud 帳戶。如果您是 Google Cloud新手,歡迎 建立帳戶,親自評估產品在實際工作環境中的成效。新客戶還能獲得價值 $300 美元的免費抵免額,可用於執行、測試及部署工作負載。
-
In the Google Cloud console, on the project selector page, select or create a Google Cloud project.
Roles required to select or create a project
- Select a project: Selecting a project doesn't require a specific IAM role—you can select any project that you've been granted a role on.
-
Create a project: To create a project, you need the Project Creator role
(
roles/resourcemanager.projectCreator), which contains theresourcemanager.projects.createpermission. Learn how to grant roles.
-
Verify that billing is enabled for your Google Cloud project.
Enable the Notebooks API.
Roles required to enable APIs
To enable APIs, you need the Service Usage Admin IAM role (
roles/serviceusage.serviceUsageAdmin), which contains theserviceusage.services.enablepermission. Learn how to grant roles.-
In the Google Cloud console, on the project selector page, select or create a Google Cloud project.
Roles required to select or create a project
- Select a project: Selecting a project doesn't require a specific IAM role—you can select any project that you've been granted a role on.
-
Create a project: To create a project, you need the Project Creator role
(
roles/resourcemanager.projectCreator), which contains theresourcemanager.projects.createpermission. Learn how to grant roles.
-
Verify that billing is enabled for your Google Cloud project.
Enable the Notebooks API.
Roles required to enable APIs
To enable APIs, you need the Service Usage Admin IAM role (
roles/serviceusage.serviceUsageAdmin), which contains theserviceusage.services.enablepermission. Learn how to grant roles.
建立執行個體
前往 Google Cloud 控制台的「Managed notebooks」頁面。
按一下 「建立新標籤」。
在「建立執行個體」視窗的「名稱」欄位中,輸入
my-instance。點選「建立」。
完成本文所述工作後,您可以刪除建立的資源,避免繼續計費,詳情請參閱「清除所用資源」一節。
開啟 JupyterLab
建立執行個體後,Vertex AI Workbench 會自動啟動執行個體。執行個體可供使用時,Vertex AI Workbench 會啟用「Open JupyterLab」(開啟 JupyterLab) 連結。
按一下代管型筆記本執行個體名稱旁的「Open JupyterLab」(開啟 JupyterLab)。
在「Authenticate your managed notebook」(驗證代管型筆記本) 對話方塊中,按一下按鈕來取得驗證碼。
選取所需的帳戶,然後按一下「Allow」(允許)。複製驗證碼。
在「Authenticate your managed notebook」(驗證代管型筆記本) 對話方塊中貼上驗證碼,然後按一下「Authenticate」(驗證)。
代管型筆記本執行個體中會開啟 JupyterLab。
開啟新的 Notebook 檔案
依序選取「File」>「New」>「Notebook」。
在「Select kernel」對話方塊中選取「Python」,然後按一下「Select」。
新的筆記本檔案隨即開啟。
變更核心
你可以透過選單或在檔案中變更 JupyterLab 筆記本檔案的 Kernel。
選單
在 JupyterLab 中,按一下「Kernel」選單中的「Change kernel」。
在「Select kernel」對話方塊中,選取要使用的其他核心。
按一下「選取」。
在檔案中
在 JupyterLab 筆記本檔案中,按一下核心名稱。

在「Select kernel」對話方塊中,選取要使用的其他核心。
按一下「選取」。
停止執行個體
前往 Google Cloud 控制台的「受管理 Notebook」頁面。
選取要停止的執行個體。
按一下 「停止」。
啟動執行個體
前往 Google Cloud 控制台的「受管理 Notebook」頁面。
選取要啟動的執行個體。
按一下「開始」。
重設執行個體
強制重設執行個體會清除執行個體的記憶體內容,並將執行個體重設為初始狀態。如要進一步瞭解如何重設執行個體,請參閱「重設執行個體」。
前往 Google Cloud 控制台的「受管理 Notebook」頁面。
選取要重設的執行個體。
依序點選 「重設」和「重設」確認操作。
 「重設」和「重設」確認操作。
清除所用資源
為了避免系統向您的 Google Cloud 帳戶收取本頁面所用資源的費用,請按照下列步驟操作。
如果您建立新專案的目的在於瞭解如何使用 Vertex AI Workbench 代管型筆記本,但現在已不再需要該專案,請刪除專案。
如果您使用現有的 Google Cloud 專案,請刪除稍早建立的資源,以免系統向您的帳戶收費:
前往 Google Cloud 控制台的「受管理 Notebook」頁面。
選取要刪除的執行個體所在的資料列。
按一下 「Delete」(刪除) (依視窗大小而定,「Delete」(刪除) 按鈕可能位於 選項選單中)。
按一下「Delete」(刪除) 確認操作。
後續步驟
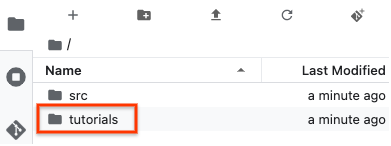
試試新代管筆記本執行個體隨附的其中一個教學課程。在 JupyterLab 「檔案瀏覽器」中,開啟「tutorials」資料夾,然後開啟其中一個筆記本檔案。
請參閱「代管型筆記本簡介」。