
יצירת כלי לסיכום מסמכים במסוף Google Cloud
אתם יכולים ליצור מעבד סיכום באמצעות Document AI כדי לסכם את התוכן של מסמכים. אפשר להתאים אישית את הפלט לפי אורך ופורמט.
דוגמה לפלט JSON של הישות שנוצרה:
{
  "type": "summary",
  "mentionText": " Superconductivity is a phenomenon in which a material conducts
  electricity with no resistance. It was discovered in 1911 by Dutch physicist Heike
  Kamerlingh Onnes. In 1986, a new class of materials was discovered that can superconduct
  at much higher temperatures. These materials are called high-temperature superconductors.
  They have the potential to revolutionize the way we use electricity. However,
  high-temperature superconductors are still very expensive to produce. Scientists
  are working on ways to make them more affordable.",
  "normalizedValue": {
    "text": " Superconductivity is a phenomenon in which a material conducts
    electricity with no resistance. It was discovered in 1911 by Dutch physicist
    Heike Kamerlingh Onnes. In 1986, a new class of materials was discovered that
    can superconduct at much higher temperatures. These materials are called
    high-temperature superconductors. They have the potential to revolutionize
    the way we use electricity. However, high-temperature superconductors are
    still very expensive to produce. Scientists are working on ways to make
    them more affordable."
  }
}
התהליך
במדריך למתחילים הזה, יוצרים מעבד לסיכום מסמכים, מעלים מסמך לדוגמה לעיבוד ויוצרים גרסה מותאמת אישית של מעבד כדי להתאים את מבנה הסיכום.
לחצו על תראו לי איך כדי לקרוא הסבר מפורט על המשימה ישירות במסוף Google Cloud :
לפני שמתחילים
- נכנסים לחשבון Google Cloud . אם אתם משתמשים חדשים ב- Google Cloud, צרו חשבון כדי שתוכלו להעריך את הביצועים של המוצרים שלנו בתרחישים מהעולם האמיתי. לקוחות חדשים מקבלים בחינם גם קרדיט בשווי 300$ להרצה, לבדיקה ולפריסה של עומסי העבודה.
-
In the Google Cloud console, on the project selector page, select or create a Google Cloud project.
Roles required to select or create a project
- Select a project: Selecting a project doesn't require a specific IAM role—you can select any project that you've been granted a role on.
-
Create a project: To create a project, you need the Project Creator role
(
roles/resourcemanager.projectCreator), which contains theresourcemanager.projects.createpermission. Learn how to grant roles.
-
If you're using an existing project for this guide, verify that you have the permissions required to complete this guide. If you created a new project, then you already have the required permissions.
-
Verify that billing is enabled for your Google Cloud project.
Enable the Document AI, Cloud Storage APIs.
Roles required to enable APIs
To enable APIs, you need the Service Usage Admin IAM role (
roles/serviceusage.serviceUsageAdmin), which contains theserviceusage.services.enablepermission. Learn how to grant roles.-
In the Google Cloud console, on the project selector page, select or create a Google Cloud project.
Roles required to select or create a project
- Select a project: Selecting a project doesn't require a specific IAM role—you can select any project that you've been granted a role on.
-
Create a project: To create a project, you need the Project Creator role
(
roles/resourcemanager.projectCreator), which contains theresourcemanager.projects.createpermission. Learn how to grant roles.
-
If you're using an existing project for this guide, verify that you have the permissions required to complete this guide. If you created a new project, then you already have the required permissions.
-
Verify that billing is enabled for your Google Cloud project.
Enable the Document AI, Cloud Storage APIs.
Roles required to enable APIs
To enable APIs, you need the Service Usage Admin IAM role (
roles/serviceusage.serviceUsageAdmin), which contains theserviceusage.services.enablepermission. Learn how to grant roles.
התפקידים הנדרשים
כדי לקבל את ההרשאות שנדרשות לבניית כלי לסיכום מסמכים, צריך לבקש מהאדמין להקצות לכם את תפקיד ה-IAM Document AI Administrator (roles/documentai.admin) בפרויקט.
כדי לקרוא הסבר על מתן תפקידים, ראו איך מנהלים את הגישה ברמת הפרויקט, התיקייה והארגון.
יכול להיות שאפשר לקבל את ההרשאות הנדרשות גם באמצעות תפקידים בהתאמה אישית או תפקידים מוגדרים מראש.
יצירת מעבד סיכום
משתמשים במסוף Google Cloud כדי ליצור מעבד סיכום. מידע נוסף אפשר למצוא במאמר בנושא יצירה וניהול של מעבדים.
במסוף Google Cloud , בקטע Document AI, עוברים לדף Workbench.
בקטע Summarizer (סיכום), לוחצים על
Create processor (יצירת מעבד).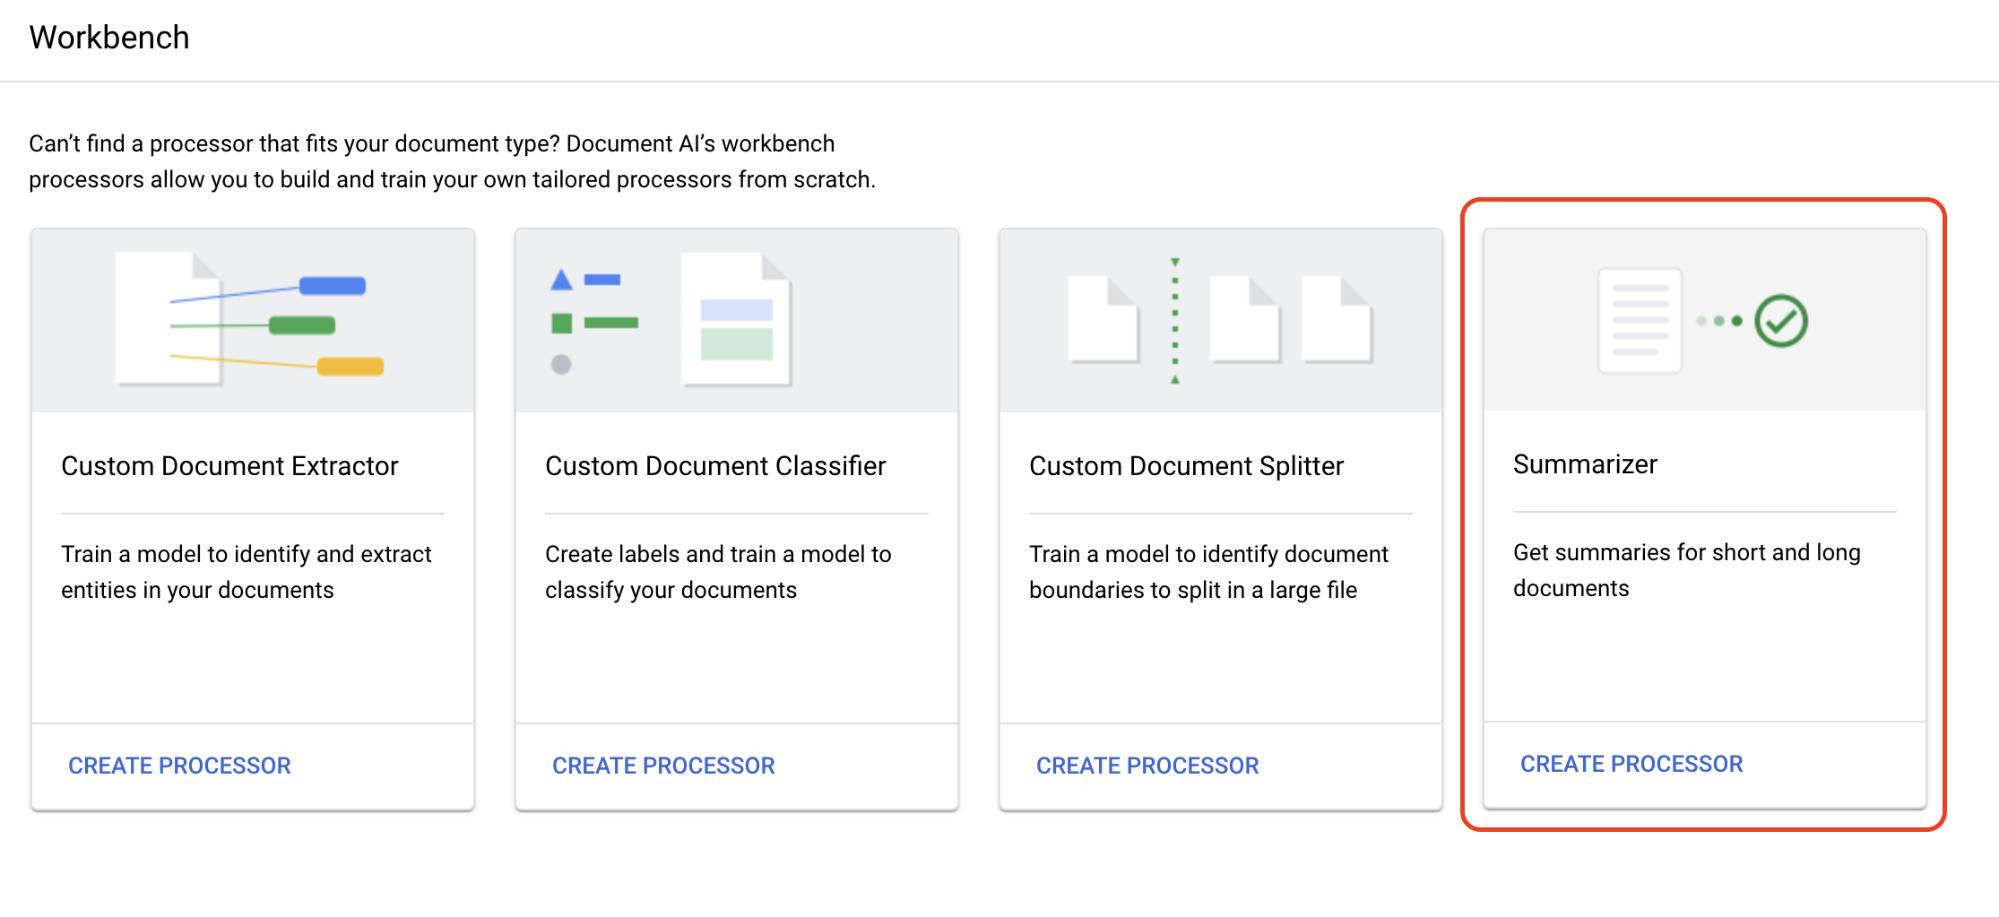
בתפריט Create processor, מזינים שם למעבד, למשל
quickstart-summarizer.בוחרים את האזור שהכי קרוב אליכם.
לוחצים על יצירה.
המעבד נוצר.
מעבד בדיקות
אתם נמצאים בדף סקירה כללית של המעבד שיצרתם.
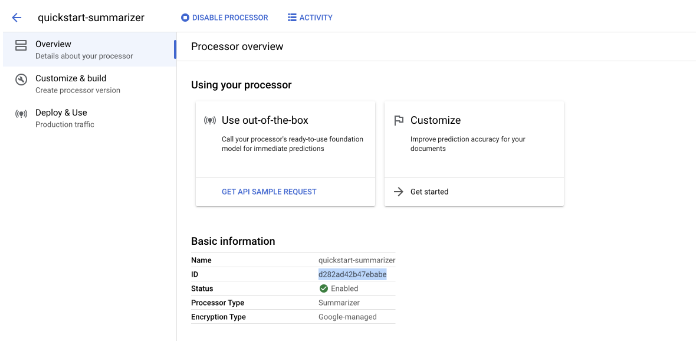
לוחצים על הכרטיסייה
התאמה אישית ויצירה כדי להתנסות במעבד.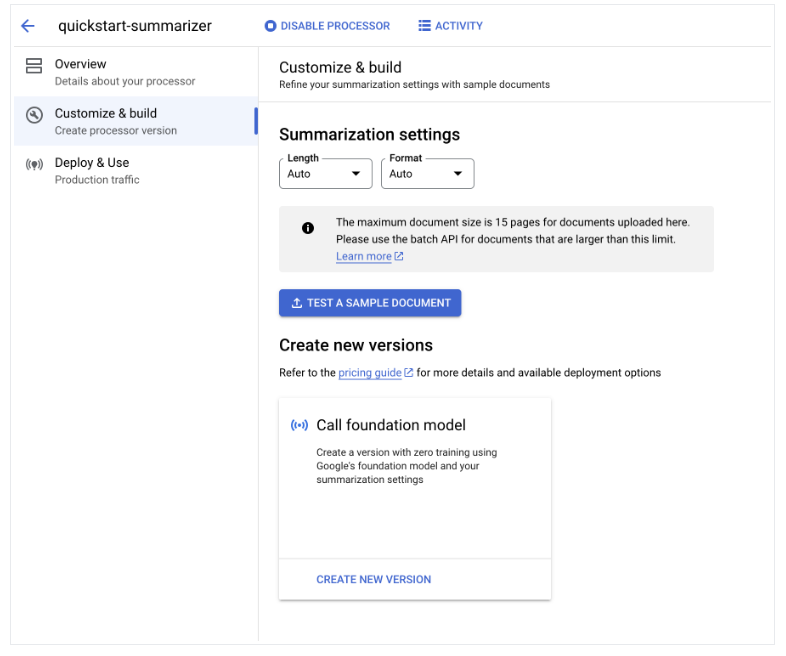
-
זהו קובץ PDF שמכיל את הדף בוויקיפדיה בנושא על-מוליכות.
בוחרים באפשרות
העלאת מסמך בדיקה ובוחרים את המסמך שהורדתם.נפתח הדף סיכום. אתם יכולים לראות את הטקסט שזוהה על ידי ה-OCR ואת סיכום המסמך.
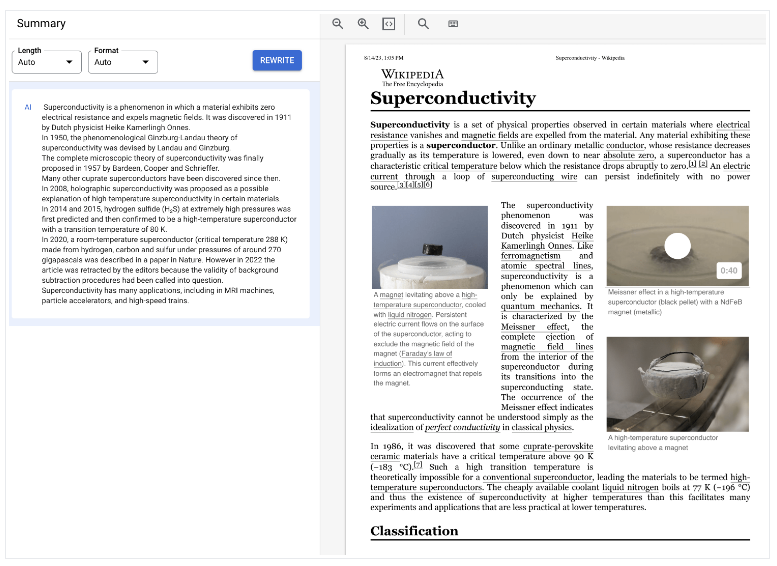
משנים את ההגדרות
אורך ופורמט לבינוני ועם תבליטים בהתאמה, ואז לוחצים על שכתוב ובודקים את התוצאות.חוזרים לדף התאמה אישית ובנייה.
פריסת גרסת מעבד
אם אתם רוצים להשתמש בהגדרות סיכום ספציפיות כשאתם מעבדים מסמכים באמצעות ה-API, אתם צריכים ליצור גרסת מעבד עם ההגדרות האלה.
הגדרות הסיכום מוגדרות לערכים האחרונים שהשתמשתם בהם בדף הקודם.לוחצים על
יצירת גרסה חדשה כדי ליצור גרסה של המעבד עם הגדרות הסיכום שצוינו.מזינים שם לגרסת המעבד, כמו
quickstart-moderate-bulleted, ולוחצים על יצירת גרסה.עוברים לכרטיסייה
פריסה ושימוש כדי לראות את סטטוס הפריסה. הפריסה נמשכת כמה דקות.אחרי פריסת הגרסה, אפשר להגדיר אותה כ
גרסת ברירת המחדל , או לספק את מזהה הגרסה כשמעבדים מסמכים באמצעות ה-API.כדי להשתמש ב-Document AI API:
- כדי להשתמש בעיבוד אונליין ובאצווה, פועלים לפי דוגמאות הקוד במאמר שליחת בקשת עיבוד.
- במאמר Quotas and limits מפורט מספר הדפים שנתמכים בעיבוד אונליין ובעיבוד ברצף (batch processing).
- כדי לקבל את תשובת הסיכום מהמעבד, פועלים לפי דוגמאות הקוד שבקטע טיפול בתשובת העיבוד.
- כדי להשתמש בעיבוד אונליין ובאצווה, פועלים לפי דוגמאות הקוד במאמר שליחת בקשת עיבוד.
השתמשת בהצלחה ב-Document AI כדי לחלץ טקסט ממסמך ולסכם אותו.
הסרת המשאבים
כדי לא לצבור חיובים לחשבון Google Cloud על המשאבים שבהם השתמשתם בדף הזה, פועלים לפי השלבים הבאים:
כדי להימנע מחיובים מיותרים Google Cloud , אפשר להשתמש ב-Google Cloud console כדי למחוק את המעבד ולמחוק את הפרויקט אם אין בהם צורך.