
This document provides a guide on managing Spanner Graph schemas visually in the Spanner Studio. Visual modeling simplifies graph design by enabling you to map nodes and edges through an intuitive interface instead of creating manual DDL statements. This feature makes it easier to design, understand, and collaborate with others. Additionally, this approach automatically applies Spanner Graph schema best practices, ensuring it is optimized from the start.
Spanner Graph schemas can also be created and edited with DDL. For more information about property graph schemas, see the Spanner Graph schema overview. If you encounter errors when you create a property graph schema, see Troubleshoot Spanner Graph.
Create a graph
To get started, navigate to Spanner Studio and click Create graph on the homepage. The graph modeling tool provides the flexibility to build your graph in several ways:
From scratch: design nodes and edges entirely through the visual interface. Spanner auto-generates the necessary DDLs and performance-optimizing schema objects.
From existing tables: map your current relational tables directly into a graph model, provided they have established connections to one another.
A hybrid approach: model some elements from scratch while mapping others from your existing tables.
Model nodes
To add a node to the graph follow these steps:
From scratch
When you create a new node, Spanner automatically generates a database table for it. As you define the node's properties and keys, Spanner configures the columns and primary keys for the table.
- Open the graph modeling canvas in Spanner Studio.
- Add a node to the graph and select New as its data source.
- Assign a name to the node. The table that is created for this node is named according to this value.
- Assign a label to the node. By default, this label matches the node's name, but can be changed.
- Define the properties associated with the label, including its names and data types. Select Is element key for at least one property to designate it as a key. Select Is not null to disallow null values.
From an existing table
When you map a node to an existing table, Spanner uses the table's schema as a foundation. Its label, properties, and keys are automatically inherited from the table, but can be overridden.
- Open the graph modeling canvas in Spanner Studio.
- Add a node to the graph and select Existing data source as its data source.
- Assign a label to the node. By default, this label matches the node's name, but can be changed.
- Define the properties associated with the label. Spanner
maps the table's columns to properties and its primary keys to element
keys. You can customize this setup by doing any of the following:
- Create new properties: add new properties, which causes Spanner to automatically create the underlying columns in your table.
- Drop properties: remove any mapped columns you don't need for this node.
Model edges
To add an edge to the graph follow these steps:
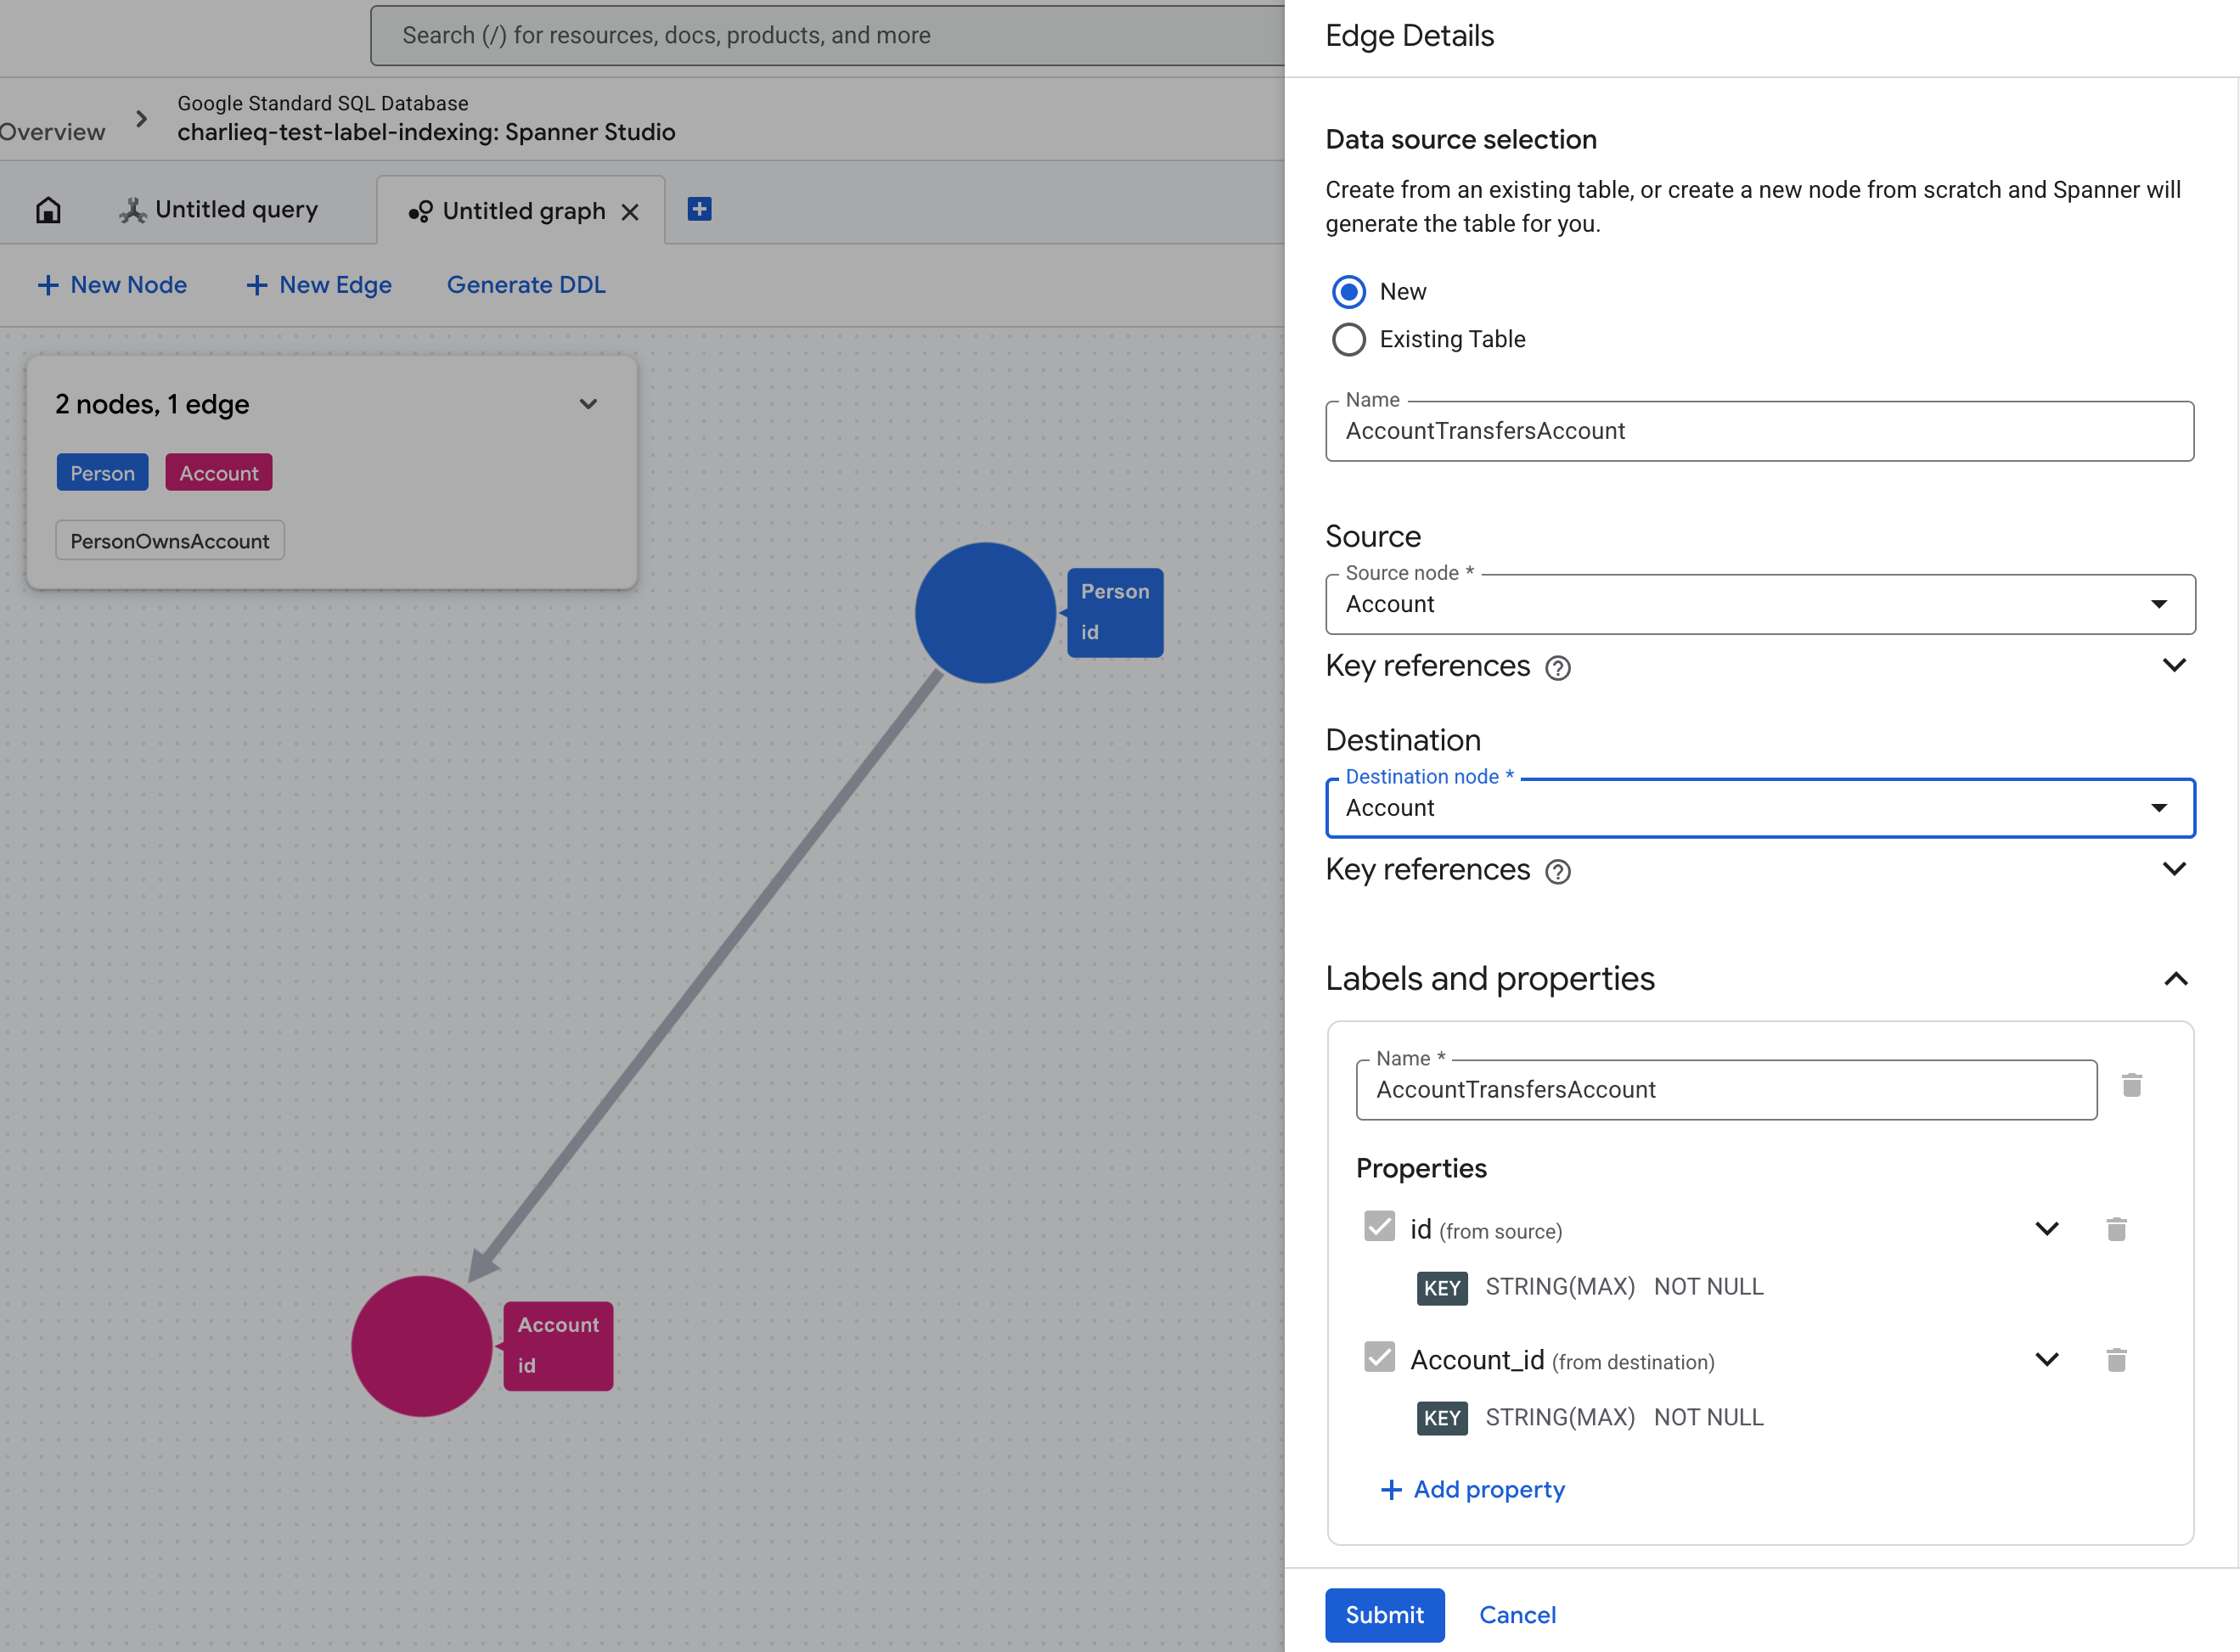
From scratch
When you create a new edge from scratch, the underlying table is created automatically. As you define the source and destination nodes, Spanner configures the necessary primary keys and referencing columns in the background.
Open the graph modeling canvas in Spanner Studio.
Add an edge to the graph and select New as its data source. Input the edge name.
Select the source and destination nodes. Spanner generates the properties needed to identify the source and destination element keys, using them as the edge's default element keys.
By default, only a single edge can exist between two specific nodes because Spanner uses the source and destination node element keys to uniquely identify each edge. If you need multiple edges between the same two nodes (a common real-world use case), define an additional property and select Is element key to keep each edge unique.
Assign a label to the edge. By default, this matches the edge's name.
Define any additional properties for the edge.
When you finalize the edge, Spanner will automatically generate the DDL statements necessary to optimize your edge traversals. For more details, see Review and generate DDL.
From an existing table
When you map an edge to an existing table, Spanner uses the table's schema as a foundation. Its label, properties, and keys are automatically inherited from the table, but you can override them or add new properties.
Open the graph modeling canvas in Spanner Studio.
Add an edge to the graph and select Existing table as its data source.
Selects the source and destination nodes. Define source and destination references columns.
Assign a label to the edge. By default, this matches the edge's input table name.
Define the properties associated with the label. Spanner automatically maps the table's columns to properties and its primary keys to edge element keys. You can modify this setup in the following ways:
- Create new properties: Add new properties, and Spanner will create the underlying columns in your table.
- Drop properties: Remove any mapped columns you don't need for this edge.
For edges created from existing tables, Spanner does not generate DDL statements to optimize edge traversals. Refer to the schema best practice to apply optimizations manually.
Modify a graph
You can load an existing property graph into Spanner Studio to update its structure.
- In the object explorer, find the graph you want to edit and choose View/modify visually from the More options menu.
- Add new nodes or edges from scratch or mapped from existing tables.
- Update the properties of existing nodes and edges. You can use available columns from the underlying tables, or add new properties and the corresponding columns are automatically added to the underlying table.
- Remove nodes or edges from the graph definition.
Review and generate DDL
When your modeling is complete, Spanner generates the following DDL statements based on your model.
CREATE OR REPLACE PROPERTY GRAPH: creates or updates the graph definition.CREATE TABLE: creates the underlying tables for any nodes or edges built from scratch.ALTER TABLE ADD COLUMN: adds new property columns to nodes or edges mapped from existing tables.ALTER TABLE ADD CONSTRAINT: creates foreign key constraints to optimize forward edge traversal.CREATE INDEX: creates reverse edge indexes to optimize reverse edge traversal.
Commit the graph changes by following these steps:
- Press the Generate DDL button to generate the schema. The necessary DDL statements described previously are created.
- Review the generated DDL statements in the Spanner Studio editor. The statements are presented in the correct order for execution and include comments explaining each schema object. You can edit any statements before proceeding.
- Execute the statements to commit the changes to your database.
Limitations
- Additive changes only: for safety the tool does not generate
DROP TABLEorDROP COLUMNstatements. Removing a node, edge, or property only updates thePROPERTY GRAPHdefinition. It does not drop the underlying tables and columns. - Some unsupported schema objects: this tool does not automatically generate all possible schema objects, column data types, or their qualifiers. However, you can manually edit the generated DDL statements in the editor before committing them.
- No support for saving drafts: when you model a graph, the progress is not saved if you close the page.
- No support for schemaless data: this tool only generates graphs with formal structure. If your use case requires schemaless data, you can use this schema example as a foundation to create your schemaless data graph.
- No support for views and named schema tables: you cannot select database views or named schema tables as a data source when mapping nodes and edges to existing data sources.
- No mapped edge constraints or indexes: the tool does not generate foreign key constraints or reverse edge indexes for edges mapped from existing tables. See best practices for manual creation.
What's next
- Manage Spanner Graph data.
- Learn about Spanner Graph queries.
- Learn best practices for tuning Spanner Graph queries.