
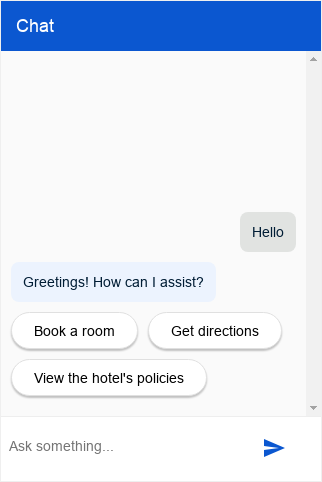
此集成服务为您的代理提供可自定义的聊天对话框,可以嵌入到您的网站中。
设置
此集成可允许经过身份验证或未经身份验证的最终用户代理查询访问。
未经身份验证的设置
如需为您的 Dialogflow CX Messenger 代理设置未经身份验证的访问权限,请执行以下操作:
- 前往 Dialogflow CX 控制台。
- 选择您的 Google Cloud 项目。
- 选择您的代理。
- 选择管理标签页。
- 点击左侧边栏菜单中的集成。
- 点击 Dialogflow CX Messenger 中的连接。
- 此时将打开一个配置对话框。
- 如果之前已为此客服人员设置集成,您将看到可嵌入的 HTML 代码。无论您想要进行身份验证还是不进行身份验证,都请点击对话框底部的停用...按钮,以便在下一步中重新配置设置。
- 选择环境。
- 选择 Unauthenticated API。
- 选择一种样式。
- 可以选择限制网域访问权限。
- 点击启用未经身份验证的 API。
- 该对话框将显示可嵌入到您网站中的 HTML 代码。 复制此代码。
- 点击完成。
经过身份验证的设置
如需为 Dialogflow CX Messenger 代理设置经过身份验证的访问权限,请执行以下操作:
- 前往 Dialogflow CX 控制台。
- 选择您的 Google Cloud 项目。
- 选择您的代理。
- 选择管理标签页。
- 点击左侧边栏菜单中的集成。
- 点击 Dialogflow CX Messenger 中的连接。
- 此时将打开一个配置对话框。
- 如果之前已为此客服人员设置集成,您将看到可嵌入的 HTML 代码。无论您想要进行身份验证还是不进行身份验证,都请点击对话框底部的停用...按钮,以便在下一步中重新配置设置。
- 选择环境。
- 选择 Authorized API。
- 选择一种样式。
- 可以选择限制网域访问权限。
- 点击启用授权的 API。
- 该对话框将显示可嵌入到您网站中的 HTML 代码。 复制此代码。
- 点击完成。
- 设置 OAuth 客户端:
- 为组织创建 OAuth 权限请求页面。
添加
https://www.googleapis.com/auth/cloud-platform作为必需范围。 - 创建 OAuth 2.0 客户端 ID。
在已获授权的 JavaScript 来源下,指定允许托管和查询您的代理的 HTTP 来源。
例如
https://your-company.com。 - 向最终用户授予查询您的代理的权限。 将每个最终用户或一个群组添加为主账号,并为其分配 Dialogflow API Client 和 Service Usage Consumer 角色。
- 为组织创建 OAuth 权限请求页面。
添加
嵌入
将您之前复制的嵌入代码粘贴到您网站上的网页中。<script> 和 <df-messenger> HTML 元素应该位于页面的 <body> 元素中。
如果您使用的是经过身份验证的集成,请将 <df-messenger> 的 oauth-client-id 属性设置为您的 OAuth 客户端 ID。如果您想使用最终用户的身份进行工具身份验证,请使用您喜欢的任何名称设置 access-token-name 属性。然后,使用值为 $session.params.ACCESS_TOKEN_NAME 的不记名令牌进行工具身份验证。
更新任何其他需要更新的属性。
如需支持响应式布局,请在 <head> 元素中添加以下内容:
<meta name="viewport" content="width=device-width, initial-scale=1">
自定义
您可以应用许多 HTML 自定义设置和 CSS 自定义设置来影响聊天对话框的外观和行为。
JavaScript
您可以使用许多 JavaScript 事件和 JavaScript 函数与聊天对话框进行互动。
示例
以下示例展示了 HTML 自定义、CSS 自定义和 JavaScript 事件处理:
<!DOCTYPE html>
<html>
<head>
  <meta charset="utf-8">
  <meta http-equiv="Cache-Control" content="no-cache, no-store, must-revalidate" />
  <meta http-equiv="Pragma" content="no-cache" />
  <meta http-equiv="Expires" content="0" />
  <title>My chat</title>
  <style>
    df-messenger {
      /*
       * Customize as required. df-messenger will fill the
       * space that is provided.
      */
      position: absolute;
      right: 0;
      top: 0;
      bottom: 0;
      width: 320px;
    }
  </style>
  <script src="https://www.gstatic.com/dialogflow-console/fast/df-messenger/prod/v1/df-messenger.js"></script>
</head>
<body>
<df-messenger
    location="global" <!-- TODO: update agent location as needed -->
    project-id="my-project-id" <!-- TODO: update project ID -->
    agent-id="my-agent-id" <!-- TODO: update agent ID -->
    language-code="en" <!-- TODO: update agent language as needed -->
>
  <df-messenger-chat
      chat-title="Agent Name" <!-- TODO: update dialog title as needed -->
  ></df-messenger-chat>
</df-messenger>

<script>
  // An example of handling events: Navigate to the first suggested URL.
  document.addEventListener('df-url-suggested', (event) => {
    if (Array.isArray(event.detail.suggestedUrls) &&
      event.detail.suggestedUrls.length) {
      window.location.href = event.detail.suggestedUrls[0];
  }
});
</script>
</body>
</html>
履行情况
您可以使用多种 fulfillment 响应类型来生成代理回答。
回答反馈
如果启用了回答反馈,聊天对话框默认会在界面中添加“我喜欢” 和“不喜欢” 按钮。 在对话期间,最终用户可以点击这些按钮来提供有关代理回答的反馈。如果用户选择“不喜欢”,可以选择提供负面反馈的原因。
自定义反馈组件
如需指定自定义反馈元素,必须在网站上定义新的自定义元素。如需提交反馈,该元素必须发出 df-custom-submit-feedback-clicked 事件。所含的 detail 字段必须是字符串。
class CustomFeedbackElement extends HTMLElement {
  constructor() {
    super();
    // It is not strictly required but recommended to contain the custom
    // element in a shadow root.
    this.renderRoot = this.attachShadow({mode: 'open'});
  }

  // Web component Lifecycle method.
  connectedCallback() {
    const wrapper = document.createElement('div');

    // Build the component as required.
    const button = document.createElement('button');
    button.innerText = 'Submit';
    button.addEventListener('click', () => {
      this._onSubmitClick();
    });
    wrapper.appendChild(button);

    this.renderRoot.appendChild(wrapper);
  }

  // Called when Submit button is clicked.
  _onSubmitClick() {
    const event = new CustomEvent("df-custom-submit-feedback-clicked", {
      // `detail` may be any string,
      // this will be sent to the backend to be stored.
      detail: JSON.stringify({
        "usefulness": 2,
        "accuracy": 3,
      }),
      // Required to propagate up the DOM tree
      // https://developer.mozilla.org/en-US/docs/Web/API/Event/bubbles
      bubbles: true,
      // Required to propagate across ShadowDOM
      // https://developer.mozilla.org/en-US/docs/Web/API/Event/composed
      composed: true,
   });
   this.dispatchEvent(event);
  }
}

(function() {
  // Registers the element. This name must be "df-external-custom-feedback".
  customElements.define('df-external-custom-feedback', CustomFeedbackElement);
})();
调试
如需在本地使用 Dialogflow CX Messenger 测试代理,请执行以下操作:
- 按上述说明将 Dialogflow CX Messenger 元素嵌入页面中。
- 使用特定端口启动该页面的本地 HTTP 服务器。
- 通过
http://localhost:port_number访问该页面。