
Anomaly detection helps you manage unexpected costs across your billing account's projects. These anomalies are spikes or deviations in usage costs that differ from your expected spend, when compared to historical spending patterns. Usage costs are calculated using the on-demand rates that are applicable to your billing account. On-demand rates include publicly available list prices and any contracted, negotiated, or discounted pricing that's available for your Cloud Billing account. Usage cost totals are gross costs that include spend-based CUD discounts, but exclude legacy spend-based CUD credits, resource-based CUD credits and other savings, such as promotional credits, and sustained use discounts.
The Anomalies dashboard displays all cost anomalies associated with your projects, within the linked billing account. You can use the Anomalies dashboard to do the following:
- Investigate the root causes of anomalies.
- Customize your view by setting thresholds for cost impact amount and percent of deviation.
- Manage automated alerts and notifications for detected anomalies.
- Provide feedback on detected anomalies to improve the tool's accuracy.
For reseller accounts and subaccounts, this feature is only available if you enable project-based cost visibility. Resellers can only view anomalies for their projects. To view anomalies for a subaccount, you must switch to the subaccount. To enable project-based cost visibility, contact Cloud Billing Support.
Permissions required for this task
You can view and manage anomalies for all projects on a Cloud Billing account or for individual projects. To manage anomalies for all projects on a Cloud Billing account, you need permissions on the billing account. To view anomalies for a specific project, you need billing-specific permissions on the project.
Full billing account permissions
Cloud Billing account permissions are granted using roles on the billing account. To view the cost anomalies for your Cloud Billing account, including viewing the cost information for all of the Google Cloud projects that are linked to the billing account, you need a role on your Cloud Billing account that includes the following permissions:
billing.accounts.getbilling.accounts.getIamPolicybilling.anomalies.getbilling.anomalies.list
To gain these permissions using a predefined role, ask your administrator to grant you one of the following Cloud Billing IAM roles on your Cloud Billing account:
To set up Pub/Sub notifications for anomalies, you need additional permissions. To gain the necessary permissions using a predefined role, ask your administrator to grant you the following role on the target project that contains the Pub/Sub topics:
Project-scoped billing permissions
Depending on your level of Cloud Billing access for project costs, by using billing-specific permissions on a project, you can view anomalies that are scoped to the projects that you own, one project at a time.
For more information about project-limited permissions for viewing costs and anomalies in Cloud Billing accounts, see project-scoped access to Cloud Billing accounts.
| Access a billing account for multiple Google Cloud projects | Access billing for an individual Google Cloud project |
|---|---|
|
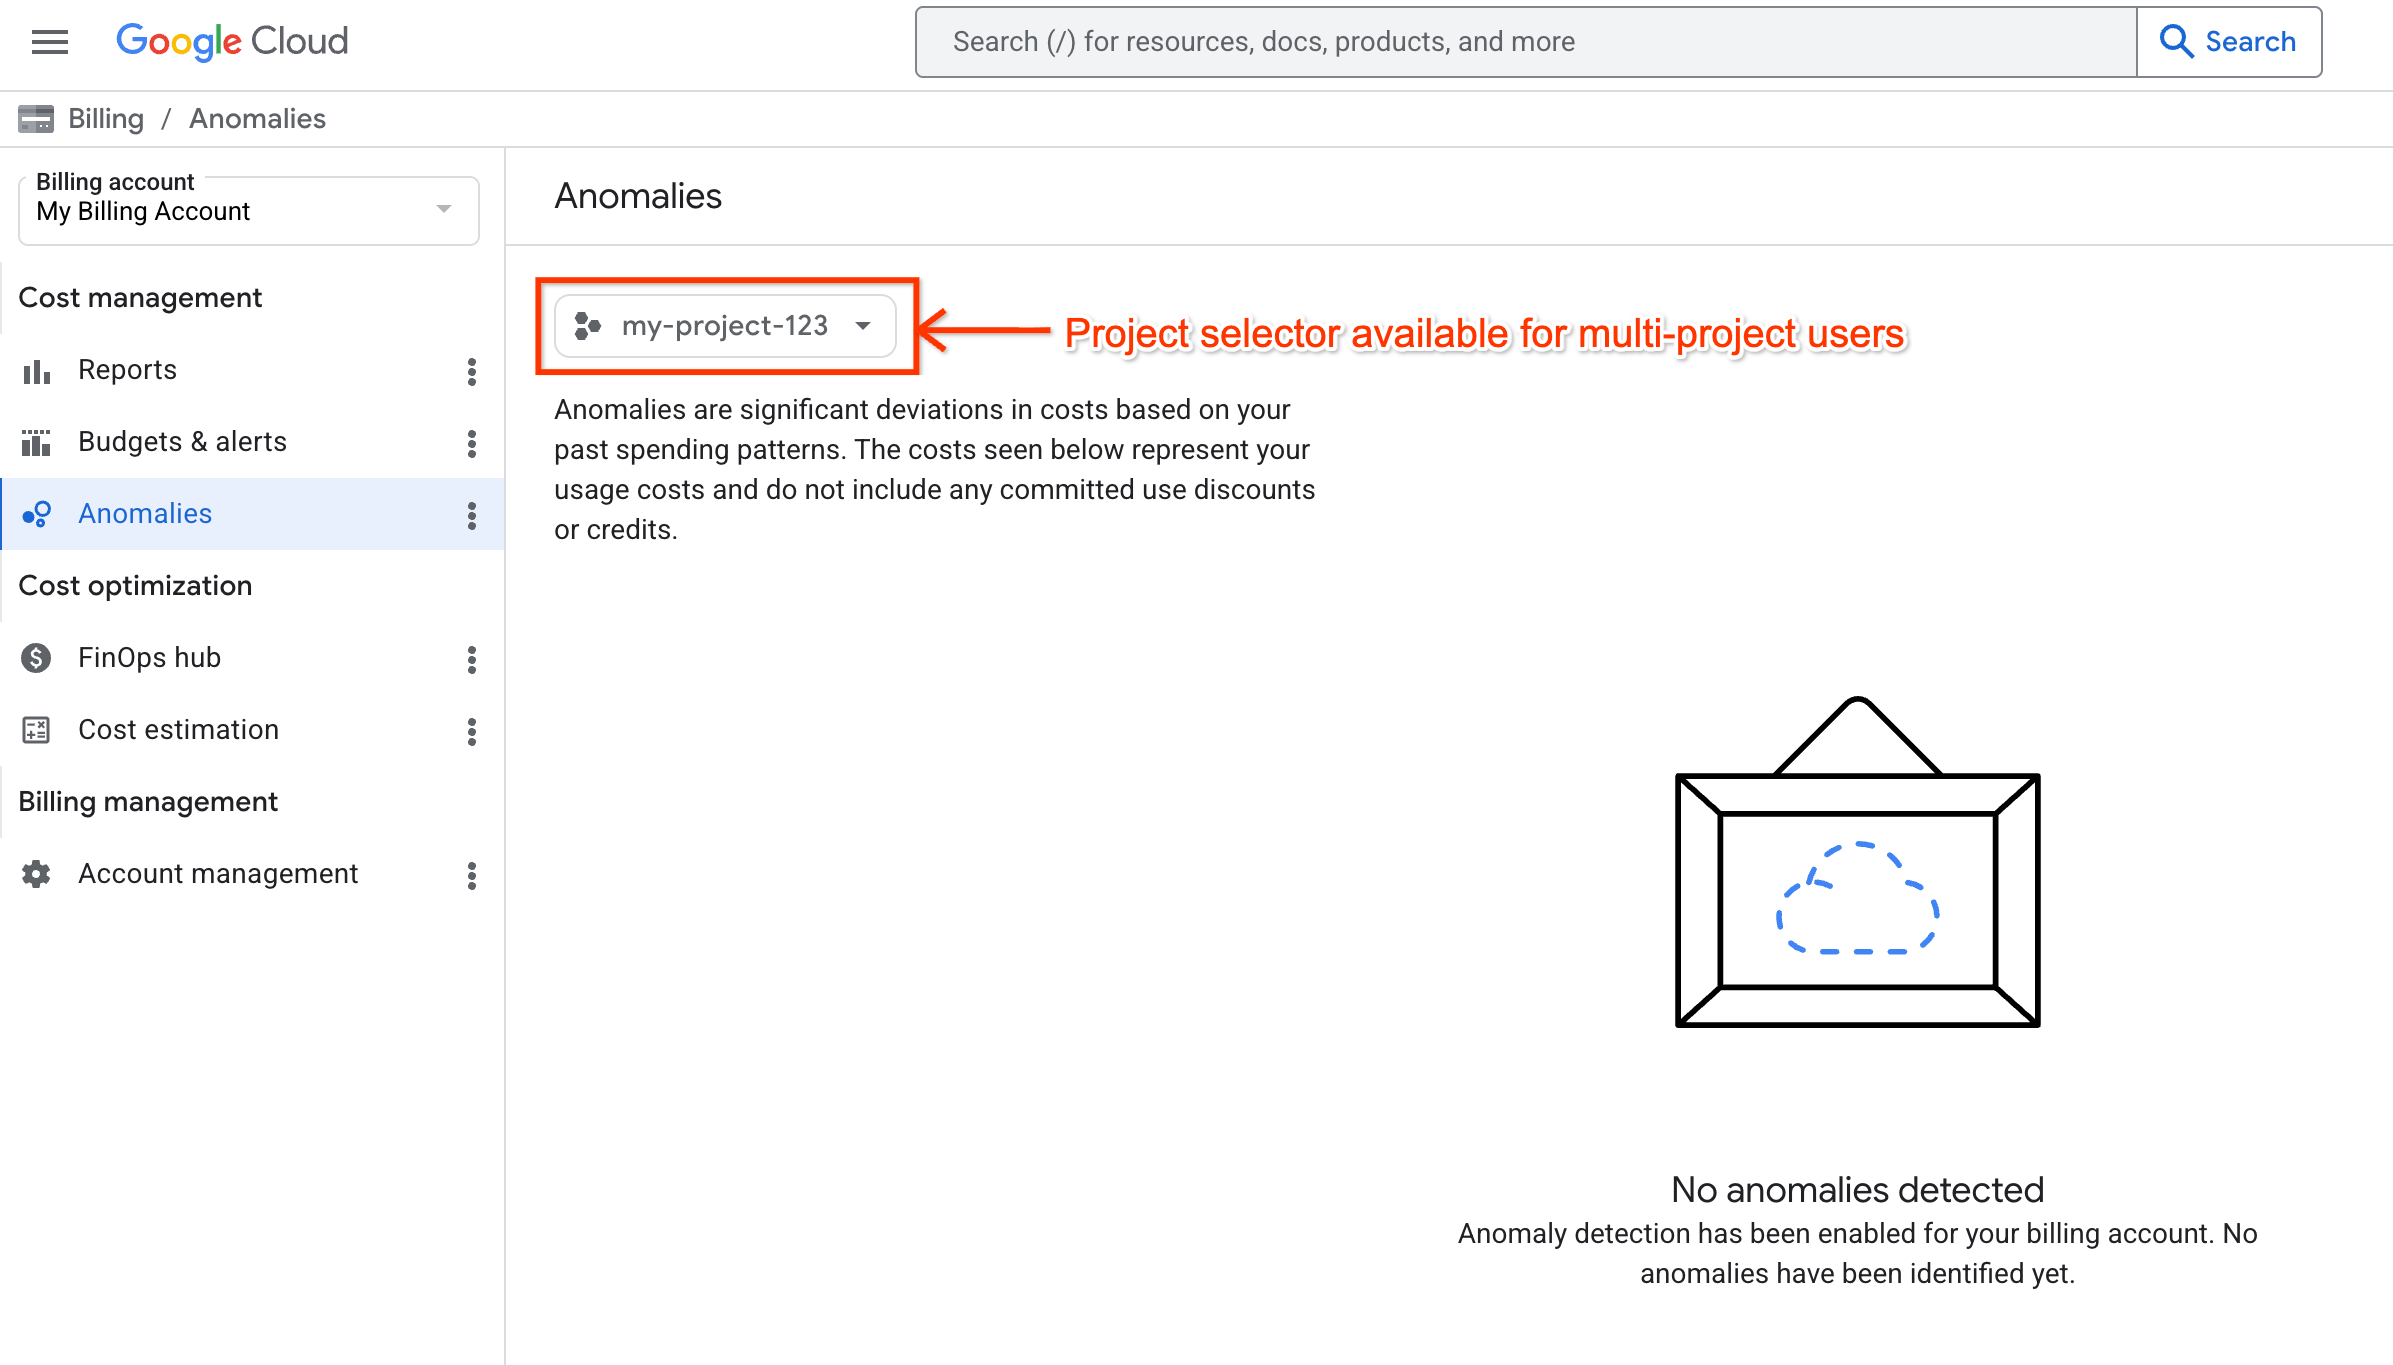
You can view cost anomalies for your authorized Google Cloud projects, one project at a time. When you have multi-project-scoped access to a Cloud Billing account through a combination of project and billing account permissions, on the Anomalies page, you can use a project selector to switch between your billing-authorized projects.
Learn more about the permissions required for multi-project-scoped access to Cloud Billing accounts. |
To access Cloud Billing to view costs anomalies for an individual Google Cloud project, one project at a time, you only need billing-specific permissions on the Google Cloud project.
Learn more about the project permissions required for single-project-scoped access to Cloud Billing accounts. |
|
For more information about Cloud Billing permissions, see: |
For more information about Google Cloud project permissions, see: |
Access the Anomalies dashboard
To view the cost anomalies for your Cloud Billing account or projects, follow the procedure that fits your level of access to Cloud Billing accounts. Cost anomalies for a Cloud Billing account are accessible in the Billing section of the Google Cloud console.
Full billing account permissions
If you have full Cloud Billing account permissions, you can select from a list of billing accounts that you have permissions to access.
In the Google Cloud console, go to your Cloud Billing account.
Go to your Cloud Billing accountAt the prompt, select the Cloud Billing account that you want to view anomalies for.
The Billing Overview page opens for the selected billing account.
- In the Cost management section of the Billing navigation menu,select Anomalies.
When you access cost anomalies with full billing-account-level permissions, you can see anomalies for all of the projects that are linked to the Cloud Billing account.
Project-scoped billing permissions
You can access the tools in Cloud Billing to view cost anomaly information for individual projects, one project at a time.
Depending on your level of Cloud Billing access for project costs, you might have a project selector on the anomalies page that you can use to switch between projects that you want to view.
| View costs in a billing account for multiple Google Cloud projects | View costs for an individual Google Cloud project |
|---|---|
|
When you have project-scoped access to view billing data and cost anomalies, you can see costs anomalies for one project at a time.
|
Important: If you only have project permissions, but don't have any permissions on your project's Cloud Billing account, you'll need to select your project before you navigate to the Billing section.
As a project user accessing the Cloud Billing account using project-level permissions only, you can see costs anomalies for a single project — the project that you selected in the Google Cloud console before you accessed the Billing section. To view cost anomalies for a different project, exit Billing, repeat the steps above to select a project on the Google Cloud console dashboard, and then navigate back to Billing. |
Analyze root causes of anomalies
Each anomaly includes a granular Root cause analysis panel that helps pinpoint the source of the cost spike. To open the panel and view the details of an anomaly, click the anomaly date.
The Root cause analysis panel shows the top services, regions, and SKUs that contributed to the spike in spend. If the anomaly is equally spread across services, regions, or SKUs, you won't see any top contributors in the Root cause analysis panel.
Click any of the links in the Root cause analysis panel to open a Billing Report that's filtered by the project you're viewing, and also by service, region, or SKU, depending on the link you select.
In the Root cause analysis panel, you can also share feedback about the anomaly to help optimize anomaly detection.
Manage anomalies
Billing Account Administrators can set threshold and notification preferences for all anomalies. On the Anomalies page, click Manage anomalies to customize thresholds and notifications.
Manage anomaly thresholds
A cost impact and deviation percentage threshold will automatically be set based on your usage patterns.
To focus on cost anomalies that are significant to you, you can configure a different cost impact and deviation percentage anomaly threshold. The threshold amount filters your view to show only anomalies exceeding a certain cost deviation (for example, $200) and deviation percentage (for example, 20%). If you set up notifications, you will also receive alerts when a cost anomaly crosses the defined threshold values.
The cost impact threshold value is in your billing account's local currency and can only contain positive numeric values, including up to two decimal places. You can't use negative or non-numeric values.
For users with billing-account-level access, the threshold amount automatically
sets a Cost impact and Deviation percentage filter on the
anomalies list, showing only anomalies that cross these thresholds. You
can remove both filters to see all anomalies, but the filter is
reapplied the next time you visit the page.
Users with project-level access can view these detected anomalies set by the Billing Account Administrator for their project. However, only users with the Billing Account Administrator (roles/billing.admin) role can update the notification thresholds.
Manage notifications
On the Manage anomalies page, you can set how you want to be notified about anomalies that go above your cost impact and percent of deviation threshold. You can configure email or Pub/Sub notifications.
By default, Cloud Billing admins will be notified by email for every individual anomaly. This can be changed in the Notifications section on the Manage Anomalies page.
You can change your notification settings at any time. Notification configurations apply to all projects on your billing account. You can't set up notifications for a subset of projects.
Set up email notifications
To set up email notifications, complete the following steps:
- From the Anomalies dashboard, click Manage anomalies.
- If you haven't already, enter an Anomaly threshold value for Cost impact and Deviation %. This amount is the threshold value that triggers notifications.
In the Email notifications section, set the email recipients (Billing admins, Essential contacts, or Project owners) and the frequency of emails for each recipient (every Individual anomaly or a Daily summary).
- For Essential contacts, selecting Individual anomaly sends notifications to the designated Essential Contacts, in the Billing category, for the project.
- For Essential contacts, selecting Daily summary sends notifications to the designated Essential Contacts, in the Billing category, for the organization.
- Project owners can receive notifications only for individual anomalies on projects that they own.
Click Save.
Set up Pub/Sub notifications
To set up Pub/Sub notifications for anomalies, complete the steps in Set up programmatic notifications.
For details about the JSON schema of Pub/Sub notifications for anomalies, see Notification format.
Optimize anomaly detection
The AI-powered anomaly detection algorithm constantly learns and improves, but your feedback helps it adapt faster to your business needs. To provide feedback, complete the following steps:
- In the list of anomalies, click the date of an anomaly to open its Root cause analysis panel.
- For Is this an anomaly?, select one of the following options:
- Yes, it's an unexpected cost increase: Select this option if the anomaly is unexpected and an unintended cost increase.
- Yes, but it's an expected cost increase: Select this option if the anomaly is an expected cost increase to meet your business needs. To help Google's anomaly detection models adapt, you can provide more context around the specific business reason for the anomaly (for example, if you have active migrations underway, are using new Google Cloud resources, or if the cost increase is temporary).
- No, the cost impact is insignificant: Select this option if the anomaly has a cost impact that you don't consider to be significant.
Click Submit feedback.
After you submit your feedback, it's recorded with a timestamp.
To change previously submitted feedback, complete the following steps:
- Open the Root cause analysis panel.
- Change your selection using the provided options.
- Click Submit feedback.
Related topics
- Set up programmatic notifications
- Analyze billing data and cost trends with Reports
- Create, edit, or delete budgets and budget alerts