
This guide walks you through using the Transfer Appliance Web User Interface (Web UI) to configure, manage, and finalize your appliance after it has been attested. The Web UI provides a visual alternative to the CLI for most common tasks.
Prerequisites:
- Appliance Model: The Web UI is supported on TA300 appliances running Security Model V2.
- Direct Connection: You must be directly connected to the appliance's management port.
- Appliance Attestation: Ensure you have successfully completed the Transfer Appliance Attestation Application using the CLI. The Web UI is only accessible after attestation.
Step 1: Access the Web UI
To access the Web UI, follow the instructions in Connect to Transfer Appliance to establish an SSH tunnel with port forwarding and open the Web UI in your browser.
Step 2: Initial Appliance Configuration
You will land on the Initial Landing/Config Page.
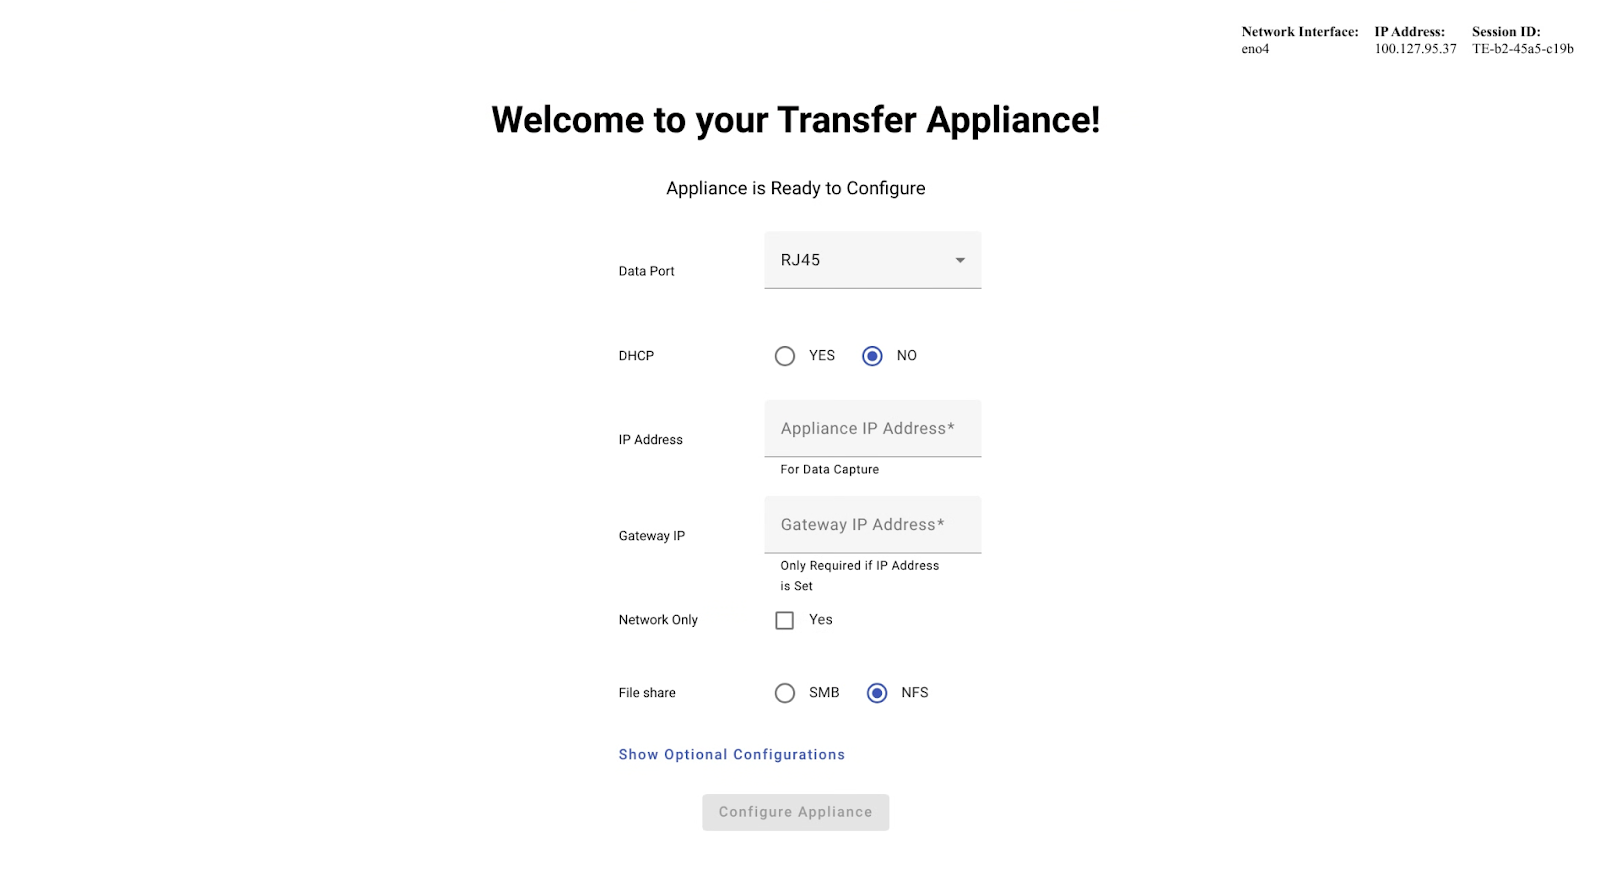
Fill out the form to configure the network:
- Select the Data Port type (RJ45 or QSFP).
- Choose if you want to use DHCP (Yes/No).
- If you selected No for DHCP, enter the static IP Address and Gateway IP.
- Decide if this is a Network Only setup. If No, select the File Share type (NFS or SMB).
- You can expand "Optional Configurations" to set Authorized Hosts, DNS Servers, etc.
Click the "Configure Appliance" button.
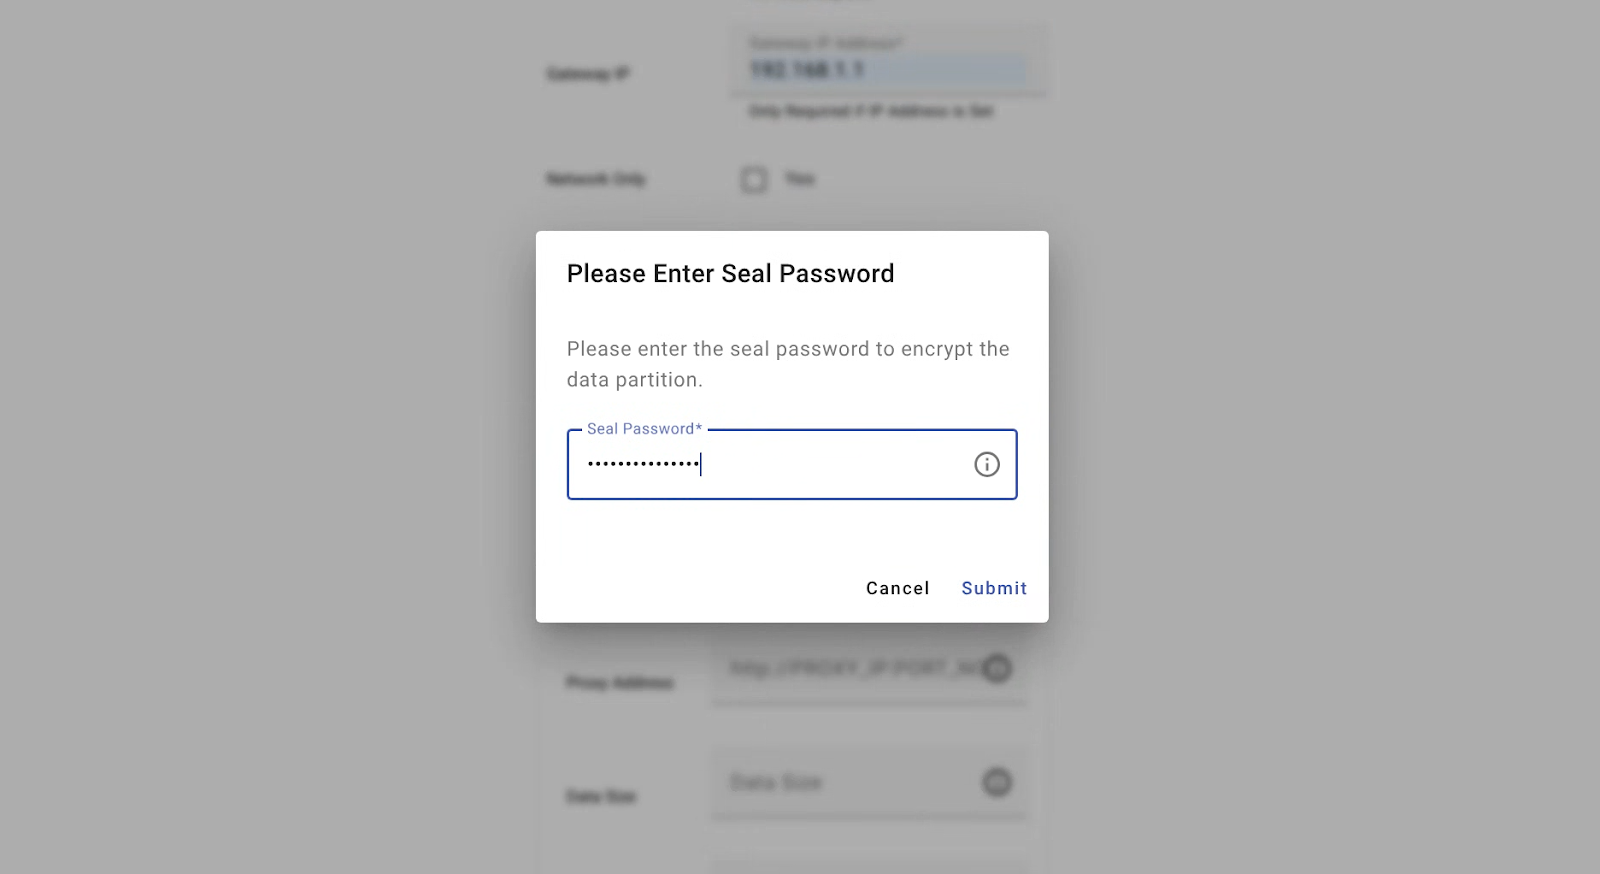
A dialog will appear prompting you to enter the Seal Password. Enter the password and submit.
Step 3: Review Configuration & Manage Appliance
Upon successful configuration, you will be directed to the Configuration Details Page.
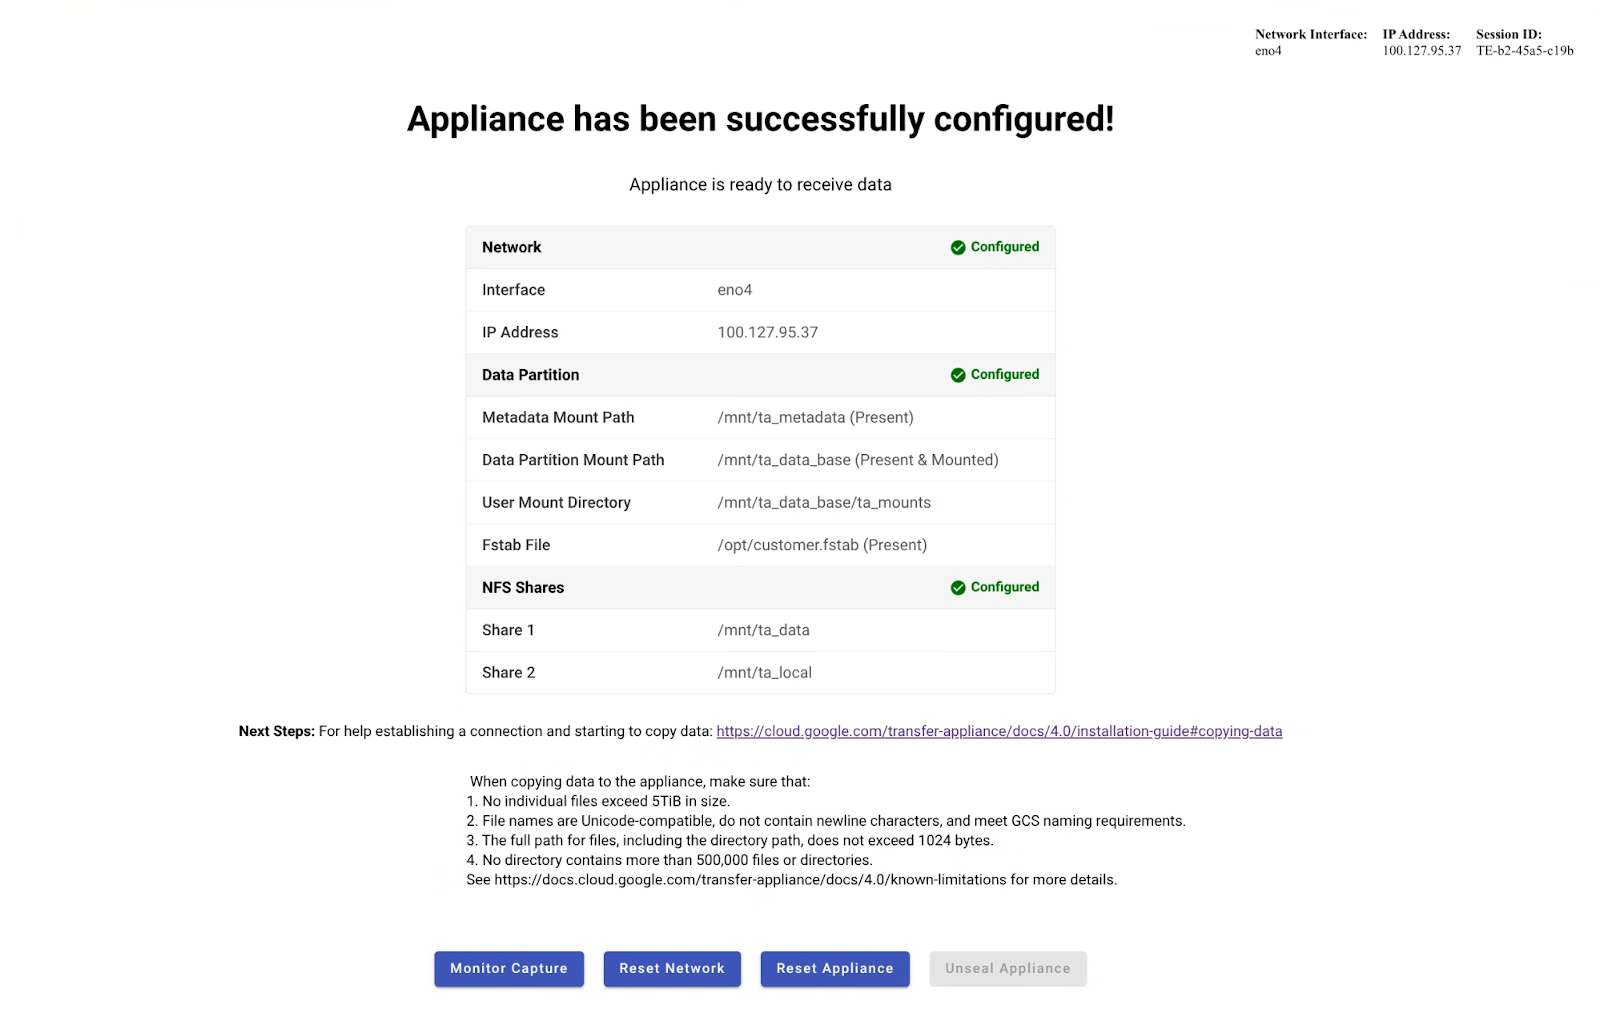
This page displays the configuration you just applied.
From here, you can choose several actions:
- Unseal Appliance: Click this to unlock the data partition for copying data. You'll be prompted for the Seal Password again. The button will change to "Seal Appliance".
- Manage/Finalize: Click this to proceed to the Appliance Management page for other tasks.
- Reset Network: If you need to change network settings.
- Reset Appliance: Returns the appliance to its initial state. Any data copied to the appliance is erased, and any applied configurations are removed. The appliance must be reconfigured after reset (use with caution).
Step 4: Appliance Management & Finalization
Clicking "Manage/Finalize" takes you to the Appliance Management Page.
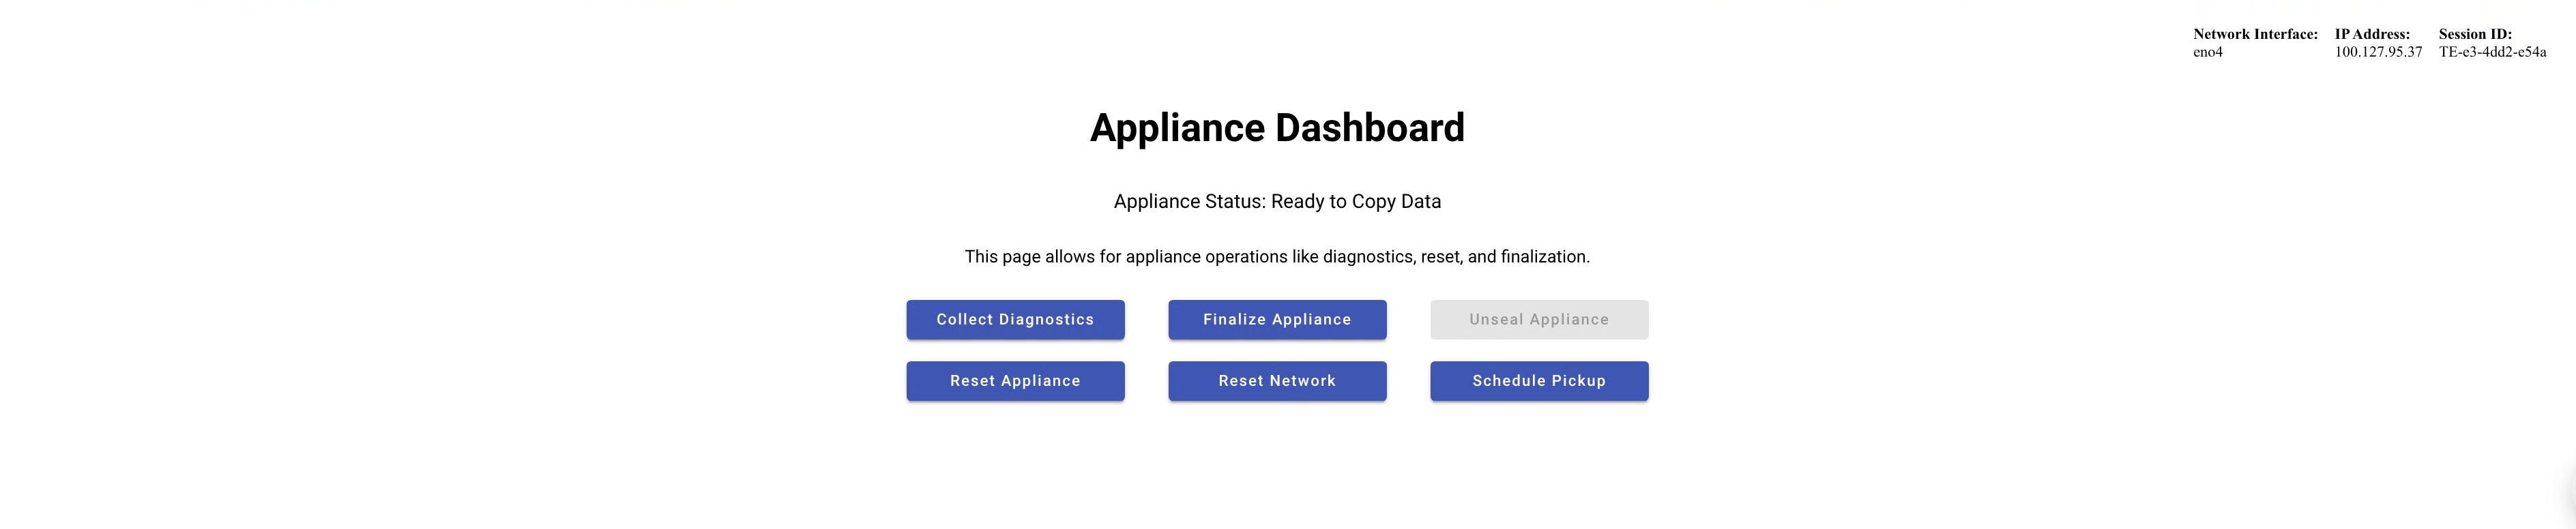
On this page, you can:
- Seal Appliance: If you previously unsealed it.
- Collect Diagnostics: Download diagnostic logs.
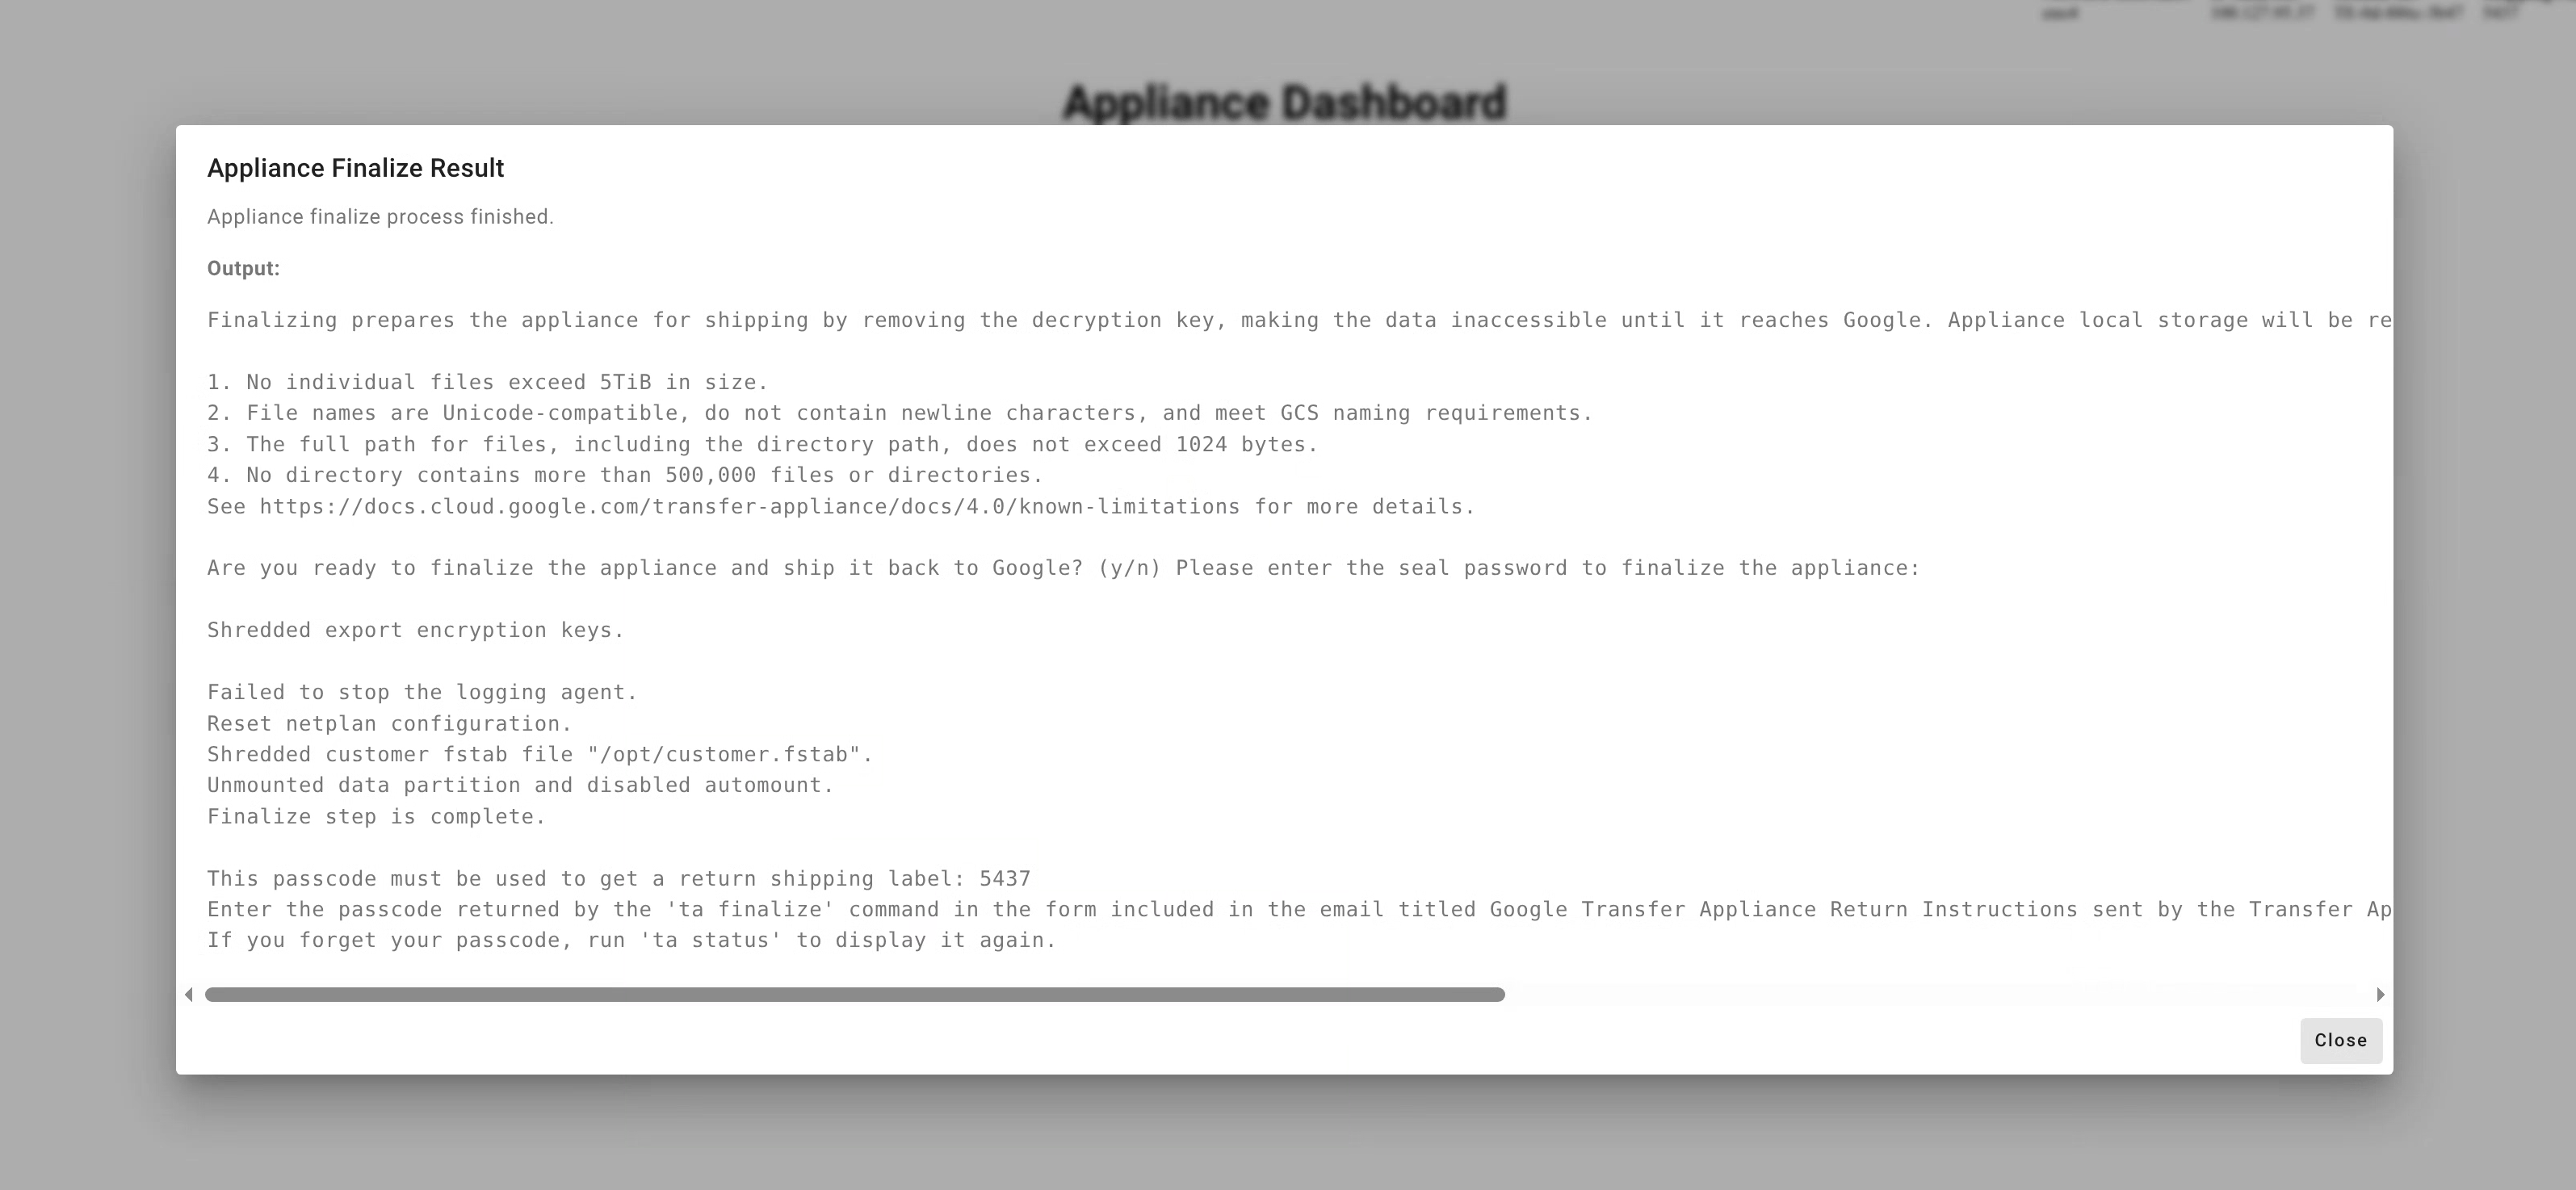
Finalize Appliance: When you are ready to return the appliance. Click this, enter the Seal Password when prompted. The system will display a Shipping Passcode. Note this down.
Schedule Pick Up: Click this to go to the Google Cloud console to arrange the return.