
Create and configure an MCP connector
The page describes how to create and configure an MCP connector in Integration Connectors. For more information about the MCP connector, see MCP connector overview.
Before you begin
Before using the MCP connector, complete the following tasks:
- In your Google Cloud project:
- Ensure that network connectivity is set up. For information about network patterns, see Network connectivity.
- Grant the roles/connectors.admin IAM role to the user configuring the connector.
- Grant the following IAM roles to the service account that you want to use for the connector:
roles/secretmanager.viewerroles/secretmanager.secretAccessor
A service account is a special type of Google account intended to represent a non-human user that needs to authenticate and be authorized to access data in Google APIs. If you don't have a service account, you must create a service account. The connector and the service account must belong to the same project. For more information, see Creating a service account.
- Enable the following services:
secretmanager.googleapis.com(Secret Manager API)connectors.googleapis.com(Connectors API)
To understand how to enable services, see Enabling services. If these services or permissions have not been enabled for your project previously, you are prompted to enable them when configuring the connector.
Configure the connector
A connection is specific to a data source. It means that if you have many data sources, you must create a separate connection for each data source. To create a connection, do the following:
- In the Google Cloud console, go to the Integration Connectors > Connections page.
- Select or create a project to use for the connector.
- Click Create Connection.
The Create Connection page appears.
-
In the Location section:
- Click Region and then select a location for the connection.
For the list of all the supported regions, see Locations.
- Click Next.
- Click Region and then select a location for the connection.
- In the Connection Details section, provide the following details:
- Connector: Select MCP (Preview).
- Connector version: Select the version of the connector to use.
- Connection Name: Enter a name for the connection.
- Description: (Optional) Enter a description for the connection.
- Optionally, enable Cloud logging,
and then select a log level. By default, the log level is set to
Error. - Service Account: Select the service account to use for the connection. Ensure that the service account has the relevant IAM roles and permissions.
- MCP Endpoint: (Optional) Leave empty to use the default endpoint -
/mcp. If the endpoint is same as the host address, then set this to/. Only applicable for the Streamable HTTP Server. - Connection node settings: (Optional) Configure the connection node settings.
- Minimum number of nodes: Enter the minimum number of connection nodes.
- Maximum number of nodes: Enter the maximum number of connection nodes.
A node is a unit (or replica) of a connection that processes transactions. More nodes process more transactions for a connection, and fewer nodes process fewer transactions. To understand how nodes affect connector pricing, see Pricing for connection nodes. If you don't enter any values, by default, the minimum number of nodes is 2 (for better availability), and the maximum number of nodes is 50.
- Click Next.
- In the Destinations section, enter details of the remote host (backend system) to connect to.
-
Destination Type: Select the destination type.
- To specify the destination hostname or IP address, select Host address and enter the address in the Host 1 field.
- To establish a private connection, select Host Address and add the endpoint attachment created for the SAP Gateway using the HTTPS protocol.
https://your-service.example.com/sse(No Authentication)https://your-oauth-provider.example.com/sse(OAuth 2.0 - Authorization code)https://your-api-key-service.example.com/sse(API Key Authentication)
If you want to establish a public connection to your backend systems with additional security, you can consider configuring static outbound IP addresses for your connections, and then configure your firewall rules to allowlist only the specific static IP addresses.
Examples of host addresses to use:
-
Destination Type: Select the destination type.
- To enter additional destinations, click +Add Destination.
- Click Next.
No Authentication
This type is used for hosts without specific authentication requirements.
OAuth 2.0 - Authorization code
This type is used for hosts that support the OAuth 2.0 Authorization Code grant type.
- Client ID: Enter the Client ID provided by your external application.
- Scopes: Enter the required permission scopes.
- Client secret: Choose the Secret Manager secret containing the client secret.
- Secret version: Select the Secret Manager secret version for the client secret.
- Enable PKCE: Optional: Enable PKCE for the auth code flow. Enable only if server supports PKCE.
- Authorization URL: Enter the URL for authorization.
- Access Token URL: Enter the URL to obtain the access token.
For the Authorization code authentication, after creating the connection,
you must complete a few additional steps to complete the authentication configuration. For more
information, see Additional steps after connection creation.
Additional steps after connection creation
If you selected OAuth 2.0 - Authorization code for authentication, you must complete the following additional steps after creating the connection:
- In the Connections page, locate the newly created connection.
- The status for the new connection is Authorization required.
- Click Authorization required.
The Edit authorization pane appears.
- Copy the Redirect URI value to your external application.
- Verify the authorization details.
- Click Authorize.
If the authorization is successful, the connection status is set to Active in the Connections page.
API Key Authentication
This type is used for hosts that require an API key for authentication.
- API key: Select the Secret Manager secret containing the API key. For example,
projects/PROJECT_ID/secrets/your-api-key-secret/versions/1. - API key parameter name: The name of the parameter for the API key. For example,
Authorization. - API key location: The location where the API key is sent. For example,
Header.
Integration Connectors starts creating the connection with the provided configuration. The connection creation takes a few minutes to complete. After the connection is created, the system redirects you to the Connections page.
Use the MCP connection in an integration
After you create the connection, it becomes available in Application Integration. You can use the connection in an integration through the Connectors task.
- To understand how to create and use the Connectors task in Application Integration, see Connectors task.
Create an integration using the MCP connector
To create an integration using the MCP connector, perform the following steps:
- Add an API Trigger to your integration:
- In the Google Cloud console, go to the Application Integration page.
- In the navigation menu, click Integrations. The Integrations List page appears.
- Select an existing integration or click Create integration to create a new one.
- If you are creating a new integration:
- Enter an integration name and description in the Create Integration pane.
- Select a region for the integration.
- Optional. Select a service account for the integration.
- Click Create. The newly created integration opens in the integration editor.
- In the integration editor navigation bar, click Triggers to view the list of available triggers.
- Click and place the API trigger element to the designer.
- Add Data Mapping if required.
- Go to Tasks and choose one of the connectors listed above or the one you created, if applicable.
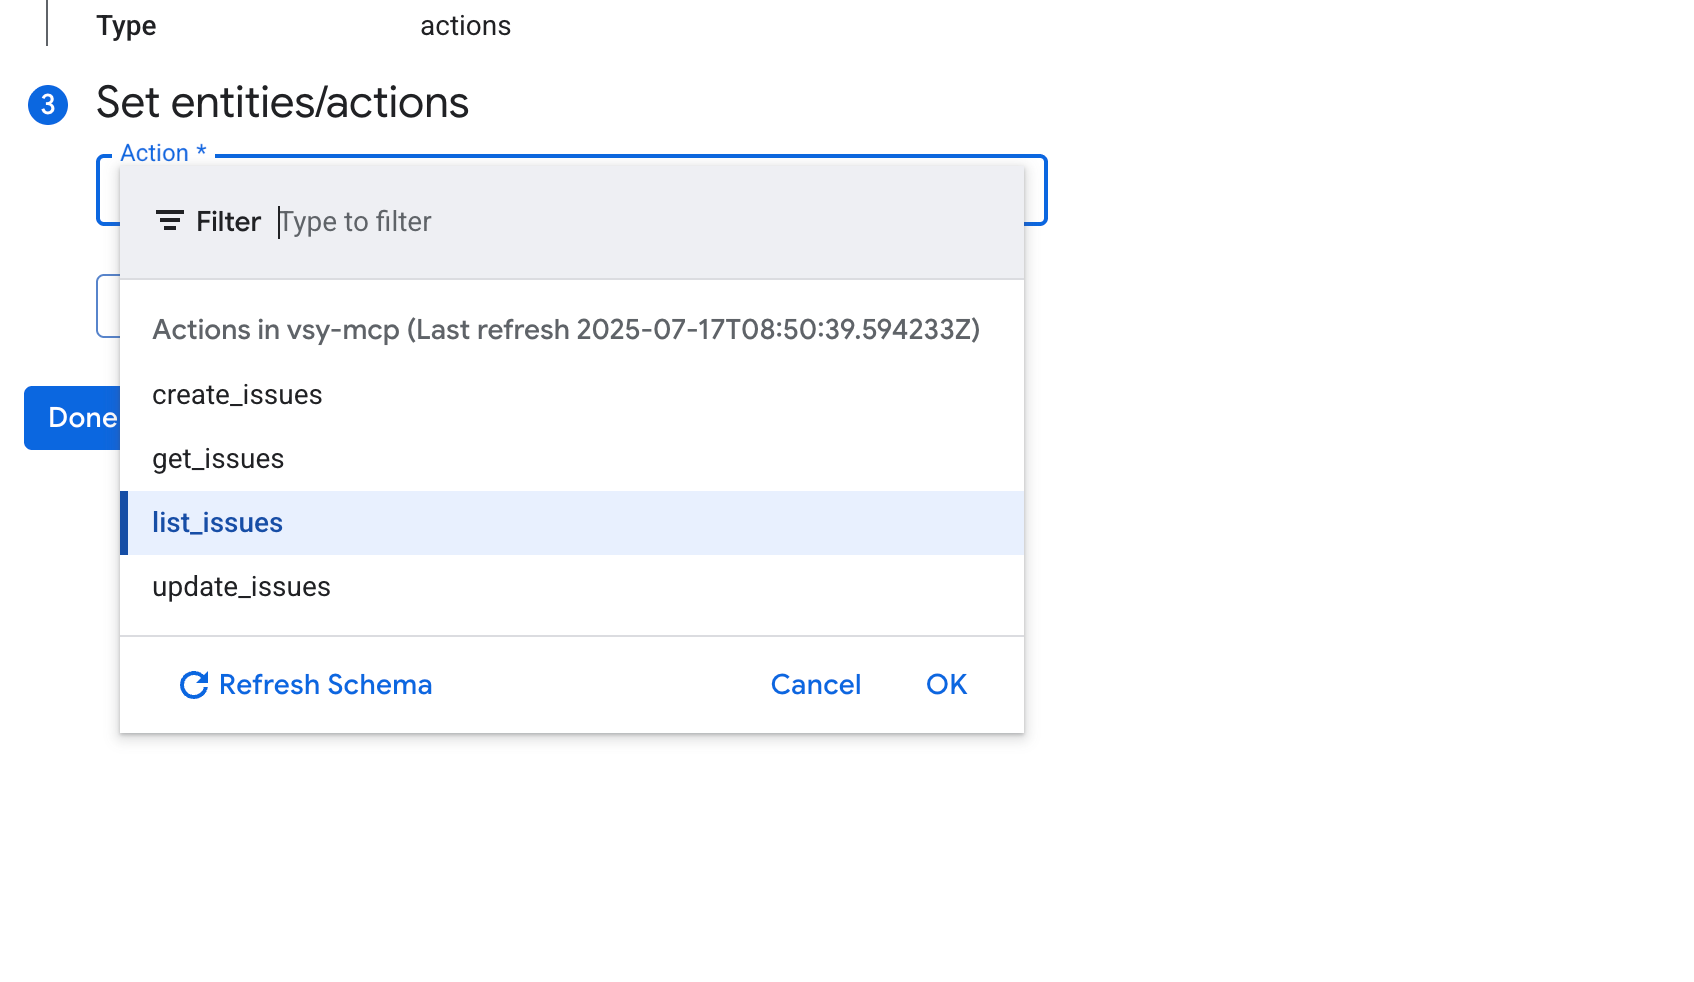
- Click Configure connector and choose actions. The default settings are pre-selected.
A dropdown will show various actions, which are tools in this context.
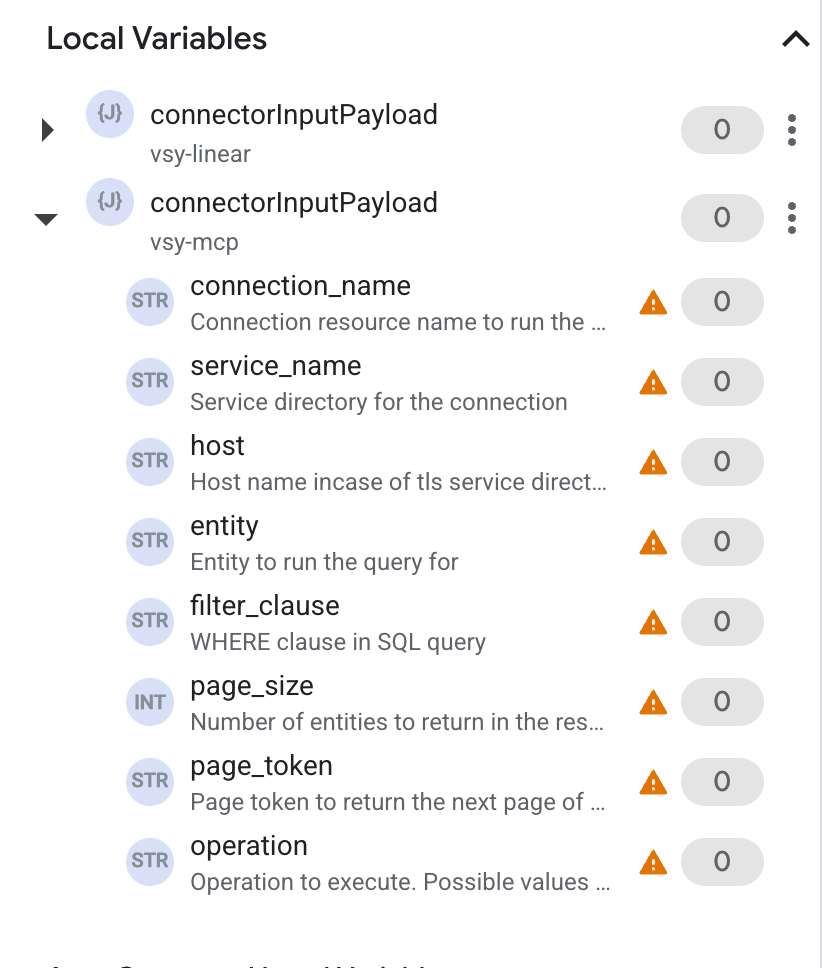
- Configure the required input parameters for the action. You can set these as integration inputs, use variables from previous tasks, or specify default values directly.
- Pass the required arguments and test the connection.
For the list of supported entities and operations, see Supported entities and operations. For information about the supported connector-specific actions, see Supported actions.
Use case example in Application Integration
The following examples demonstrate how to use the Connectors task in Application Integration to perform operations using your configured MCP connection.
Example - Jira: Create Issue
To create an issue in Jira using a MCP connection:
- In the Configure connector task dialog, select your Jira MCP connection (e.g.,
jira-connection). - Click Actions.
- Select the
create_issueaction. - Click Done.
- In the Task Input section, pass the following arguments:
{
  "fields": {
    "project": {
      "key": "YOUR_PROJECT_KEY"
    },
    "summary": "New issue created from Integration Connectors",
    "issuetype": {
      "name": "Task"
    },
    "description": "This is a test issue created via the MCP Jira connector."
  }
}
Create connections using Terraform
You can use the Terraform resource to create a new connection.
To learn how to apply or remove a Terraform configuration, see Basic Terraform commands.
To view a sample terraform template for connection creation, see sample template.
When creating this connection by using Terraform, you must set the following variables in your Terraform configuration file:
| Parameter name | Data type | Required | Description |
|---|---|---|---|
| proxy_enabled | BOOLEAN | False | Set to true to configure a proxy server for the connection. |
| proxy_auth_scheme | ENUM | False | The authentication type to use to authenticate to the ProxyServer proxy. Supported values are: BASIC, DIGEST, NONE |
| proxy_user | STRING | False | A user name to be used to authenticate to the ProxyServer proxy. |
| proxy_password | SECRET | False | A password to be used to authenticate to the ProxyServer proxy. |
| proxy_ssltype | ENUM | False | The SSL type to use when connecting to the ProxyServer proxy. Supported values are: AUTO, ALWAYS, NEVER, TUNNEL |