Pengenalan Karakter Optik (OCR)
Vision API dapat mendeteksi dan mengekstrak teks dari gambar. Ada dua fitur anotasi yang mendukung pengenalan karakter optik (OCR):
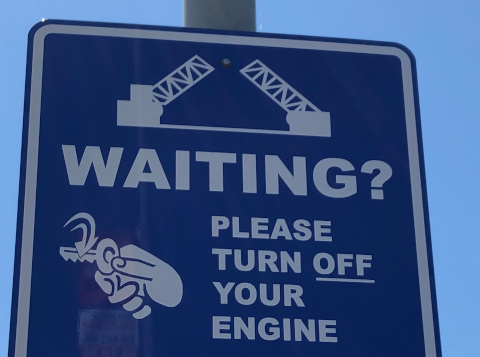
TEXT_DETECTIONmendeteksi dan mengekstrak teks dari gambar apa pun. Misalnya, foto mungkin berisi rambu jalan atau rambu lalu lintas. JSON mencakup seluruh string yang diekstrak, serta setiap kata, dan kotak pembatasnya.
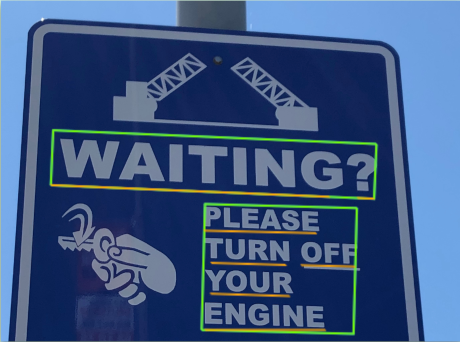
DOCUMENT_TEXT_DETECTIONjuga mengekstrak teks dari gambar, tetapi responsnya dioptimalkan untuk teks dan dokumen yang padat. JSON mencakup informasi halaman, blok, paragraf, kata, dan jeda.
Pelajari lebih lanjut tentang
DOCUMENT_TEXT_DETECTIONuntuk ekstraksi tulisan tangan dan ekstraksi teks dari file (PDF/TIFF).
Coba sendiri
Jika Anda baru menggunakan Google Cloud, buat akun untuk mengevaluasi performa Cloud Vision dalam skenario dunia nyata. Pelanggan baru juga akan mendapatkan kredit gratis senilai $300 untuk menjalankan, menguji, dan men-deploy workload.
Coba Cloud Vision gratisPermintaan deteksi teks
Menyiapkan project dan autentikasi Google Cloud
Jika Anda belum membuat Google Cloud project, lakukan sekarang. Luaskan bagian ini untuk menampilkan petunjuk.
- Sign in to your Google Cloud account. If you're new to Google Cloud, create an account to evaluate how our products perform in real-world scenarios. New customers also get $300 in free credits to run, test, and deploy workloads.
-
In the Google Cloud console, on the project selector page, select or create a Google Cloud project.
Roles required to select or create a project
- Select a project: Selecting a project doesn't require a specific IAM role—you can select any project that you've been granted a role on.
-
Create a project: To create a project, you need the Project Creator role
(
roles/resourcemanager.projectCreator), which contains theresourcemanager.projects.createpermission. Learn how to grant roles.
-
Verify that billing is enabled for your Google Cloud project.
-
Enable the Vision API.
Roles required to enable APIs
To enable APIs, you need the Service Usage Admin IAM role (
roles/serviceusage.serviceUsageAdmin), which contains theserviceusage.services.enablepermission. Learn how to grant roles. -
Install the Google Cloud CLI.
-
Jika Anda menggunakan penyedia identitas (IdP) eksternal, Anda harus login ke gcloud CLI dengan identitas gabungan Anda terlebih dahulu.
-
Untuk melakukan inisialisasi gcloud CLI, jalankan perintah berikut:
gcloud init -
In the Google Cloud console, on the project selector page, select or create a Google Cloud project.
Roles required to select or create a project
- Select a project: Selecting a project doesn't require a specific IAM role—you can select any project that you've been granted a role on.
-
Create a project: To create a project, you need the Project Creator role
(
roles/resourcemanager.projectCreator), which contains theresourcemanager.projects.createpermission. Learn how to grant roles.
-
Verify that billing is enabled for your Google Cloud project.
-
Enable the Vision API.
Roles required to enable APIs
To enable APIs, you need the Service Usage Admin IAM role (
roles/serviceusage.serviceUsageAdmin), which contains theserviceusage.services.enablepermission. Learn how to grant roles. -
Install the Google Cloud CLI.
-
Jika Anda menggunakan penyedia identitas (IdP) eksternal, Anda harus login ke gcloud CLI dengan identitas gabungan Anda terlebih dahulu.
-
Untuk melakukan inisialisasi gcloud CLI, jalankan perintah berikut:
gcloud init - BASE64_ENCODED_IMAGE: Representasi
base64 (string ASCII) dari data gambar biner Anda. String ini akan terlihat seperti
string berikut:
/9j/4QAYRXhpZgAA...9tAVx/zDQDlGxn//2Q==
- PROJECT_ID: Project ID Google Cloud Anda.
- CLOUD_STORAGE_IMAGE_URI: jalur ke file gambar
yang valid di bucket Cloud Storage. Anda setidaknya harus memiliki hak istimewa baca ke file tersebut.
Contoh:
gs://cloud-samples-data/vision/ocr/sign.jpg
- PROJECT_ID: Project ID Google Cloud Anda.
us: Khusus negara ASeu: Uni Eropa- https://eu-vision.googleapis.com/v1/projects/PROJECT_ID/locations/eu/images:annotate
- https://eu-vision.googleapis.com/v1/projects/PROJECT_ID/locations/eu/images:asyncBatchAnnotate
- https://eu-vision.googleapis.com/v1/projects/PROJECT_ID/locations/eu/files:annotate
- https://eu-vision.googleapis.com/v1/projects/PROJECT_ID/locations/eu/files:asyncBatchAnnotate
- REGION_ID: Salah satu ID lokasi
regional yang valid:
us: Khusus negara ASeu: Uni Eropa
- CLOUD_STORAGE_IMAGE_URI: jalur ke file gambar
yang valid di bucket Cloud Storage. Anda setidaknya harus memiliki hak istimewa baca ke file tersebut.
Contoh:
gs://cloud-samples-data/vision/ocr/sign.jpg
- PROJECT_ID: Project ID Google Cloud Anda.
Deteksi teks di gambar lokal
Anda dapat menggunakan Vision API untuk melakukan deteksi fitur pada file gambar lokal.
Untuk permintaan REST, kirim konten file gambar sebagai string yang berenkode base64 dalam isi permintaan Anda.
Untuk gcloud dan permintaan library klien, tentukan jalur ke image lokal dalam
permintaan Anda.
gcloud
Untuk melakukan deteksi teks, gunakan
perintah gcloud ml vision detect-text
seperti ditunjukkan dalam contoh berikut:
gcloud ml vision detect-text ./path/to/local/file.jpg
REST
Sebelum menggunakan salah satu data permintaan, buat penggantian berikut:
Metode HTTP dan URL:
POST https://vision.googleapis.com/v1/images:annotate
Meminta isi JSON:
{
"requests": [
{
"image": {
"content": "BASE64_ENCODED_IMAGE"
},
"features": [
{
"type": "TEXT_DETECTION"
}
]
}
]
}
Untuk mengirim permintaan Anda, pilih salah satu opsi berikut:
curl
Simpan isi permintaan dalam file bernama request.json,
dan jalankan perintah berikut:
curl -X POST \
-H "Authorization: Bearer $(gcloud auth print-access-token)" \
-H "x-goog-user-project: PROJECT_ID" \
-H "Content-Type: application/json; charset=utf-8" \
-d @request.json \
"https://vision.googleapis.com/v1/images:annotate"
PowerShell
Simpan isi permintaan dalam file bernama request.json,
dan jalankan perintah berikut:
$cred = gcloud auth print-access-token
$headers = @{ "Authorization" = "Bearer $cred"; "x-goog-user-project" = "PROJECT_ID" }
Invoke-WebRequest `
-Method POST `
-Headers $headers `
-ContentType: "application/json; charset=utf-8" `
-InFile request.json `
-Uri "https://vision.googleapis.com/v1/images:annotate" | Select-Object -Expand Content
Jika permintaan berhasil, server akan menampilkan kode status HTTP 200 OK dan
respons dalam format JSON.
Respons TEXT_DETECTION berisi frasa yang terdeteksi, kotak pembatasnya,
dan setiap kata serta kotak pembatasnya.
Tanggapan
{
"responses": [
{
"textAnnotations": [
{
"locale": "en",
"description": "WAITING?\nPLEASE\nTURN OFF\nYOUR\nENGINE\n",
"boundingPoly": {
"vertices": [
{
"x": 341,
"y": 828
},
{
"x": 2249,
"y": 828
},
{
"x": 2249,
"y": 1993
},
{
"x": 341,
"y": 1993
}
]
}
},
{
"description": "WAITING?",
"boundingPoly": {
"vertices": [
{
"x": 352,
"y": 828
},
{
"x": 2248,
"y": 911
},
{
"x": 2238,
"y": 1148
},
{
"x": 342,
"y": 1065
}
]
}
},
{
"description": "PLEASE",
"boundingPoly": {
"vertices": [
{
"x": 1210,
"y": 1233
},
{
"x": 1907,
"y": 1263
},
{
"x": 1902,
"y": 1383
},
{
"x": 1205,
"y": 1353
}
]
}
},
{
"description": "TURN",
"boundingPoly": {
"vertices": [
{
"x": 1210,
"y": 1418
},
{
"x": 1730,
"y": 1441
},
{
"x": 1724,
"y": 1564
},
{
"x": 1205,
"y": 1541
}
]
}
},
{
"description": "OFF",
"boundingPoly": {
"vertices": [
{
"x": 1792,
"y": 1443
},
{
"x": 2128,
"y": 1458
},
{
"x": 2122,
"y": 1581
},
{
"x": 1787,
"y": 1566
}
]
}
},
{
"description": "YOUR",
"boundingPoly": {
"vertices": [
{
"x": 1219,
"y": 1603
},
{
"x": 1746,
"y": 1629
},
{
"x": 1740,
"y": 1759
},
{
"x": 1213,
"y": 1733
}
]
}
},
{
"description": "ENGINE",
"boundingPoly": {
"vertices": [
{
"x": 1222,
"y": 1771
},
{
"x": 1944,
"y": 1834
},
{
"x": 1930,
"y": 1992
},
{
"x": 1208,
"y": 1928
}
]
}
}
],
"fullTextAnnotation": {
"pages": [
...
]
},
"paragraphs": [
...
]
},
"words": [
...
},
"symbols": [
...
}
]
}
],
"blockType": "TEXT"
},
...
]
}
],
"text": "WAITING?\nPLEASE\nTURN OFF\nYOUR\nENGINE\n"
}
}
]
}
Go
Sebelum mencoba contoh ini, ikuti petunjuk penyiapan Go di Panduan memulai Vision menggunakan library klien. Untuk mengetahui informasi selengkapnya, lihat dokumentasi referensi Vision Go API.
Untuk melakukan autentikasi ke Vision, siapkan Kredensial Default Aplikasi. Untuk mengetahui informasi selengkapnya, lihat Menyiapkan autentikasi untuk lingkungan pengembangan lokal.
// detectText gets text from the Vision API for an image at the given file path.
func detectText(w io.Writer, file string) error {
ctx := context.Background()
client, err := vision.NewImageAnnotatorClient(ctx)
if err != nil {
return err
}
f, err := os.Open(file)
if err != nil {
return err
}
defer f.Close()
image, err := vision.NewImageFromReader(f)
if err != nil {
return err
}
annotations, err := client.DetectTexts(ctx, image, nil, 10)
if err != nil {
return err
}
if len(annotations) == 0 {
fmt.Fprintln(w, "No text found.")
} else {
fmt.Fprintln(w, "Text:")
for _, annotation := range annotations {
fmt.Fprintf(w, "%q\n", annotation.Description)
}
}
return nil
}
Java
Sebelum mencoba contoh ini, ikuti petunjuk penyiapan Java di Panduan Memulai Vision API Menggunakan Library Klien. Untuk mengetahui informasi selengkapnya, lihat dokumentasi referensi Java Vision API.
import com.google.cloud.vision.v1.AnnotateImageRequest;
import com.google.cloud.vision.v1.AnnotateImageResponse;
import com.google.cloud.vision.v1.BatchAnnotateImagesResponse;
import com.google.cloud.vision.v1.EntityAnnotation;
import com.google.cloud.vision.v1.Feature;
import com.google.cloud.vision.v1.Image;
import com.google.cloud.vision.v1.ImageAnnotatorClient;
import com.google.protobuf.ByteString;
import java.io.FileInputStream;
import java.io.IOException;
import java.util.ArrayList;
import java.util.List;
public class DetectText {
public static void detectText() throws IOException {
// TODO(developer): Replace these variables before running the sample.
String filePath = "path/to/your/image/file.jpg";
detectText(filePath);
}
// Detects text in the specified image.
public static void detectText(String filePath) throws IOException {
List<AnnotateImageRequest> requests = new ArrayList<>();
ByteString imgBytes = ByteString.readFrom(new FileInputStream(filePath));
Image img = Image.newBuilder().setContent(imgBytes).build();
Feature feat = Feature.newBuilder().setType(Feature.Type.TEXT_DETECTION).build();
AnnotateImageRequest request =
AnnotateImageRequest.newBuilder().addFeatures(feat).setImage(img).build();
requests.add(request);
// Initialize client that will be used to send requests. This client only needs to be created
// once, and can be reused for multiple requests. After completing all of your requests, call
// the "close" method on the client to safely clean up any remaining background resources.
try (ImageAnnotatorClient client = ImageAnnotatorClient.create()) {
BatchAnnotateImagesResponse response = client.batchAnnotateImages(requests);
List<AnnotateImageResponse> responses = response.getResponsesList();
for (AnnotateImageResponse res : responses) {
if (res.hasError()) {
System.out.format("Error: %s%n", res.getError().getMessage());
return;
}
// For full list of available annotations, see http://g.co/cloud/vision/docs
for (EntityAnnotation annotation : res.getTextAnnotationsList()) {
System.out.format("Text: %s%n", annotation.getDescription());
System.out.format("Position : %s%n", annotation.getBoundingPoly());
}
}
}
}
}Node.js
Sebelum mencoba contoh ini, ikuti petunjuk penyiapan Node.js di Panduan memulai Vision menggunakan library klien. Untuk mengetahui informasi selengkapnya, lihat dokumentasi referensi Vision Node.js API.
Untuk melakukan autentikasi ke Vision, siapkan Kredensial Default Aplikasi. Untuk mengetahui informasi selengkapnya, lihat Menyiapkan autentikasi untuk lingkungan pengembangan lokal.
const vision = require('@google-cloud/vision');
// Creates a client
const client = new vision.ImageAnnotatorClient();
/**
* TODO(developer): Uncomment the following line before running the sample.
*/
// const fileName = 'Local image file, e.g. /path/to/image.png';
// Performs text detection on the local file
const [result] = await client.textDetection(fileName);
const detections = result.textAnnotations;
console.log('Text:');
detections.forEach(text => console.log(text));Python
Sebelum mencoba contoh ini, ikuti petunjuk penyiapan Python di Panduan memulai Vision menggunakan library klien. Untuk mengetahui informasi selengkapnya, lihat dokumentasi referensi Vision Python API.
Untuk melakukan autentikasi ke Vision, siapkan Kredensial Default Aplikasi. Untuk mengetahui informasi selengkapnya, lihat Menyiapkan autentikasi untuk lingkungan pengembangan lokal.
def detect_text(path):
"""Detects text in the file."""
from google.cloud import vision
client = vision.ImageAnnotatorClient()
with open(path, "rb") as image_file:
content = image_file.read()
image = vision.Image(content=content)
response = client.text_detection(image=image)
texts = response.text_annotations
print("Texts:")
for text in texts:
print(f'\n"{text.description}"')
vertices = [
f"({vertex.x},{vertex.y})" for vertex in text.bounding_poly.vertices
]
print("bounds: {}".format(",".join(vertices)))
if response.error.message:
raise Exception(
"{}\nFor more info on error messages, check: "
"https://cloud.google.com/apis/design/errors".format(response.error.message)
)
Bahasa tambahan
C#: Ikuti petunjuk penyiapan C# di halaman library klien, lalu buka dokumentasi referensi Vision untuk .NET.
PHP: Ikuti Petunjuk penyiapan PHP di halaman library klien, lalu buka Dokumentasi referensi Vision untuk PHP.
Ruby: Ikuti Petunjuk penyiapan Ruby di halaman library klien, lalu buka Dokumentasi referensi Vision untuk Ruby.
Deteksi teks dalam gambar jarak jauh
Anda dapat menggunakan Vision API untuk melakukan deteksi fitur pada file gambar jarak jauh yang terletak di Cloud Storage atau di Web. Untuk mengirim permintaan file jarak jauh, tentukan URL Web atau Cloud Storage URI file dalam isi permintaan.
gcloud
Untuk melakukan deteksi teks, gunakan
perintah gcloud ml vision detect-text
seperti ditunjukkan dalam contoh berikut:
gcloud ml vision detect-text gs://cloud-samples-data/vision/ocr/sign.jpg
REST
Sebelum menggunakan salah satu data permintaan, buat penggantian berikut:
Metode HTTP dan URL:
POST https://vision.googleapis.com/v1/images:annotate
Meminta isi JSON:
{
"requests": [
{
"image": {
"source": {
"imageUri": "CLOUD_STORAGE_IMAGE_URI"
}
},
"features": [
{
"type": "TEXT_DETECTION"
}
]
}
]
}
Untuk mengirim permintaan Anda, pilih salah satu opsi berikut:
curl
Simpan isi permintaan dalam file bernama request.json,
dan jalankan perintah berikut:
curl -X POST \
-H "Authorization: Bearer $(gcloud auth print-access-token)" \
-H "x-goog-user-project: PROJECT_ID" \
-H "Content-Type: application/json; charset=utf-8" \
-d @request.json \
"https://vision.googleapis.com/v1/images:annotate"
PowerShell
Simpan isi permintaan dalam file bernama request.json,
dan jalankan perintah berikut:
$cred = gcloud auth print-access-token
$headers = @{ "Authorization" = "Bearer $cred"; "x-goog-user-project" = "PROJECT_ID" }
Invoke-WebRequest `
-Method POST `
-Headers $headers `
-ContentType: "application/json; charset=utf-8" `
-InFile request.json `
-Uri "https://vision.googleapis.com/v1/images:annotate" | Select-Object -Expand Content
Jika permintaan berhasil, server akan menampilkan kode status HTTP 200 OK dan
respons dalam format JSON.
Respons TEXT_DETECTION berisi frasa yang terdeteksi, kotak pembatasnya,
dan setiap kata serta kotak pembatasnya.
Tanggapan
{
"responses": [
{
"textAnnotations": [
{
"locale": "en",
"description": "WAITING?\nPLEASE\nTURN OFF\nYOUR\nENGINE\n",
"boundingPoly": {
"vertices": [
{
"x": 341,
"y": 828
},
{
"x": 2249,
"y": 828
},
{
"x": 2249,
"y": 1993
},
{
"x": 341,
"y": 1993
}
]
}
},
{
"description": "WAITING?",
"boundingPoly": {
"vertices": [
{
"x": 352,
"y": 828
},
{
"x": 2248,
"y": 911
},
{
"x": 2238,
"y": 1148
},
{
"x": 342,
"y": 1065
}
]
}
},
{
"description": "PLEASE",
"boundingPoly": {
"vertices": [
{
"x": 1210,
"y": 1233
},
{
"x": 1907,
"y": 1263
},
{
"x": 1902,
"y": 1383
},
{
"x": 1205,
"y": 1353
}
]
}
},
{
"description": "TURN",
"boundingPoly": {
"vertices": [
{
"x": 1210,
"y": 1418
},
{
"x": 1730,
"y": 1441
},
{
"x": 1724,
"y": 1564
},
{
"x": 1205,
"y": 1541
}
]
}
},
{
"description": "OFF",
"boundingPoly": {
"vertices": [
{
"x": 1792,
"y": 1443
},
{
"x": 2128,
"y": 1458
},
{
"x": 2122,
"y": 1581
},
{
"x": 1787,
"y": 1566
}
]
}
},
{
"description": "YOUR",
"boundingPoly": {
"vertices": [
{
"x": 1219,
"y": 1603
},
{
"x": 1746,
"y": 1629
},
{
"x": 1740,
"y": 1759
},
{
"x": 1213,
"y": 1733
}
]
}
},
{
"description": "ENGINE",
"boundingPoly": {
"vertices": [
{
"x": 1222,
"y": 1771
},
{
"x": 1944,
"y": 1834
},
{
"x": 1930,
"y": 1992
},
{
"x": 1208,
"y": 1928
}
]
}
}
],
"fullTextAnnotation": {
"pages": [
...
]
},
"paragraphs": [
...
]
},
"words": [
...
},
"symbols": [
...
}
]
}
],
"blockType": "TEXT"
},
...
]
}
],
"text": "WAITING?\nPLEASE\nTURN OFF\nYOUR\nENGINE\n"
}
}
]
}
Go
Sebelum mencoba contoh ini, ikuti petunjuk penyiapan Go di Panduan memulai Vision menggunakan library klien. Untuk mengetahui informasi selengkapnya, lihat dokumentasi referensi Vision Go API.
Untuk melakukan autentikasi ke Vision, siapkan Kredensial Default Aplikasi. Untuk mengetahui informasi selengkapnya, lihat Menyiapkan autentikasi untuk lingkungan pengembangan lokal.
// detectText gets text from the Vision API for an image at the given file path.
func detectTextURI(w io.Writer, file string) error {
ctx := context.Background()
client, err := vision.NewImageAnnotatorClient(ctx)
if err != nil {
return err
}
image := vision.NewImageFromURI(file)
annotations, err := client.DetectTexts(ctx, image, nil, 10)
if err != nil {
return err
}
if len(annotations) == 0 {
fmt.Fprintln(w, "No text found.")
} else {
fmt.Fprintln(w, "Text:")
for _, annotation := range annotations {
fmt.Fprintf(w, "%q\n", annotation.Description)
}
}
return nil
}
Java
Sebelum mencoba contoh ini, ikuti petunjuk penyiapan Java di Panduan Memulai Vision API Menggunakan Library Klien. Untuk mengetahui informasi selengkapnya, lihat dokumentasi referensi Java Vision API.
import com.google.cloud.vision.v1.AnnotateImageRequest;
import com.google.cloud.vision.v1.AnnotateImageResponse;
import com.google.cloud.vision.v1.BatchAnnotateImagesResponse;
import com.google.cloud.vision.v1.EntityAnnotation;
import com.google.cloud.vision.v1.Feature;
import com.google.cloud.vision.v1.Image;
import com.google.cloud.vision.v1.ImageAnnotatorClient;
import com.google.cloud.vision.v1.ImageSource;
import java.io.IOException;
import java.util.ArrayList;
import java.util.List;
public class DetectTextGcs {
public static void detectTextGcs() throws IOException {
// TODO(developer): Replace these variables before running the sample.
String filePath = "gs://your-gcs-bucket/path/to/image/file.jpg";
detectTextGcs(filePath);
}
// Detects text in the specified remote image on Google Cloud Storage.
public static void detectTextGcs(String gcsPath) throws IOException {
List<AnnotateImageRequest> requests = new ArrayList<>();
ImageSource imgSource = ImageSource.newBuilder().setGcsImageUri(gcsPath).build();
Image img = Image.newBuilder().setSource(imgSource).build();
Feature feat = Feature.newBuilder().setType(Feature.Type.TEXT_DETECTION).build();
AnnotateImageRequest request =
AnnotateImageRequest.newBuilder().addFeatures(feat).setImage(img).build();
requests.add(request);
// Initialize client that will be used to send requests. This client only needs to be created
// once, and can be reused for multiple requests. After completing all of your requests, call
// the "close" method on the client to safely clean up any remaining background resources.
try (ImageAnnotatorClient client = ImageAnnotatorClient.create()) {
BatchAnnotateImagesResponse response = client.batchAnnotateImages(requests);
List<AnnotateImageResponse> responses = response.getResponsesList();
for (AnnotateImageResponse res : responses) {
if (res.hasError()) {
System.out.format("Error: %s%n", res.getError().getMessage());
return;
}
// For full list of available annotations, see http://g.co/cloud/vision/docs
for (EntityAnnotation annotation : res.getTextAnnotationsList()) {
System.out.format("Text: %s%n", annotation.getDescription());
System.out.format("Position : %s%n", annotation.getBoundingPoly());
}
}
}
}
}Node.js
Sebelum mencoba contoh ini, ikuti petunjuk penyiapan Node.js di Panduan memulai Vision menggunakan library klien. Untuk mengetahui informasi selengkapnya, lihat dokumentasi referensi Vision Node.js API.
Untuk melakukan autentikasi ke Vision, siapkan Kredensial Default Aplikasi. Untuk mengetahui informasi selengkapnya, lihat Menyiapkan autentikasi untuk lingkungan pengembangan lokal.
// Imports the Google Cloud client libraries
const vision = require('@google-cloud/vision');
// Creates a client
const client = new vision.ImageAnnotatorClient();
/**
* TODO(developer): Uncomment the following lines before running the sample.
*/
// const bucketName = 'Bucket where the file resides, e.g. my-bucket';
// const fileName = 'Path to file within bucket, e.g. path/to/image.png';
// Performs text detection on the gcs file
const [result] = await client.textDetection(`gs://${bucketName}/${fileName}`);
const detections = result.textAnnotations;
console.log('Text:');
detections.forEach(text => console.log(text));Python
Sebelum mencoba contoh ini, ikuti petunjuk penyiapan Python di Panduan memulai Vision menggunakan library klien. Untuk mengetahui informasi selengkapnya, lihat dokumentasi referensi Vision Python API.
Untuk melakukan autentikasi ke Vision, siapkan Kredensial Default Aplikasi. Untuk mengetahui informasi selengkapnya, lihat Menyiapkan autentikasi untuk lingkungan pengembangan lokal.
def detect_text_uri(uri):
"""Detects text in the file located in Google Cloud Storage or on the Web."""
from google.cloud import vision
client = vision.ImageAnnotatorClient()
image = vision.Image()
image.source.image_uri = uri
response = client.text_detection(image=image)
texts = response.text_annotations
print("Texts:")
for text in texts:
print(f'\n"{text.description}"')
vertices = [
f"({vertex.x},{vertex.y})" for vertex in text.bounding_poly.vertices
]
print("bounds: {}".format(",".join(vertices)))
if response.error.message:
raise Exception(
"{}\nFor more info on error messages, check: "
"https://cloud.google.com/apis/design/errors".format(response.error.message)
)
Bahasa tambahan
C#: Ikuti petunjuk penyiapan C# di halaman library klien, lalu buka dokumentasi referensi Vision untuk .NET.
PHP: Ikuti Petunjuk penyiapan PHP di halaman library klien, lalu buka Dokumentasi referensi Vision untuk PHP.
Ruby: Ikuti Petunjuk penyiapan Ruby di halaman library klien, lalu buka Dokumentasi referensi Vision untuk Ruby.
Tentukan bahasa (opsional)
Kedua jenis permintaan OCR mendukung satu atau beberapa languageHints yang menentukan
bahasa teks apa pun dalam gambar. Namun, nilai kosong biasanya memberikan hasil terbaik,
karena menghapus nilai akan mengaktifkan deteksi bahasa otomatis. Untuk bahasa yang didasarkan pada alfabet
Latin, penyetelan languageHints tidak diperlukan. Dalam kasus yang jarang terjadi, jika bahasa
teks dalam
gambar diketahui, setelan petunjuk akan membantu mendapatkan hasil yang lebih baik (meskipun dapat menjadi penghalang yang signifikan
jika petunjuk salah). Deteksi teks akan menampilkan error jika satu atau beberapa
bahasa yang ditentukan bukan salah satu
bahasa yang didukung.
Jika Anda memilih untuk memberikan petunjuk bahasa, ubah isi permintaan Anda
(file request.json) untuk memberikan string dari salah satu bahasa yang didukung
di kolom imageContext.languageHints seperti yang ditunjukkan di contoh berikut:
{ "requests": [ { "image": { "source": { "imageUri": "IMAGE_URL" } }, "features": [ { "type": "DOCUMENT_TEXT_DETECTION" } ], "imageContext": { "languageHints": ["en-t-i0-handwrit"] } } ] }
Dukungan multi-regional
Sekarang Anda dapat menentukan penyimpanan data tingkat benua dan pemrosesan OCR. Wilayah berikut saat ini didukung:
Lokasi
Cloud Vision menawarkan Anda beberapa kontrol terkait lokasi penyimpanan dan pemrosesan resource untuk project Anda. Secara khusus, Anda dapat mengonfigurasi Cloud Vision untuk menyimpan dan memproses data hanya di Uni Eropa.
Secara default, Cloud Vision menyimpan dan memproses resource di lokasi Global, yang berarti bahwa Cloud Vision tidak menjamin resource Anda akan tetap berada dalam lokasi atau region tertentu. Jika Anda memilih lokasi Uni Eropa, Google akan menyimpan data Anda dan memprosesnya hanya di Uni Eropa. Anda dan pengguna Anda dapat mengakses data dari lokasi mana pun.
Menetapkan lokasi menggunakan API
Vision API mendukung endpoint API global (vision.googleapis.com) dan juga
dua endpoint berbasis region: endpoint Uni Eropa
(eu-vision.googleapis.com) dan endpoint Amerika Serikat
(us-vision.googleapis.com ). Gunakan endpoint ini untuk pemrosesan khusus
per region. Misalnya, untuk menyimpan dan memproses data Anda hanya di Uni Eropa, gunakan
URI eu-vision.googleapis.com sebagai pengganti vision.googleapis.com
untuk panggilan REST API Anda:
Untuk menyimpan dan memproses data Anda hanya di Amerika Serikat, gunakan endpoint AS
(us-vision.googleapis.com) dengan metode sebelumnya.
Menetapkan lokasi menggunakan library klien
Library klien Vision API mengakses endpoint API global
(vision.googleapis.com) secara default. Untuk menyimpan dan memproses data hanya di
Uni Eropa, Anda perlu menetapkan endpoint
(eu-vision.googleapis.com) secara eksplisit. Contoh kode berikut menunjukkan cara mengonfigurasi
setelan ini.
REST
Sebelum menggunakan salah satu data permintaan, lakukan penggantian berikut:
Metode HTTP dan URL:
POST https://REGION_ID-vision.googleapis.com/v1/projects/PROJECT_ID/locations/REGION_ID/images:annotate
Meminta isi JSON:
{
"requests": [
{
"image": {
"source": {
"imageUri": "CLOUD_STORAGE_IMAGE_URI"
}
},
"features": [
{
"type": "TEXT_DETECTION"
}
]
}
]
}
Untuk mengirim permintaan Anda, pilih salah satu opsi berikut:
curl
Simpan isi permintaan dalam file bernama request.json,
dan jalankan perintah berikut:
curl -X POST \
-H "Authorization: Bearer $(gcloud auth print-access-token)" \
-H "x-goog-user-project: PROJECT_ID" \
-H "Content-Type: application/json; charset=utf-8" \
-d @request.json \
"https://REGION_ID-vision.googleapis.com/v1/projects/PROJECT_ID/locations/REGION_ID/images:annotate"
PowerShell
Simpan isi permintaan dalam file bernama request.json,
dan jalankan perintah berikut:
$cred = gcloud auth print-access-token
$headers = @{ "Authorization" = "Bearer $cred"; "x-goog-user-project" = "PROJECT_ID" }
Invoke-WebRequest `
-Method POST `
-Headers $headers `
-ContentType: "application/json; charset=utf-8" `
-InFile request.json `
-Uri "https://REGION_ID-vision.googleapis.com/v1/projects/PROJECT_ID/locations/REGION_ID/images:annotate" | Select-Object -Expand Content
Jika permintaan berhasil, server akan menampilkan kode status HTTP 200 OK dan
respons dalam format JSON.
Respons TEXT_DETECTION berisi frasa yang terdeteksi, kotak pembatasnya,
dan setiap kata serta kotak pembatasnya.
Tanggapan
{
"responses": [
{
"textAnnotations": [
{
"locale": "en",
"description": "WAITING?\nPLEASE\nTURN OFF\nYOUR\nENGINE\n",
"boundingPoly": {
"vertices": [
{
"x": 341,
"y": 828
},
{
"x": 2249,
"y": 828
},
{
"x": 2249,
"y": 1993
},
{
"x": 341,
"y": 1993
}
]
}
},
{
"description": "WAITING?",
"boundingPoly": {
"vertices": [
{
"x": 352,
"y": 828
},
{
"x": 2248,
"y": 911
},
{
"x": 2238,
"y": 1148
},
{
"x": 342,
"y": 1065
}
]
}
},
{
"description": "PLEASE",
"boundingPoly": {
"vertices": [
{
"x": 1210,
"y": 1233
},
{
"x": 1907,
"y": 1263
},
{
"x": 1902,
"y": 1383
},
{
"x": 1205,
"y": 1353
}
]
}
},
{
"description": "TURN",
"boundingPoly": {
"vertices": [
{
"x": 1210,
"y": 1418
},
{
"x": 1730,
"y": 1441
},
{
"x": 1724,
"y": 1564
},
{
"x": 1205,
"y": 1541
}
]
}
},
{
"description": "OFF",
"boundingPoly": {
"vertices": [
{
"x": 1792,
"y": 1443
},
{
"x": 2128,
"y": 1458
},
{
"x": 2122,
"y": 1581
},
{
"x": 1787,
"y": 1566
}
]
}
},
{
"description": "YOUR",
"boundingPoly": {
"vertices": [
{
"x": 1219,
"y": 1603
},
{
"x": 1746,
"y": 1629
},
{
"x": 1740,
"y": 1759
},
{
"x": 1213,
"y": 1733
}
]
}
},
{
"description": "ENGINE",
"boundingPoly": {
"vertices": [
{
"x": 1222,
"y": 1771
},
{
"x": 1944,
"y": 1834
},
{
"x": 1930,
"y": 1992
},
{
"x": 1208,
"y": 1928
}
]
}
}
],
"fullTextAnnotation": {
"pages": [
...
]
},
"paragraphs": [
...
]
},
"words": [
...
},
"symbols": [
...
}
]
}
],
"blockType": "TEXT"
},
...
]
}
],
"text": "WAITING?\nPLEASE\nTURN OFF\nYOUR\nENGINE\n"
}
}
]
}
Go
Sebelum mencoba contoh ini, ikuti petunjuk penyiapan Go di Panduan memulai Vision menggunakan library klien. Untuk mengetahui informasi selengkapnya, lihat dokumentasi referensi Vision Go API.
Untuk melakukan autentikasi ke Vision, siapkan Kredensial Default Aplikasi. Untuk mengetahui informasi selengkapnya, lihat Menyiapkan autentikasi untuk lingkungan pengembangan lokal.
import (
"context"
"fmt"
vision "cloud.google.com/go/vision/apiv1"
"google.golang.org/api/option"
)
// setEndpoint changes your endpoint.
func setEndpoint(endpoint string) error {
// endpoint := "eu-vision.googleapis.com:443"
ctx := context.Background()
client, err := vision.NewImageAnnotatorClient(ctx, option.WithEndpoint(endpoint))
if err != nil {
return fmt.Errorf("NewImageAnnotatorClient: %w", err)
}
defer client.Close()
return nil
}
Java
Sebelum mencoba contoh ini, ikuti petunjuk penyiapan Java di Panduan Memulai Vision API Menggunakan Library Klien. Untuk mengetahui informasi selengkapnya, lihat dokumentasi referensi Java Vision API.
ImageAnnotatorSettings settings =
ImageAnnotatorSettings.newBuilder().setEndpoint("eu-vision.googleapis.com:443").build();
// Initialize client that will be used to send requests. This client only needs to be created
// once, and can be reused for multiple requests. After completing all of your requests, call
// the "close" method on the client to safely clean up any remaining background resources.
ImageAnnotatorClient client = ImageAnnotatorClient.create(settings);Node.js
Sebelum mencoba contoh ini, ikuti petunjuk penyiapan Node.js di Panduan memulai Vision menggunakan library klien. Untuk mengetahui informasi selengkapnya, lihat dokumentasi referensi Vision Node.js API.
Untuk melakukan autentikasi ke Vision, siapkan Kredensial Default Aplikasi. Untuk mengetahui informasi selengkapnya, lihat Menyiapkan autentikasi untuk lingkungan pengembangan lokal.
// Imports the Google Cloud client library
const vision = require('@google-cloud/vision');
async function setEndpoint() {
// Specifies the location of the api endpoint
const clientOptions = {apiEndpoint: 'eu-vision.googleapis.com'};
// Creates a client
const client = new vision.ImageAnnotatorClient(clientOptions);
// Performs text detection on the image file
const [result] = await client.textDetection('./resources/wakeupcat.jpg');
const labels = result.textAnnotations;
console.log('Text:');
labels.forEach(label => console.log(label.description));
}
setEndpoint();Python
Sebelum mencoba contoh ini, ikuti petunjuk penyiapan Python di Panduan memulai Vision menggunakan library klien. Untuk mengetahui informasi selengkapnya, lihat dokumentasi referensi Vision Python API.
Untuk melakukan autentikasi ke Vision, siapkan Kredensial Default Aplikasi. Untuk mengetahui informasi selengkapnya, lihat Menyiapkan autentikasi untuk lingkungan pengembangan lokal.
from google.cloud import vision
client_options = {"api_endpoint": "eu-vision.googleapis.com"}
client = vision.ImageAnnotatorClient(client_options=client_options)Cobalah
Coba deteksi teks dan deteksi teks dokumen di bawah ini. Anda dapat menggunakan
gambar yang sudah ditetapkan (gs://cloud-samples-data/vision/ocr/sign.jpg) dengan mengklik
Eksekusi, atau Anda dapat menentukan gambar Anda sendiri sebagai gantinya.
Untuk mencoba deteksi teks dokumen, perbarui nilai type menjadi
DOCUMENT_TEXT_DETECTION.

Isi permintaan:
{
"requests": [
{
"features": [
{
"type": "TEXT_DETECTION"
}
],
"image": {
"source": {
"imageUri": "gs://cloud-samples-data/vision/ocr/sign.jpg"
}
}
}
]
}