
Membangun pipeline pemrosesan dokumen dengan Workflows
Jika Anda menggunakan Document AI untuk membangun alur kerja yang melibatkan beberapa langkah untuk memproses dokumen, Anda mungkin ingin menggunakan orkestrasi serverless untuk mengelola alur kerja.
Workflows menghubungkan serangkaian tugas dalam urutan yang Anda tentukan. Layanan ini tidak memerlukan pengelolaan infrastruktur dan menskalakan dengan lancar sesuai permintaan, termasuk menurunkan skala hingga nol. Dengan model harga bayar per penggunaan, Anda hanya membayar waktu eksekusi.
Workflows menyediakan konektor bawaan untuk Document AI API. Konektor tidak memerlukan kode tambahan selain menentukan langkah-langkah menggunakan file konfigurasi. Konektor menangani pemformatan permintaan, menyembunyikan detail API. Konektor juga menyediakan perilaku bawaan untuk autentikasi, menangani percobaan ulang, dan operasi yang berjalan lama.
Untuk mengetahui informasi selengkapnya, lihat Memahami konektor.
Panduan ini memproses serangkaian invoice contoh menggunakan pemroses Invoice Parser dengan pemrosesan batch
Untuk mengikuti panduan langkah demi langkah untuk tugas ini langsung di Google Cloud konsol, klik Pandu saya:
Sebelum memulai
- Login ke akun Google Cloud Anda. Jika Anda baru menggunakan Google Cloud, buat akun untuk mengevaluasi performa produk kami dalam skenario dunia nyata. Pelanggan baru juga mendapatkan kredit gratis senilai $300 untuk menjalankan, menguji, dan men-deploy workload.
-
In the Google Cloud console, on the project selector page, select or create a Google Cloud project.
Roles required to select or create a project
- Select a project: Selecting a project doesn't require a specific IAM role—you can select any project that you've been granted a role on.
-
Create a project: To create a project, you need the Project Creator role
(
roles/resourcemanager.projectCreator), which contains theresourcemanager.projects.createpermission. Learn how to grant roles.
-
If you're using an existing project for this guide, verify that you have the permissions required to complete this guide. If you created a new project, then you already have the required permissions.
-
Verify that billing is enabled for your Google Cloud project.
Enable the Document AI, Cloud Storage, Workflows APIs.
Roles required to enable APIs
To enable APIs, you need the Service Usage Admin IAM role (
roles/serviceusage.serviceUsageAdmin), which contains theserviceusage.services.enablepermission. Learn how to grant roles.-
In the Google Cloud console, on the project selector page, select or create a Google Cloud project.
Roles required to select or create a project
- Select a project: Selecting a project doesn't require a specific IAM role—you can select any project that you've been granted a role on.
-
Create a project: To create a project, you need the Project Creator role
(
roles/resourcemanager.projectCreator), which contains theresourcemanager.projects.createpermission. Learn how to grant roles.
-
If you're using an existing project for this guide, verify that you have the permissions required to complete this guide. If you created a new project, then you already have the required permissions.
-
Verify that billing is enabled for your Google Cloud project.
Enable the Document AI, Cloud Storage, Workflows APIs.
Roles required to enable APIs
To enable APIs, you need the Service Usage Admin IAM role (
roles/serviceusage.serviceUsageAdmin), which contains theserviceusage.services.enablepermission. Learn how to grant roles.
Peran yang diperlukan
Untuk mendapatkan izin yang Anda perlukan untuk membuat pengklasifikasi kustom, minta administrator Anda untuk memberi Anda peran IAM berikut di project Anda:
- Administrator Document AI (
roles/documentai.admin) - Project IAM Admin (
roles/resourcemanager.projectIamAdmin) - Service Account User (
roles/iam.serviceAccountUser) - Storage Admin (
roles/storage.admin) - Workflows Editor (
roles/workflows.editor) -
Buat akun layanan baru:
Buat Akun Layanan (
roles/iam.serviceAccountCreator)
Untuk mengetahui informasi selengkapnya tentang pemberian peran, lihat Mengelola akses ke project, folder, dan organisasi.
Anda mungkin juga bisa mendapatkan izin yang diperlukan melalui peran khusus atau peran bawaan lainnya.
Membuat Parser Invoice
Gunakan konsol Google Cloud untuk membuat Parser Invoice baru. Lihat halaman membuat dan mengelola pemroses untuk mengetahui informasi selengkapnya.
Di menu navigasi konsol Google Cloud , klik Document AI, lalu pilih Processor Gallery.
Di Processor Gallery,
cari Invoice Parser, lalu pilih Buat.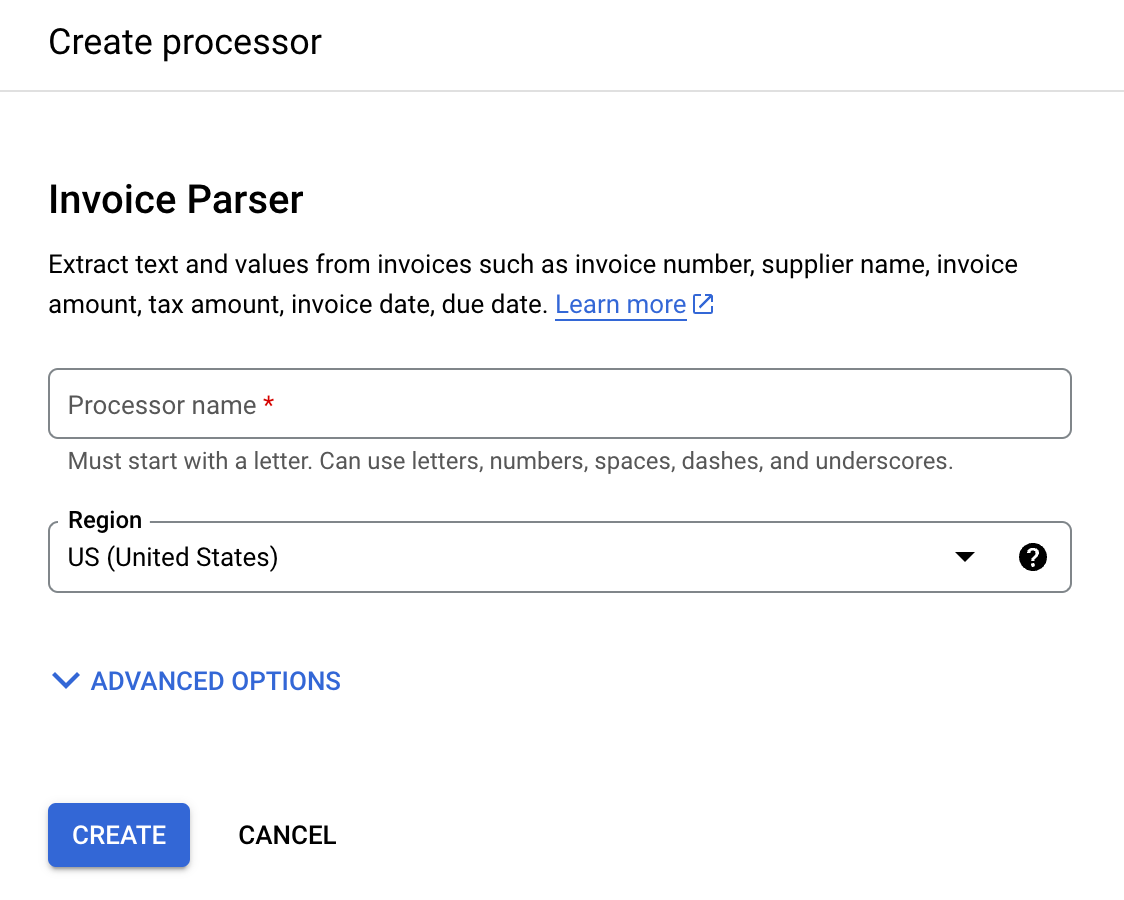
Masukkan Processor name, seperti
workflows-invoice-processor.Pilih region (
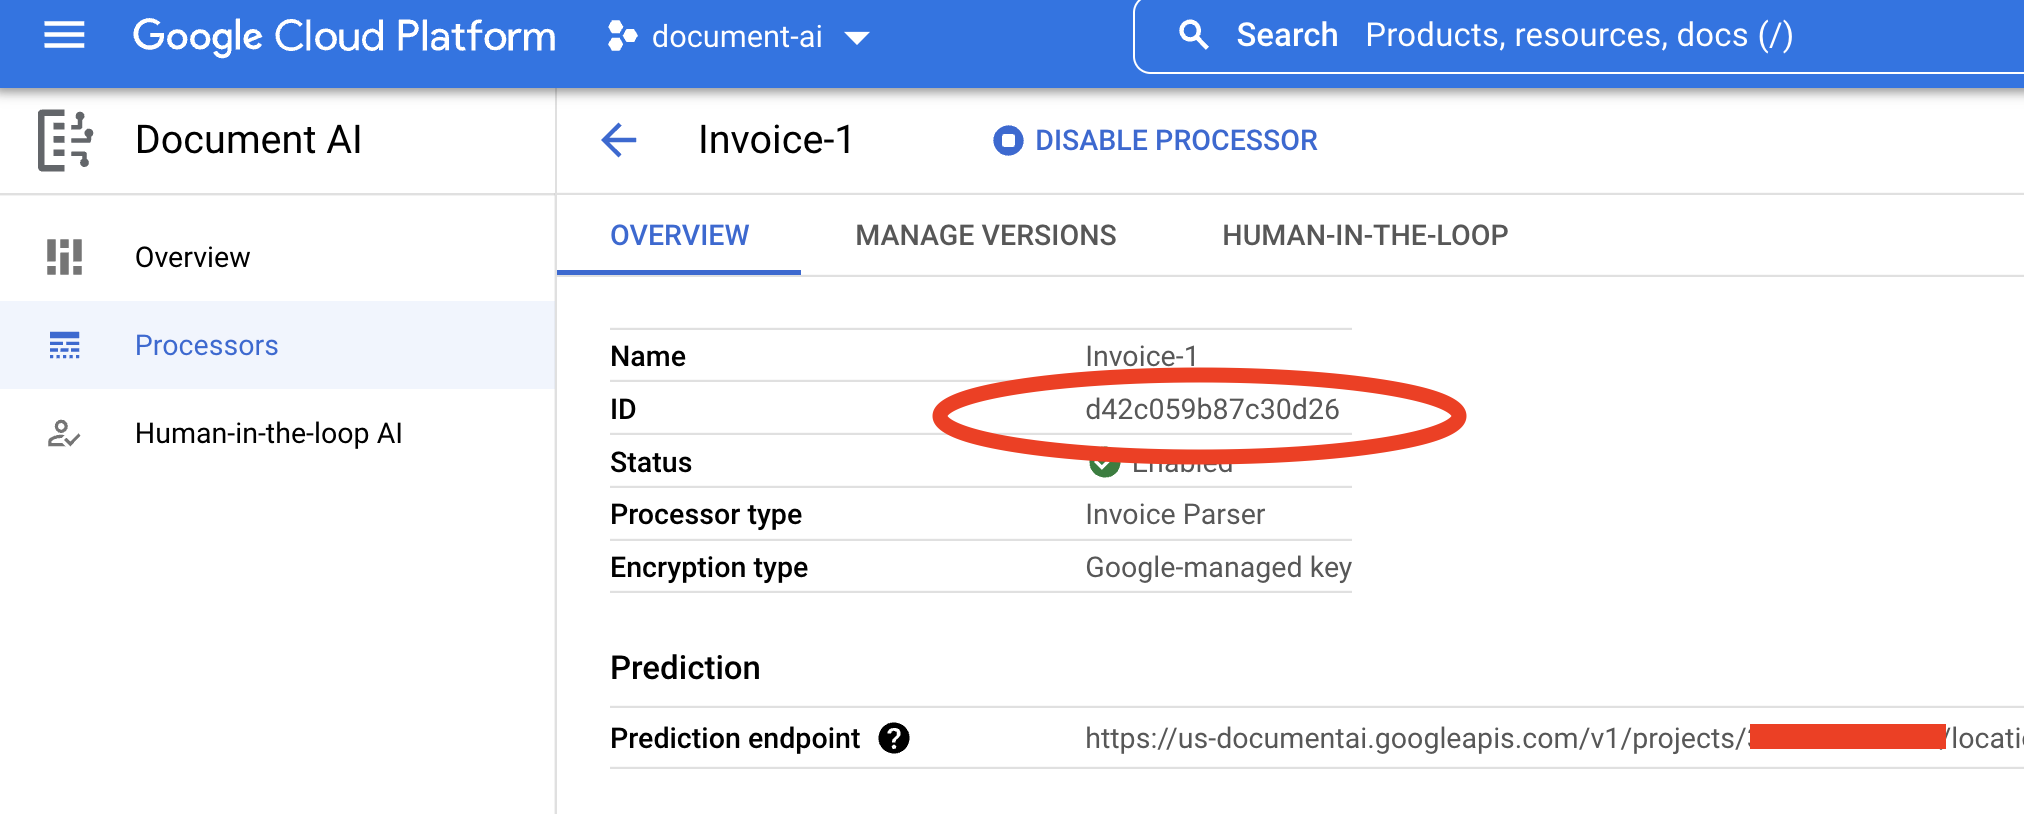
locationdi Document AI API) untuk menghosting pemroses.Klik Create. Tab Processor Details akan muncul.
Salin ID Prosesor Anda. Anda harus menggunakan ini dalam kode nanti.
Mengonfigurasi bucket output di Cloud Storage
Saat menggunakan pemrosesan batch (asinkron), file input dan output harus disimpan di Cloud Storage. Bucket berikut berisi file contoh untuk digunakan sebagai input untuk panduan ini:
gs://cloud-samples-data/documentai/workflows
Konfigurasi bucket untuk menyimpan file output di project Anda.
Ikuti panduan Membuat Bucket dalam dokumentasi Cloud Storage untuk membuat bucket, atau gunakan bucket yang sudah ada.
Buat folder di bucket (misalnya,
docai-workflows-output).
Buat alur kerja
Buka dasbor Workflows di konsol Google Cloud .
Klik
Buat untuk membuat alur kerja pertama Anda. Halaman Create Workflow akan muncul.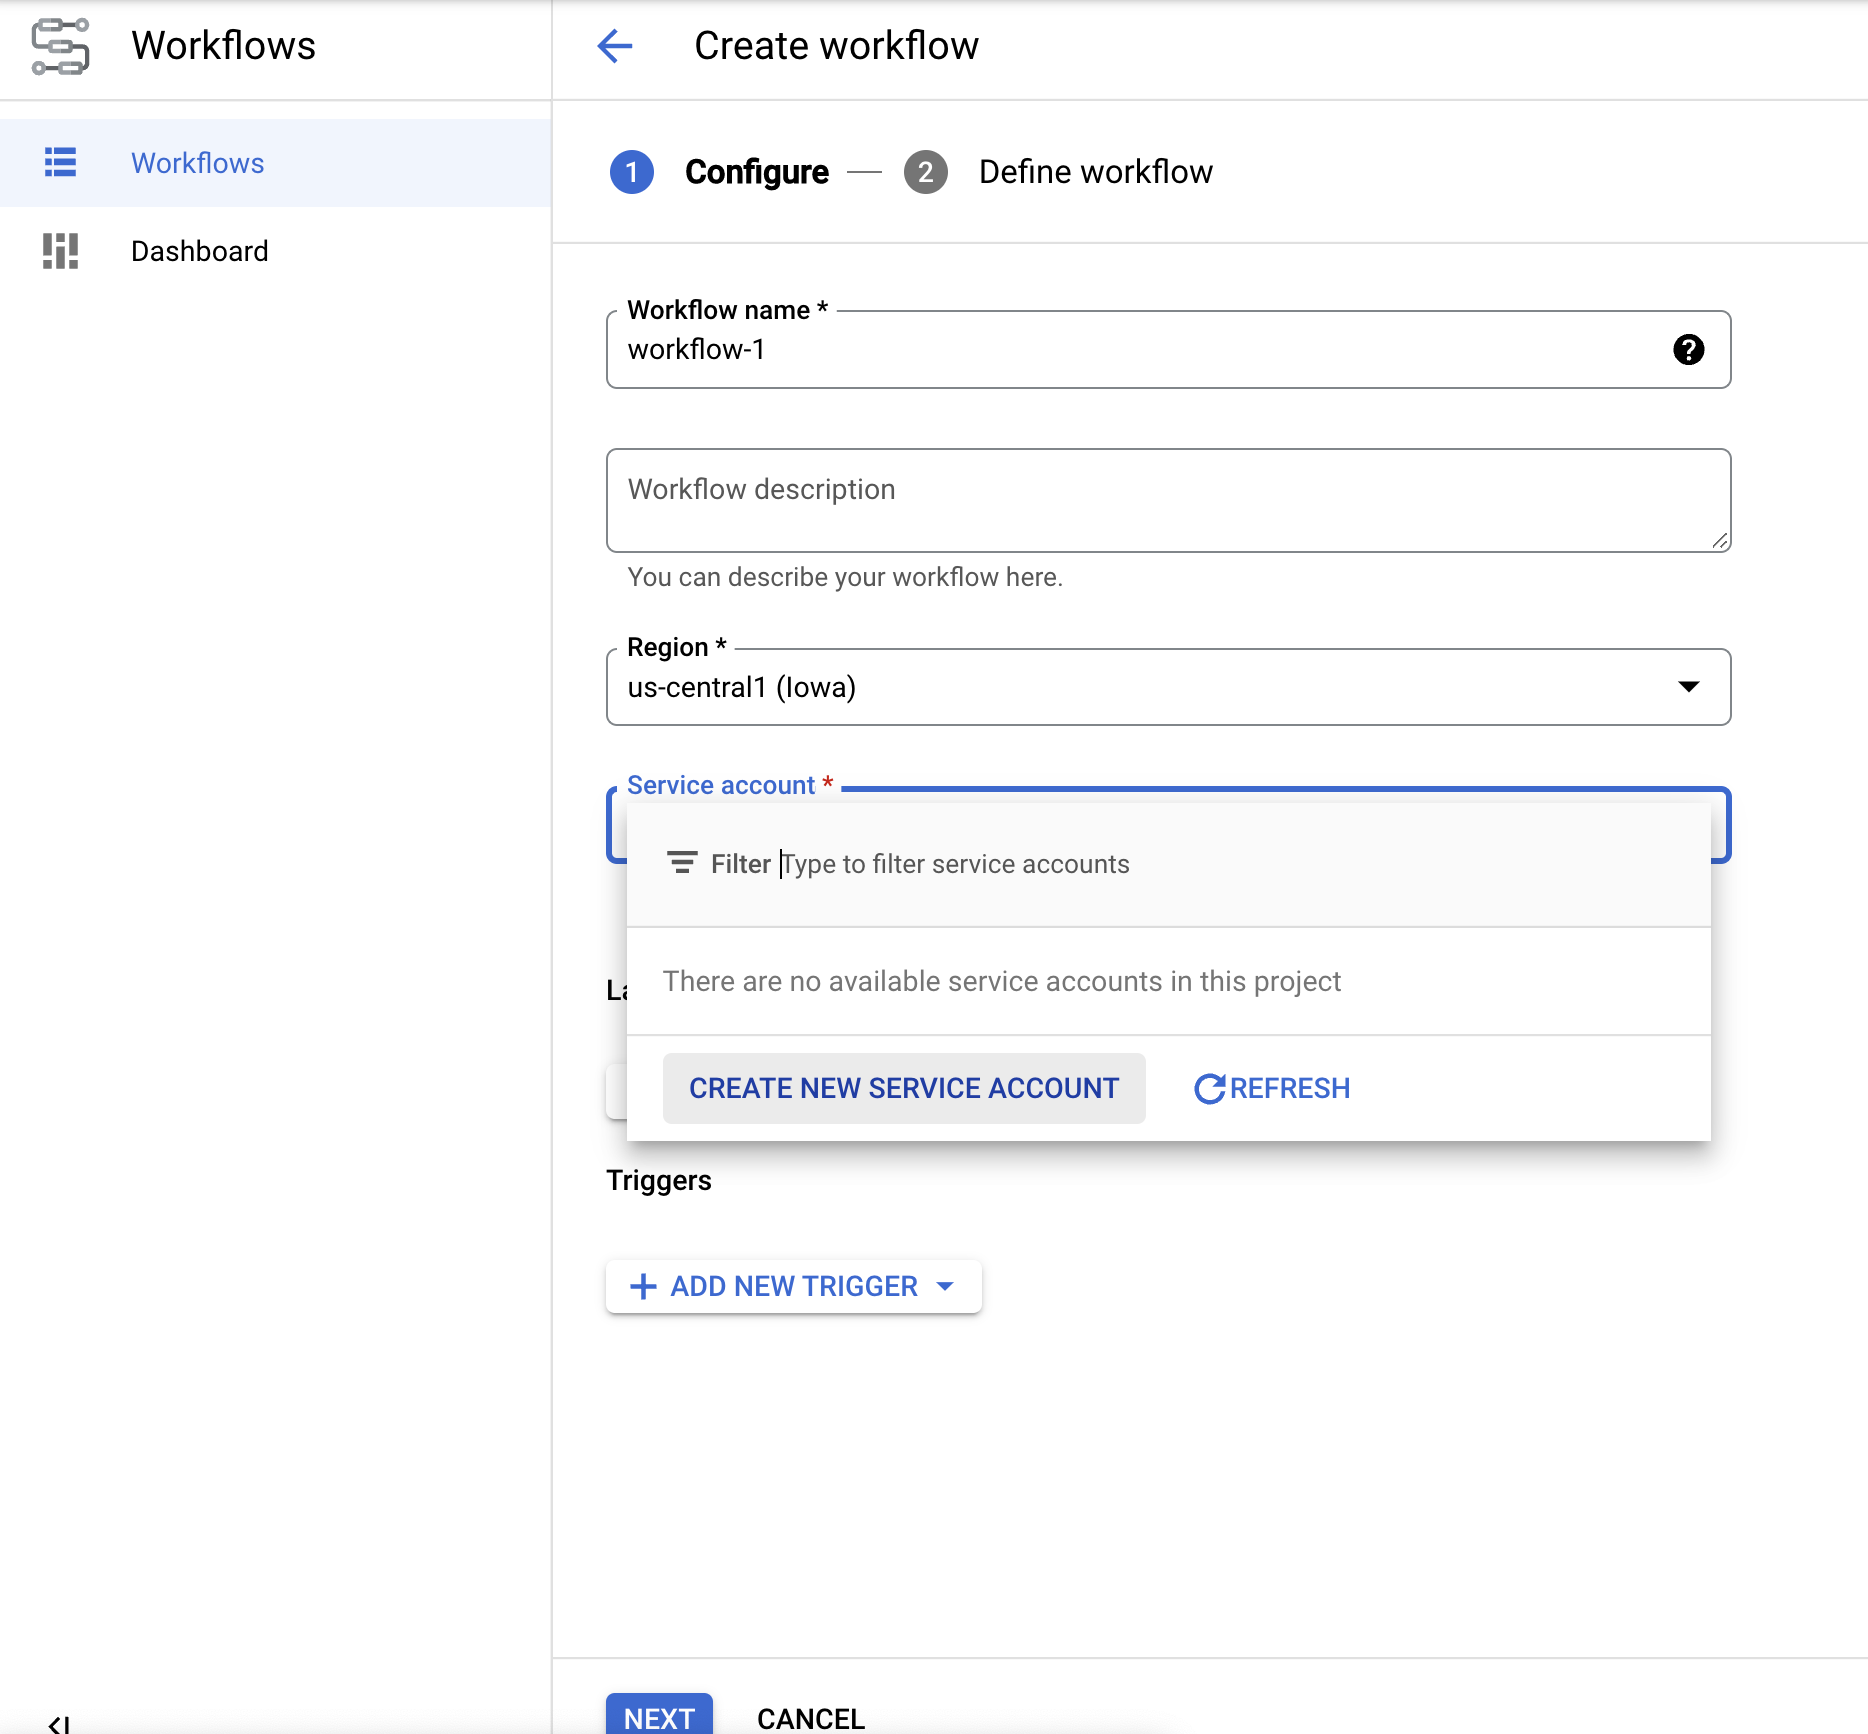
Ganti nama alur kerja menjadidocai-workflows-quickstart.Tambahkan deskripsi, dan pilih akun layanan jika Anda memilikinya untuk project ini.
- Jika Anda tidak memiliki akun layanan, pilih Buat Akun Layanan Baru.
- Beri nama akun layanan Anda, lalu pilih Create and Continue.
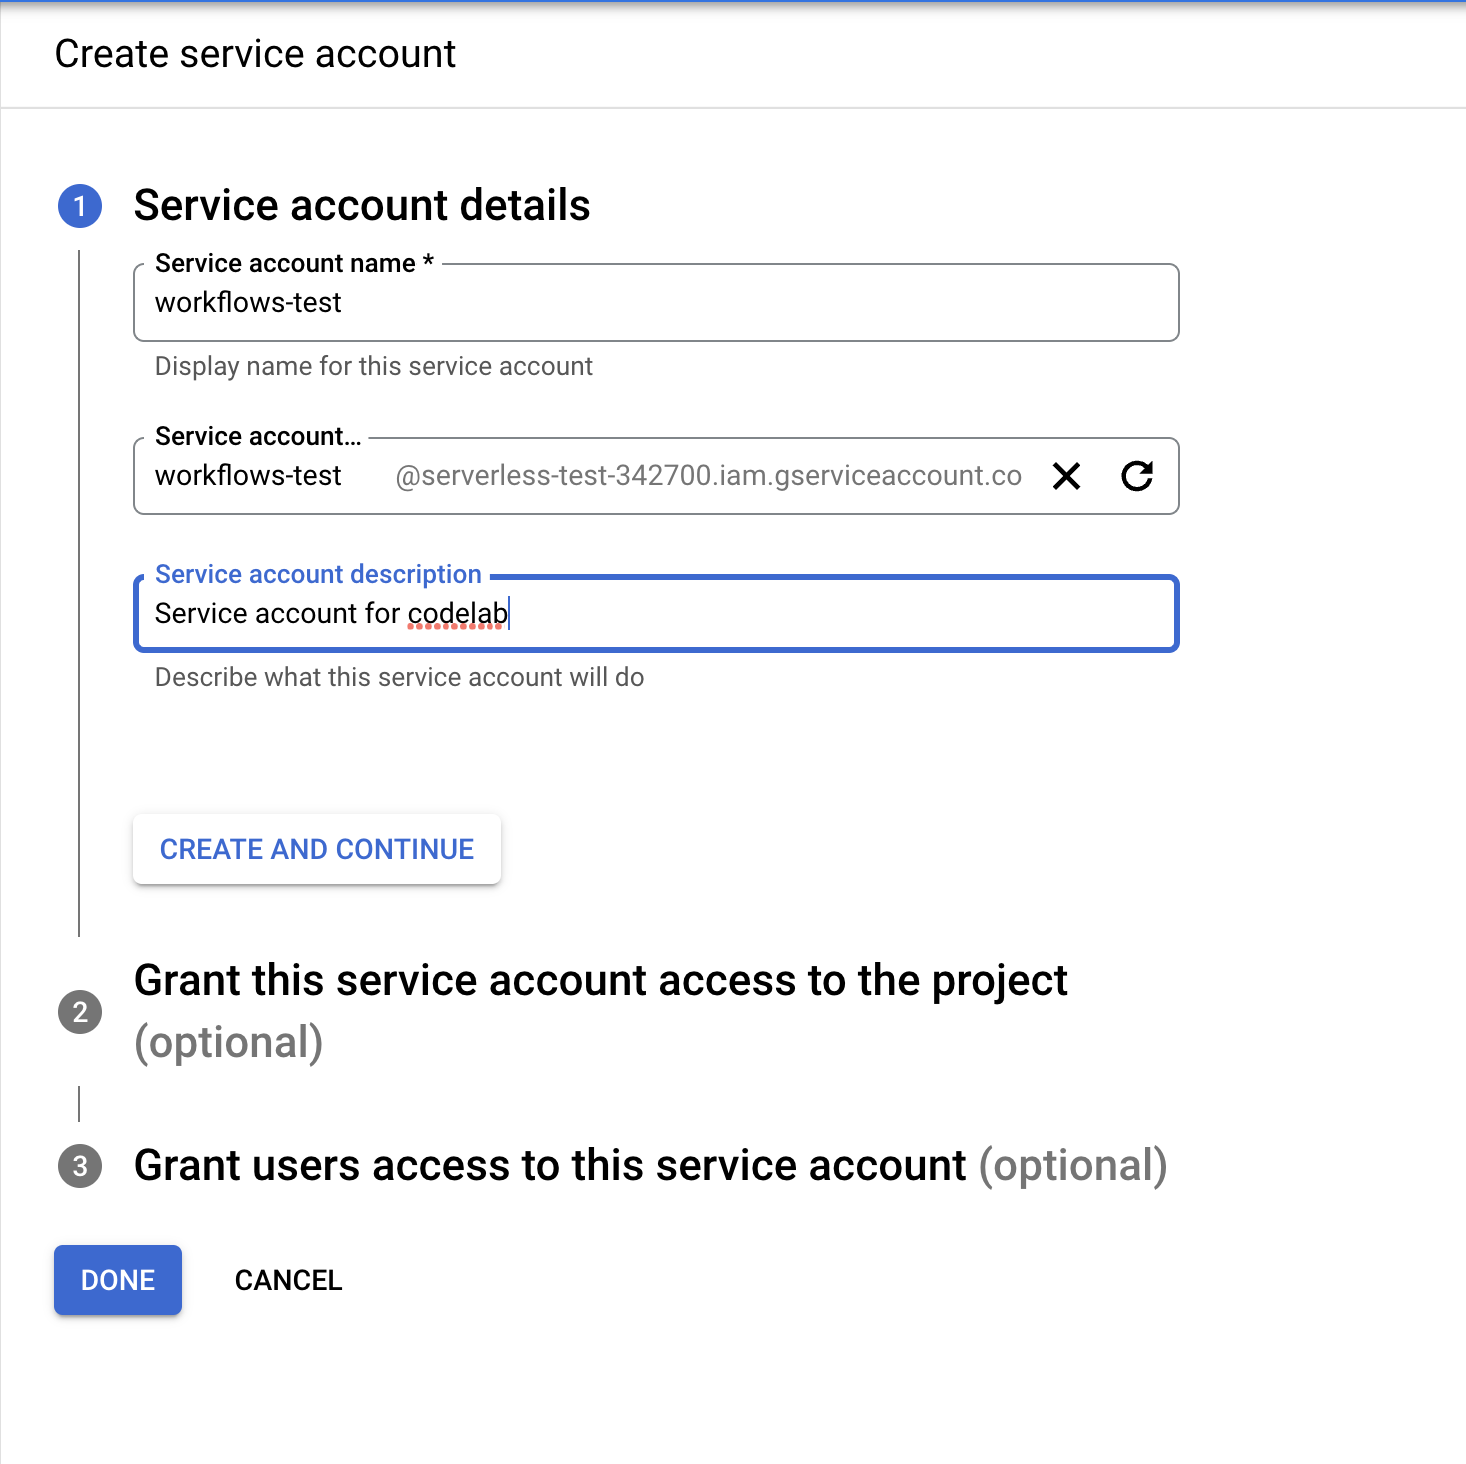
- Berikan peran berikut:
Document AI API UserWorkflows InvokerLogs WriterService Usage Consumer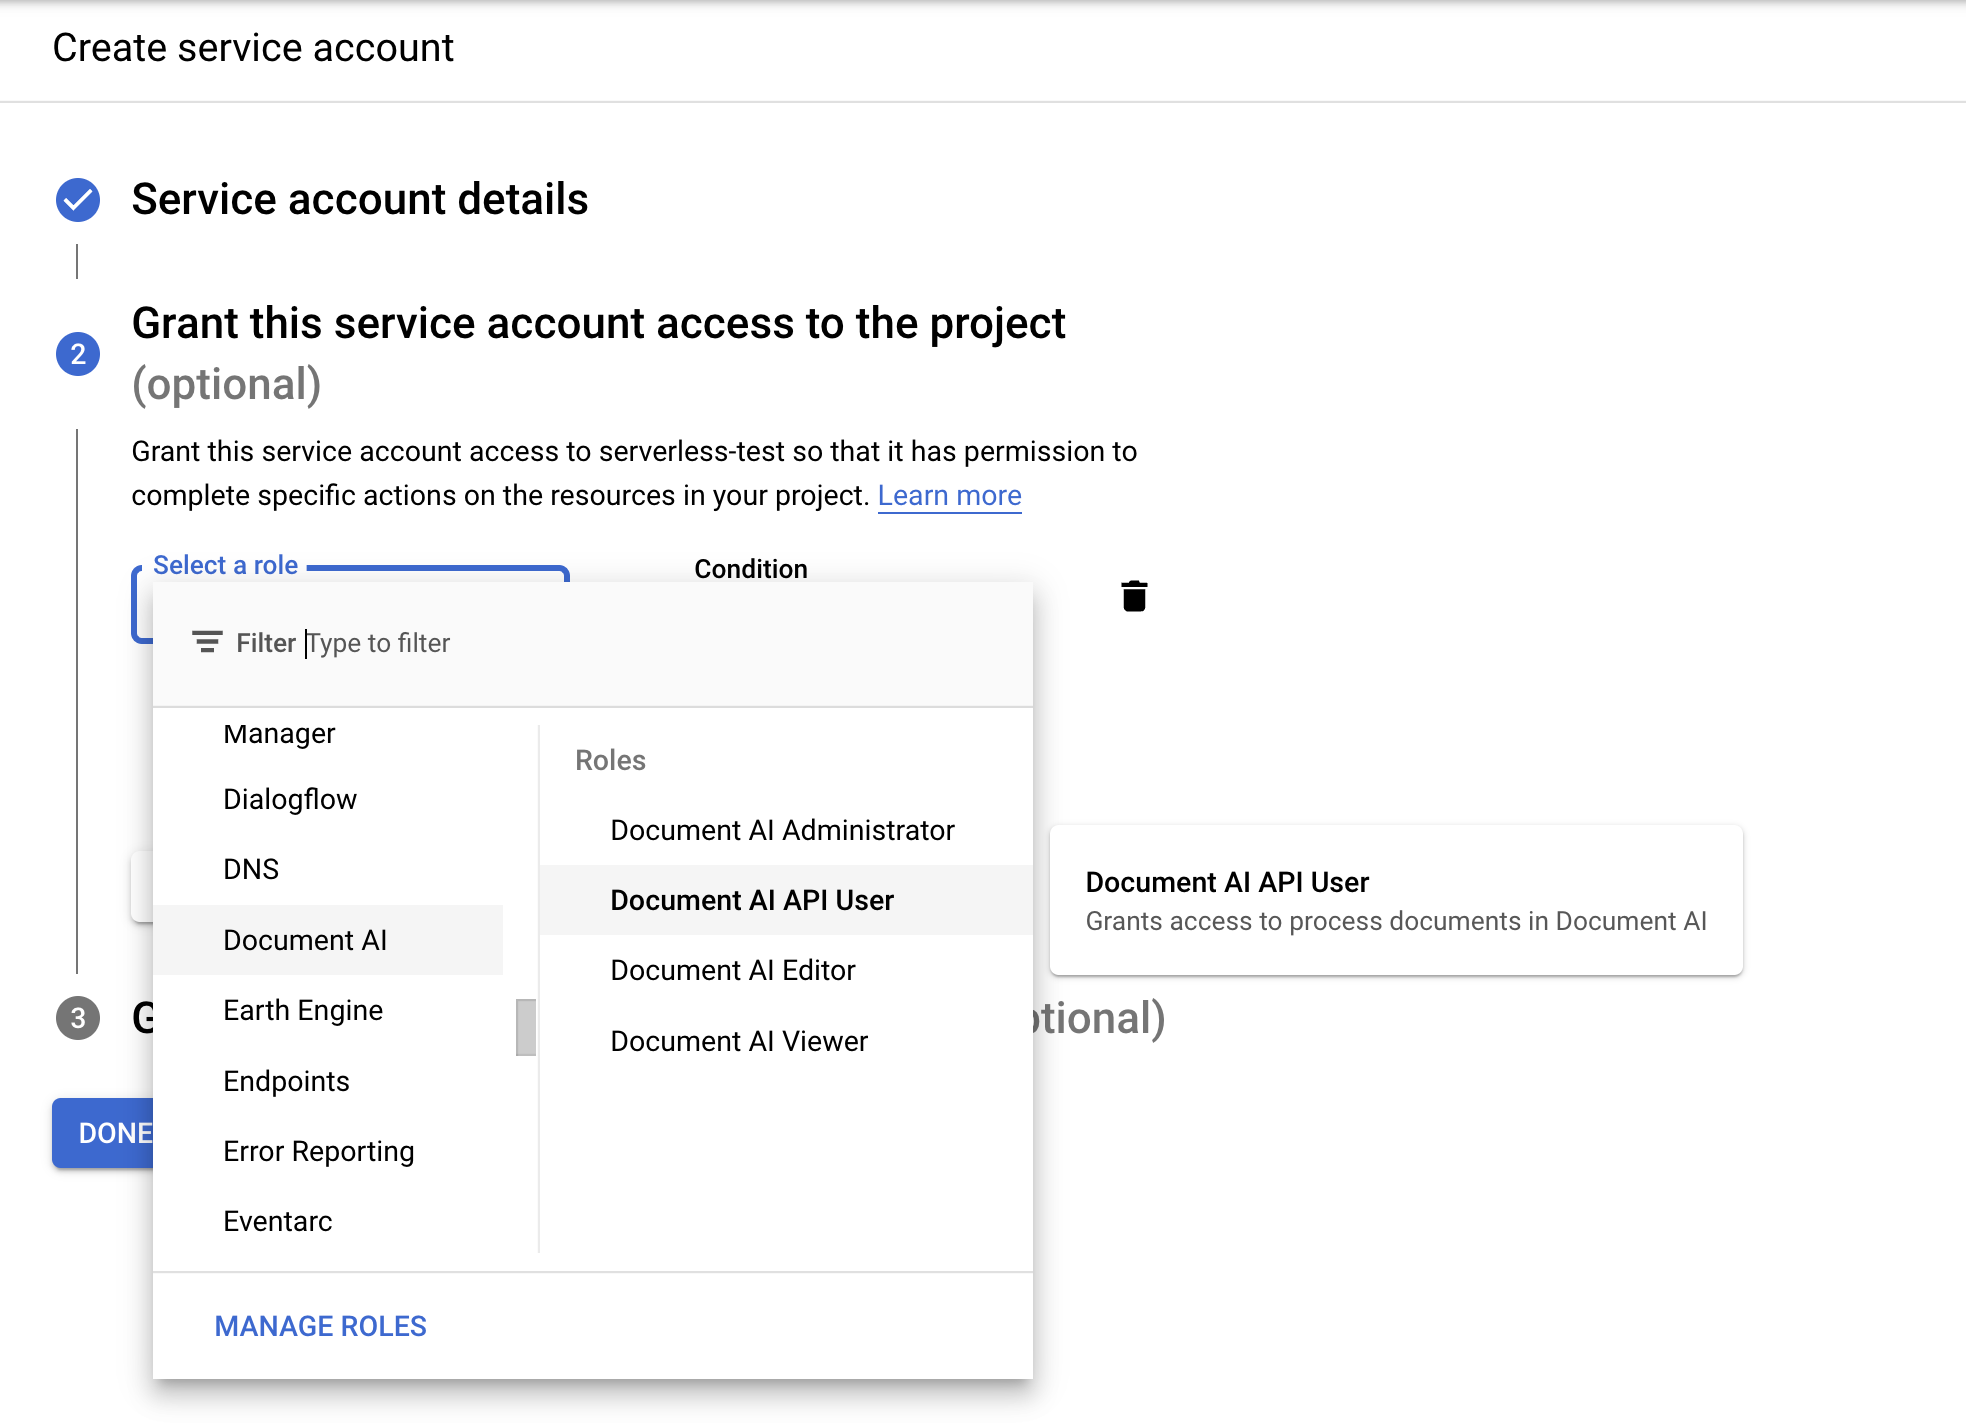
- Beri nama akun layanan Anda, lalu pilih Create and Continue.
- Jika Anda tidak memiliki akun layanan, pilih Buat Akun Layanan Baru.
Di halaman Create Workflow, klik
Next .
Tentukan alur kerja
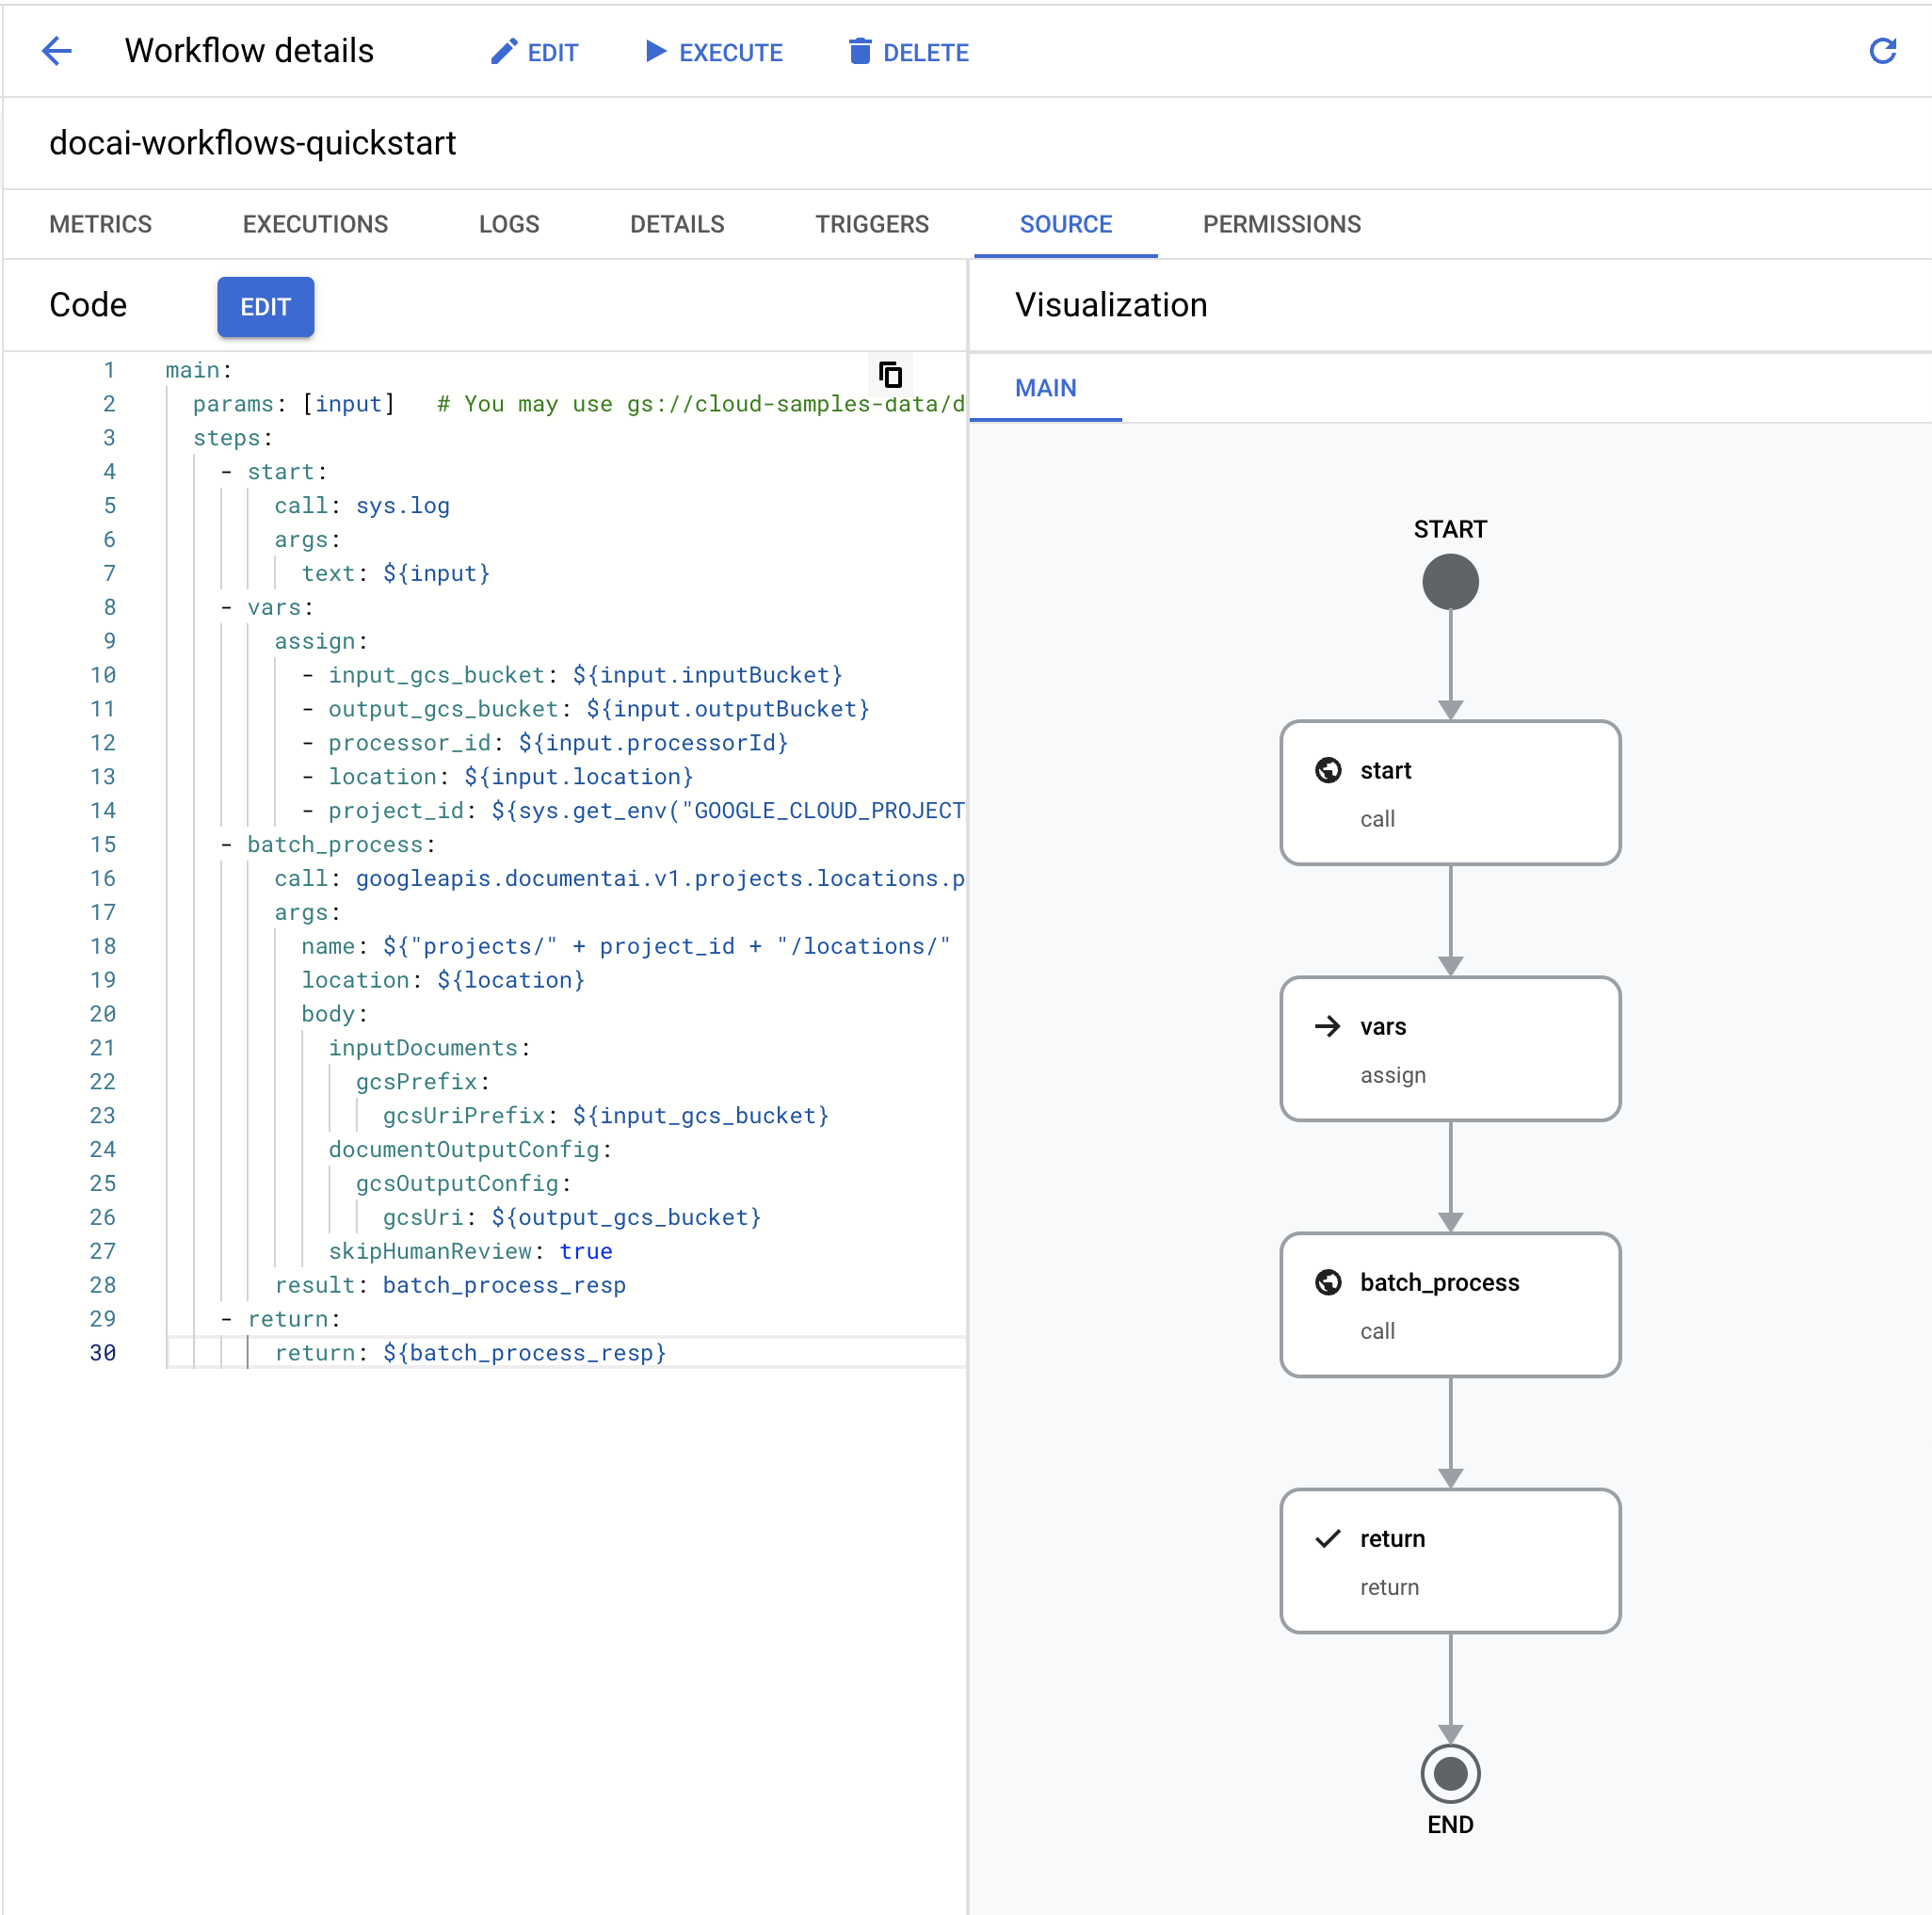
Di
editor Alur kerja , hapus YAML default dan tempelkan kode di bawah:main: params: [input] steps: - start: call: sys.log args: text: ${input} - vars: assign: - input_gcs_bucket: ${input.inputBucket} - output_gcs_bucket: ${input.outputBucket} - processor_id: ${input.processorId} - location: ${input.location} - project_id: ${sys.get_env("GOOGLE_CLOUD_PROJECT_ID")} - batch_process: call: googleapis.documentai.v1.projects.locations.processors.batchProcess args: name: ${"projects/" + project_id + "/locations/" + location + "/processors/" + processor_id} location: ${location} body: inputDocuments: gcsPrefix: gcsUriPrefix: ${input_gcs_bucket} documentOutputConfig: gcsOutputConfig: gcsUri: ${output_gcs_bucket} skipHumanReview: true result: batch_process_resp - return: return: ${batch_process_resp}
- Pilih
Deploy .
Alur kerja pengujian
Setelah alur kerja di-deploy, Anda akan berada di halaman Detail alur kerja.
Klik
Jalankan di bagian atas halaman untuk membuka halaman Jalankan alur kerja. Halaman ini memungkinkan Anda menguji alur kerja di konsol.Ganti variabel placeholder dalam JSON input berikut:
- OUTPUT_BUCKET_PATH: Jalur lengkap ke bucket dan folder output yang dibuat sebelumnya.
- PROCESSOR_ID: ID pemroses untuk pemroses yang dibuat sebelumnya.
- LOCATION: Region untuk pemroses yang dibuat sebelumnya.
{
  "inputBucket": "gs://cloud-samples-data/documentai/workflows",
  "outputBucket": "OUTPUT_BUCKET_PATH",
  "processorId": "PROCESSOR_ID",
  "location": "LOCATION"
}
Salin/Tempel JSON ke
kotak teks input .Klik
Execute di bagian bawah alur kerja untuk menguji input Anda dan tunggu beberapa saat hingga proses selesai.Setelah alur kerja selesai, JSON output akan terlihat seperti ini.
{
  "done": true,
  "metadata": {
    "@type": "type.googleapis.com/google.cloud.documentai.v1.BatchProcessMetadata",
    "createTime": "2023-02-24T18:31:18.521764Z",
    "individualProcessStatuses": [
      {
        "humanReviewStatus": {
          "state": "SKIPPED"
        },
        "inputGcsSource": "gs://cloud-samples-data/documentai/workflows/baking_technologies_invoice.pdf",
        "outputGcsDestination": "OUTPUT_BUCKET_PATH/11119195367705871803/0",
        "status": {}
      },
      {
        "humanReviewStatus": {
          "state": "SKIPPED"
        },
        "inputGcsSource": "gs://cloud-samples-data/documentai/workflows/generic_invoice.pdf",
        "outputGcsDestination": "OUTPUT_BUCKET_PATH/11119195367705871803/1",
        "status": {}
      },
      {
        "humanReviewStatus": {
          "state": "SKIPPED"
        },
        "inputGcsSource": "gs://cloud-samples-data/documentai/workflows/google_invoice.pdf",
        "outputGcsDestination": "OUTPUT_BUCKET_PATH/11119195367705871803/2",
        "status": {}
      }
    ],
    "state": "SUCCEEDED",
    "updateTime": "2023-02-24T18:31:52.543163Z"
  },
  "name": "projects/PROJECT_ID/locations/LOCATION/operations/11119195367705871803",
  "response": {
    "@type": "type.googleapis.com/google.cloud.documentai.v1.BatchProcessResponse"
  }
}
Buka bucket penyimpanan output Anda, Anda akan melihat output untuk setiap invoice yang diproses dalam folder yang diberi nama sesuai dengan ID Operasi.

Di dalam folder ini akan ada subfolder, satu untuk setiap dokumen yang diproses dari batch input yang berisi file JSON
Document.Anda dapat memeriksa setiap file JSON atau menulis kode untuk menggunakan kolom yang relevan untuk kasus penggunaan Anda. Lihat panduan menangani respons pemrosesan untuk mengetahui informasi selengkapnya.
Anda kini dapat menautkan langkah-langkah tambahan dalam alur kerja untuk memproses lebih lanjut output, seperti menyisipkan entity yang diekstrak ke dalam database untuk analisis.
Lihat Dokumentasi Workflows untuk mengetahui informasi selengkapnya tentang cara memicu alur kerja.
Pembersihan
Agar akun Google Cloud Anda tidak dikenai biaya untuk resource yang digunakan pada halaman ini, ikuti langkah-langkah berikut.
Untuk menghindari tagihan Google Cloud yang tidak perlu, gunakan Google Cloud console untuk menghapus prosesor, bucket, alur kerja, dan project Anda jika tidak lagi diperlukan.
Langkah berikutnya
- Pelajari lebih lanjut Workflows
- Pelajari lebih lanjut Konektor Workflows Document AI
- Lihat daftar dan deskripsi prosesor yang tersedia saat ini.
- Pelajari cara menangani respons pemrosesan.