
Panduan memulai Layout parser
Gunakan parser tata letak untuk mengekstrak elemen dari dokumen, seperti teks, tabel, dan daftar.
Untuk mengikuti panduan langkah demi langkah untuk tugas ini langsung di Google Cloud konsol, klik Pandu saya:
Sebelum memulai
- Login ke akun Google Cloud Anda. Jika Anda baru menggunakan Google Cloud, buat akun untuk mengevaluasi performa produk kami dalam skenario dunia nyata. Pelanggan baru juga mendapatkan kredit gratis senilai $300 untuk menjalankan, menguji, dan men-deploy workload.
-
In the Google Cloud console, on the project selector page, select or create a Google Cloud project.
Roles required to select or create a project
- Select a project: Selecting a project doesn't require a specific IAM role—you can select any project that you've been granted a role on.
-
Create a project: To create a project, you need the Project Creator role
(
roles/resourcemanager.projectCreator), which contains theresourcemanager.projects.createpermission. Learn how to grant roles.
-
Verify that billing is enabled for your Google Cloud project.
Enable the Document AI, Cloud Storage APIs.
Roles required to enable APIs
To enable APIs, you need the Service Usage Admin IAM role (
roles/serviceusage.serviceUsageAdmin), which contains theserviceusage.services.enablepermission. Learn how to grant roles.-
In the Google Cloud console, on the project selector page, select or create a Google Cloud project.
Roles required to select or create a project
- Select a project: Selecting a project doesn't require a specific IAM role—you can select any project that you've been granted a role on.
-
Create a project: To create a project, you need the Project Creator role
(
roles/resourcemanager.projectCreator), which contains theresourcemanager.projects.createpermission. Learn how to grant roles.
-
Verify that billing is enabled for your Google Cloud project.
Enable the Document AI, Cloud Storage APIs.
Roles required to enable APIs
To enable APIs, you need the Service Usage Admin IAM role (
roles/serviceusage.serviceUsageAdmin), which contains theserviceusage.services.enablepermission. Learn how to grant roles.
Membuat pemroses
Di konsol Google Cloud , di bagian Document AI, pilih Processor Gallery.
Di Galeri Prosesor,
cari Layout parser, lalu pilih Buat.
Di jendela samping, masukkan Processor name, seperti
quickstart-layout-processor.Pilih wilayah yang terdekat dengan Anda.
Klik Create.
Anda akan diarahkan ke halaman Processor Details dari pemroses parser formulir baru Anda.
Opsional: Pilih prosesor default dengan mengklik
Kelola versi , lalu pilih prosesor dari tabel Versi. Kemudian, klikTandai sebagai default dan konfirmasi dengan memasukkan nama prosesor.
Prosesor pengujian
Setelah membuat pemroses, Anda dapat mengirim permintaan anotasi ke pemroses tersebut.
Klik tombol
Upload Test Document dan pilih dokumen yang baru saja Anda download.Anda akan berada di halaman analisis penguraian tata letak. Anda dapat melihat blok atau bagian yang diuraikan dari dokumen, yang disusun menurut jenis yang terdeteksi.
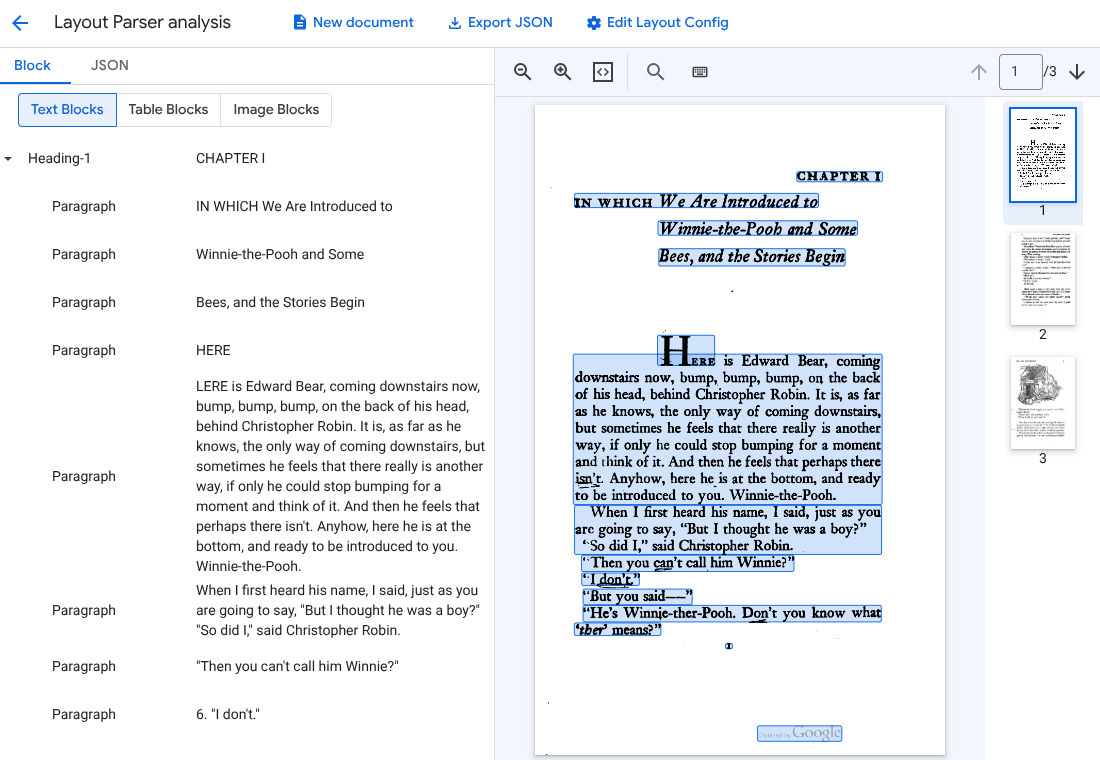
Opsional: Pilih
Edit Layout Config untuk mengaktifkan data anotasi gambar atau tabel.
Memproses dokumen
REST
Contoh ini menunjukkan cara mengirim dokumen yang disimpan di Cloud Storage ke parser tata letak untuk diproses. Proses ini mengaktifkan anotasi gambar dan tabel secara default.
REST
Sebelum menggunakan salah satu data permintaan, lakukan penggantian berikut:
- PROJECT_ID: Project ID Google Cloud Anda.
- LOCATION: lokasi prosesor Anda, misalnya:
us- Amerika Serikateu- Uni Eropa
- PROCESSOR_ID: ID pemroses kustom Anda.
- MIME_TYPE: Parser tata letak mendukung
application/pdfdantext/html. - GCS_FILE_PATH: Jalur file untuk bucket Cloud Storage dengan dokumen Anda.
- CHUNK_SIZE: Opsional. Ukuran potongan, dalam token, yang akan digunakan saat membagi dokumen.
- INCLUDE_ANCESTOR_HEADINGS: Opsional. Boolean. Apakah akan menyertakan judul induk saat memisahkan dokumen atau tidak.
Metode HTTP dan URL:
POST https://LOCATION-documentai.googleapis.com/v1beta3/projects/PROJECT_ID/locations/LOCATION/processors/PROCESSOR_ID/processorVersions/pretrained-layout-parser-v1.5-2025-08-25:process
Meminta isi JSON:
{
  "gcsDocument": {
    "gcsUri": "GCS_FILE_PATH",
    "mimeType": "MIME_TYPE"
  },
  "processOptions": {
    "layoutConfig": {
      "enableTableAnnotation": "true",
      "enableImageAnnotation": "true",
      "chunkingConfig": {
        "chunkSize": "CHUNK_SIZE",
        "includeAncestorHeadings": "INCLUDE_ANCESTOR_HEADINGS",
      }
    }
  }
}
Untuk mengirim permintaan Anda, pilih salah satu opsi berikut:
curl
Simpan isi permintaan dalam file bernama request.json,
dan jalankan perintah berikut:
curl -X POST \
     -H "Authorization: Bearer $(gcloud auth print-access-token)" \
     -H "Content-Type: application/json; charset=utf-8" \
     -d @request.json \
     "https://LOCATION-documentai.googleapis.com/v1beta3/projects/PROJECT_ID/locations/LOCATION/processors/PROCESSOR_ID/processorVersions/pretrained-layout-parser-v1.5-2025-08-25:process"
PowerShell
Simpan isi permintaan dalam file bernama request.json,
dan jalankan perintah berikut:
$cred = gcloud auth print-access-token
$headers = @{ "Authorization" = "Bearer $cred" }

Invoke-WebRequest `
    -Method POST `
    -Headers $headers `
    -ContentType: "application/json; charset=utf-8" `
    -InFile request.json `
    -Uri "https://LOCATION-documentai.googleapis.com/v1beta3/projects/PROJECT_ID/locations/LOCATION/processors/PROCESSOR_ID/processorVersions/pretrained-layout-parser-v1.5-2025-08-25:process" | Select-Object -Expand Content
Anda akan menerima kode status berhasil (2xx) dan respons kosong.
Meninjau output
Permintaan yang berhasil akan menampilkan objek dokumen dalam JSON. Kolom terpenting untuk Retrieval-Augmented Generation (RAG) adalah document.chunked_document.chunks.
Berikut adalah output dari penguraian formulir halaman ketiga "Winnie the Pooh" karya A.A. Milne.
{
  "document": {
  document_layout {
    blocks {
      block_id: "1"
      text_block {
        text: "WE ARE INTRODUCED 3"
        type_: "header"
      }
      page_span {
        page_start: 1
        page_end: 1
      }
    }
    blocks {
      block_id: "2"
      page_span {
        page_start: 1
        page_end: 1
      }
      image_block {
        mime_type: "image/png"
        annotations {
          description: "This is an ink drawing depicting Winnie-the-Pooh sitting outside his house.\n\nHere are the facts and conclusions that can be derived from the image:\n\n*   **Character:** The central figure is a bear, identifiable as Winnie-the-Pooh, sitting on a log.\n*   **Location:** He is positioned outside what appears to be a small, rustic shelter or house.\n*   **Signage:** Above the doorway of the shelter, there is a sign that reads \"MR SANDERZ\". Below this sign, there is another partial sign visible, where the letters \"RNIG\" and \"ALSO\" can be seen.\n*   **Doorbell:** To the left of the doorway, a bell is hanging, indicating a doorbell mechanism.\n*   **Setting:** The dwelling is surrounded by what looks like brush, trees, and general wilderness, suggested by the lines representing foliage and twigs.\n*   **Log:** Pooh is seated on a cut log or tree trunk. To the left of this log, there are other smaller logs or branches piled up.\n*   **Style:** The image is a black and white line drawing, characteristic of classic book illustrations."
        }
        blob_asset_id: "blob_1"
      }
    }
    blocks {
      block_id: "3"
      text_block {
        text: ""Winnie-the-Pooh wasn't quite sure," said Christopher Robin. "Now I am," said a growly voice. "Then I will go on,"said I.) One day when he was out walking, he came to an open place in the middle of the forest, and in the middle of this place was a large oak-tree, and, from the top of the tree, there came a loud buzzing-noise. Winnie-the-Pooh sat down at the foot of the tree,put his head between his paws and began to think."
        type_: "paragraph"
      }
      page_span {
        page_start: 1
        page_end: 1
      }
    }
    blocks {
      block_id: "4"
      text_block {
        text: "Digitized by Google"
        type_: "footer"
      }
      page_span {
        page_start: 1
        page_end: 1
      }
    }
  }
  chunked_document {
    chunks {
      chunk_id: "c1"
      source_block_ids: "2"
      source_block_ids: "3"
      content: "__START_OF_ANNOTATION__This is an ink drawing depicting Winnie-the-Pooh sitting outside his house.\n\nHere are the facts and conclusions that can be derived from the image:\n\n*   **Character:** The central figure is a bear, identifiable as Winnie-the-Pooh, sitting on a log.\n*   **Location:** He is positioned outside what appears to be a small, rustic shelter or house.\n*   **Signage:** Above the doorway of the shelter, there is a sign that reads \"MR SANDERZ\". Below this sign, there is another partial sign visible, where the letters \"RNIG\" and \"ALSO\" can be seen.\n*   **Doorbell:** To the left of the doorway, a bell is hanging, indicating a doorbell mechanism.\n*   **Setting:** The dwelling is surrounded by what looks like brush, trees, and general wilderness, suggested by the lines representing foliage and twigs.\n*   **Log:** Pooh is seated on a cut log or tree trunk. To the left of this log, there are other smaller logs or branches piled up.\n*   **Style:** The image is a black and white line drawing, characteristic of classic book illustrations.__END_OF_ANNOTATION__"Winnie-the-Pooh wasn't quite sure," said Christopher Robin. "Now I am," said a growly voice. "Then I will go on," said I.) One day when he was out walking, he came to an open place in the middle of the forest, and in the middle of this place was a large oak-tree, and, from the top of the tree, there came a loud buzzing-noise. Winnie-the-Pooh sat down at the foot of the tree,put his head between his paws and began to think."
      page_span {
        page_start: 1
        page_end: 1
      }
      page_headers {
        text: "WE ARE INTRODUCED 3"
        page_span {
          page_start: 1
          page_end: 1
        }
      }
      page_footers {
        text: "Digitized by Google"
        page_span {
          page_start: 1
          page_end: 1
        }
      }
      chunk_fields {
        image_chunk_field {
          blob_asset_id: "blob_1"
          annotations {
            description: "This is an ink drawing depicting Winnie-the-Pooh sitting outside his house.\n\nHere are the facts and conclusions that can be derived from the image:\n\n*   **Character:** The central figure is a bear, identifiable as Winnie-the-Pooh, sitting on a log.\n*   **Location:** He is positioned outside what appears to be a small, rustic shelter or house.\n*   **Signage:** Above the doorway of the shelter, there is a sign that reads \"MR SANDERZ\". Below this sign, there is another partial sign visible, where the letters \"RNIG\" and \"ALSO\" can be seen.\n*   **Doorbell:** To the left of the doorway, a bell is hanging, indicating a doorbell mechanism.\n*   **Setting:** The dwelling is surrounded by what looks like brush, trees, and general wilderness, suggested by the lines representing foliage and twigs.\n*   **Log:** Pooh is seated on a cut log or tree trunk. To the left of this log, there are other smaller logs or branches piled up.\n*   **Style:** The image is a black and white line drawing, characteristic of classic book illustrations."
          }
        }
      }
    }
  }
  blob_assets {
    asset_id: "blob_1"
    content: "image_bytes"
    mime_type: "image/png"
  }
}
Python
Panduan ini menunjukkan cara menggunakan library klien Python untuk memproses dokumen. Menggunakan kode ini akan mengaktifkan anotasi gambar dan tabel secara default.
Instal library klien
! pip install --upgrade --quiet google-cloud-documentaiJalankan pemroses.
def process_layout_parser(
    project_id: str, location: str, processor_id: str, gcs_uri: str, mime_type: str
):
    """
    Processes a document with the layout parser and prints chunk text.
    """
    client = documentai.DocumentProcessorServiceClient()

    # The full resource name of the processor
    processor_version_id = 'pretrained-layout-parser-v1.5-2025-08-25'
    name = client.processor_path(project_id, location, processor_id, processor_version_id)

    # Configure the Cloud Storage document
    gcs_document = documentai.GcsDocument(gcs_uri=gcs_uri, mime_type=mime_type)

    # Configure processing options for RAG
    # This enables annotation and context-aware chunking.
    process_options = documentai.ProcessOptions(
      # Process only specific pages
      layout_config=documentai.ProcessOptions.LayoutConfig(
          enable_table_annotation=True,
          enable_image_annotation=True,
          chunking_config=documentai.ProcessOptions.LayoutConfig.ChunkingConfig(
        chunk_size=1024,
        include_ancestor_headings=True,
          ),
      ),
  )

    # Build the request
    request = documentai.ProcessRequest(
        name=name,
        gcs_document=gcs_document,
        process_options=process_options,
    )

    # Process the document
    result = client.process_document(request=request)
    document = result.document

    print(f"Document processing complete.\n")

    print("--- RAG-Ready Chunks (with context) ---")
    for i, chunk in enumerate(document.chunked_document.chunks):
        print(f"\n--- Chunk {i} ---")

        # Print the chunk's content
        print(f"Text: {chunk.content}")
    return result
Memproses dokumen secara batch dengan parser tata letak
Gunakan prosedur berikut untuk mengurai dan membagi beberapa dokumen dalam satu permintaan.
Masukkan dokumen ke parser tata letak untuk diurai dan dipotong.
Ikuti petunjuk untuk permintaan batch processing di Mengirim permintaan pemrosesan.
Konfigurasi kolom di
ProcessOptions.layoutConfigsaat membuat permintaanbatchProcess.Input
Contoh JSON berikut mengonfigurasi
ProcessOptions.layoutConfig."processOptions": { "layoutConfig": { "enableTableAnnotation": "true", "enableImageAnnotation": "true", "chunkingConfig": { "chunkSize": "CHUNK_SIZE", "includeAncestorHeadings": "INCLUDE_ANCESTOR_HEADINGS_BOOLEAN" } } }Ganti kode berikut:
CHUNK_SIZE: Ukuran potongan maksimum, dalam jumlah token, yang akan digunakan saat memisahkan dokumen.INCLUDE_ANCESTOR_HEADINGS_BOOLEAN: Apakah akan menyertakan judul induk saat memisahkan dokumen. Judul ancestor adalah induk dari subjudul dalam dokumen asli. Chunk ini dapat memberikan konteks tambahan tentang posisinya dalam dokumen asli. Hingga dua tingkat judul dapat disertakan dengan chunk.
Pembersihan
Agar akun Google Cloud Anda tidak dikenai biaya untuk resource yang digunakan pada halaman ini, ikuti langkah-langkah berikut.
Untuk menghindari tagihan Google Cloud yang tidak perlu, gunakan Google Cloud console untuk menghapus prosesor dan project Anda jika tidak lagi diperlukan.
Jika Anda membuat project baru untuk mempelajari Document AI dan Anda tidak lagi memerlukan project tersebut, [hapus project tersebut][delete-project].
Jika Anda menggunakan project Google Cloud yang sudah ada, hapus resource yang dibuat untuk menghindari tagihan pada akun Anda:
Di menu navigasi konsol Google Cloud , pilih Document AI, lalu pilih My Processors.
Pilih
Tindakan lainnya di baris yang sama dengan prosesor yang ingin Anda hapus.Pilih Hapus pemroses, masukkan nama pemroses, lalu pilih Hapus lagi untuk mengonfirmasi.
Langkah berikutnya
Untuk mengetahui detailnya, lihat Panduan.