
레이아웃 파서 빠른 시작
레이아웃 파서를 사용하여 문서에서 텍스트, 표, 목록과 같은 요소를 추출합니다.
콘솔에서 이 태스크에 대한 단계별 안내를 직접 수행하려면 Google Cloud 둘러보기를 클릭합니다.
시작하기 전에
- 계정에 로그인합니다. Google Cloud 를 처음 사용하는 경우 Google Cloud, 계정을 만들고 Google 제품의 실제 성능을 평가해 보세요. 신규 고객에게는 워크로드를 실행, 테스트, 배포하는 데 사용할 수 있는 $300의 무료 크레딧이 제공됩니다.
-
In the Google Cloud console, on the project selector page, select or create a Google Cloud project.
Roles required to select or create a project
- Select a project: Selecting a project doesn't require a specific IAM role—you can select any project that you've been granted a role on.
-
Create a project: To create a project, you need the Project Creator role
(
roles/resourcemanager.projectCreator), which contains theresourcemanager.projects.createpermission. Learn how to grant roles.
-
Verify that billing is enabled for your Google Cloud project.
Enable the Document AI, Cloud Storage APIs.
Roles required to enable APIs
To enable APIs, you need the Service Usage Admin IAM role (
roles/serviceusage.serviceUsageAdmin), which contains theserviceusage.services.enablepermission. Learn how to grant roles.-
In the Google Cloud console, on the project selector page, select or create a Google Cloud project.
Roles required to select or create a project
- Select a project: Selecting a project doesn't require a specific IAM role—you can select any project that you've been granted a role on.
-
Create a project: To create a project, you need the Project Creator role
(
roles/resourcemanager.projectCreator), which contains theresourcemanager.projects.createpermission. Learn how to grant roles.
-
Verify that billing is enabled for your Google Cloud project.
Enable the Document AI, Cloud Storage APIs.
Roles required to enable APIs
To enable APIs, you need the Service Usage Admin IAM role (
roles/serviceusage.serviceUsageAdmin), which contains theserviceusage.services.enablepermission. Learn how to grant roles.
프로세서 만들기
콘솔의 Document AI 섹션에서 프로세서 갤러리를 선택합니다. Google Cloud
프로세서 갤러리에서
레이아웃 파서 를 검색하고 만들기를 선택합니다.
측면 창에 프로세서 이름(예:
quickstart-layout-processor)을 입력합니다.가장 가까운 리전을 선택합니다.
만들기를 클릭합니다.
새 양식 파서 프로세서의 프로세서 세부정보 페이지로 이동합니다.
선택사항:
버전 관리 를 클릭하고 버전 표에서 프로세서를 선택하여 기본 프로세서를 선택합니다. 그런 다음기본값으로 표시 를 클릭하고 프로세서 이름을 입력하여 확인합니다.
프로세서 테스트
프로세서를 만든 후 프로세서에 주석 요청을 보낼 수 있습니다.
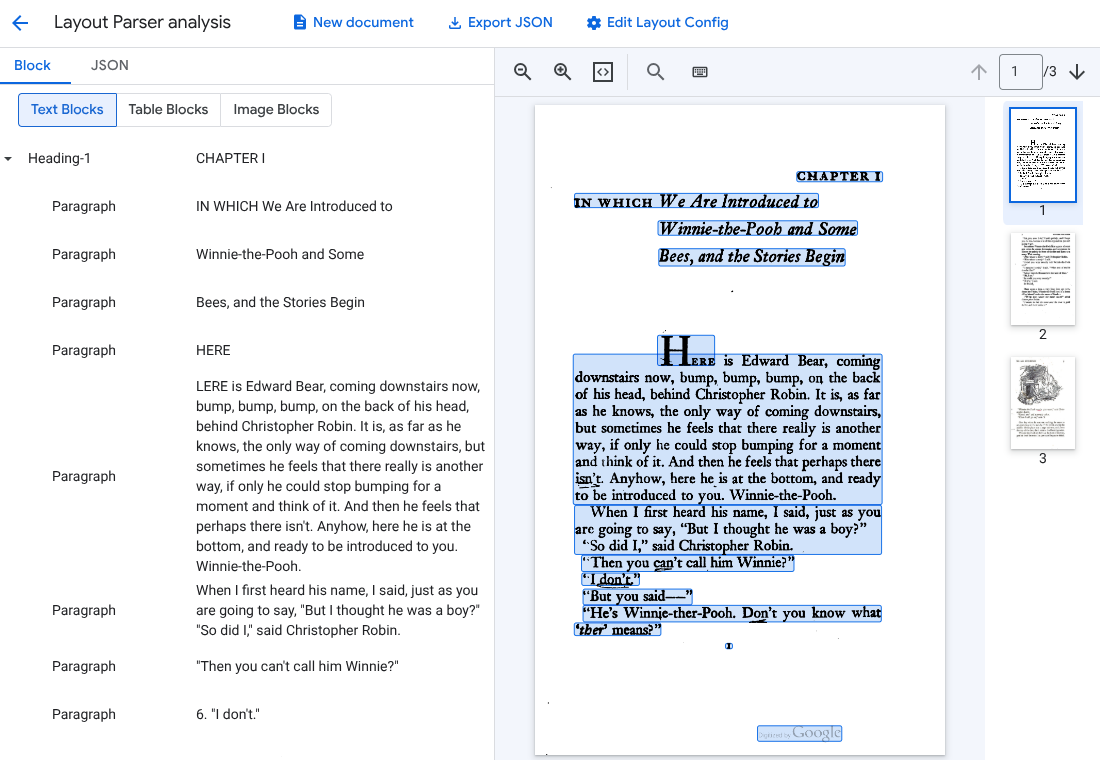
테스트 문서 업로드 버튼을 클릭하고 방금 다운로드한 문서를 선택합니다.이제 레이아웃 파서 분석 페이지가 표시됩니다. 문서에서 파싱된 블록 또는 청크를 감지된 유형별로 정리하여 볼 수 있습니다.
선택사항:
레이아웃 구성 수정 을 선택하여 이미지 또는 표 주석 데이터를 사용 설정합니다.
문서 처리
REST
이 예시에서는 Cloud Storage에 저장된 문서를 처리하기 위해 레이아웃 파서로 보내는 방법을 보여줍니다. 이 프로세스는 기본적으로 이미지 및 표 주석을 사용 설정합니다.
REST
요청 데이터를 사용하기 전에 다음을 바꿉니다.
- PROJECT_ID: 프로젝트 ID입니다. Google Cloud
- LOCATION: 프로세서의 위치(예:)
us- 미국eu- 유럽연합
- PROCESSOR_ID: 커스텀 프로세서의 ID입니다.
- MIME_TYPE: 레이아웃 파서는
application/pdf및text/html을 지원합니다. - GCS_FILE_PATH: 문서가 포함된 Cloud Storage 버킷의 파일 경로입니다.
- CHUNK_SIZE: 선택사항입니다. 문서를 분할할 때 사용할 청크 크기(토큰)입니다.
- INCLUDE_ANCESTOR_HEADINGS: 선택사항입니다. 부울입니다. 문서를 분할할 때 상위 제목을 포함할지 여부입니다.
HTTP 메서드 및 URL:
POST https://LOCATION-documentai.googleapis.com/v1beta3/projects/PROJECT_ID/locations/LOCATION/processors/PROCESSOR_ID/processorVersions/pretrained-layout-parser-v1.5-2025-08-25:process
JSON 요청 본문:
{
  "gcsDocument": {
    "gcsUri": "GCS_FILE_PATH",
    "mimeType": "MIME_TYPE"
  },
  "processOptions": {
    "layoutConfig": {
      "enableTableAnnotation": "true",
      "enableImageAnnotation": "true",
      "chunkingConfig": {
        "chunkSize": "CHUNK_SIZE",
        "includeAncestorHeadings": "INCLUDE_ANCESTOR_HEADINGS",
      }
    }
  }
}
요청을 보내려면 다음 옵션 중 하나를 선택합니다.
curl
요청 본문을 request.json 파일에 저장하고 다음 명령어를 실행합니다.
curl -X POST \
     -H "Authorization: Bearer $(gcloud auth print-access-token)" \
     -H "Content-Type: application/json; charset=utf-8" \
     -d @request.json \
     "https://LOCATION-documentai.googleapis.com/v1beta3/projects/PROJECT_ID/locations/LOCATION/processors/PROCESSOR_ID/processorVersions/pretrained-layout-parser-v1.5-2025-08-25:process"
PowerShell
요청 본문을 request.json 파일에 저장하고 다음 명령어를 실행합니다.
$cred = gcloud auth print-access-token
$headers = @{ "Authorization" = "Bearer $cred" }

Invoke-WebRequest `
    -Method POST `
    -Headers $headers `
    -ContentType: "application/json; charset=utf-8" `
    -InFile request.json `
    -Uri "https://LOCATION-documentai.googleapis.com/v1beta3/projects/PROJECT_ID/locations/LOCATION/processors/PROCESSOR_ID/processorVersions/pretrained-layout-parser-v1.5-2025-08-25:process" | Select-Object -Expand Content
성공 상태 코드 (2xx)와 빈 응답을 받게 됩니다.
출력 검토
요청이 성공하면 JSON 형식의 문서 객체가 반환됩니다. 검색 증강 생성 (RAG)의 가장 중요한 필드는 document.chunked_document.chunks입니다.
다음은 A.A. 밀른의 '곰돌이 푸'의 세 번째 페이지를 파싱한 출력 양식입니다.
{
  "document": {
  document_layout {
    blocks {
      block_id: "1"
      text_block {
        text: "WE ARE INTRODUCED 3"
        type_: "header"
      }
      page_span {
        page_start: 1
        page_end: 1
      }
    }
    blocks {
      block_id: "2"
      page_span {
        page_start: 1
        page_end: 1
      }
      image_block {
        mime_type: "image/png"
        annotations {
          description: "This is an ink drawing depicting Winnie-the-Pooh sitting outside his house.\n\nHere are the facts and conclusions that can be derived from the image:\n\n*   **Character:** The central figure is a bear, identifiable as Winnie-the-Pooh, sitting on a log.\n*   **Location:** He is positioned outside what appears to be a small, rustic shelter or house.\n*   **Signage:** Above the doorway of the shelter, there is a sign that reads \"MR SANDERZ\". Below this sign, there is another partial sign visible, where the letters \"RNIG\" and \"ALSO\" can be seen.\n*   **Doorbell:** To the left of the doorway, a bell is hanging, indicating a doorbell mechanism.\n*   **Setting:** The dwelling is surrounded by what looks like brush, trees, and general wilderness, suggested by the lines representing foliage and twigs.\n*   **Log:** Pooh is seated on a cut log or tree trunk. To the left of this log, there are other smaller logs or branches piled up.\n*   **Style:** The image is a black and white line drawing, characteristic of classic book illustrations."
        }
        blob_asset_id: "blob_1"
      }
    }
    blocks {
      block_id: "3"
      text_block {
        text: ""Winnie-the-Pooh wasn't quite sure," said Christopher Robin. "Now I am," said a growly voice. "Then I will go on,"said I.) One day when he was out walking, he came to an open place in the middle of the forest, and in the middle of this place was a large oak-tree, and, from the top of the tree, there came a loud buzzing-noise. Winnie-the-Pooh sat down at the foot of the tree,put his head between his paws and began to think."
        type_: "paragraph"
      }
      page_span {
        page_start: 1
        page_end: 1
      }
    }
    blocks {
      block_id: "4"
      text_block {
        text: "Digitized by Google"
        type_: "footer"
      }
      page_span {
        page_start: 1
        page_end: 1
      }
    }
  }
  chunked_document {
    chunks {
      chunk_id: "c1"
      source_block_ids: "2"
      source_block_ids: "3"
      content: "__START_OF_ANNOTATION__This is an ink drawing depicting Winnie-the-Pooh sitting outside his house.\n\nHere are the facts and conclusions that can be derived from the image:\n\n*   **Character:** The central figure is a bear, identifiable as Winnie-the-Pooh, sitting on a log.\n*   **Location:** He is positioned outside what appears to be a small, rustic shelter or house.\n*   **Signage:** Above the doorway of the shelter, there is a sign that reads \"MR SANDERZ\". Below this sign, there is another partial sign visible, where the letters \"RNIG\" and \"ALSO\" can be seen.\n*   **Doorbell:** To the left of the doorway, a bell is hanging, indicating a doorbell mechanism.\n*   **Setting:** The dwelling is surrounded by what looks like brush, trees, and general wilderness, suggested by the lines representing foliage and twigs.\n*   **Log:** Pooh is seated on a cut log or tree trunk. To the left of this log, there are other smaller logs or branches piled up.\n*   **Style:** The image is a black and white line drawing, characteristic of classic book illustrations.__END_OF_ANNOTATION__"Winnie-the-Pooh wasn't quite sure," said Christopher Robin. "Now I am," said a growly voice. "Then I will go on," said I.) One day when he was out walking, he came to an open place in the middle of the forest, and in the middle of this place was a large oak-tree, and, from the top of the tree, there came a loud buzzing-noise. Winnie-the-Pooh sat down at the foot of the tree,put his head between his paws and began to think."
      page_span {
        page_start: 1
        page_end: 1
      }
      page_headers {
        text: "WE ARE INTRODUCED 3"
        page_span {
          page_start: 1
          page_end: 1
        }
      }
      page_footers {
        text: "Digitized by Google"
        page_span {
          page_start: 1
          page_end: 1
        }
      }
      chunk_fields {
        image_chunk_field {
          blob_asset_id: "blob_1"
          annotations {
            description: "This is an ink drawing depicting Winnie-the-Pooh sitting outside his house.\n\nHere are the facts and conclusions that can be derived from the image:\n\n*   **Character:** The central figure is a bear, identifiable as Winnie-the-Pooh, sitting on a log.\n*   **Location:** He is positioned outside what appears to be a small, rustic shelter or house.\n*   **Signage:** Above the doorway of the shelter, there is a sign that reads \"MR SANDERZ\". Below this sign, there is another partial sign visible, where the letters \"RNIG\" and \"ALSO\" can be seen.\n*   **Doorbell:** To the left of the doorway, a bell is hanging, indicating a doorbell mechanism.\n*   **Setting:** The dwelling is surrounded by what looks like brush, trees, and general wilderness, suggested by the lines representing foliage and twigs.\n*   **Log:** Pooh is seated on a cut log or tree trunk. To the left of this log, there are other smaller logs or branches piled up.\n*   **Style:** The image is a black and white line drawing, characteristic of classic book illustrations."
          }
        }
      }
    }
  }
  blob_assets {
    asset_id: "blob_1"
    content: "image_bytes"
    mime_type: "image/png"
  }
}
Python
이 가이드에서는 Python 클라이언트 라이브러리를 사용하여 문서를 처리하는 방법을 보여줍니다. 이 코드를 사용하면 기본적으로 이미지 및 표 주석이 사용 설정됩니다.
클라이언트 라이브러리를 설치합니다.
! pip install --upgrade --quiet google-cloud-documentai프로세서를 실행합니다.
def process_layout_parser(
    project_id: str, location: str, processor_id: str, gcs_uri: str, mime_type: str
):
    """
    Processes a document with the layout parser and prints chunk text.
    """
    client = documentai.DocumentProcessorServiceClient()

    # The full resource name of the processor
    processor_version_id = 'pretrained-layout-parser-v1.5-2025-08-25'
    name = client.processor_path(project_id, location, processor_id, processor_version_id)

    # Configure the Cloud Storage document
    gcs_document = documentai.GcsDocument(gcs_uri=gcs_uri, mime_type=mime_type)

    # Configure processing options for RAG
    # This enables annotation and context-aware chunking.
    process_options = documentai.ProcessOptions(
      # Process only specific pages
      layout_config=documentai.ProcessOptions.LayoutConfig(
          enable_table_annotation=True,
          enable_image_annotation=True,
          chunking_config=documentai.ProcessOptions.LayoutConfig.ChunkingConfig(
        chunk_size=1024,
        include_ancestor_headings=True,
          ),
      ),
  )

    # Build the request
    request = documentai.ProcessRequest(
        name=name,
        gcs_document=gcs_document,
        process_options=process_options,
    )

    # Process the document
    result = client.process_document(request=request)
    document = result.document

    print(f"Document processing complete.\n")

    print("--- RAG-Ready Chunks (with context) ---")
    for i, chunk in enumerate(document.chunked_document.chunks):
        print(f"\n--- Chunk {i} ---")

        # Print the chunk's content
        print(f"Text: {chunk.content}")
    return result
레이아웃 파서로 문서 일괄 처리
다음 절차에 따라 단일 요청에서 여러 문서를 파싱하고 청크 처리합니다.
파싱 및 청크 처리를 위해 레이아웃 파서에 문서를 입력합니다.
요청을 할 때
ProcessOptions.layoutConfig에서 필드를 구성합니다.batchProcess입력
다음 JSON 예시에서는
ProcessOptions.layoutConfig를 구성합니다."processOptions": { "layoutConfig": { "enableTableAnnotation": "true", "enableImageAnnotation": "true", "chunkingConfig": { "chunkSize": "CHUNK_SIZE", "includeAncestorHeadings": "INCLUDE_ANCESTOR_HEADINGS_BOOLEAN" } } }다음을 바꿉니다.
CHUNK_SIZE: 문서를 분할할 때 사용할 최대 청크 크기(토큰 수)입니다.INCLUDE_ANCESTOR_HEADINGS_BOOLEAN: 문서를 분할할 때 상위 제목을 포함할지 여부입니다. 상위 제목은 원본 문서의 소제목의 상위 항목입니다. 상위 제목은 청크에 원본 문서에서의 위치에 관한 추가 컨텍스트를 제공할 수 있습니다. 청크에 최대 2단계의 제목을 포함할 수 있습니다.
정리
이 페이지에서 사용한 리소스 비용이 Google Cloud 계정에 청구되지 않도록 하려면 다음 단계를 수행합니다.
불필요한 Google Cloud 요금이 청구되지 않도록 하려면 Google Cloud console 을 사용하여 필요하지 않은 프로세서와 프로젝트를 삭제합니다.
Document AI 학습용으로 만든 새 프로젝트가 더 이상 필요 없는 경우 [프로젝트를 삭제하세요][delete-project].
기존 Google Cloud 프로젝트를 사용한 경우 계정에 요금이 청구되지 않도록 만든 리소스를 삭제합니다.
Google Cloud 콘솔 탐색 메뉴에서 Document AI 를 선택하고 내 프로세서 를 선택합니다.
삭제하려는 프로세서와 동일한 행에서
**작업 더보기** 를 선택합니다.프로세서 삭제를 선택하고 프로세서 이름을 입력한 다음 삭제 를 다시 선택하여 확인합니다.
다음 단계
자세한 내용은 가이드를 참고하세요.