
Guia de início rápido do analisador de layout
Use o analisador de layout para extrair elementos de um documento, como texto, tabelas e listas.
Para seguir as instruções detalhadas desta tarefa diretamente no console do Google Cloud , clique em Orientação:
Antes de começar
- Faça login na sua conta do Google Cloud . Se você começou a usar o Google Cloud, crie uma conta para avaliar o desempenho de nossos produtos em situações reais. Clientes novos também recebem US$ 300 em créditos para executar, testar e implantar cargas de trabalho.
-
In the Google Cloud console, on the project selector page, select or create a Google Cloud project.
Roles required to select or create a project
- Select a project: Selecting a project doesn't require a specific IAM role—you can select any project that you've been granted a role on.
-
Create a project: To create a project, you need the Project Creator role
(
roles/resourcemanager.projectCreator), which contains theresourcemanager.projects.createpermission. Learn how to grant roles.
-
Verify that billing is enabled for your Google Cloud project.
Enable the Document AI, Cloud Storage APIs.
Roles required to enable APIs
To enable APIs, you need the Service Usage Admin IAM role (
roles/serviceusage.serviceUsageAdmin), which contains theserviceusage.services.enablepermission. Learn how to grant roles.-
In the Google Cloud console, on the project selector page, select or create a Google Cloud project.
Roles required to select or create a project
- Select a project: Selecting a project doesn't require a specific IAM role—you can select any project that you've been granted a role on.
-
Create a project: To create a project, you need the Project Creator role
(
roles/resourcemanager.projectCreator), which contains theresourcemanager.projects.createpermission. Learn how to grant roles.
-
Verify that billing is enabled for your Google Cloud project.
Enable the Document AI, Cloud Storage APIs.
Roles required to enable APIs
To enable APIs, you need the Service Usage Admin IAM role (
roles/serviceusage.serviceUsageAdmin), which contains theserviceusage.services.enablepermission. Learn how to grant roles.
Criar um processador
No console Google Cloud , na seção "Document AI", selecione Galeria de processadores.
Na Galeria de processadores,
procure Analisador de layout e selecione Criar.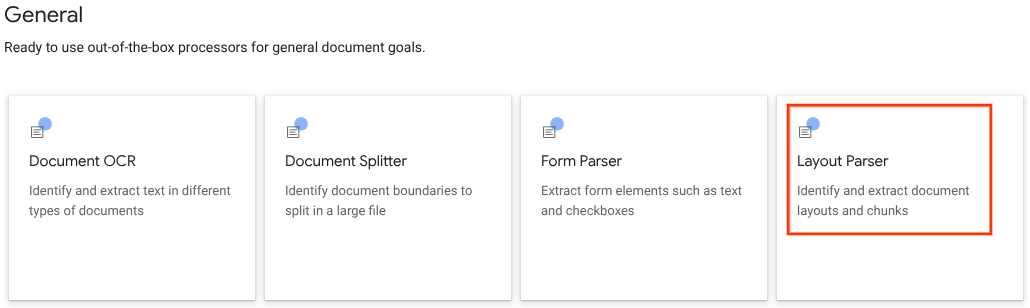
Na janela lateral, digite um Nome de processador, como
quickstart-layout-processor.Selecione a região mais próxima de você.
Clique em Criar.
Você será direcionado para a página Detalhes do processador do novo processador do analisador de formulários.
Opcional: selecione um processador padrão clicando em
Gerenciar versões e escolhendo um processador na tabela Versões. Em seguida, clique emMarcar como padrão e confirme inserindo o nome do processador.
Processador de testes
Depois de criar o processador, você pode enviar solicitações de anotação para ele.
Clique no botão
Fazer upload do documento de teste e selecione o documento que você acabou de salvar.Agora você está na página Análise do analisador de layout. É possível conferir os blocos ou partes analisados do documento, organizados por tipos detectados.

Opcional: selecione
Editar configuração de layout para ativar os dados de anotação de imagem ou tabela.
Processar um documento
REST
Este exemplo mostra como enviar um documento armazenado no Cloud Storage para o analisador de layout para processamento. Esse processo ativa a anotação de imagens e tabelas por padrão.
REST
Antes de usar os dados da solicitação abaixo, faça as substituições a seguir:
- PROJECT_ID: o ID do projeto do Google Cloud .
- LOCATION: a localização do seu processador, por exemplo:
us: Estados Unidoseu: União Europeia
- PROCESSOR_ID: o ID do seu processador personalizado.
- MIME_TYPE: o analisador de layout é compatível com
application/pdfetext/html. - GCS_FILE_PATH: o caminho do arquivo para o bucket do Cloud Storage com seu documento.
- CHUNK_SIZE: opcional. O tamanho do bloco, em tokens, a ser usado ao dividir documentos.
- INCLUDE_ANCESTOR_HEADINGS: opcional. Booleano. Se os títulos ancestrais devem ser incluídos ao dividir documentos.
Método HTTP e URL:
POST https://LOCATION-documentai.googleapis.com/v1beta3/projects/PROJECT_ID/locations/LOCATION/processors/PROCESSOR_ID/processorVersions/pretrained-layout-parser-v1.5-2025-08-25:process
Corpo JSON da solicitação:
{
  "gcsDocument": {
    "gcsUri": "GCS_FILE_PATH",
    "mimeType": "MIME_TYPE"
  },
  "processOptions": {
    "layoutConfig": {
      "enableTableAnnotation": "true",
      "enableImageAnnotation": "true",
      "chunkingConfig": {
        "chunkSize": "CHUNK_SIZE",
        "includeAncestorHeadings": "INCLUDE_ANCESTOR_HEADINGS",
      }
    }
  }
}
Para enviar a solicitação, escolha uma destas opções:
curl
Salve o corpo da solicitação em um arquivo com o nome request.json e execute o comando abaixo:
curl -X POST \
     -H "Authorization: Bearer $(gcloud auth print-access-token)" \
     -H "Content-Type: application/json; charset=utf-8" \
     -d @request.json \
     "https://LOCATION-documentai.googleapis.com/v1beta3/projects/PROJECT_ID/locations/LOCATION/processors/PROCESSOR_ID/processorVersions/pretrained-layout-parser-v1.5-2025-08-25:process"
PowerShell
Salve o corpo da solicitação em um arquivo com o nome request.json e execute o comando a seguir:
$cred = gcloud auth print-access-token
$headers = @{ "Authorization" = "Bearer $cred" }

Invoke-WebRequest `
    -Method POST `
    -Headers $headers `
    -ContentType: "application/json; charset=utf-8" `
    -InFile request.json `
    -Uri "https://LOCATION-documentai.googleapis.com/v1beta3/projects/PROJECT_ID/locations/LOCATION/processors/PROCESSOR_ID/processorVersions/pretrained-layout-parser-v1.5-2025-08-25:process" | Select-Object -Expand Content
Você receberá um código de status bem-sucedido (2xx) e uma resposta vazia.
Verificar a saída
Uma solicitação bem-sucedida retorna um objeto de documento em JSON. Os campos mais importantes para a geração aumentada de recuperação (RAG) são document.chunked_document.chunks.
A seguir, a saída da análise da terceira página de "O Ursinho Pooh", de A.A. Milne.
{
  "document": {
  document_layout {
    blocks {
      block_id: "1"
      text_block {
        text: "WE ARE INTRODUCED 3"
        type_: "header"
      }
      page_span {
        page_start: 1
        page_end: 1
      }
    }
    blocks {
      block_id: "2"
      page_span {
        page_start: 1
        page_end: 1
      }
      image_block {
        mime_type: "image/png"
        annotations {
          description: "This is an ink drawing depicting Winnie-the-Pooh sitting outside his house.\n\nHere are the facts and conclusions that can be derived from the image:\n\n*   **Character:** The central figure is a bear, identifiable as Winnie-the-Pooh, sitting on a log.\n*   **Location:** He is positioned outside what appears to be a small, rustic shelter or house.\n*   **Signage:** Above the doorway of the shelter, there is a sign that reads \"MR SANDERZ\". Below this sign, there is another partial sign visible, where the letters \"RNIG\" and \"ALSO\" can be seen.\n*   **Doorbell:** To the left of the doorway, a bell is hanging, indicating a doorbell mechanism.\n*   **Setting:** The dwelling is surrounded by what looks like brush, trees, and general wilderness, suggested by the lines representing foliage and twigs.\n*   **Log:** Pooh is seated on a cut log or tree trunk. To the left of this log, there are other smaller logs or branches piled up.\n*   **Style:** The image is a black and white line drawing, characteristic of classic book illustrations."
        }
        blob_asset_id: "blob_1"
      }
    }
    blocks {
      block_id: "3"
      text_block {
        text: ""Winnie-the-Pooh wasn't quite sure," said Christopher Robin. "Now I am," said a growly voice. "Then I will go on,"said I.) One day when he was out walking, he came to an open place in the middle of the forest, and in the middle of this place was a large oak-tree, and, from the top of the tree, there came a loud buzzing-noise. Winnie-the-Pooh sat down at the foot of the tree,put his head between his paws and began to think."
        type_: "paragraph"
      }
      page_span {
        page_start: 1
        page_end: 1
      }
    }
    blocks {
      block_id: "4"
      text_block {
        text: "Digitized by Google"
        type_: "footer"
      }
      page_span {
        page_start: 1
        page_end: 1
      }
    }
  }
  chunked_document {
    chunks {
      chunk_id: "c1"
      source_block_ids: "2"
      source_block_ids: "3"
      content: "__START_OF_ANNOTATION__This is an ink drawing depicting Winnie-the-Pooh sitting outside his house.\n\nHere are the facts and conclusions that can be derived from the image:\n\n*   **Character:** The central figure is a bear, identifiable as Winnie-the-Pooh, sitting on a log.\n*   **Location:** He is positioned outside what appears to be a small, rustic shelter or house.\n*   **Signage:** Above the doorway of the shelter, there is a sign that reads \"MR SANDERZ\". Below this sign, there is another partial sign visible, where the letters \"RNIG\" and \"ALSO\" can be seen.\n*   **Doorbell:** To the left of the doorway, a bell is hanging, indicating a doorbell mechanism.\n*   **Setting:** The dwelling is surrounded by what looks like brush, trees, and general wilderness, suggested by the lines representing foliage and twigs.\n*   **Log:** Pooh is seated on a cut log or tree trunk. To the left of this log, there are other smaller logs or branches piled up.\n*   **Style:** The image is a black and white line drawing, characteristic of classic book illustrations.__END_OF_ANNOTATION__"Winnie-the-Pooh wasn't quite sure," said Christopher Robin. "Now I am," said a growly voice. "Then I will go on," said I.) One day when he was out walking, he came to an open place in the middle of the forest, and in the middle of this place was a large oak-tree, and, from the top of the tree, there came a loud buzzing-noise. Winnie-the-Pooh sat down at the foot of the tree,put his head between his paws and began to think."
      page_span {
        page_start: 1
        page_end: 1
      }
      page_headers {
        text: "WE ARE INTRODUCED 3"
        page_span {
          page_start: 1
          page_end: 1
        }
      }
      page_footers {
        text: "Digitized by Google"
        page_span {
          page_start: 1
          page_end: 1
        }
      }
      chunk_fields {
        image_chunk_field {
          blob_asset_id: "blob_1"
          annotations {
            description: "This is an ink drawing depicting Winnie-the-Pooh sitting outside his house.\n\nHere are the facts and conclusions that can be derived from the image:\n\n*   **Character:** The central figure is a bear, identifiable as Winnie-the-Pooh, sitting on a log.\n*   **Location:** He is positioned outside what appears to be a small, rustic shelter or house.\n*   **Signage:** Above the doorway of the shelter, there is a sign that reads \"MR SANDERZ\". Below this sign, there is another partial sign visible, where the letters \"RNIG\" and \"ALSO\" can be seen.\n*   **Doorbell:** To the left of the doorway, a bell is hanging, indicating a doorbell mechanism.\n*   **Setting:** The dwelling is surrounded by what looks like brush, trees, and general wilderness, suggested by the lines representing foliage and twigs.\n*   **Log:** Pooh is seated on a cut log or tree trunk. To the left of this log, there are other smaller logs or branches piled up.\n*   **Style:** The image is a black and white line drawing, characteristic of classic book illustrations."
          }
        }
      }
    }
  }
  blob_assets {
    asset_id: "blob_1"
    content: "image_bytes"
    mime_type: "image/png"
  }
}
Python
Este guia mostra como usar a biblioteca de cliente Python para processar um documento. Usar esse código ativa a anotação de imagens e tabelas por padrão.
Instale a biblioteca de cliente.
! pip install --upgrade --quiet google-cloud-documentaiExecute o processador.
def process_layout_parser(
    project_id: str, location: str, processor_id: str, gcs_uri: str, mime_type: str
):
    """
    Processes a document with the layout parser and prints chunk text.
    """
    client = documentai.DocumentProcessorServiceClient()

    # The full resource name of the processor
    processor_version_id = 'pretrained-layout-parser-v1.5-2025-08-25'
    name = client.processor_path(project_id, location, processor_id, processor_version_id)

    # Configure the Cloud Storage document
    gcs_document = documentai.GcsDocument(gcs_uri=gcs_uri, mime_type=mime_type)

    # Configure processing options for RAG
    # This enables annotation and context-aware chunking.
    process_options = documentai.ProcessOptions(
      # Process only specific pages
      layout_config=documentai.ProcessOptions.LayoutConfig(
          enable_table_annotation=True,
          enable_image_annotation=True,
          chunking_config=documentai.ProcessOptions.LayoutConfig.ChunkingConfig(
        chunk_size=1024,
        include_ancestor_headings=True,
          ),
      ),
  )

    # Build the request
    request = documentai.ProcessRequest(
        name=name,
        gcs_document=gcs_document,
        process_options=process_options,
    )

    # Process the document
    result = client.process_document(request=request)
    document = result.document

    print(f"Document processing complete.\n")

    print("--- RAG-Ready Chunks (with context) ---")
    for i, chunk in enumerate(document.chunked_document.chunks):
        print(f"\n--- Chunk {i} ---")

        # Print the chunk's content
        print(f"Text: {chunk.content}")
    return result
Processar documentos em lote com o analisador de layout
Use o procedimento a seguir para analisar e dividir vários documentos em um único pedido.
Insira documentos no analisador de layout para analisar e dividir.
Siga as instruções para solicitações de processamento em lote em Enviar uma solicitação de processamento.
Configure os campos em
ProcessOptions.layoutConfigao fazer uma solicitaçãobatchProcess.Entrada
O exemplo de JSON a seguir configura
ProcessOptions.layoutConfig."processOptions": { "layoutConfig": { "enableTableAnnotation": "true", "enableImageAnnotation": "true", "chunkingConfig": { "chunkSize": "CHUNK_SIZE", "includeAncestorHeadings": "INCLUDE_ANCESTOR_HEADINGS_BOOLEAN" } } }Substitua:
CHUNK_SIZE: o tamanho máximo do bloco, em número de tokens, a ser usado ao dividir documentos.INCLUDE_ANCESTOR_HEADINGS_BOOLEAN: se os cabeçalhos ancestrais devem ser incluídos ao dividir documentos. Os títulos ancestrais são os pais dos subtítulos no documento original. Eles podem fornecer um trecho com mais contexto sobre a posição dele no documento original. É possível incluir até dois níveis de cabeçalhos com um trecho.
Limpar
Para evitar cobranças na conta do Google Cloud pelos recursos usados nesta página, siga as etapas abaixo.
Para evitar cobranças desnecessárias do Google Cloud , use o Google Cloud console para excluir o processador e o projeto se você não precisar deles.
Se você criou um projeto novo para aprender sobre a Document AI e não precisa mais dele, [delete the project][delete-project].
Se você usou um projeto do Google Cloud que já existe, exclua os recursos que você criou para evitar cobranças na sua conta:
No menu de navegação do console Google Cloud , selecione Document AI e Meus processadores.
Clique em
Mais ações na mesma linha do processador que você quer excluir.Clique em Excluir processador, insira o nome do processador e selecione Excluir novamente para confirmar.
A seguir
Para mais detalhes, consulte os Guias.