
Guida rapida del parser del layout
Utilizza il parser del layout per estrarre elementi da un documento, ad esempio testo, tabelle ed elenchi.
Per seguire le indicazioni dettagliate per questa attività direttamente nella console Google Cloud , fai clic su Procedura guidata:
Prima di iniziare
- Accedi al tuo account Google Cloud . Se non conosci Google Cloud, crea un account per valutare le prestazioni dei nostri prodotti in scenari reali. I nuovi clienti ricevono anche 300 $di crediti senza costi per l'esecuzione, il test e il deployment dei workload.
-
In the Google Cloud console, on the project selector page, select or create a Google Cloud project.
Roles required to select or create a project
- Select a project: Selecting a project doesn't require a specific IAM role—you can select any project that you've been granted a role on.
-
Create a project: To create a project, you need the Project Creator role
(
roles/resourcemanager.projectCreator), which contains theresourcemanager.projects.createpermission. Learn how to grant roles.
-
Verify that billing is enabled for your Google Cloud project.
Enable the Document AI, Cloud Storage APIs.
Roles required to enable APIs
To enable APIs, you need the Service Usage Admin IAM role (
roles/serviceusage.serviceUsageAdmin), which contains theserviceusage.services.enablepermission. Learn how to grant roles.-
In the Google Cloud console, on the project selector page, select or create a Google Cloud project.
Roles required to select or create a project
- Select a project: Selecting a project doesn't require a specific IAM role—you can select any project that you've been granted a role on.
-
Create a project: To create a project, you need the Project Creator role
(
roles/resourcemanager.projectCreator), which contains theresourcemanager.projects.createpermission. Learn how to grant roles.
-
Verify that billing is enabled for your Google Cloud project.
Enable the Document AI, Cloud Storage APIs.
Roles required to enable APIs
To enable APIs, you need the Service Usage Admin IAM role (
roles/serviceusage.serviceUsageAdmin), which contains theserviceusage.services.enablepermission. Learn how to grant roles.
Crea un processore
Nella console Google Cloud , nella sezione Document AI, seleziona Galleria processori.
Nella Galleria processori,
cerca Parser del layout e seleziona Crea.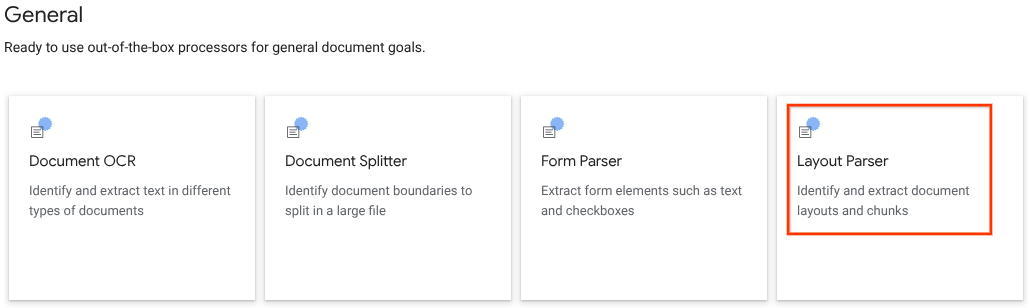
Nella finestra laterale, inserisci un nome processore, ad esempio
quickstart-layout-processor.Seleziona la regione più vicina a te.
Fai clic su Crea.
Viene visualizzata la pagina Dettagli processore per il nuovo processore dell'analizzatore sintattico di moduli.
(Facoltativo) Seleziona un processore predefinito facendo clic su
Gestisci versioni e selezionando un processore dalla tabella Versioni. Poi fai clic suContrassegna come predefinito e conferma inserendo il nome del processore.
Testa il processore
Puoi inviare richieste di annotazione al processore dopo averlo creato.
Fai clic sul pulsante
Carica documento di test e seleziona il documento appena scaricato.Ora dovresti trovarti nella pagina Analisi parser layout. Puoi visualizzare i blocchi o i chunk analizzati dal documento, organizzati per tipi rilevati.

(Facoltativo) Seleziona
Modifica configurazione layout per attivare i dati di annotazione di immagini o tabelle.
Elaborare un documento
REST
Questo esempio mostra come inviare un documento archiviato in Cloud Storage al parser del layout per l'elaborazione. Questo processo attiva l'annotazione di immagini e tabelle per impostazione predefinita.
REST
Prima di utilizzare i dati della richiesta, apporta le sostituzioni seguenti:
- PROJECT_ID: l'ID progetto Google Cloud .
- LOCATION: la posizione del tuo processore, ad esempio:
us- Stati Unitieu- Unione Europea
- PROCESSOR_ID: l'ID del tuo processore personalizzato.
- MIME_TYPE: il parser del layout supporta
application/pdfetext/html. - GCS_FILE_PATH: il percorso del file per il bucket Cloud Storage con il documento.
- CHUNK_SIZE: (Facoltativo) La dimensione del blocco, in token, da utilizzare per dividere i documenti.
- INCLUDE_ANCESTOR_HEADINGS: (Facoltativo) Valore booleano. Indica se includere o meno le intestazioni predecessore durante la suddivisione dei documenti.
Metodo HTTP e URL:
POST https://LOCATION-documentai.googleapis.com/v1beta3/projects/PROJECT_ID/locations/LOCATION/processors/PROCESSOR_ID/processorVersions/pretrained-layout-parser-v1.5-2025-08-25:process
Corpo JSON della richiesta:
{
  "gcsDocument": {
    "gcsUri": "GCS_FILE_PATH",
    "mimeType": "MIME_TYPE"
  },
  "processOptions": {
    "layoutConfig": {
      "enableTableAnnotation": "true",
      "enableImageAnnotation": "true",
      "chunkingConfig": {
        "chunkSize": "CHUNK_SIZE",
        "includeAncestorHeadings": "INCLUDE_ANCESTOR_HEADINGS",
      }
    }
  }
}
Per inviare la richiesta, scegli una di queste opzioni:
curl
Salva il corpo della richiesta in un file denominato request.json,
quindi esegui il comando seguente:
curl -X POST \
     -H "Authorization: Bearer $(gcloud auth print-access-token)" \
     -H "Content-Type: application/json; charset=utf-8" \
     -d @request.json \
     "https://LOCATION-documentai.googleapis.com/v1beta3/projects/PROJECT_ID/locations/LOCATION/processors/PROCESSOR_ID/processorVersions/pretrained-layout-parser-v1.5-2025-08-25:process"
PowerShell
Salva il corpo della richiesta in un file denominato request.json,
quindi esegui il comando seguente:
$cred = gcloud auth print-access-token
$headers = @{ "Authorization" = "Bearer $cred" }

Invoke-WebRequest `
    -Method POST `
    -Headers $headers `
    -ContentType: "application/json; charset=utf-8" `
    -InFile request.json `
    -Uri "https://LOCATION-documentai.googleapis.com/v1beta3/projects/PROJECT_ID/locations/LOCATION/processors/PROCESSOR_ID/processorVersions/pretrained-layout-parser-v1.5-2025-08-25:process" | Select-Object -Expand Content
Dovresti ricevere un codice di stato riuscito (2xx) e una risposta vuota.
Rivedi l'output
Una richiesta riuscita restituisce un oggetto documento in formato JSON. I campi più importanti
per la Retrieval Augmented Generation (RAG) sono document.chunked_document.chunks.
Di seguito è riportato l'output dell'analisi del modulo della terza pagina di "Winnie the Pooh" di A.A. Milne.
{
  "document": {
  document_layout {
    blocks {
      block_id: "1"
      text_block {
        text: "WE ARE INTRODUCED 3"
        type_: "header"
      }
      page_span {
        page_start: 1
        page_end: 1
      }
    }
    blocks {
      block_id: "2"
      page_span {
        page_start: 1
        page_end: 1
      }
      image_block {
        mime_type: "image/png"
        annotations {
          description: "This is an ink drawing depicting Winnie-the-Pooh sitting outside his house.\n\nHere are the facts and conclusions that can be derived from the image:\n\n*   **Character:** The central figure is a bear, identifiable as Winnie-the-Pooh, sitting on a log.\n*   **Location:** He is positioned outside what appears to be a small, rustic shelter or house.\n*   **Signage:** Above the doorway of the shelter, there is a sign that reads \"MR SANDERZ\". Below this sign, there is another partial sign visible, where the letters \"RNIG\" and \"ALSO\" can be seen.\n*   **Doorbell:** To the left of the doorway, a bell is hanging, indicating a doorbell mechanism.\n*   **Setting:** The dwelling is surrounded by what looks like brush, trees, and general wilderness, suggested by the lines representing foliage and twigs.\n*   **Log:** Pooh is seated on a cut log or tree trunk. To the left of this log, there are other smaller logs or branches piled up.\n*   **Style:** The image is a black and white line drawing, characteristic of classic book illustrations."
        }
        blob_asset_id: "blob_1"
      }
    }
    blocks {
      block_id: "3"
      text_block {
        text: ""Winnie-the-Pooh wasn't quite sure," said Christopher Robin. "Now I am," said a growly voice. "Then I will go on,"said I.) One day when he was out walking, he came to an open place in the middle of the forest, and in the middle of this place was a large oak-tree, and, from the top of the tree, there came a loud buzzing-noise. Winnie-the-Pooh sat down at the foot of the tree,put his head between his paws and began to think."
        type_: "paragraph"
      }
      page_span {
        page_start: 1
        page_end: 1
      }
    }
    blocks {
      block_id: "4"
      text_block {
        text: "Digitized by Google"
        type_: "footer"
      }
      page_span {
        page_start: 1
        page_end: 1
      }
    }
  }
  chunked_document {
    chunks {
      chunk_id: "c1"
      source_block_ids: "2"
      source_block_ids: "3"
      content: "__START_OF_ANNOTATION__This is an ink drawing depicting Winnie-the-Pooh sitting outside his house.\n\nHere are the facts and conclusions that can be derived from the image:\n\n*   **Character:** The central figure is a bear, identifiable as Winnie-the-Pooh, sitting on a log.\n*   **Location:** He is positioned outside what appears to be a small, rustic shelter or house.\n*   **Signage:** Above the doorway of the shelter, there is a sign that reads \"MR SANDERZ\". Below this sign, there is another partial sign visible, where the letters \"RNIG\" and \"ALSO\" can be seen.\n*   **Doorbell:** To the left of the doorway, a bell is hanging, indicating a doorbell mechanism.\n*   **Setting:** The dwelling is surrounded by what looks like brush, trees, and general wilderness, suggested by the lines representing foliage and twigs.\n*   **Log:** Pooh is seated on a cut log or tree trunk. To the left of this log, there are other smaller logs or branches piled up.\n*   **Style:** The image is a black and white line drawing, characteristic of classic book illustrations.__END_OF_ANNOTATION__"Winnie-the-Pooh wasn't quite sure," said Christopher Robin. "Now I am," said a growly voice. "Then I will go on," said I.) One day when he was out walking, he came to an open place in the middle of the forest, and in the middle of this place was a large oak-tree, and, from the top of the tree, there came a loud buzzing-noise. Winnie-the-Pooh sat down at the foot of the tree,put his head between his paws and began to think."
      page_span {
        page_start: 1
        page_end: 1
      }
      page_headers {
        text: "WE ARE INTRODUCED 3"
        page_span {
          page_start: 1
          page_end: 1
        }
      }
      page_footers {
        text: "Digitized by Google"
        page_span {
          page_start: 1
          page_end: 1
        }
      }
      chunk_fields {
        image_chunk_field {
          blob_asset_id: "blob_1"
          annotations {
            description: "This is an ink drawing depicting Winnie-the-Pooh sitting outside his house.\n\nHere are the facts and conclusions that can be derived from the image:\n\n*   **Character:** The central figure is a bear, identifiable as Winnie-the-Pooh, sitting on a log.\n*   **Location:** He is positioned outside what appears to be a small, rustic shelter or house.\n*   **Signage:** Above the doorway of the shelter, there is a sign that reads \"MR SANDERZ\". Below this sign, there is another partial sign visible, where the letters \"RNIG\" and \"ALSO\" can be seen.\n*   **Doorbell:** To the left of the doorway, a bell is hanging, indicating a doorbell mechanism.\n*   **Setting:** The dwelling is surrounded by what looks like brush, trees, and general wilderness, suggested by the lines representing foliage and twigs.\n*   **Log:** Pooh is seated on a cut log or tree trunk. To the left of this log, there are other smaller logs or branches piled up.\n*   **Style:** The image is a black and white line drawing, characteristic of classic book illustrations."
          }
        }
      }
    }
  }
  blob_assets {
    asset_id: "blob_1"
    content: "image_bytes"
    mime_type: "image/png"
  }
}
Python
Questa guida mostra come utilizzare la libreria client Python per elaborare un documento. L'utilizzo di questo codice attiva l'annotazione di immagini e tabelle per impostazione predefinita.
Installa la libreria client.
! pip install --upgrade --quiet google-cloud-documentaiEsegui il processore.
def process_layout_parser(
    project_id: str, location: str, processor_id: str, gcs_uri: str, mime_type: str
):
    """
    Processes a document with the layout parser and prints chunk text.
    """
    client = documentai.DocumentProcessorServiceClient()

    # The full resource name of the processor
    processor_version_id = 'pretrained-layout-parser-v1.5-2025-08-25'
    name = client.processor_path(project_id, location, processor_id, processor_version_id)

    # Configure the Cloud Storage document
    gcs_document = documentai.GcsDocument(gcs_uri=gcs_uri, mime_type=mime_type)

    # Configure processing options for RAG
    # This enables annotation and context-aware chunking.
    process_options = documentai.ProcessOptions(
      # Process only specific pages
      layout_config=documentai.ProcessOptions.LayoutConfig(
          enable_table_annotation=True,
          enable_image_annotation=True,
          chunking_config=documentai.ProcessOptions.LayoutConfig.ChunkingConfig(
        chunk_size=1024,
        include_ancestor_headings=True,
          ),
      ),
  )

    # Build the request
    request = documentai.ProcessRequest(
        name=name,
        gcs_document=gcs_document,
        process_options=process_options,
    )

    # Process the document
    result = client.process_document(request=request)
    document = result.document

    print(f"Document processing complete.\n")

    print("--- RAG-Ready Chunks (with context) ---")
    for i, chunk in enumerate(document.chunked_document.chunks):
        print(f"\n--- Chunk {i} ---")

        # Print the chunk's content
        print(f"Text: {chunk.content}")
    return result
Elabora in batch i documenti con il parser di layout
Utilizza la seguente procedura per analizzare e dividere più documenti in una singola richiesta.
Inserisci i documenti nel parser del layout per analizzarli e suddividerli in blocchi.
Segui le istruzioni per le richieste di elaborazione batch in Invia una richiesta di elaborazione.
Configura i campi in
ProcessOptions.layoutConfigquando effettui una richiestabatchProcess.Input
Il seguente esempio di JSON configura
ProcessOptions.layoutConfig."processOptions": { "layoutConfig": { "enableTableAnnotation": "true", "enableImageAnnotation": "true", "chunkingConfig": { "chunkSize": "CHUNK_SIZE", "includeAncestorHeadings": "INCLUDE_ANCESTOR_HEADINGS_BOOLEAN" } } }Sostituisci quanto segue:
CHUNK_SIZE: la dimensione massima del chunk, in numero di token, da utilizzare per dividere i documenti.INCLUDE_ANCESTOR_HEADINGS_BOOLEAN: Indica se includere le intestazioni predecessore durante la suddivisione dei documenti. Le intestazioni predecessore sono i genitori dei sottotitoli nel documento originale. Possono fornire un blocco con un contesto aggiuntivo sulla sua posizione nel documento originale. Un blocco può includere fino a due livelli di intestazioni.
Esegui la pulizia
Per evitare che al tuo account Google Cloud vengano addebitati costi relativi alle risorse utilizzate in questa pagina, segui questi passaggi.
Per evitare addebiti non necessari Google Cloud , utilizzaGoogle Cloud console per eliminare il processore e il progetto se non ti servono.
Se hai creato un nuovo progetto per prendere dimestichezza con Document AI, ma non ne hai più bisogno, elimina il progetto, [delete the project][delete-project].
Se hai utilizzato un progetto Google Cloud esistente, elimina le risorse che hai creato per evitare addebiti sul tuo account.
Nel menu di navigazione della console Google Cloud , seleziona Document AI e I miei processori.
Seleziona
Altre azioni nella stessa riga del processore da eliminare.Seleziona Elimina processore, inserisci il nome del processore, quindi seleziona di nuovo Elimina per confermare.
Passaggi successivi
Per maggiori dettagli, vedi Guide.