
使用部署政策来限制发布
本快速入门介绍如何在指定时间内阻止 Cloud Deploy 发布到目标,以及如何替换该限制。
在本快速入门中,您将执行以下操作:
创建 Skaffold 配置和 Kubernetes 清单或 Cloud Run 服务定义,以指定要部署的(预构建)容器 映像。
定义 Cloud Deploy 交付流水线和一个部署 目标,指向一个 GKE 集群或 Cloud Run 服务。
此流水线仅包含一个阶段,用于一个目标。
为目标配置部署政策。
该政策定义了禁止向该目标发布的时间范围。
创建版本。
通常,当您创建版本时,Cloud Deploy 会为交付流水线进度中的第一个目标创建发布。在这种情况下,由于有一项政策阻止部署到目标,因此不会为该目标创建发布。
在 Google Cloud 控制台中查看结果。
由于该政策,您将看不到版本的发布,并且交付流水线直观显示中也没有待处理的操作。
替换部署政策。
此替换操作会导致 Cloud Deploy 现在为目标创建发布。
在 Google Cloud 控制台中查看结果。
由于该政策现已被替换,因此您可以看到发布正在进行中(或已完成,如果已过去足够的时间)。
准备工作
- 登录您的 Google Cloud 账号。如果您是 Google Cloud的新用户, 请创建一个账号,以评估我们的产品在 实际场景中的表现。新客户还可获享 $300 赠金,用于 运行、测试和部署工作负载。
-
In the Google Cloud console, on the project selector page, select or create a Google Cloud project.
Roles required to select or create a project
- Select a project: Selecting a project doesn't require a specific IAM role—you can select any project that you've been granted a role on.
-
Create a project: To create a project, you need the Project Creator role
(
roles/resourcemanager.projectCreator), which contains theresourcemanager.projects.createpermission. Learn how to grant roles.
-
Verify that billing is enabled for your Google Cloud project.
Enable the Cloud Deploy, Cloud Build, GKE, and Cloud Storage APIs.
Roles required to enable APIs
To enable APIs, you need the Service Usage Admin IAM role (
roles/serviceusage.serviceUsageAdmin), which contains theserviceusage.services.enablepermission. Learn how to grant roles.-
安装 Google Cloud CLI。
-
如果您使用的是外部身份提供方 (IdP),则必须先使用联合身份登录 gcloud CLI。
-
如需初始化 gcloud CLI,请运行以下命令:
gcloud init -
In the Google Cloud console, on the project selector page, select or create a Google Cloud project.
Roles required to select or create a project
- Select a project: Selecting a project doesn't require a specific IAM role—you can select any project that you've been granted a role on.
-
Create a project: To create a project, you need the Project Creator role
(
roles/resourcemanager.projectCreator), which contains theresourcemanager.projects.createpermission. Learn how to grant roles.
-
Verify that billing is enabled for your Google Cloud project.
Enable the Cloud Deploy, Cloud Build, GKE, and Cloud Storage APIs.
Roles required to enable APIs
To enable APIs, you need the Service Usage Admin IAM role (
roles/serviceusage.serviceUsageAdmin), which contains theserviceusage.services.enablepermission. Learn how to grant roles.-
安装 Google Cloud CLI。
-
如果您使用的是外部身份提供方 (IdP),则必须先使用联合身份登录 gcloud CLI。
-
如需初始化 gcloud CLI,请运行以下命令:
gcloud init - 确保默认 Compute Engine 服务账号具有足够的权限。
服务帐号可能已经拥有必要的权限。针对默认服务账号停用自动角色授予的项目包含这些步骤。
- 首先添加
clouddeploy.jobRunner角色:gcloud projects add-iam-policy-binding PROJECT_ID \ --member=serviceAccount:$(gcloud projects describe PROJECT_ID \ --format="value(projectNumber)")-compute@developer.gserviceaccount.com \ --role="roles/clouddeploy.jobRunner" - 为您的特定运行时添加开发者角色。
- 对于 GKE:
gcloud projects add-iam-policy-binding PROJECT_ID \ --member=serviceAccount:$(gcloud projects describe PROJECT_ID \ --format="value(projectNumber)")-compute@developer.gserviceaccount.com \ --role="roles/container.developer" - 对于 Cloud Run:
gcloud projects add-iam-policy-binding PROJECT_ID \ --member=serviceAccount:$(gcloud projects describe PROJECT_ID \ --format="value(projectNumber)")-compute@developer.gserviceaccount.com \ --role="roles/run.developer" -
添加
iam.serviceAccountUser角色,该角色可提供用于部署到运行时的actAs权限:gcloud iam service-accounts add-iam-policy-binding $(gcloud projects describe PROJECT_ID \ --format="value(projectNumber)")-compute@developer.gserviceaccount.com \ --member=serviceAccount:$(gcloud projects describe PROJECT_ID \ --format="value(projectNumber)")-compute@developer.gserviceaccount.com \ --role="roles/iam.serviceAccountUser" \ --project=PROJECT_ID
如果您已安装 Google Cloud CLI,请确保您运行的是最新版本:
gcloud components update
创建运行时环境
如果您要部署到 Cloud Run,则可以跳过此命令。
对于 GKE,创建一个集群:quickstart-cluster-qsprod。
集群的 Kubernetes API 端点必须可通过公共互联网访问。默认情况下,GKE 集群可从外部访问。
gcloud container clusters create-auto quickstart-cluster-qsprod \
                 --project=PROJECT_ID \
                 --region=us-central1
准备 Skaffold 配置和应用清单
Cloud Deploy 使用 Skaffold 提供 有关要部署的内容以及如何将其部署到您的 目标的详细信息。
在本快速入门中,您将创建一个 skaffold.yaml 文件,以标识要用于部署示例应用的 Kubernetes 清单。
打开一个终端窗口。
创建一个新目录并进入该目录。
mkdir deploy-policy-quickstart
cd deploy-policy-quickstart
创建一个名为
skaffold.yaml且包含以下内容的文件:GKE
apiVersion: skaffold/v4beta1
kind: Config
manifests:
  rawYaml:
  - k8s-pod.yaml
deploy:
  kubectl: {}
Cloud Run
apiVersion: skaffold/v4beta1
kind: Config
manifests:
  rawYaml:
  - service.yaml
deploy:
  cloudrun: {}
此文件是最小的 Skaffold 配置。在本快速入门中,您需要创建该文件。不过,您也可以让 Cloud Deploy 为您创建一个文件,用于基本的非生产应用。
如需详细了解此配置文件,请参阅
skaffold.yaml参考文档 。为您的应用创建清单,即 Cloud Run 的服务定义或 GKE 的 Kubernetes 清单。
GKE
创建一个名为
k8s-pod.yaml的文件,其中包含以下内容:apiVersion: v1 kind: Pod metadata: name: getting-started spec: containers: - name: nginx image: my-app-image此文件是一个基本的 Kubernetes 清单,它会应用于集群以 部署应用。要部署的容器映像在此处设置为 占位符
my-app-image,当您 创建版本时,该占位符将替换为特定映像。Cloud Run
创建一个名为
service.yaml的文件,其中包含以下内容:apiVersion: serving.knative.dev/v1 kind: Service metadata: name: my-deploy-policy-run-service spec: template: spec: containers: - image: my-app-image此文件是一个基本的 Cloud Run 服务定义,用于部署应用。要部署的容器映像 在此处设置为占位符
my-app-image,当您 创建版本时,该占位符将替换为特定映像。
创建交付流水线和目标
您可以在一个文件中或在单独的文件中定义交付流水线和目标。在本快速入门中,您将创建一个包含这两者的文件。
创建交付流水线和目标定义:
GKE
在
deploy-policy-quickstart目录中,创建一个新文件:clouddeploy.yaml,其中包含以下内容:apiVersion: deploy.cloud.google.com/v1 kind: DeliveryPipeline metadata: name: deploy-policy-pipeline serialPipeline: stages: - targetId: prod-target --- apiVersion: deploy.cloud.google.com/v1 kind: Target metadata: name: prod-target description: production cluster gke: cluster: projects/PROJECT_ID/locations/us-central1/clusters/quickstart-cluster-qsprodCloud Run
在
deploy-policy-quickstart目录中,创建一个新文件:clouddeploy.yaml,其中包含以下内容:apiVersion: deploy.cloud.google.com/v1 kind: DeliveryPipeline metadata: name: deploy-policy-pipeline serialPipeline: stages: - targetId: prod-target --- apiVersion: deploy.cloud.google.com/v1 kind: Target metadata: name: prod-target description: production Run service run: location: projects/PROJECT_ID/locations/us-central1在 Cloud Deploy 服务中注册流水线和目标资源:
gcloud deploy apply --file=clouddeploy.yaml --region=us-central1 --project=PROJECT_ID
您现在有了一个包含一个目标的交付流水线。
确认您的流水线和目标:
在 Google Cloud 控制台中,导航到 Cloud Deploy 交付流水线 页面,以查看可用交付 流水线的列表。
此时将显示您刚刚创建的交付流水线,并且目标 列会列出了一个目标。

创建部署政策
您可以在交付流水线和目标所在的同一个文件中定义部署政策,也可以在单独的文件中定义部署政策。在本快速入门中,我们将单独定义部署政策。
在您创建交付流水线和目标的同一目录中,创建一个新文件
deploypolicy.yaml,其中包含以下内容:apiVersion: deploy.cloud.google.com/v1 description: Restrict all rollouts in the deploy-policy-pipeline resource for the next ten years kind: DeployPolicy metadata: name: quickstart-deploy-policy selectors: - deliveryPipeline: id: 'deploy-policy-pipeline' rules: - rolloutRestriction: id: no-rollouts timeWindows: timeZone: America/New_York oneTimeWindows: - start: 2024-01-01 00:00 end: 2034-01-01 24:00此政策会阻止从 2024 年 1 月 1 日开始的 10 年内的发布。这不是一个实际的政策;我们仅在本快速入门中这样做,以确保在您创建版本时政策已到位。
在 Cloud Deploy 服务中注册部署政策资源:
gcloud deploy apply --file=deploypolicy.yaml --region=us-central1 --project=PROJECT_ID
确认您的部署政策:
在 Google Cloud 控制台中,导航到 Cloud Deploy 部署政策 页面,以查看可用政策的列表。
此时将显示您刚刚创建的部署政策。

创建版本
版本是表示要部署的更改的中央 Cloud Deploy 资源。交付流水线定义该版本的生命周期。如需详细了解该生命周期,请参阅 Cloud Deploy 服务架构 。
GKE
从 deploy-policy-quickstart 目录运行以下命令,以
创建版本:
 gcloud deploy releases create test-release-001 \
   --project=PROJECT_ID \
   --region=us-central1 \
   --delivery-pipeline=deploy-policy-pipeline \
   --images=my-app-image=gcr.io/google-containers/nginx@sha256:f49a843c290594dcf4d193535d1f4ba8af7d56cea2cf79d1e9554f077f1e7aaa
请注意
--images= 标志,
您可以使用该标志将
清单或服务定义中的占位符 (my-app-image) 替换为
特定的 SHA 限定映像。Google 建议您以这种方式将清单模板化,并在创建版本时使用 SHA 限定的映像名称。
Cloud Run
从 deploy-policy-quickstart 目录运行以下命令,以
创建版本:
 gcloud deploy releases create test-release-001 \
   --project=PROJECT_ID \
   --region=us-central1 \
   --delivery-pipeline=deploy-policy-pipeline \
   --images=my-app-image=us-docker.pkg.dev/cloudrun/container/hello@sha256:95ade4b17adcd07623b0a0c68359e344fe54e65d0cb01b989e24c39f2fcd296a
请注意
--images= 标志,
您可以使用该标志将
清单或服务定义中的占位符 (my-app-image) 替换为
特定的 SHA 限定映像。Google 建议您以这种方式将清单模板化,并在创建版本时使用 SHA 限定的映像名称。
在正常情况下,当您使用此命令创建 版本时,Cloud Deploy 会创建到第一个目标的 发布。在这种情况下,由于发布受到部署政策的限制,因此不会创建任何发布。命令行中会显示一条错误消息:
ERROR: (gcloud.deploy.releases.create) A create-rollout attempt was blocked by the "quickstart-deploy-policy"
policy. Target: "prod-target", Delivery pipeline: "deploy-policy-pipeline", policy rule: "no-rollouts"
替换政策限制
如需部署被部署政策阻止的示例应用,您需要替换该政策。为此,您需要针对此版本创建一个新发布,这次包含 --override-deploy-policies 选项:
GKE
从 deploy-policy-quickstart 目录运行以下命令,以
创建版本:
 gcloud deploy releases promote --release=test-release-001 \
   --project=PROJECT_ID \
   --region=us-central1 \
   --delivery-pipeline=deploy-policy-pipeline \
   --to-target=prod-target \
   --override-deploy-policies=quickstart-deploy-policy
Cloud Run
从 deploy-policy-quickstart 目录运行以下命令,以
创建版本:
 gcloud deploy releases promote --release=test-release-001 \
   --project=PROJECT_ID \
   --region=us-central1 \
   --delivery-pipeline=deploy-policy-pipeline \
   --to-target=prod-target \
   --override-deploy-policies=quickstart-deploy-policy
由于您添加了 --override-deploy-policies=quickstart-deploy-policy,并且您拥有 roles/clouddeploy.policyAdmin 角色,因此 Cloud Deploy 会忽略您创建的部署政策,并创建到 prod-target 的发布。
在 Google Cloud 控制台中查看结果
在 Google Cloud 控制台中,再次导航到 Cloud Deploy 交付流水线 页面,以查看您的交付流水线 (
deploy-policy-pipeline)。点击交付流水线的名称 (
deploy-policy-pipeline)。流水线可视化显示应用的部署状态。在这种情况下,由于政策被替换,因此发布已创建并成功。
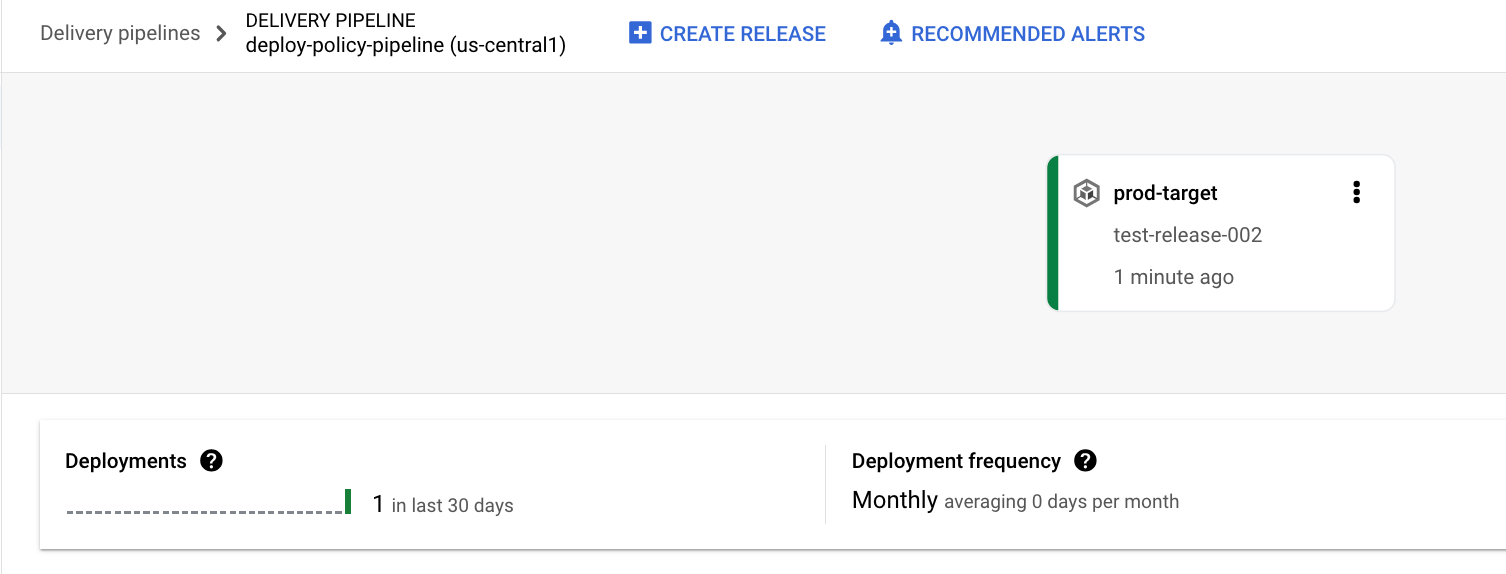
您的版本列在版本 标签页中交付流水线详细信息 下。
清理
为避免因本页中使用的资源导致您的 Google Cloud 账号产生费用,请按照以下步骤操作。
删除 GKE 集群或 Cloud Run 服务:
GKE
gcloud container clusters delete quickstart-cluster-qsprod --region=us-central1 --project=PROJECT_IDCloud Run
gcloud run services delete my-deploy-policy-run-service --region=us-central1 --project=PROJECT_ID删除部署政策:
gcloud deploy delete --file=deploypolicy.yaml --region=us-central1 --project=PROJECT_ID删除交付流水线、目标、版本和发布:
gcloud deploy delete --file=clouddeploy.yaml --force --region=us-central1 --project=PROJECT_ID删除 Cloud Deploy 创建的两个 Cloud Storage 存储分区。
恭喜,您已经完成快速入门!