
Dalam dokumen ini, Anda akan menggunakan komponen Google Cloudyang dapat ditagih berikut:
- Managed Service for Apache Spark
- Compute Engine
- Cloud Composer
Untuk membuat perkiraan biaya berdasarkan proyeksi penggunaan Anda,
gunakan kalkulator harga.
Sebelum memulai
Menyiapkan project
- Login ke akun Google Cloud Anda. Jika Anda baru menggunakan Google Cloud, buat akun untuk mengevaluasi performa produk kami dalam skenario dunia nyata. Pelanggan baru juga mendapatkan kredit gratis senilai $300 untuk menjalankan, menguji, dan men-deploy workload.
-
In the Google Cloud console, on the project selector page, select or create a Google Cloud project.
Roles required to select or create a project
- Select a project: Selecting a project doesn't require a specific IAM role—you can select any project that you've been granted a role on.
-
Create a project: To create a project, you need the Project Creator role
(
roles/resourcemanager.projectCreator), which contains theresourcemanager.projects.createpermission. Learn how to grant roles.
-
Verify that billing is enabled for your Google Cloud project.
Enable the Dataproc, Compute Engine, and Cloud Composer APIs.
Roles required to enable APIs
To enable APIs, you need the Service Usage Admin IAM role (
roles/serviceusage.serviceUsageAdmin), which contains theserviceusage.services.enablepermission. Learn how to grant roles.-
Instal Google Cloud CLI.
-
Jika Anda menggunakan penyedia identitas (IdP) eksternal, Anda harus login ke gcloud CLI dengan identitas gabungan Anda terlebih dahulu.
-
Untuk melakukan inisialisasi gcloud CLI, jalankan perintah berikut:
gcloud init -
In the Google Cloud console, on the project selector page, select or create a Google Cloud project.
Roles required to select or create a project
- Select a project: Selecting a project doesn't require a specific IAM role—you can select any project that you've been granted a role on.
-
Create a project: To create a project, you need the Project Creator role
(
roles/resourcemanager.projectCreator), which contains theresourcemanager.projects.createpermission. Learn how to grant roles.
-
Verify that billing is enabled for your Google Cloud project.
Enable the Dataproc, Compute Engine, and Cloud Composer APIs.
Roles required to enable APIs
To enable APIs, you need the Service Usage Admin IAM role (
roles/serviceusage.serviceUsageAdmin), which contains theserviceusage.services.enablepermission. Learn how to grant roles.-
Instal Google Cloud CLI.
-
Jika Anda menggunakan penyedia identitas (IdP) eksternal, Anda harus login ke gcloud CLI dengan identitas gabungan Anda terlebih dahulu.
-
Untuk melakukan inisialisasi gcloud CLI, jalankan perintah berikut:
gcloud init
Buat template alur kerja Managed Service for Apache Spark
Salin dan jalankan perintah berikut di jendela terminal lokal atau di Cloud Shell untuk membuat dan menentukan template alur kerja.
- Buat template alur kerja
sparkpi.gcloud dataproc workflow-templates create sparkpi \ --region=us-central1 - Tambahkan tugas spark ke template alur kerja
sparkpi. Flag "compute"step-idmengidentifikasi tugas SparkPi.gcloud dataproc workflow-templates add-job spark \ --workflow-template=sparkpi \ --step-id=compute \ --class=org.apache.spark.examples.SparkPi \ --jars=file:///usr/lib/spark/examples/jars/spark-examples.jar \ --region=us-central1 \ -- 1000 - Gunakan cluster terkelola,
node tunggal
untuk menjalankan alur kerja. Managed Service for Apache Spark akan membuat cluster, menjalankan alur kerja di cluster tersebut, lalu menghapus cluster saat alur kerja selesai.
gcloud dataproc workflow-templates set-managed-cluster sparkpi \ --cluster-name=sparkpi \ --single-node \ --region=us-central1 - Konfirmasi pembuatan template alur kerja.
Konsol
Klik nama
sparkpidi halaman Managed Service for Apache Spark Workflows di konsol Google Cloud untuk membuka halaman Workflow template details. Klik nama template alur kerja Anda untuk mengonfirmasi atribut templatesparkpi.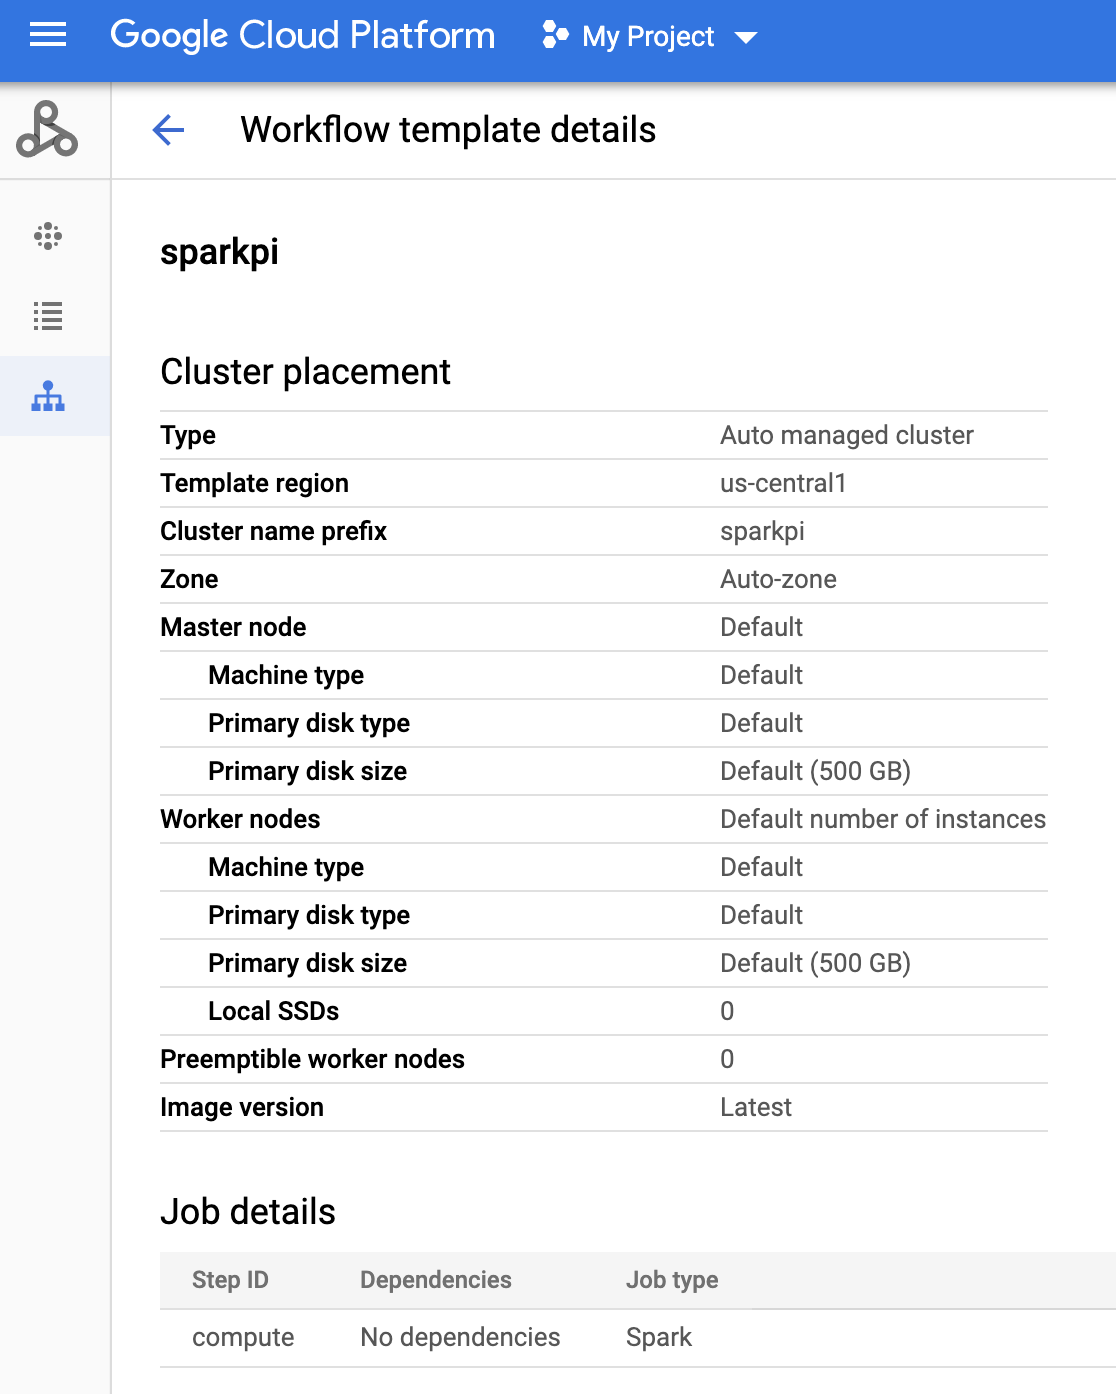
Perintah gcloud
Jalankan perintah berikut:
gcloud dataproc workflow-templates describe sparkpi --region=us-central1
Membuat dan mengupload DAG ke Cloud Storage
- Buat atau gunakan lingkungan Cloud Composer yang sudah ada.
- Menetapkan variabel lingkungan.
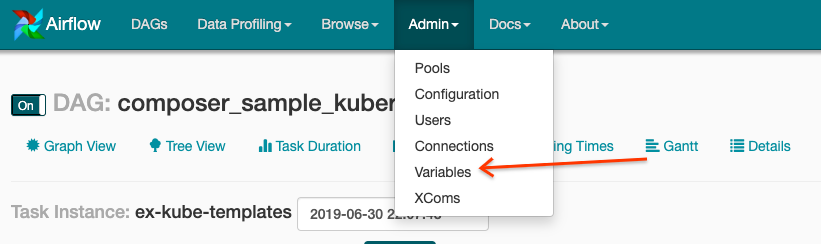
UI Airflow
- Di toolbar, klik Admin > Variabel.
- Klik Create.
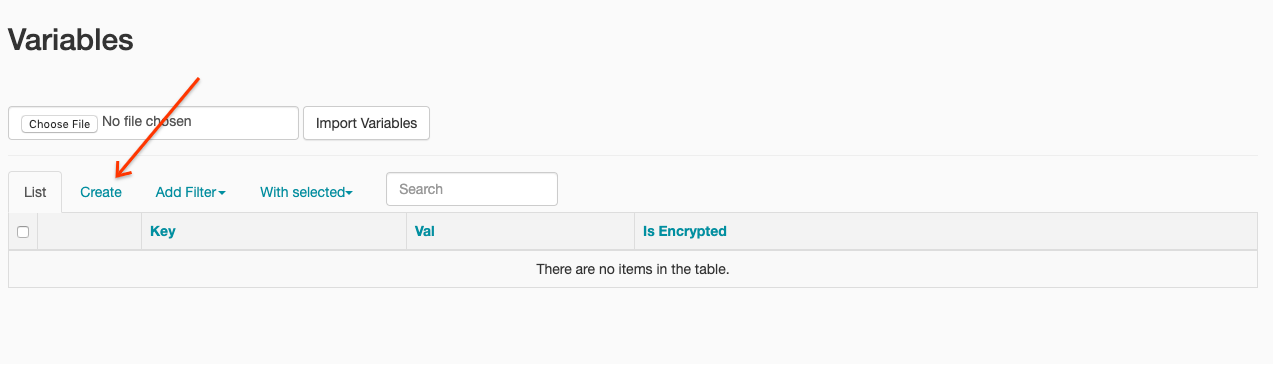
- Masukkan informasi berikut:
- Kunci:
project_id - Val: PROJECT_ID — project ID Google Cloud Anda
- Kunci:
- Klik Simpan.
Perintah gcloud
Masukkan perintah berikut:
ENVIRONMENTadalah nama lingkungan Cloud ComposerLOCATIONadalah region tempat lingkungan Cloud Composer beradaPROJECT_IDadalah project ID untuk project yang berisi lingkungan Cloud Composer
gcloud composer environments run ENVIRONMENT --location LOCATION variables set -- project_id PROJECT_ID - Di toolbar, klik Admin > Variabel.
- Salin kode DAG berikut secara lokal ke dalam file berjudul "composer-dataproc-dag.py",
yang menggunakan
DataprocInstantiateWorkflowTemplateOperator.
Airflow 2
Aliran udara 1
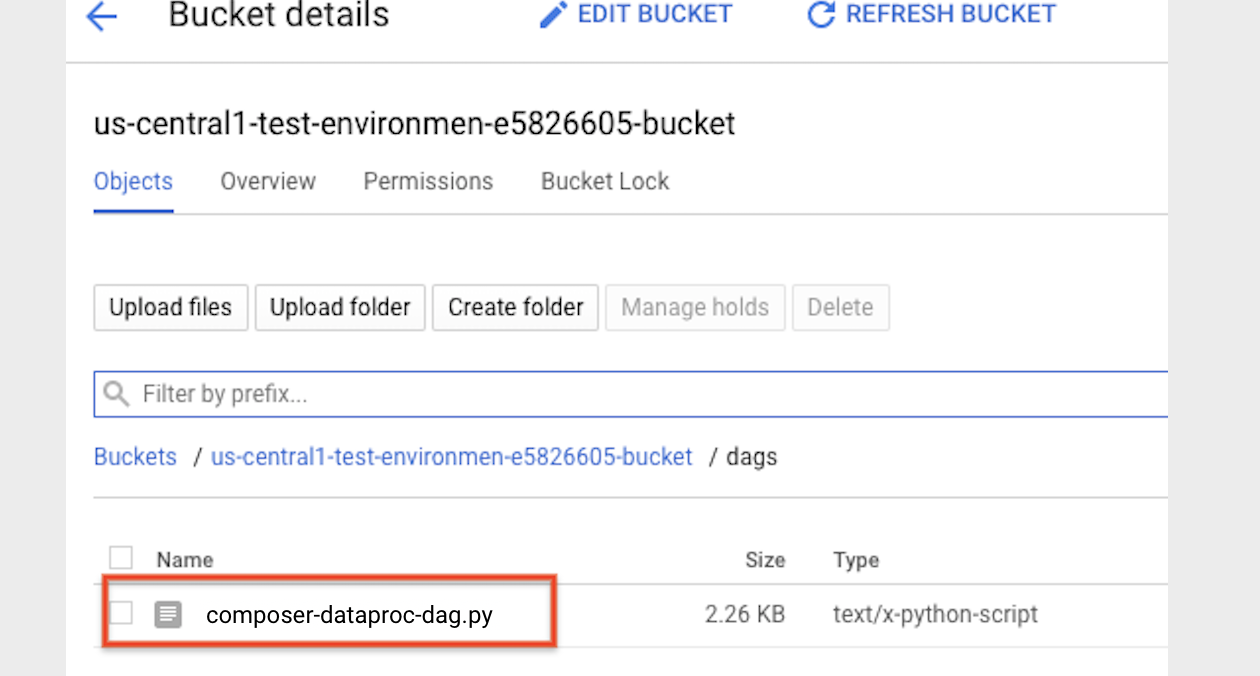
- Upload
DAG ke folder lingkungan Anda di Cloud Storage. Setelah upload berhasil diselesaikan, klik link Folder DAG di halaman Lingkungan Cloud Composer.
Melihat status tugas
UI Airflow
- Buka antarmuka web Airflow.
- Di halaman DAG, klik nama DAG (misalnya,
dataproc_workflow_dag). - Di halaman DAGs Details, klik Graph View.
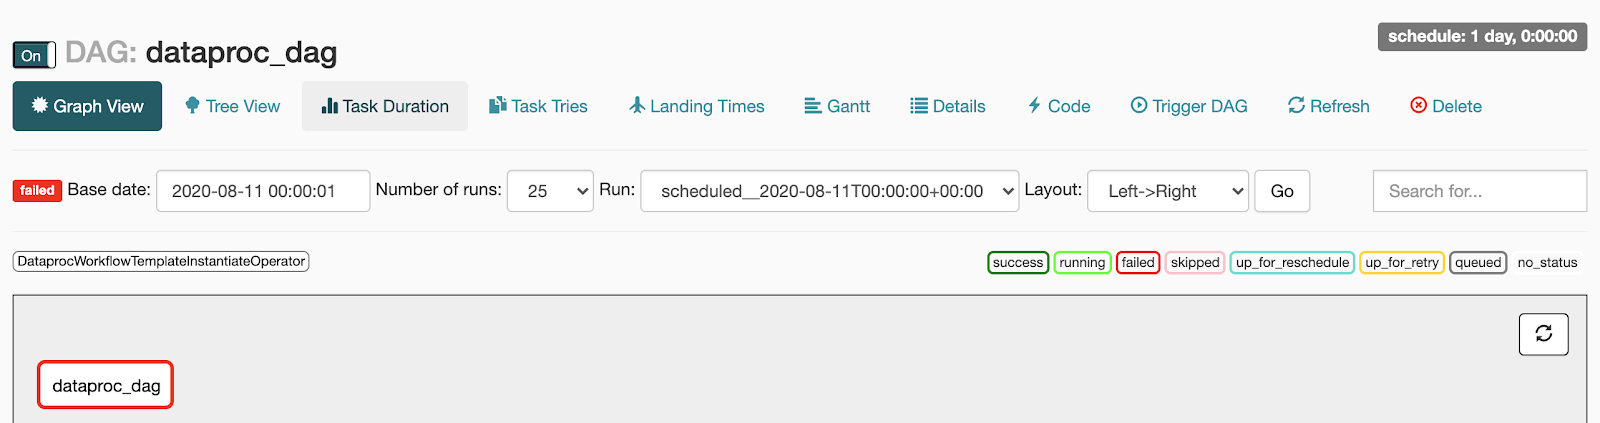
- Periksa status:
- Gagal: Tugas memiliki kotak merah di sekelilingnya.
Anda juga dapat menahan kursor di tugas dan mencari Status: Gagal.
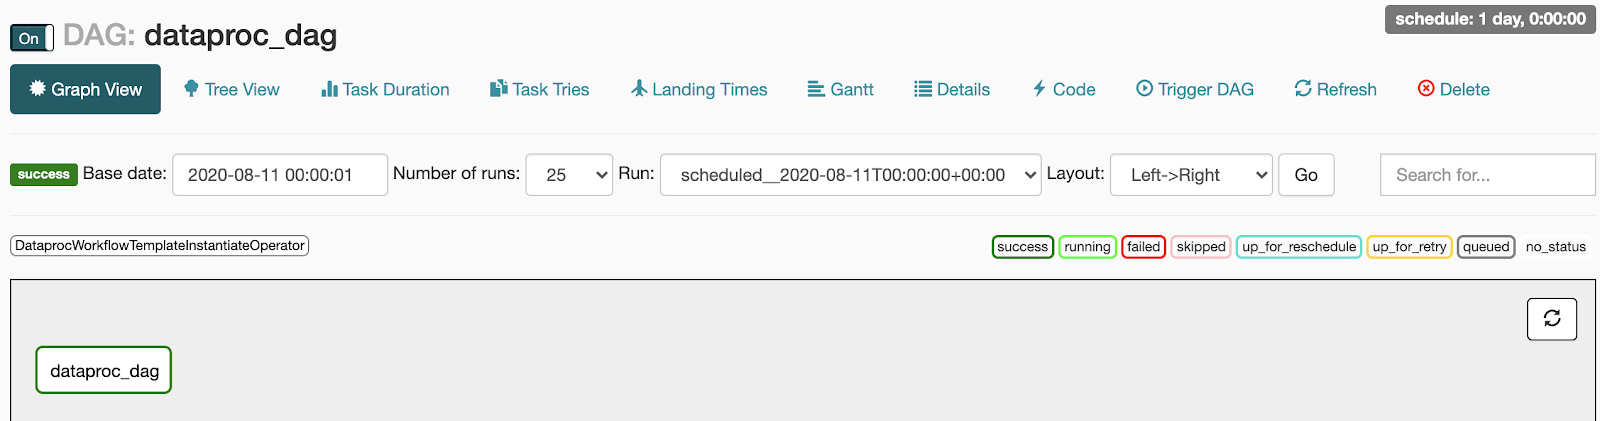
- Berhasil: Tugas memiliki kotak hijau di sekitarnya.
Anda juga dapat mengarahkan kursor ke tugas dan memeriksa Status: Berhasil.
- Gagal: Tugas memiliki kotak merah di sekelilingnya.
Anda juga dapat menahan kursor di tugas dan mencari Status: Gagal.
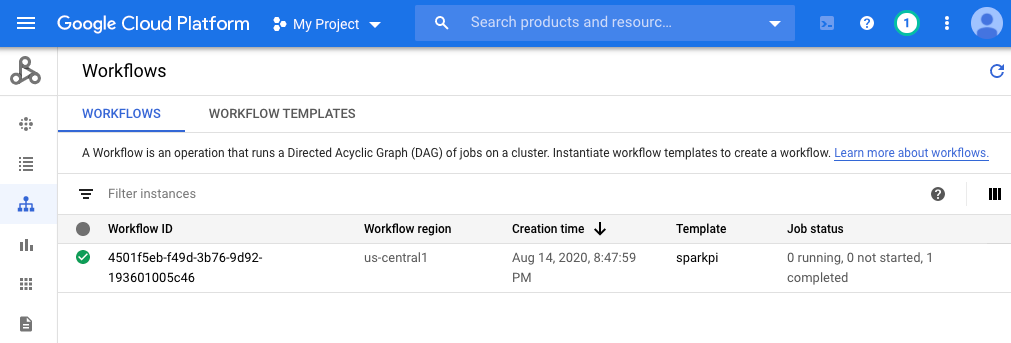
Konsol
Klik tab Alur Kerja untuk melihat status alur kerja.
Perintah gcloud
gcloud dataproc operations list \
    --region=us-central1 \
    --filter="labels.goog-dataproc-workflow-template-id=sparkpi"
Pembersihan
Agar akun Google Cloud Anda tidak dikenai biaya, Anda dapat menghapus resource yang digunakan dalam tutorial ini:
Langkah berikutnya
- Lihat Ringkasan template alur kerja Managed Service for Apache Spark.
- Lihat Solusi penjadwalan alur kerja.