Job senden

Sie können einen Job über eine jobs.submit API als HTTP- oder programmatische Anfrage an einen vorhandenen Managed Service for Apache Spark-Cluster übergeben. Verwenden Sie dazu das gcloud-Befehlszeilentool der Google Cloud CLI in einem lokalen Terminalfenster oder in Cloud Shell oder aus der Google Cloud Console in einem lokalen Browser. Sie können auch eine SSH-Verbindung zur Masterinstanz in Ihrem Cluster herstellen und dann einen Job direkt aus der Instanz ausführen, ohne Managed Service for Apache Spark zu verwenden.

Job senden

Console

Öffnen Sie die Seite Job senden von Managed Service for Apache Spark in der Google Cloud Console in Ihrem Browser.

Spark-Job – Beispiel

Zum Senden eines Spark-Beispieljobs füllen Sie die Felder auf der Job senden Seite aus. Gehen Sie dabei so vor:

  1. Wählen Sie den Namen des Clusters aus der Clusterliste aus.
  2. Legen Sie für Job type (Jobtyp) den Wert Spark fest.
  3. Legen Sie für Main class or jar (Hauptklasse oder JAR-Datei) den Wert org.apache.spark.examples.SparkPi fest.
  4. Legen Sie für Arguments (Argumente) das einzelne Argument 1000 fest.
  5. Fügen Sie file:///usr/lib/spark/examples/jars/spark-examples.jar zu Jar-Dateien hinzu:
    1. file:/// gibt ein Hadoop LocalFileSystem-Schema an. Managed Service for Apache Spark installierte /usr/lib/spark/examples/jars/spark-examples.jar auf dem Masterknoten des Clusters, als der Cluster erstellt wurde.
    2. Alternativ können Sie einen Cloud Storage-Pfad (gs://your-bucket/your-jarfile.jar) oder einen Hadoop Distributed File System-Pfad (hdfs://path-to-jar.jar) zu einer Ihrer JAR-Dateien angeben.

Klicken Sie auf Submit (Senden), um den Job zu starten. Nach dem Start wird der Job der Jobliste hinzugefügt.

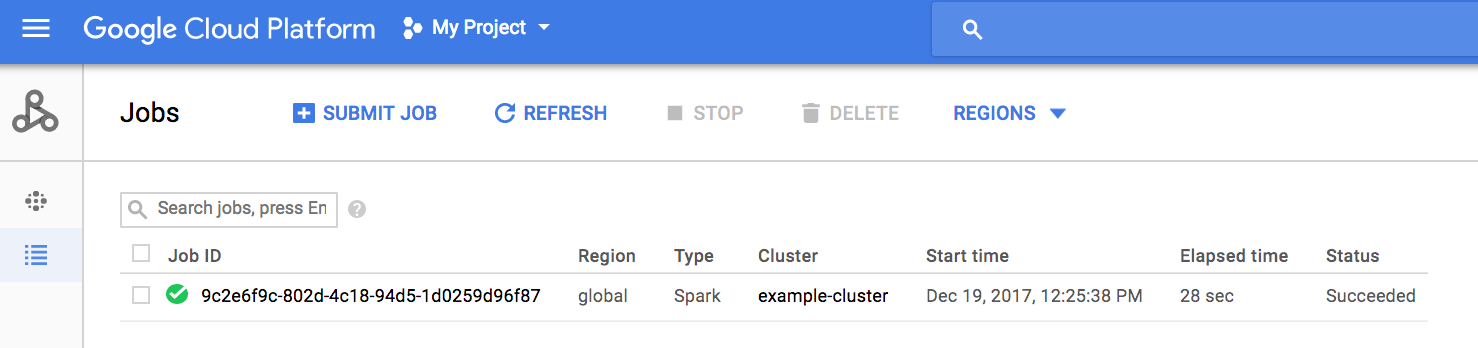
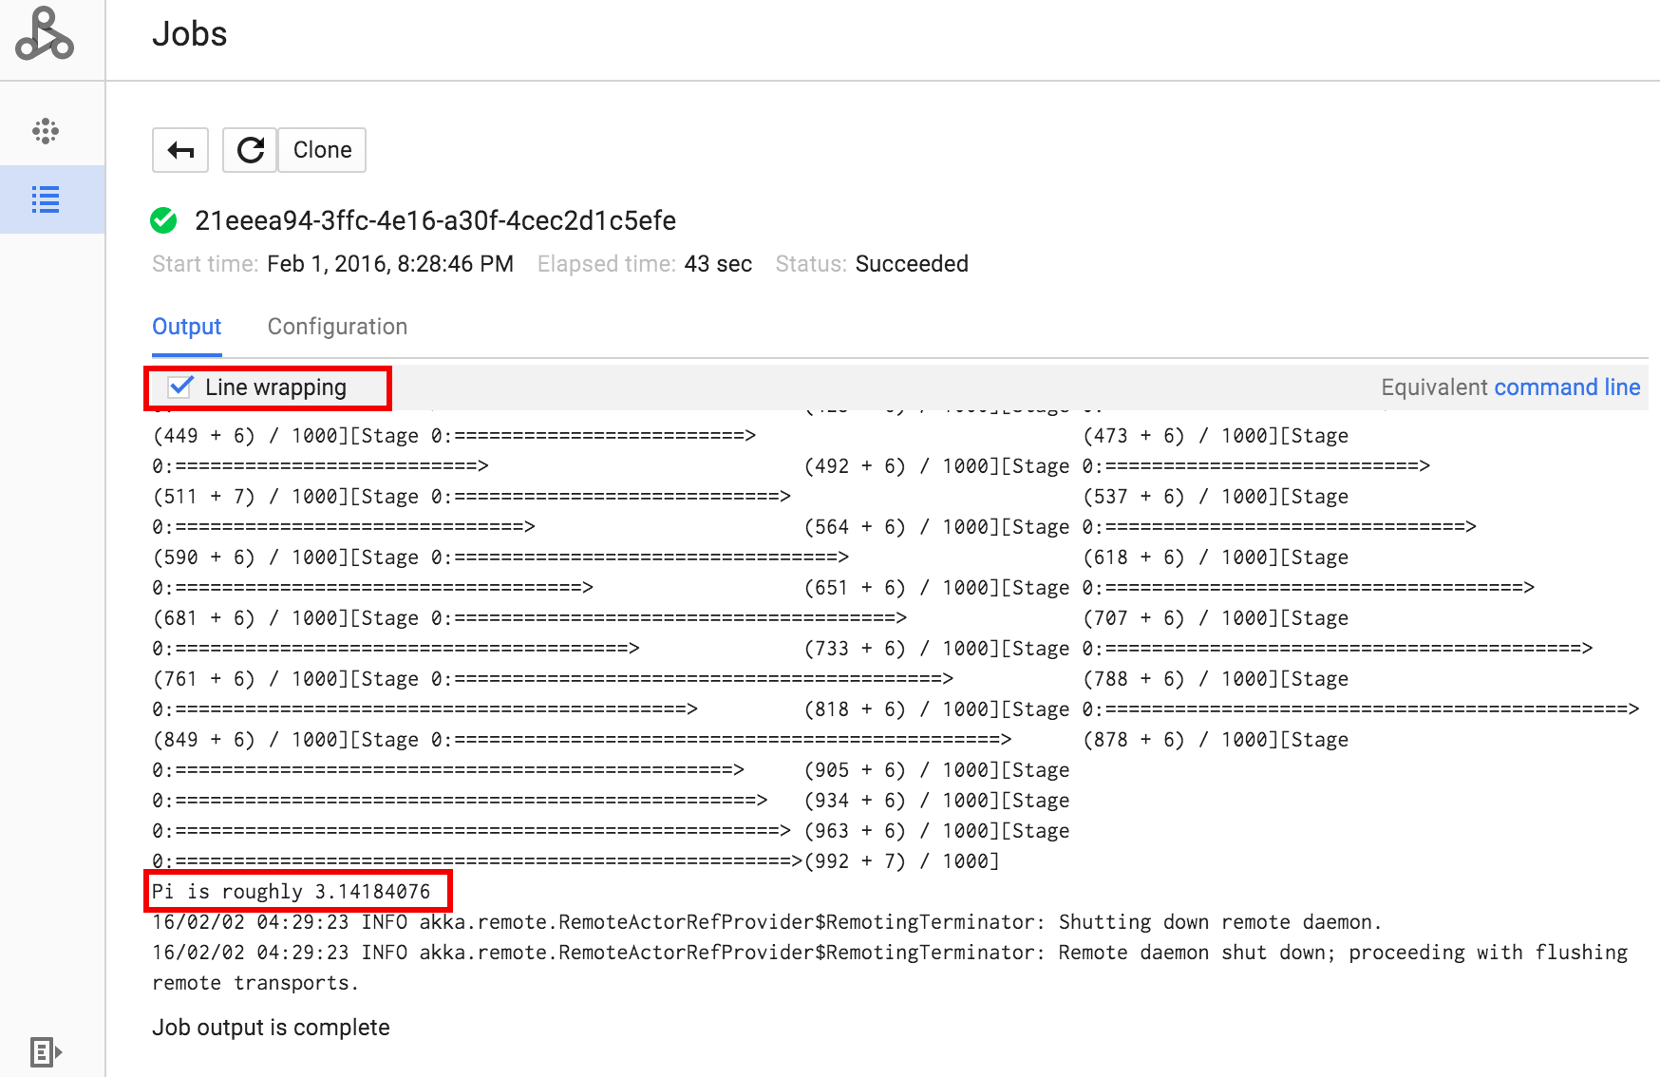
Klicken Sie auf die Job-ID, um die Seite Jobs zu öffnen, auf der Sie die Treiberausgabe des Jobs anzeigen können. Da die generierten Ausgabezeilen die Breite des Browserfensters überschreiten, klicken Sie auf das Kästchen Zeilenumbruch , um den gesamten Ausgabetext in der Ansicht darzustellen und das berechnete Ergebnis für pi einzublenden.

Sie können die Treiberausgabe des Jobs über die Befehlszeile mit dem gcloud dataproc jobs wait Befehl aufrufen. Weitere Informationen finden Sie unter Jobausgabe ansehen. Kopieren Sie die Projekt-ID und fügen Sie sie als den Wert für das Flag --project ein. Kopieren Sie anschließend die Job-ID (in der Jobliste angezeigt) und fügen Sie sie als endgültiges Argument ein.

gcloud dataproc jobs wait job-id \
    --project=project-id \
    --region=region

Hier sind Snippets aus der Treiberausgabe für den oben gesendeten SparkPi-Beispieljob:

...
2015-06-25 23:27:23,810 INFO [dag-scheduler-event-loop]
scheduler.DAGScheduler (Logging.scala:logInfo(59)) - Stage 0 (reduce at
SparkPi.scala:35) finished in 21.169 s

2015-06-25 23:27:23,810 INFO [task-result-getter-3] cluster.YarnScheduler
(Logging.scala:logInfo(59)) - Removed TaskSet 0.0, whose tasks have all
completed, from pool

2015-06-25 23:27:23,819 INFO [main] scheduler.DAGScheduler
(Logging.scala:logInfo(59)) - Job 0 finished: reduce at SparkPi.scala:35,
took 21.674931 s

Pi is roughly 3.14189648
...
Job [c556b47a-4b46-4a94-9ba2-2dcee31167b2] finished successfully.

driverOutputUri:
gs://sample-staging-bucket/google-cloud-dataproc-metainfo/cfeaa033-749e-48b9-...
...

gcloud

Zum Senden eines Jobs an einen Managed Service for Apache Spark-Cluster führen Sie den Befehl gcloud CLI gcloud dataproc jobs submit lokal in einem Terminalfenster oder in Cloud Shellaus.

gcloud dataproc jobs submit job-command \
    --cluster=cluster-name \
    --region=region \
    other dataproc-flags \
    -- job-args
Beispiel für das Senden eines PySpark-Jobs
  1. Listen Sie das öffentlich zugängliche hello-world.py in Cloud Storage auf.
    gcloud storage cat gs://dataproc-examples/pyspark/hello-world/hello-world.py
    
    Dateiliste:

    #!/usr/bin/python
    import pyspark
    sc = pyspark.SparkContext()
    rdd = sc.parallelize(['Hello,', 'world!'])
    words = sorted(rdd.collect())
    print(words)
  2. Senden Sie den Pyspark-Job an Managed Service for Apache Spark.
    gcloud dataproc jobs submit pyspark \
        gs://dataproc-examples/pyspark/hello-world/hello-world.py \
        --cluster=cluster-name  \
        --region=region
    
    Terminalausgabe:
    Waiting for job output...
    …
    ['Hello,', 'world!']
    Job finished successfully.
    
Beispiel für das Senden eines Spark-Jobs
  1. Führen Sie das vorinstallierte SparkPi-Beispiel auf dem Masterknoten des Managed Service for Apache Spark-Clusters aus.
    gcloud dataproc jobs submit spark \
        --cluster=cluster-name \
        --region=region \
        --class=org.apache.spark.examples.SparkPi \
        --jars=file:///usr/lib/spark/examples/jars/spark-examples.jar \
        -- 1000
    
    Terminalausgabe:
    Job [54825071-ae28-4c5b-85a5-58fae6a597d6] submitted.
    Waiting for job output…
    …
    Pi is roughly 3.14177148
    …
    Job finished successfully.
    …
    

REST

In diesem Abschnitt wird gezeigt, wie Sie einen Spark-Job senden, um den ungefähren Wert von pi mithilfe der Managed Service for Apache Spark jobs.submit-API zu berechnen.

Ersetzen Sie diese Werte in den folgenden Anfragedaten:

  • project-id: Google Cloud Projekt-ID
  • region: Cluster-Region
  • clusterName: Clustername

HTTP-Methode und URL:

POST https://dataproc.googleapis.com/v1/projects/project-id/regions/region/jobs:submit

JSON-Text anfordern:

{
  "job": {
    "placement": {
      "clusterName": "cluster-name"
    },
    "sparkJob": {
      "args": [
        "1000"
      ],
      "mainClass": "org.apache.spark.examples.SparkPi",
      "jarFileUris": [
        "file:///usr/lib/spark/examples/jars/spark-examples.jar"
      ]
    }
  }
}

Wenn Sie die Anfrage senden möchten, maximieren Sie eine der folgenden Optionen:

Sie sollten eine JSON-Antwort ähnlich wie diese erhalten:

{
  "reference": {
    "projectId": "project-id",
    "jobId": "job-id"
  },
  "placement": {
    "clusterName": "cluster-name",
    "clusterUuid": "cluster-Uuid"
  },
  "sparkJob": {
    "mainClass": "org.apache.spark.examples.SparkPi",
    "args": [
      "1000"
    ],
    "jarFileUris": [
      "file:///usr/lib/spark/examples/jars/spark-examples.jar"
    ]
  },
  "status": {
    "state": "PENDING",
    "stateStartTime": "2020-10-07T20:16:21.759Z"
  },
  "jobUuid": "job-Uuid"
}
Google Cloud

Java

  1. Clientbibliothek installieren
  2. Standardanmeldedaten für Anwendungen einrichten
  3. Führen Sie den Code aus
    
    import com.google.api.gax.longrunning.OperationFuture;
    import com.google.cloud.dataproc.v1.Job;
    import com.google.cloud.dataproc.v1.JobControllerClient;
    import com.google.cloud.dataproc.v1.JobControllerSettings;
    import com.google.cloud.dataproc.v1.JobMetadata;
    import com.google.cloud.dataproc.v1.JobPlacement;
    import com.google.cloud.dataproc.v1.SparkJob;
    import com.google.cloud.storage.Blob;
    import com.google.cloud.storage.Storage;
    import com.google.cloud.storage.StorageOptions;
    import java.io.IOException;
    import java.util.concurrent.ExecutionException;
    import java.util.regex.Matcher;
    import java.util.regex.Pattern;
    
    public class SubmitJob {
    
      public static void submitJob() throws IOException, InterruptedException {
        // TODO(developer): Replace these variables before running the sample.
        String projectId = "your-project-id";
        String region = "your-project-region";
        String clusterName = "your-cluster-name";
        submitJob(projectId, region, clusterName);
      }
    
      public static void submitJob(String projectId, String region, String clusterName)
          throws IOException, InterruptedException {
        String myEndpoint = String.format("%s-dataproc.googleapis.com:443", region);
    
        // Configure the settings for the job controller client.
        JobControllerSettings jobControllerSettings =
            JobControllerSettings.newBuilder().setEndpoint(myEndpoint).build();
    
        // Create a job controller client with the configured settings. Using a try-with-resources
        // closes the client,
        // but this can also be done manually with the .close() method.
        try (JobControllerClient jobControllerClient =
            JobControllerClient.create(jobControllerSettings)) {
    
          // Configure cluster placement for the job.
          JobPlacement jobPlacement = JobPlacement.newBuilder().setClusterName(clusterName).build();
    
          // Configure Spark job settings.
          SparkJob sparkJob =
              SparkJob.newBuilder()
                  .setMainClass("org.apache.spark.examples.SparkPi")
                  .addJarFileUris("file:///usr/lib/spark/examples/jars/spark-examples.jar")
                  .addArgs("1000")
                  .build();
    
          Job job = Job.newBuilder().setPlacement(jobPlacement).setSparkJob(sparkJob).build();
    
          // Submit an asynchronous request to execute the job.
          OperationFuture<Job, JobMetadata> submitJobAsOperationAsyncRequest =
              jobControllerClient.submitJobAsOperationAsync(projectId, region, job);
    
          Job response = submitJobAsOperationAsyncRequest.get();
    
          // Print output from Google Cloud Storage.
          Matcher matches =
              Pattern.compile("gs://(.*?)/(.*)").matcher(response.getDriverOutputResourceUri());
          matches.matches();
    
          Storage storage = StorageOptions.getDefaultInstance().getService();
          Blob blob = storage.get(matches.group(1), String.format("%s.000000000", matches.group(2)));
    
          System.out.println(
              String.format("Job finished successfully: %s", new String(blob.getContent())));
    
        } catch (ExecutionException e) {
          // If the job does not complete successfully, print the error message.
          System.err.println(String.format("submitJob: %s ", e.getMessage()));
        }
      }
    }

Python

  1. Clientbibliothek installieren
  2. Standardanmeldedaten für Anwendungen einrichten
  3. Führen Sie den Code aus
    import re
    
    
    from google.cloud import dataproc_v1 as dataproc
    from google.cloud import storage
    
    
    def submit_job(project_id, region, cluster_name):
        # Create the job client.
        job_client = dataproc.JobControllerClient(
            client_options={"api_endpoint": f"{region}-dataproc.googleapis.com:443"}
        )
    
        # Create the job config. 'main_jar_file_uri' can also be a
        # Google Cloud Storage URL.
        job = {
            "placement": {"cluster_name": cluster_name},
            "spark_job": {
                "main_class": "org.apache.spark.examples.SparkPi",
                "jar_file_uris": ["file:///usr/lib/spark/examples/jars/spark-examples.jar"],
                "args": ["1000"],
            },
        }
    
        operation = job_client.submit_job_as_operation(
            request={"project_id": project_id, "region": region, "job": job}
        )
        response = operation.result()
    
        # Dataproc job output gets saved to the Google Cloud Storage bucket
        # allocated to the job. Use a regex to obtain the bucket and blob info.
        matches = re.match("gs://(.*?)/(.*)", response.driver_output_resource_uri)
    
        output = (
            storage.Client()
            .get_bucket(matches.group(1))
            .blob(f"{matches.group(2)}.000000000")
            .download_as_bytes()
            .decode("utf-8")
        )
    
        print(f"Job finished successfully: {output}")


Go

  1. Clientbibliothek installieren
  2. Standardanmeldedaten für Anwendungen einrichten
  3. Code ausführen
    import (
    	"context"
    	"fmt"
    	"io"
    	"log"
    	"regexp"
    
    	dataproc "cloud.google.com/go/dataproc/apiv1"
    	"cloud.google.com/go/dataproc/apiv1/dataprocpb"
    	"cloud.google.com/go/storage"
    	"google.golang.org/api/option"
    )
    
    func submitJob(w io.Writer, projectID, region, clusterName string) error {
    	// projectID := "your-project-id"
    	// region := "us-central1"
    	// clusterName := "your-cluster"
    	ctx := context.Background()
    
    	// Create the job client.
    	endpoint := fmt.Sprintf("%s-dataproc.googleapis.com:443", region)
    	jobClient, err := dataproc.NewJobControllerClient(ctx, option.WithEndpoint(endpoint))
    	if err != nil {
    		log.Fatalf("error creating the job client: %s\n", err)
    	}
    
    	// Create the job config.
    	submitJobReq := &dataprocpb.SubmitJobRequest{
    		ProjectId: projectID,
    		Region:    region,
    		Job: &dataprocpb.Job{
    			Placement: &dataprocpb.JobPlacement{
    				ClusterName: clusterName,
    			},
    			TypeJob: &dataprocpb.Job_SparkJob{
    				SparkJob: &dataprocpb.SparkJob{
    					Driver: &dataprocpb.SparkJob_MainClass{
    						MainClass: "org.apache.spark.examples.SparkPi",
    					},
    					JarFileUris: []string{"file:///usr/lib/spark/examples/jars/spark-examples.jar"},
    					Args:        []string{"1000"},
    				},
    			},
    		},
    	}
    
    	submitJobOp, err := jobClient.SubmitJobAsOperation(ctx, submitJobReq)
    	if err != nil {
    		return fmt.Errorf("error with request to submitting job: %w", err)
    	}
    
    	submitJobResp, err := submitJobOp.Wait(ctx)
    	if err != nil {
    		return fmt.Errorf("error submitting job: %w", err)
    	}
    
    	re := regexp.MustCompile("gs://(.+?)/(.+)")
    	matches := re.FindStringSubmatch(submitJobResp.DriverOutputResourceUri)
    
    	if len(matches) < 3 {
    		return fmt.Errorf("regex error: %s", submitJobResp.DriverOutputResourceUri)
    	}
    
    	// Dataproc job output gets saved to a GCS bucket allocated to it.
    	storageClient, err := storage.NewClient(ctx)
    	if err != nil {
    		return fmt.Errorf("error creating storage client: %w", err)
    	}
    
    	obj := fmt.Sprintf("%s.000000000", matches[2])
    	reader, err := storageClient.Bucket(matches[1]).Object(obj).NewReader(ctx)
    	if err != nil {
    		return fmt.Errorf("error reading job output: %w", err)
    	}
    
    	defer reader.Close()
    
    	body, err := io.ReadAll(reader)
    	if err != nil {
    		return fmt.Errorf("could not read output from Dataproc Job: %w", err)
    	}
    
    	fmt.Fprintf(w, "Job finished successfully: %s", body)
    
    	return nil
    }
    

Node.js

  1. Clientbibliothek installieren
  2. Standardanmeldedaten für Anwendungen einrichten
  3. Führen Sie den Code aus.
    const dataproc = require('@google-cloud/dataproc');
    const {Storage} = require('@google-cloud/storage');
    
    // TODO(developer): Uncomment and set the following variables
    // projectId = 'YOUR_PROJECT_ID'
    // region = 'YOUR_CLUSTER_REGION'
    // clusterName = 'YOUR_CLUSTER_NAME'
    
    // Create a client with the endpoint set to the desired cluster region
    const jobClient = new dataproc.v1.JobControllerClient({
      apiEndpoint: `${region}-dataproc.googleapis.com`,
      projectId: projectId,
    });
    
    async function submitJob() {
      const job = {
        projectId: projectId,
        region: region,
        job: {
          placement: {
            clusterName: clusterName,
          },
          sparkJob: {
            mainClass: 'org.apache.spark.examples.SparkPi',
            jarFileUris: [
              'file:///usr/lib/spark/examples/jars/spark-examples.jar',
            ],
            args: ['1000'],
          },
        },
      };
    
      const [jobOperation] = await jobClient.submitJobAsOperation(job);
      const [jobResponse] = await jobOperation.promise();
    
      const matches =
        jobResponse.driverOutputResourceUri.match('gs://(.*?)/(.*)');
    
      const storage = new Storage();
    
      const output = await storage
        .bucket(matches[1])
        .file(`${matches[2]}.000000000`)
        .download();
    
      // Output a success message.
      console.log(`Job finished successfully: ${output}`);

Job direkt an Cluster senden

Wenn Sie einen Job direkt auf Ihrem Cluster ohne den Managed Service for Apache Spark-Dienst ausführen möchten, stellen Sie eine SSH-Verbindung zum Masterknoten Ihres Clusters her und führen Sie den Job dann auf dem Masterknoten aus.

Nachdem Sie eine SSH-Verbindung zur VM-Masterinstanz hergestellt haben, führen Sie die folgenden Schritte in einem Terminalfenster im Masterknoten des Clusters aus:

  1. Öffnen Sie eine Spark-Shell.
  2. Führen Sie einen einfachen Spark-Job aus, um die Anzahl der Zeilen in einer (siebenzeiligen) Python-Datei "hello-world" zu zählen, die sich in einer öffentlich zugänglichen Cloud Storage-Datei befindet.
  3. Beenden Sie die Shell.

    user@cluster-name-m:~$ spark-shell
    ...
    scala> sc.textFile("gs://dataproc-examples"
    + "/pyspark/hello-world/hello-world.py").count
    ...
    res0: Long = 7
    scala> :quit
    

Bash-Jobs in Managed Service for Apache Spark ausführen

Möglicherweise möchten Sie ein Bash-Skript als Managed Service for Apache Spark-Job ausführen, weil die von Ihnen verwendeten Engines nicht als Managed Service for Apache Spark-Job auf oberster Ebene unterstützt werden oder weil Sie vor dem Start eines Jobs mit hadoop oder spark-submit aus dem Skript zusätzliche Einrichtungsschritte oder Berechnung von Argumenten vornehmen müssen.

Pig-Beispiel

Angenommen, Sie haben ein hello.sh-Bash-Skript in Cloud Storage kopiert:

gcloud storage cp hello.sh gs://${BUCKET}/hello.sh

Da der Befehl pig fs Hadoop-Pfade verwendet, kopieren Sie das Skript aus Cloud Storage an ein Ziel als file:///, damit es sich im lokalen Dateisystem statt in HDFS befindet. Die nachfolgenden sh-Befehle verweisen automatisch auf das lokale Dateisystem und erfordern nicht das Präfix file:///.

gcloud dataproc jobs submit pig --cluster=${CLUSTER} --region=${REGION} \
    -e='fs -cp -f gs://${BUCKET}/hello.sh file:///tmp/hello.sh; sh chmod 750 /tmp/hello.sh; sh /tmp/hello.sh'

Alternativ können Sie das Cloud Storage-Shell-Skript als --jars-Argument angeben, da das Managed Service for Apache Spark-Jobübermittlungsargument eine Datei in ein temporäres Verzeichnis stellt, das für die Lebensdauer des Jobs erstellt wurde:--jars

gcloud dataproc jobs submit pig --cluster=${CLUSTER} --region=${REGION} \
    --jars=gs://${BUCKET}/hello.sh \
    -e='sh chmod 750 ${PWD}/hello.sh; sh ${PWD}/hello.sh'

Beachten Sie, dass das --jars-Argument auch auf ein lokales Skript verweisen kann:

gcloud dataproc jobs submit pig --cluster=${CLUSTER} --region=${REGION} \
    --jars=hello.sh \
    -e='sh chmod 750 ${PWD}/hello.sh; sh ${PWD}/hello.sh'