

This page describes how to share notebooks between users and also how to revoke notebook sharing.
Sharing notebooks is one of the few user features that differs between Gemini Notebook Enterprise and the other Gemini Notebook products.
Who can you share notebooks with?
You can share your notebooks with others if they fulfill the following criteria:
They're users in the same project.
They've been granted the Cloud Gemini Notebook User role. For more information, see Grant Gemini Notebook Enterprise roles to users.
They're in the same workforce pool.
They have a Gemini Notebook Enterprise or Gemini Enterprise license.
Sharing permissions
There are two levels of sharing permissions:
Viewer: Viewers can interact with the notebook but otherwise have limited access. For example, viewers can't upload sources or add notes.
Editor: Editors have the same permissions as the notebook owner with the following exceptions. Editors can't:
- Delete notebooks
- Share notebooks
- Revoke access to notebooks
If a user is assigned both the permissions, the highest permission is granted. For example, if a person belongs to one group with editor permissions and another group with view permissions, that person can edit the notebook.
Autocomplete for user emails and group names
The autocomplete feature for the Add people and groups field is a convenience that makes entering email addresses and group names less error prone.
If you have set up Gemini Notebook Enterprise with the Cloud Identity authentication, then autocomplete is available automatically. (Cloud Identity corresponds to the Google identity provider in the Identity settings dropdown.)
However, if you're using Workforce Identity Federation for authentication, then you must configure Workforce Identity Federation to use extended attributes with System for Cross-domain Identity Management (SCIM). Most likely, you did this when you set up Gemini Notebook Enterprise, see Set up Gemini Notebook Enterprise.
Limitations related to sharing notebooks
Be aware of the following limitations related to sharing notebooks in Gemini Notebook Enterprise:
If your notebook is integrated with Gemini Enterprise and you added sources from Gemini Enterprise search results, then you can't share those notebooks.
If a notebook is already shared, you can't add sources to it from Gemini Enterprise.
Autocomplete for user emails and group names is not available if authentication is through Workforce Identity Federation with Okta.
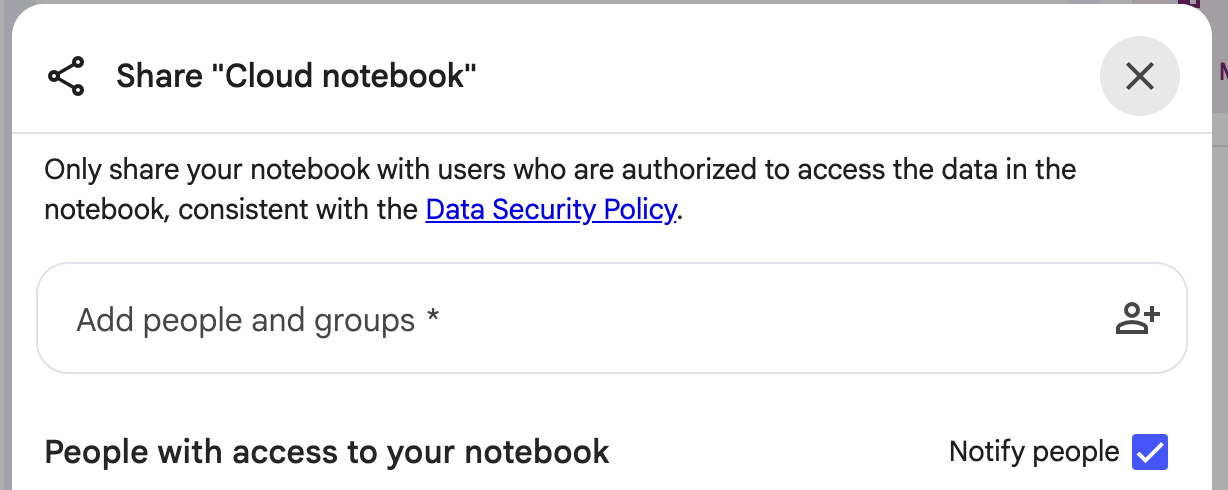
Share a notebook with individuals
To share a notebook with people using their email addresses, follow these steps:
Click Share.
Enter comma-separated email addresses and click .
Optional. Clear the Notify people checkbox if you don't want the people you add to receive an email telling them that you've shared the notebook.
Set the permissions to Viewer or Editor.
Click Send.
After you've shared the notebook with someone, they'll find the shared notebook at the top of the notebook list on their My Notebooks page.
Share a notebook with a group
You can share a notebook with others using an email distribution group such as a Google group or a Microsoft Entra ID group.
To share a notebook with a group, follow these steps:
Click Share.
In the Add people and groups field, type the name of the group that you want to share the notebook with (for example,
my-google-group@example.com), and click .Set the permission to Viewer or Editor.
Click Share.
After you've shared the notebook with a group, each member of the group receives an email with a message saying that you've invited them to edit or view the notebook. A link to the notebook is included in the message. The group member doesn't see the notebook in their My Notebooks page until after they've clicked the notebook link in the email.
Revoke access to a notebook
If you've shared a notebook with someone and you decide that you no longer want that person to have access to the notebook, then you can revoke sharing.
To revoke access to a notebook, follow these steps:
Click Share.
Select Revoke access next to the email address of the person.
Click Send.