## Overview
[Chrome Enterprise Premium](https://docs.cloud.google.com/chrome-enterprise-premium/docs/overview) is
Google Cloud's zero trust solution
that enables an organization's workforce to access web applications securely
from anywhere, without the need for VPN, and to help prevent malware, phishing,
and data loss.
With the power of Google Chrome, Chrome Enterprise Premium enables users to access
applications from any device. Chrome Enterprise Premium is expanding its capabilities
to address some key security challenges in the developer environment.
Using context-aware access control for
[Google Cloud console](https://console.cloud.google.com/) and APIs,
Chrome Enterprise Premium enables additional security for the Cloud Workstations API.
> [!CAUTION]
> **Caution:** To enable context-aware access control for workstations, you must first enable [IAP](https://docs.cloud.google.com/workstations/docs/enable-iap) on your workstation cluster.
The following table lists whether Chrome Enterprise Premium supports context-aware access
control for the specified Cloud Workstations access method.
- The Yes check mark indicates Chrome Enterprise Premium limits this Cloud Workstations access method.
- The No not supported icon indicates Chrome Enterprise Premium does not limit this Cloud Workstations access method.
| Cloud Workstations access | Chrome Enterprise Premium context-aware access control |
|---|---|
| Google Cloud console | Yes |
| `gcloud` CLI: Create, Edit, Delete resource | Yes |
| `gcloud` CLI: SSH | No |
| API: REST | Yes |
| API: RPC | Yes |
| API: Client Libraries | Yes |
| API: browser access | Yes |
| HTTP: browser access | Yes |
| HTTP: SSH | No |
| HTTP: local JetBrains IDEs | No |
| HTTP: local VS Code | No |
## Objectives
This document describes the steps that an administrator follows to set up
Chrome Enterprise Premium access control for the Cloud Workstations API
and to provide additional mechanisms that help prevent source code exfiltration
from browser-based Cloud Workstations IDEs.
## Costs
As part of this tutorial, you may need to get other teams involved (for billing or IAM) and you also test access-control to demonstrate that Chrome Enterprise Premium guardrails are in place.
In this document, you use the following billable components of Google Cloud:
- [Chrome Enterprise Premium](https://docs.cloud.google.com/chrome-enterprise-premium/pricing)
- [Cloud Workstations](https://docs.cloud.google.com/workstations/pricing)
To generate a cost estimate based on your projected usage,
use the [pricing calculator](https://docs.cloud.google.com/products/calculator).
New Google Cloud users might be eligible for a [free trial](https://docs.cloud.google.com/free).
When you finish the tasks that are described in this document, you can avoid
continued billing by deleting the resources that you created. For more information, see
[Clean up](https://docs.cloud.google.com/workstations/docs/tutorial-help-secure-workstations-api-using-beyondcorp-enterprise#clean-up).
## Before you begin
1. Make sure that you have assigned a
Chrome Enterprise Premium Standard license to each of your users. Only users
with a license have access controls enforced. For more information, see
[Assign, remove, and reassign licenses](https://support.google.com/a/answer/1727173#zippy=%2Cautomatically-assign-a-license-to-every-user-in-your-organization).
## Part 1: Set up Chrome Enterprise Premium for Cloud Workstations
This section takes you through the steps to help you secure context-aware access
to the Cloud Workstations API:
1. [Set up Cloud Workstations](https://docs.cloud.google.com/workstations/docs/tutorial-help-secure-workstations-api-using-beyondcorp-enterprise#set-up-cloud-workstations).
2. [Create a demo user and a demo group](https://docs.cloud.google.com/workstations/docs/tutorial-help-secure-workstations-api-using-beyondcorp-enterprise#create_a_demo_user_and_a_demo_group).
3. [Create an access level in Access Context Manager](https://docs.cloud.google.com/workstations/docs/tutorial-help-secure-workstations-api-using-beyondcorp-enterprise#create_an_access_level).
4. [Enable Chrome Enterprise Premium CAA](https://docs.cloud.google.com/workstations/docs/tutorial-help-secure-workstations-api-using-beyondcorp-enterprise#enable-beyondcorp-enterprise-caa).
5. [Add required Google groups with access levels](https://docs.cloud.google.com/workstations/docs/tutorial-help-secure-workstations-api-using-beyondcorp-enterprise#add_required_google_groups_with_access_levels).
6. [Test developer access to Cloud Workstations](https://docs.cloud.google.com/workstations/docs/tutorial-help-secure-workstations-api-using-beyondcorp-enterprise#test-developer-access-to-cloud-workstations).
### Set up Cloud Workstations
To integrate with Chrome Enterprise Premium, your Cloud Workstations cluster
must use Identity-Aware Proxy (IAP). Skip this section if you have these
resources already configured.
To set up Cloud Workstations:
1. [Create a workstation cluster with a custom domain](https://docs.cloud.google.com/workstations/docs/set-up-custom-domains-for-cloud-workstations).
2. [Enable IAP](https://docs.cloud.google.com/workstations/docs/enable-iap).
3. [Create a workstation configuration](https://docs.cloud.google.com/workstations/docs/create-configuration) in the cluster.
If you're new to Cloud Workstations, see the
[Overview](https://docs.cloud.google.com/workstations/docs/overview) and [Architecture](https://docs.cloud.google.com/workstations/docs/architecture).
### Create a demo user and a demo group
From the Google Workspace Admin console, create a demo user and a
new user group. When enabled, context-aware access (CAA) for
Google Cloud console applies to all users and Google groups because it is a
global setting.
1. Sign in to the Google Workspace Admin console with your
administrator account:
**Menu \> Directory \>**
**Users \> Add New User**.
2. Create a demo user: **`demo-user@`**.
3. Sign in to the [Google Cloud console](https://console.cloud.google.com/) and navigate to
**Menu \> IAM \& Admin** \> **Groups**.
4. Create an **IAM group** for Cloud Workstations access,
name it `Cloud Workstations Users`, and assign the previously
created demo user, **`demo-user@`**.
5. Click **Save**.
6. Also create an IAM administrator group, and name it **Cloud Admin Users**.
Assign your project and organization administrators to this group.
7. Add the demo user, **`demo-user@`**, to the
Cloud Workstations user group that you created:
1. In the [Google Cloud console](https://console.cloud.google.com/), go to **Cloud Workstations \> Workstations**.
2. Select the workstation and then click more_vert**More \> Add Users**.
3. Select the demo user, **`demo-user@`** and select `Cloud Workstations User` as the **Role**.
4. To give the demo user access to the workstation, select **`demo-user@`** , select `Cloud Workstations Users` as the **Role** , and click **Save**.
### Create an access level
Go back to the Google Cloud console to create an access level in
Access Context Manager.
> [!NOTE]
> **Note:** Enrolling a device as a corporate-owned device is not covered in this tutorial. To enroll a device, follow instructions at [Add company-owned devices to the inventory](https://support.google.com/a/answer/7129612#zippy=%2Cos-requirements-by-device-type).
Follow these instructions to test access:
1. From the [Google Cloud console](https://console.cloud.google.com/), navigate to
**Security \>**
**[Access Context Manager](https://console.cloud.google.com/security/access-level)**
to configure a corporate-managed device policy.
2. Click **Create access level** and fill in the following fields:
1. In the **Access level title** field, enter `corpManagedDevice`.
2. Select **Basic** **mode**.
3. Under **Conditions** select **True** to enable the condition.
4. Click **+ Device** **policy** to expand the options and check **Require corp owned device**.
5. Click **Save** to save the access policy.
### Enable Chrome Enterprise Premium CAA for Google Cloud console
To assign context-aware access controls (CAA) to workstations, start by
enabling CAA for Google Cloud console:
1. From the [Google Cloud console](https://console.cloud.google.com/), navigate to
**Security \> BeyondCorp Enterprise**.
2. Click **Manage access to Google Cloud console and API** .
This takes you to the Chrome Enterprise Premium **Organization level** page.
3. In the **Secure Google Cloud console \& APIs** section, click **Enable**.
### Add required Google groups with access levels
> [!WARNING]
>
> **Warning:** These access permissions affect all
> [Google Cloud console](https://console.cloud.google.com/)
> and API access, not just for the Cloud Workstations API. Make sure that you
> configure users and access levels correctly to avoid being locked out of
> the Google Cloud console.
Add required administrator groups with relevant members and the correct access
policy.
> [!TIP]
>
> **Tip:** CAA for [Google Cloud console](https://console.cloud.google.com/)
> provides access controls for administrators to Google Cloud console and
> all cloud APIs. As a precaution, we recommend that you add a CAA dry-run policy
> before changing permissions.
### Console
1. Create an administrator access policy named **CloudAdminAccess** with
the location set to regions where your administrators work. This makes
sure that administrators can access resources even when another policy
blocks them.
2. Create an IAM group with administrator access at
**IAM \& Admin \> Groups**.
1. Select the organization.
2. Create a group, name it **Cloud Admin Users**.
3. Assign yourself and any other administrators to this group.
4. Click **Save**.
3. Go to **Security \> Chrome Enterprise Premium** .
Click **Manage access** and review
the list of groups and access levels that appear.
4. Click **Add principals to Google Cloud console \& APIs**.
1. For **Google Groups** , select **Cloud Admin Users**. This is the Google Group that you selected in the previous step.
2. Select **CloudAdminAccess**, the access level that you created for administrator access.
3. Click **Save**.
### gcloud and API
To enable dry-run, follow the
[Chrome Enterprise Premium dry-run tutorial](https://docs.cloud.google.com/chrome-enterprise-premium/docs/securing-console-and-apis#create-dry-run).
### Assign access level to Cloud Workstations users group
To assign the access level to Cloud Workstations users group:
1. Go to **Security \> Chrome Enterprise Premium** and click
**Manage access**.
2. Review the list of groups and access levels that appears.
3. Click **Add principals to Google Cloud console \& APIs**.
1. For **Google Groups** , select **Cloud Workstations Users**. This is the Google Group that you selected in the previous step.
2. Select the access level you created earlier, `corpManagedDevice`.
3. Click **Save**.
### Test developer access to Cloud Workstations
Test developer access to Cloud Workstations API from multiple entry
points. For a corporate-owned device, make sure that developers can access
the workstation API.
- Test that access to the workstation API from an unmanaged device is blocked:
Chrome Enterprise Premium blocks users trying to access the
Cloud Workstations API. When users try to sign in, an error
message appears, altering the user that they don't have access or that they
should check network connection and browser settings.
- Test that access to the workstation API from a corporate-owned device is
enabled:
Developers with Chrome Enterprise Premium and Cloud Workstations
access should be able to
[create their workstation](https://docs.cloud.google.com/workstations/docs/create-workstation)
and then
[launch their workstation](https://docs.cloud.google.com/workstations/docs/create-workstation#launch_your_workstation).
## Part 2: Set up Chrome Enterprise Premium DLP capabilities
This section includes steps to take advantage of BeyondCorp Threat and Data Protection
to integrate data loss prevention (DLP) features. This helps prevent source code
exfiltration from the Chrome-based,
[Cloud Workstations base editor (Code OSS for Cloud Workstations)](https://docs.cloud.google.com/workstations/docs/base-editor-overview).
> [!CAUTION]
> **Caution:** Interfaces that are not Chrome-based, such as the `gcloud` CLI, JetBrains Gateway, or other browsers, are not covered by Chrome Enterprise Premium DLP, and this integration cannot enforce context-aware access policies from these sources.
Follow these steps to set up Chrome Enterprise Premium DLP capabilities to help
prevent download of source code:
1. [Enable threat and data protection](https://docs.cloud.google.com/workstations/docs/tutorial-help-secure-workstations-api-using-beyondcorp-enterprise#enable_threat_and_data_protection).
2. [Create a BeyondCorp DLP rule](https://docs.cloud.google.com/workstations/docs/tutorial-help-secure-workstations-api-using-beyondcorp-enterprise#create-a-beyondcorp-enterprise-dlp-rule).
3. [Review settings and create the rule](https://docs.cloud.google.com/workstations/docs/tutorial-help-secure-workstations-api-using-beyondcorp-enterprise#review_settings_and_create_the_rule).
4. [Test the DLP rule](https://docs.cloud.google.com/workstations/docs/tutorial-help-secure-workstations-api-using-beyondcorp-enterprise#test_the_dlp_rule).
### Enable threat and data protection
To enable threat and data protection from the
Google Workspace Admin console, follow these steps:
1. Go to **Devices \> Chrome \>
Settings \> Users \& browsers**.
2. After you select your organizational unit identifier (OU ID), click
**Search or add a filter** under **User and Browser Settings** and select
the **Category** subtype.
3. Search for the **Chrome Enterprise connector** in the **Category** subtype.
4. In **Download content analysis** select **Google BeyondCorp Enterprise**.
5. Expand **Additional Settings.**
1. Select **Delay file access until analysis is complete**.
2. In **Check for sensitive data \> Mode** , select **On by default, except for the following URL pattern**.
6. Click **Save** to save the configuration.
### Create a Chrome Enterprise Premium DLP rule
To create a DLP rule, follow these steps:
1. Go to the Google Workspace Admin console and select
**Security \> Access and data control \>
Data protection \> Manage Rules**.
2. To create a new rule, click **Add rule** , and then **New rule** .
This opens the **Name and scope** page.
3. In the **Name** section, enter a name and description. For example,
for the **Name** field, enter `CloudWorkstations-DLP-Rule1` and, for the
**Description** field, enter `Cloud Workstations Data Loss
Prevention Rule 1`.
4. In the **Scope** section, configure the following:
1. Select **Organizational units and/or groups**.
2. Click **Include organizational units** and select your **organization**.
3. Click **Continue**.
5. In the **Apps** section, configure the following:
1. In the **Chrome** options, select **File uploaded** and **File
downloaded**.
2. Click **Continue**.
6. In the **Conditions** page, configure the following:
1. Click **Add condition** to create a new condition.
2. Select **All content**.
3. Select **Matches Predefined data type (recommended)**.
4. For **Select data type** , select **Documents---Source code file**.
5. For the **Likelihood threshold** field, select **High**.
6. For the **Minimum unique matches** field, enter **1**.
7. For the **Minimum match count** field, enter **1**.
8. Click **Continue**.
7. On the **Actions** page, configure the following:
1. In the **Actions** options, select **Chrome \> Block content**.
2. In the **Alerting** options, configure the following:
- For severity, select **Medium**.
- Select **Sent to alert center**.
3. Click **Continue**.
### Review settings and create the rule
From the **Review** page, review the settings that you configured in previous
pages:
1. Make sure the settings are correct.
2. To proceed, click **Create**.
3. On the next page, make sure **Active** is selected.
4. To finish creating the rule, click **Complete**.
### Test the DLP rule
Now that the DLP rule is added, you can test from Cloud Workstations
in Chrome:
1. In a new Chrome tab, enter `chrome://policy` and
click **Reload policies** to make sure the Chrome policy is
updated.
> [!NOTE]
> **Note:** typically you don't need to do this unless you want to update the policy right away. Chrome automatically checks for new policy updates every three hours.
2. Scroll down to make sure you see a list of policies. If you see these,
the policies have been pulled down successfully. In this case, look
for the **OnFileDownloadEnterpriseConnector** policy.
3. Navigate to the [Google Cloud console](https://console.cloud.google.com/) and
[create a Cloud Workstations configuration](https://docs.cloud.google.com/workstations/docs/create-configuration).
When creating your workstation configuration, be sure to select
**Code editors on base images** and then select the **Base Editor (Code OSS for Cloud Workstations)**
[preconfigured base image](https://docs.cloud.google.com/workstations/docs/preconfigured-base-images#list_of_preconfigured_base_images).
4. [Create a workstation](https://docs.cloud.google.com/workstations/docs/create-workstation).
5. [Start and launch your workstation](https://docs.cloud.google.com/workstations/docs/create-workstation#launch_your_workstation).
6. Access the **Code OSS for Cloud Workstations** URL that appears after
you launch your workstation and connect to port 80.
> [!NOTE]
> **Note:** the same DLP policies would also apply to applications running on any other Cloud Workstations ports---for example, port 3000---when accessed through the browser.
7. Clone a repository with the **Clone Git Repository** option in the IDE.
After the repository is cloned, try to **download a file** with
**source code.**
To download files in the Code OSS for Cloud Workstations Explorer view, use
any of the following methods:
- Drag files from the Explorer view.
- Navigate to the files and directories you would like to use,
right-click, and then choose **Download**.
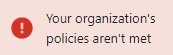
8. Upon download, the DLP policy goes into effect. Notice a download blocked
notification that states that your organization's policies aren't met:
Congratulations! You have successfully helped prevent source code files from
being downloaded.
## Clean up
To avoid incurring charges to your Google Cloud account for the resources
used in this tutorial, either delete the project that contains the resources, or
keep the project and delete the individual resources. For more information, see
[Delete resources](https://docs.cloud.google.com/workstations/docs/delete-resources).
## What's next
- To learn more about Chrome Enterprise Premium, see the [Chrome Enterprise Premium overview](https://docs.cloud.google.com/chrome-enterprise-premium/docs/overview).
- Read the high level steps for [applying Chrome Enterprise Premium](https://docs.cloud.google.com/chrome-enterprise-premium/docs/apply-resources) to your Google Cloud and on-premises resources.