# Set up workstations
Learn how to set up and use workstation clusters, workstation configurations,
and workstations. Check the prerequisites for this quickstart
[before you begin](https://docs.cloud.google.com/workstations/docs/quickstart-set-up-workstations-console#before-you-begin),
and then follow these steps:
1. [Create a workstation cluster](https://docs.cloud.google.com/workstations/docs/quickstart-set-up-workstations-console#create_a_workstation_cluster)
2. [Create a workstation configuration](https://docs.cloud.google.com/workstations/docs/quickstart-set-up-workstations-console#create_a_workstation_configuration)
3. [Create and launch a workstation](https://docs.cloud.google.com/workstations/docs/quickstart-set-up-workstations-console#create_and_launch_a_workstation)
If you no longer need the resources created in this quickstart,
make sure that you
[clean up](https://docs.cloud.google.com/workstations/docs/quickstart-set-up-workstations-console#clean-up)
to avoid incurring extra costs.
*** ** * ** ***
To follow step-by-step guidance for this task directly in the
Google Cloud console, click **Guide me**:
[Guide me](https://console.cloud.google.com/?journey_id=workstations--set-up--intro)
*** ** * ** ***
## Before you begin
This guide covers steps for administrators to set up Cloud Workstations and for developers
to use the workstations.
To set up Cloud Workstations, complete the following steps:
1.
Enable the Cloud Workstations API, if it is not already enabled.
**Roles required to enable APIs**
To enable APIs, you need the `serviceusage.services.enable` permission. If you
created the project, then you likely already have this permission through the
Owner role (`roles/owner`). Otherwise, you can get this permission through the
Service Usage Admin role (`roles/serviceusage.serviceUsageAdmin`).
[Learn how to grant roles](https://docs.cloud.google.com/iam/docs/granting-changing-revoking-access).
[Enable the API](https://console.cloud.google.com/apis/enableflow?apiid=workstations.googleapis.com)
### Required roles
To get the permissions that
you need to manage and use workstations,
ask your administrator to grant you the
following IAM roles:
- Create and manage workstation clusters and configurations: [Cloud Workstations Admin](https://docs.cloud.google.com/iam/docs/roles-permissions/workstations#workstations.admin) (`roles/workstations.admin`) on the project
- Create workstations using a configuration: [Cloud Workstations Creator](https://docs.cloud.google.com/iam/docs/roles-permissions/workstations#workstations.workstationCreator) (`roles/workstations.workstationCreator`) on the project or the workstation configuration
- Use a workstation: [Cloud Workstations User](https://docs.cloud.google.com/iam/docs/roles-permissions/workstations#workstations.user) (`roles/workstations.user`) on the workstation. This is automatically granted on workstations you create.
For more information about granting roles, see [Manage access to projects, folders, and organizations](https://docs.cloud.google.com/iam/docs/granting-changing-revoking-access).
You might also be able to get
the required permissions through [custom
roles](https://docs.cloud.google.com/iam/docs/creating-custom-roles) or other [predefined
roles](https://docs.cloud.google.com/iam/docs/roles-overview#predefined).
For a detailed overview of all Cloud Workstations roles, see
[Access control with IAM](https://docs.cloud.google.com/workstations/docs/access-control).
## Create a workstation cluster
The first step is to create a *workstation cluster* . Workstation clusters define a group of workstations in a particular region, manage workstations during their lifecycle, and provide configurable network connectivity.
Workstation clusters aren't related to Google Kubernetes Engine (GKE) clusters.
To create a workstation cluster, follow these steps:
1. In the console,
navigate to the **Cloud Workstations** \>
**Cluster management** page.
[Go to Cluster management](https://console.cloud.google.com/workstations/clusters)
2. From the workstations **Cluster management** page, click
add_box**Create**.
3. In the **Name** field, enter `test-cluster` as the name of your
workstation cluster.
4. Select the **Region** that is closest to you.
5. Optional: Enter a different **Workstation authorization URL** to use a
custom authentication flow.
6. Skip the **Network settings**.
7. Optional: The **Workstation launcher URL** is populated with the default
Google Cloud console launcher, which [automatically starts stopped workstations](https://docs.cloud.google.com/workstations/docs/automatically-restart-stopped-workstations).
If you want to use a custom launcher, replace this URL with your custom
page.
To reset a custom URL back to the default, click
**Use Cloud Console launcher**.
8. Click **Create**, which begins the cluster creation process.
Workstation cluster creation is generally
only needed once.
## Create a workstation configuration
This quickstart takes you through the most basic workstation configuration. To get started quickly, accept the defaults for defining machine settings, for customizing the environment, and for adding users.
To configure the basics of a workstation configuration, follow these steps:
1. In the console,
navigate to **Cloud Workstations** \>
**Workstation configurations**.
[Go to Workstation configurations](https://console.cloud.google.com/workstations/configurations)
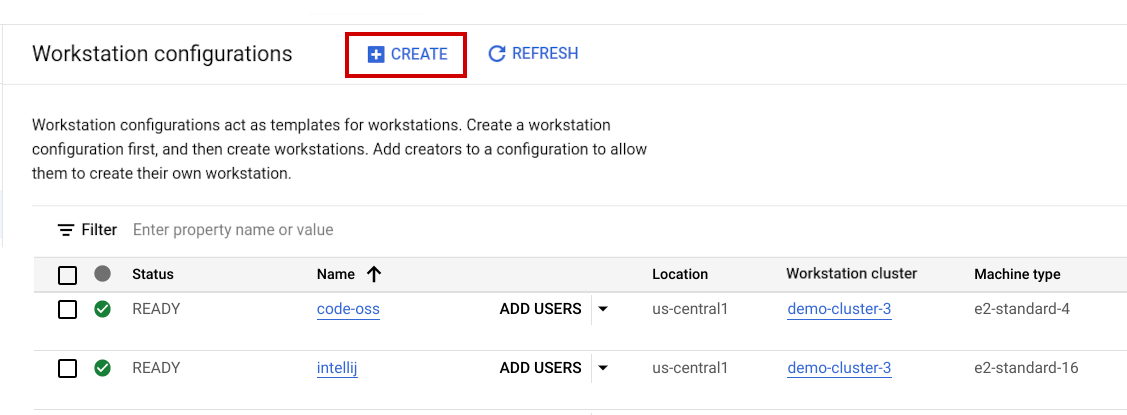
2. From the **Workstation configurations** page, click
add_box**Create**.
3. In the **Name** field, enter `test-configuration` as the name of your
workstation configuration.
4. In the **Region** field, select the region where you created your
workstation cluster `test-cluster`.
5. From the available workstation **Clusters** list, select `test-cluster`,
and then click **Continue**.
6. For **Machine preset** , select **Moderate**.
7. For **Quick start workstations** , select **Disabled** for lower cost.
8. If you were customizing a workstation configuration for your team, you might
define **Machine settings** , customize **Environment settings** , and grant
access to users on the **Users and permissions** page. For this exercise,
you can skip those steps.
9. To create your workstation configuration, click **Create**.
For more information about creating a workstation configuration with the options
that were skipped in this quickstart, see the detailed section about
[workstation configurations](https://docs.cloud.google.com/workstations/docs/create-configuration).
## Create and launch a workstation
A workstation is a preconfigured development environment that administrators or platform teams define in a workstation configuration. To create a workstation, follow these steps:
1. In the Google Cloud console, navigate to the
**Cloud Workstations** \> **Workstations**
page.
[Go to Workstations](https://console.cloud.google.com/workstations/list)
2. Click add_box**Create**.
The **Create** link might be disabled if there aren't any
workstation configurations in the project or if you don't have permissions
to view them.
Ask your organization's Cloud Workstations Admin to create a
workstation configuration for you.
3. Accept the default workstation **Name**.
4. Click the arrow_drop_downexpander
arrow in the **Configuration** field and select the
workstation configuration to define your workstation.
For example, if you named your workstation configuration
`test-configuration` in the prior step, select that from the list.
5. Click **Create**
to create your workstation.
Now that you have created a workstation, launch it to begin development:
1. Click **Workstations**.
2. In the list of workstations, find your workstation name and click **Launch**.
3. The workstation connects to port `80` by default.
If the workstation is stopped, clicking **Launch** also starts it.
> [!TIP]
> **Tip:** You can bookmark the launch page to restart and access your workstation.
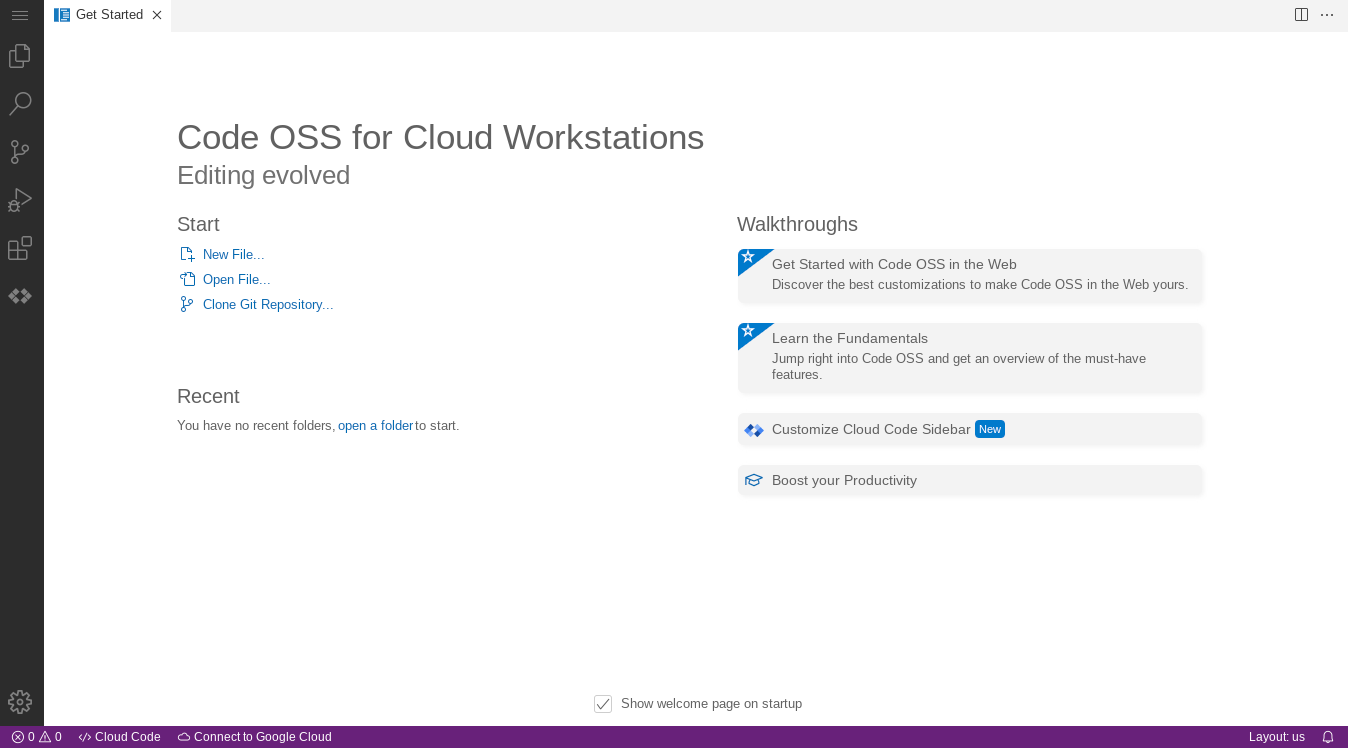
4. The following example shows the welcome page for the Cloud Workstations
[base editor](https://docs.cloud.google.com/workstations/docs/base-editor-overview).
Your page might look different, depending on how you define your
workstation configuration:
For more information about connecting through SSH, see
[SSH support](https://docs.cloud.google.com/workstations/docs/ssh-support).
For more information about connecting to web apps running on your
workstation, see
[Access HTTP servers running on a workstation](https://docs.cloud.google.com/workstations/docs/access-http-servers-running-on-workstations).
## Clean up
To avoid incurring charges to your Google Cloud account for the resources
used on this page, make sure that you delete resources that you no longer need.
To delete a Google Cloud project from the Google Cloud console or from the
`gcloud` CLI:
### Console
> [!CAUTION]
> **Caution** : Deleting a project has the following effects:
>
> - **Everything in the project is deleted.** If you used an existing project for the tasks in this document, when you delete it, you also delete any other work you've done in the project.
> - **Custom project IDs are lost.** When you created this project, you might have created a custom project ID that you want to use in the future. To preserve the URLs that use the project ID, such as an `appspot.com` URL, delete selected resources inside the project instead of deleting the whole project.
>
>
> If you plan to explore multiple architectures, tutorials, or quickstarts, reusing projects
> can help you avoid exceeding project quota limits.
1. In the Google Cloud console, go to the **Manage resources** page.
[Go to Manage resources](https://console.cloud.google.com/iam-admin/projects)
2. In the project list, select the project that you want to delete, and then click **Delete**.
3. In the dialog, type the project ID, and then click **Shut down** to delete the project.
### gcloud
> [!CAUTION]
> **Caution** : Deleting a project has the following effects:
>
> - **Everything in the project is deleted.** If you used an existing project for the tasks in this document, when you delete it, you also delete any other work you've done in the project.
> - **Custom project IDs are lost.** When you created this project, you might have created a custom project ID that you want to use in the future. To preserve the URLs that use the project ID, such as an `appspot.com` URL, delete selected resources inside the project instead of deleting the whole project.
>
>
> If you plan to explore multiple architectures, tutorials, or quickstarts, reusing projects
> can help you avoid exceeding project quota limits.
- Delete a Google Cloud project:
```
gcloud projects delete PROJECT_ID
```
For more information about deleting other resources, such as workstation clusters, workstation configurations, and workstations, see [Delete resources](https://docs.cloud.google.com/workstations/docs/delete-resources).
## What's next
- Use the
[Cloud Workstations base editor](https://docs.cloud.google.com/workstations/docs/base-editor-overview).
- Learn more about configuring additional options in your
[workstation configuration](https://docs.cloud.google.com/workstations/docs/create-configuration).
- Use Cloud Workstations with [JetBrains IDEs](https://docs.cloud.google.com/workstations/docs/preconfigured-ides)
such as IntelliJ IDEA Ultimate and PyCharm Professional.