Gemini CLI is an open source AI agent that brings Gemini
to your terminal. All Cloud Workstations workstation images include
Gemini CLI and the Cloud Workstations base editor includes the
Gemini CLI Companion extension.
With access to your workspace, Gemini CLI provides features like
in-editor diffs for code suggestions.
## Before you begin
Before you use Gemini CLI, ensure you have the following:
- A [workstation configuration](https://docs.cloud.google.com/workstations/docs/create-configuration), created by you or a team member.
- A running workstation. For instructions, see [Create and launch your
workstation](https://docs.cloud.google.com/workstations/docs/create-workstation).
## Start AI agent-assisted coding
To begin using Gemini CLI for AI agent-assisted coding, follow these
steps:
1. In your workstation's base editor, open a folder or workspace using one of the following methods:
- Click **Open Folder** from the explorer view.
- Select **Menu** \> **File** \> **Open Folder**.
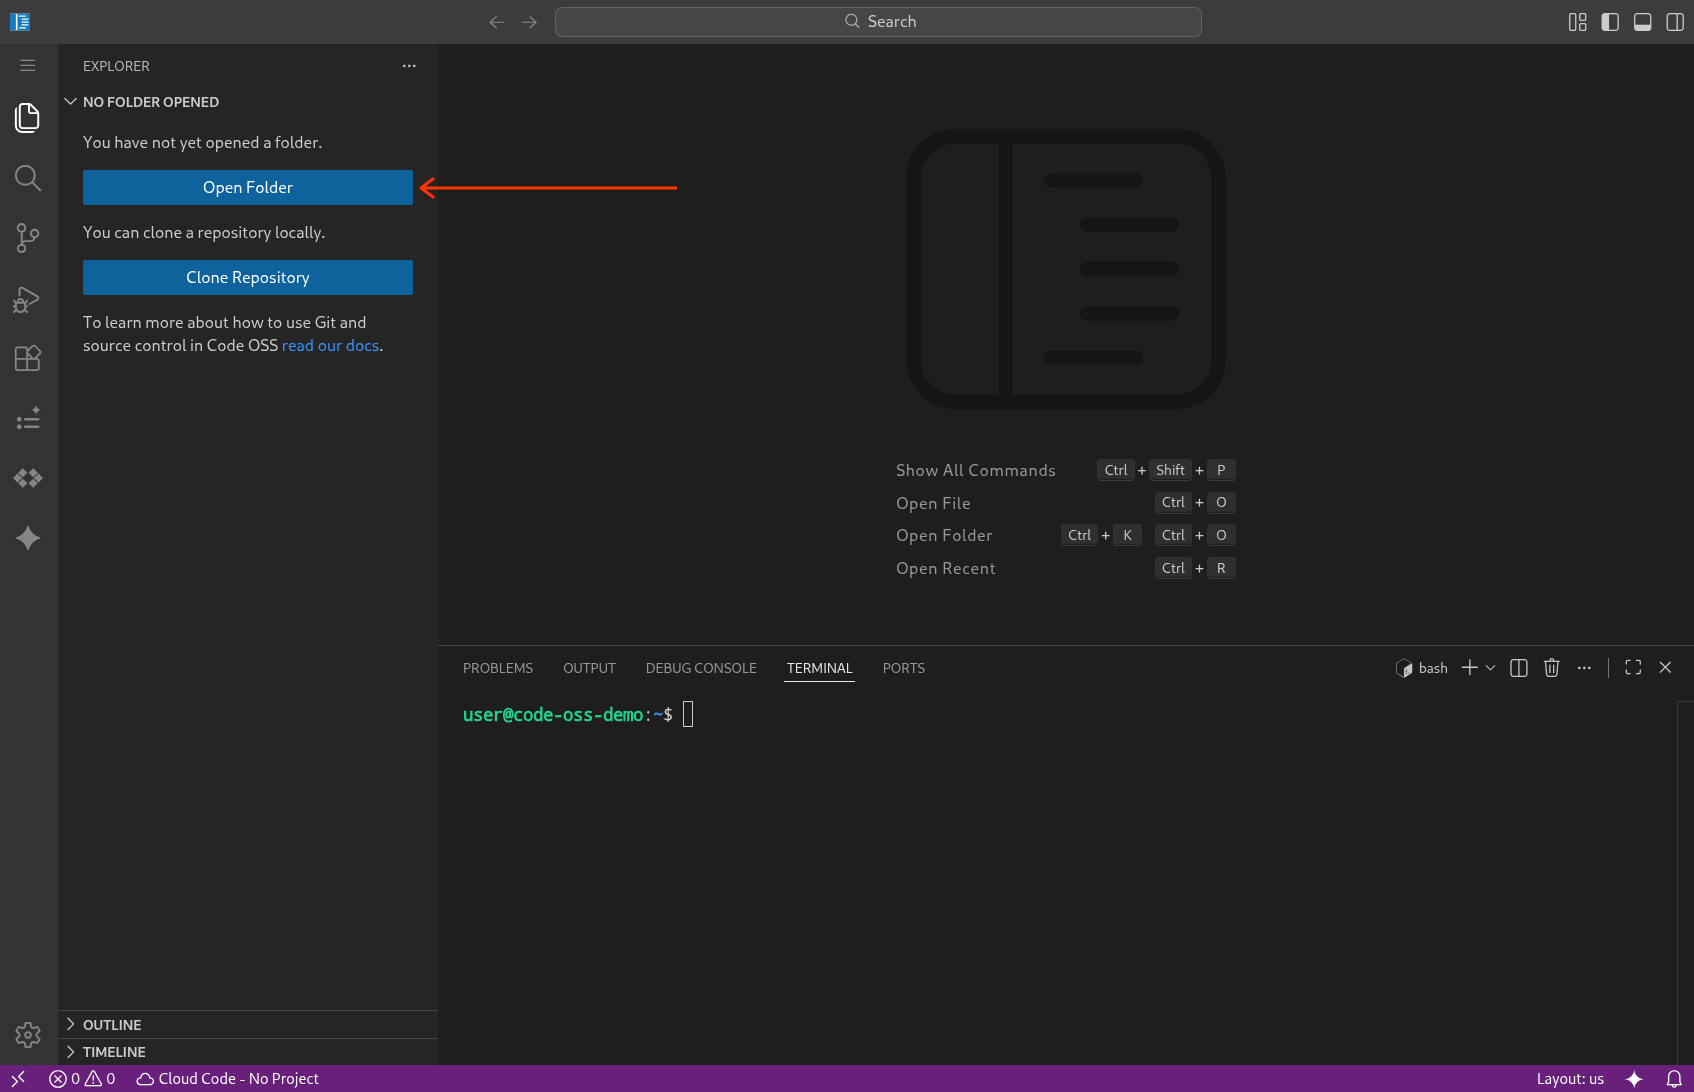 Figure 1. Open a folder or workspace in Code OSS for Cloud Workstations.
1. Open an integrated terminal. Use one of the following methods:
- Press Control+</kbd> (or <kbd>Command+ on macOS).
- Select **Terminal** \> **New Terminal**.
2. In the terminal, run the following command to start Gemini CLI:
gemini
3. The first time you run Gemini CLI, follow the prompts to sign in
with your Google Account.
4. If prompted to connect to the Gemini CLI Companion extension,
respond with `yes`. This enables the connection between the CLI and your
editor workspace.
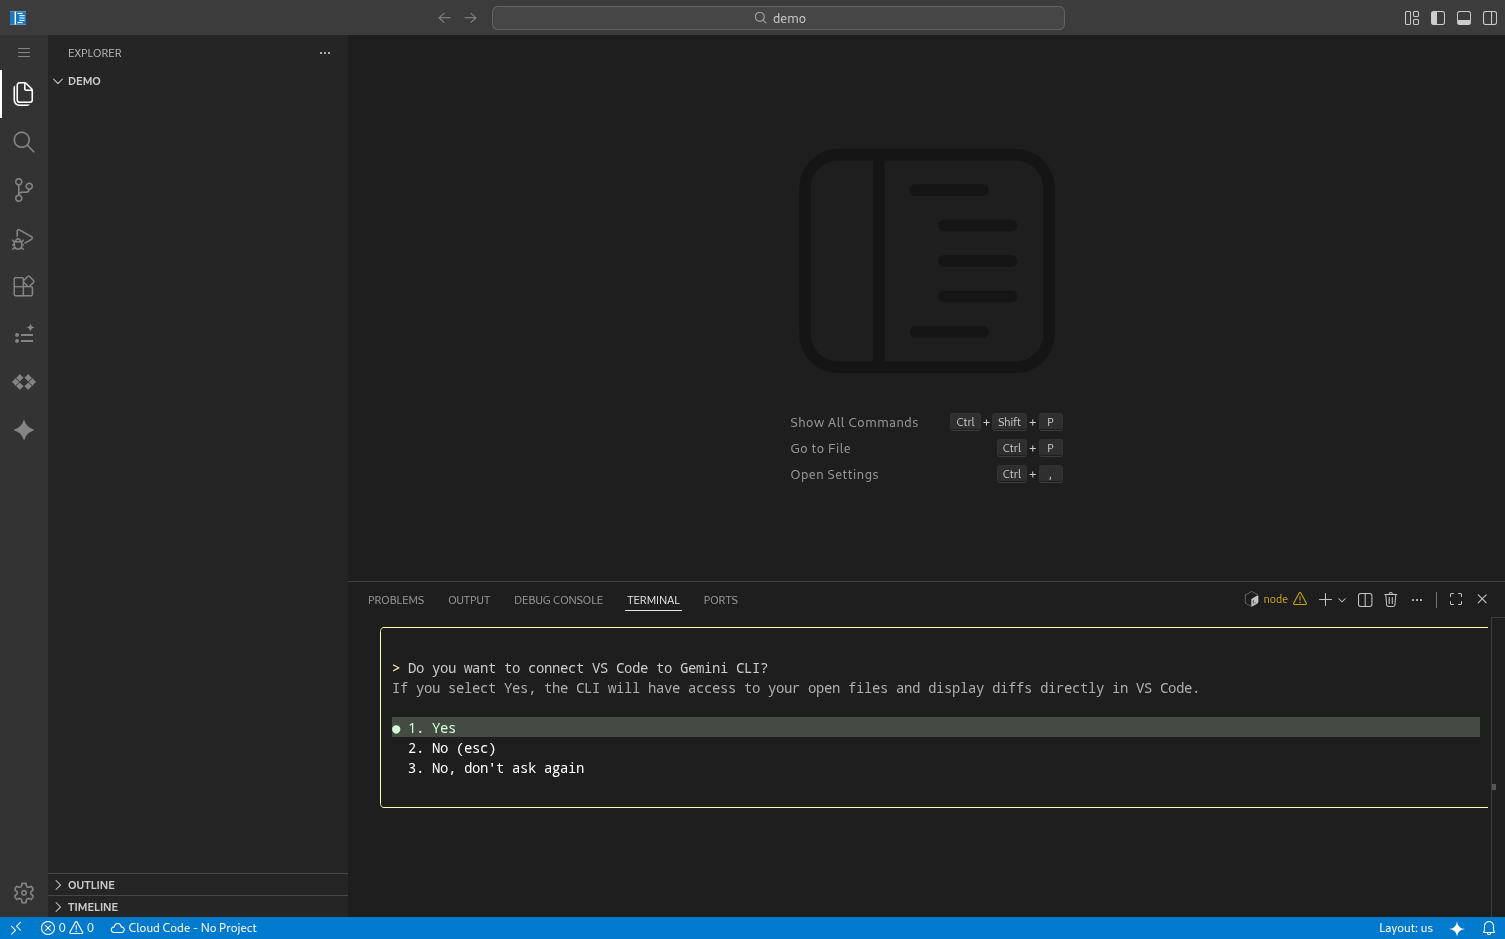 Figure 2. Connect Gemini CLI Companion to Code OSS for Cloud Workstations.
## Use Gemini CLI
Once started, you can interact with Gemini CLI using natural language.
For example:
- `Explain the architecture of this codebase`
- `Write a unit test for the function in main.py`
- `Refactor the current file to use async/await`
### Work with diffs
When Gemini CLI suggests code modifications, it can open a diff view
directly within your editor. This lets you review the changes before accepting
them.
To accept a suggested change:
- Click the icon in the diff editor's title bar.
- Open the Command Palette (Cmd+Shift+P or Ctrl+Shift+P) and run **Gemini CLI: Accept Diff**.
- Respond with `yes` in the terminal when prompted.
To reject a change:
- Click the icon in the diff editor's title bar.
- Close the diff editor tab.
- Respond with `no` in the terminal when prompted.
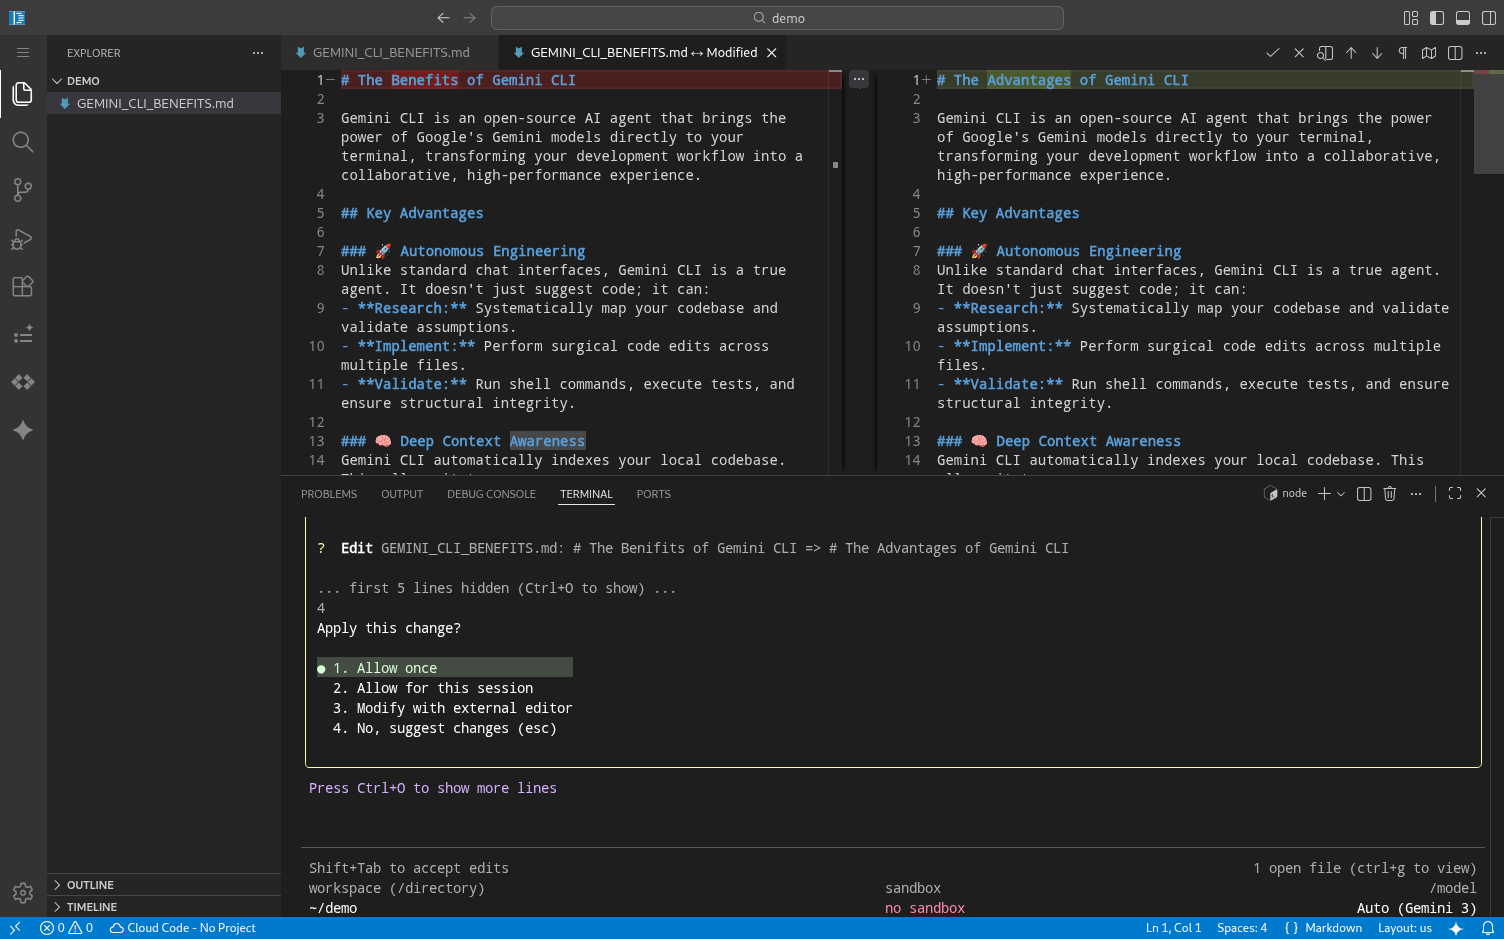 Figure 3. Gemini CLI Companion diff in Code OSS for Cloud Workstations.
## Troubleshooting
If you encounter issues with the IDE integration, you can check the connection
status by running the following command inside Gemini CLI:
/ide status
## What's next
- Learn more about using the [Gemini CLI on Google
Cloud](https://docs.cloud.google.com/gemini/docs/codeassist/gemini-cli).
- Explore the [IDE integration
documentation](https://geminicli.com/docs/ide-integration/).