You can use a Transfer Appliance to export your data from Cloud Storage.
## Before you begin
The following page provides instructions on how to order a Transfer Appliance
for data export, including how to validate and activate the appliance, perform
the transfer, and return the appliance back to Google.
[Online mode](https://docs.cloud.google.com/transfer-appliance/docs/4.0/online-transfer.md.txt) cannot be enabled on
appliances that are ordered for data export purposes.
## How it works
|---|---|
| 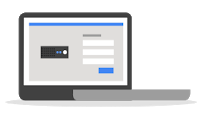 | **Request an appliance**: Place an order for a Transfer Appliance for data export and apply permissions. |
| 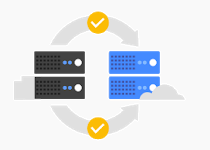 | **Google copies your data to the appliance**: We encrypt your data, copy it to the appliance, encrypt the appliance, then ship it to you. |
| 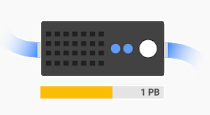 | **Receive the appliance and download your data**: Linux and Apple macOS systems mount the NFS share exposed by the appliance. Windows systems use SCP, SSH, or SMB to download data from the appliance. |
| 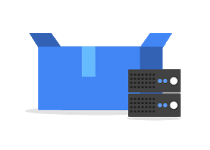 | **Finalize the appliance and ship it back**: Complete the transfer, finalize the appliance, and ship it back to Google. |
## Perform data export
To export your data, perform the following steps:
1. [Order a data export Transfer Appliance](https://docs.cloud.google.com/transfer-appliance/docs/4.0/data-export.md.txt#order).
2. [Receive and validate your appliance](https://docs.cloud.google.com/transfer-appliance/docs/4.0/data-export.md.txt#receive-and-validate).
3. [Activate your appliance](https://docs.cloud.google.com/transfer-appliance/docs/4.0/data-export.md.txt#activate).
4. [Configure appliance software](https://docs.cloud.google.com/transfer-appliance/docs/4.0/data-export.md.txt#configure).
5. [Download data](https://docs.cloud.google.com/transfer-appliance/docs/4.0/data-export.md.txt#download).
6. [Finalize copied data and wipe the appliance](https://docs.cloud.google.com/transfer-appliance/docs/4.0/data-export.md.txt#finalize).
7. [Return the appliance](https://docs.cloud.google.com/transfer-appliance/docs/4.0/data-export.md.txt#return).
### Order a data export Transfer Appliance
> [!NOTE]
> **Note:** Export feature is available in the USA only.
The source bucket must contain the necessary data for export before initiating an order, as any additional data added after the order may not be exported to the appliance.
To order a Transfer Appliance, perform the following steps:
Go to the **Order appliance** page. Choose the type of appliance you would
like to order and select data transfer direction as **From Cloud Storage to on premises**.
Provide your customer-managed encryption key (CMEK), and the name of the
source bucket from which you want to transfer your data. Optionally, provide the path to the manifest file.
[Go to Transfer Appliance ordering](https://console.cloud.google.com/transfer/appliance)
**Optional manifest file:**
The transfer of specific files or objects can be specified using a manifest. This manifest file needs to be selected while creating the order.
To create a manifest of objects, create a CSV file whose first column contains the object names relative to the bucket name and folder specified in the data source in Cloud Storage. All objects must be in the same bucket.
You can also specify an optional second column with the Cloud Storage generation number of the specific version to transfer.
For example, you may want to transfer the following objects:
| Object path | Cloud Storage generation number |
|---|---|
| `SOURCE_PATH/object1.pdf` | 1664826685911832 |
| `SOURCE_PATH/object2.pdf` | |
| `SOURCE_PATH/object3.pdf` | 1664826610699837 |
Your manifest file should look like the following for above example:
object1.pdf,1664826685911832
object2.pdf
object3.pdf,1664826610699837
Save the manifest file with any filename, and a `.csv` extension. This file needs to reside in the same data source in Cloud Storage.
### Prepare permissions and access
Once the order is submitted, provide permissions that are required to prepare
your Transfer Appliance. The permissions can be set either by [Cloud setup application](https://docs.cloud.google.com/transfer-appliance/docs/4.0/export-permissions-application.md.txt)
or by [manual configuration](https://docs.cloud.google.com/transfer-appliance/docs/4.0/export-permissions-step-by-step.md.txt).
> [!NOTE]
> **Note:** If permissions are not provided within 60 days of ordering, the current order cannot be used and a fresh order needs to be submitted.
Once your request has been received, Transfer Appliance Team validates your
order details and transfers your data onto the appliance.
Transfer Appliance Team seals and ships your appliance to the requested
destination. No further action is required until you receive your
appliance.
### Receive and validate your appliance
Once you receive your appliance, verify the package arrived intact and connect
to the Transfer Appliance:
1. [Verify package contents](https://docs.cloud.google.com/transfer-appliance/docs/4.0/receive-appliance.md.txt#verify-package)
to ensure that your appliance wasn't tampered with during transit.
2. [Run the Transfer Appliance Attestation Application](https://docs.cloud.google.com/transfer-appliance/docs/4.0/receive-appliance.md.txt#validate)
to ensure that the appliance software wasn't tampered with.
### Connect and activate your appliance
To connect to your appliance and activate it, perform the following steps on
your laptop:
1. [Connect to the Transfer Appliance](https://docs.cloud.google.com/transfer-appliance/docs/4.0/receive-appliance.md.txt#validate) the same way as described in the validation step above.
2. Activate your appliance using the following commands. Make sure your laptop
is connected to the internet and the user has permissions to install and execute `gcloud` command below. Google Cloud CLI may need to be installed if it's not already following the [Install the Google Cloud CLI](https://cloud.google.com/sdk/docs/install) instructions.
1. Run `gcloud auth application-default login`.
> [!NOTE]
> **Note:** The user account performing the login must have `storage.objects.get` permission on the source Cloud Storage bucket as well as `cloudkms.cryptoKeyVersions.useToDecrypt` permission on the Cloud Key Management Service key configured during ordering.
1. Run the activation command.
### Windows
```
taattestator_x86_64-windows.exe --activation
```
### Linux
```
./taattestator_x86_64-linux --activation
```
### macOS
```
./taattestator_x86_64-darwin --activation
```
### Configure appliance software
[Configure the Transfer Appliance's software](https://docs.cloud.google.com/transfer-appliance/docs/4.0/receive-appliance.md.txt#configure-appliance)
and verify the status of the appliance.
### Download data
Extract the data from the appliance using one of the following methods. We
strongly recommend that you verify that data download is completed before deleting any the data in your source
Cloud Storage bucket. It's a good practice to verify the data against the manifest file if one was provided at the time of order.
### SCP or SFTP
Copy data using SCP or SFTP based on your operating system:
### Windows
1. Download an SCP or SFTP client that supports UTF-8 filenames, such as
[WinSCP](https://winscp.net/eng/index.php).
2. Using the SCP tool, connect to the appliance with the following
settings:
- **File protocol:** SFTP
- **Host name:** IP address for the appliance
- **Port number:** 22
- **Username:** The appliance username provided by the
Transfer Appliance Team
- **Password:** The appliance password provided by the
Transfer Appliance Team
The source directory on the Transfer Appliance must be `/mnt/ta_data`.
### Linux
1. Run the following command:
```
scp USERNAME@IP_ADDRESS:/mnt/ta_data PATH_ON_DEVICE
```
Replace the following items:
- `PATH_ON_DEVICE`: The path on the device
you are copying data onto.
- `USERNAME`: The appliance username provided
by the Transfer Appliance Team.
- `IP_ADDRESS`: The IP address for the
appliance.
2. When prompted, enter the appliance password provided by the
Transfer Appliance Team.
### macOS
1. Run the following command:
```
scp USERNAME@IP_ADDRESS:/mnt/ta_data PATH_ON_DEVICE
```
Replace the following:
- `PATH_ON_DEVICE`: The path on the device
you are copying data onto.
- `USERNAME`: The appliance username provided
by the Transfer Appliance Team.
- `IP_ADDRESS`: The IP address for the appliance.
2. When prompted, enter the appliance password provided by the
Transfer Appliance Team.
### NFS share
Copy data from the appliance using NFS share:
1. Run the following command on your data source depending on your
operating system:
### Linux
1.
```
sudo apt install nfs-common
```
2.
```
sudo mkdir /mnt/data
```
3.
```
sudo mount -o vers=4 IP_ADDRESS:/mnt/ta_data /mnt/data
```
Replace `IP_ADDRESS` with the IP address for the
appliance.
### macOS
1.
```
cd ~
```
2.
```
mkdir ta_data
```
3.
```
sudo mount -t nfs -o vers=4, resvport IP_ADDRESS:/mnt/ta_data ~/ta_data
```
Replace `IP_ADDRESS` with the IP address for the
appliance.
1. Copy data from the appliance using a copy utility of your choice.
Copying data is a long-running operation. For macOS or Linux, we
recommend using `tmux` or `screen` to ensure the copy process
survives logout or network disconnects.
### SMB share
To enable SMB file share, follow the steps below:
1. Configure the appliance to use SMB using the following file share
protocol flag:
ta config --data_port=PORT --ip=IP_ADDRESS --fileshare=smb
The `ta_data` directory is shared and the following user is created:
- Username: `ta_customer`
- Password: `ta_customer`
2. Based on your host type, connect to the SMB file share:
### Microsoft Windows
### File manager
1. Open the file manager and edit the file path to `\\IP_ADDRESS\ta_data`.
2. Enter your username and password when prompted.
### Command line
1. Enter the following at the Windows command prompt: `net use X: \\IP_ADDRESS\ta_data`
2. Enter your username and password when prompted.
### Linux
### File manager
1. Open the default file manager and click **Connect to server**.
2. Enter `smb://IP_ADDRESS/ta_data`.
3. Enter your username and password when prompted.
### Command line
1. Install SMB client: `sudo apt-get install smbclient`.
2. Connect to the SMB file share: `smbclient //IP_ADDRESS/ta_data -U USERNAME`
An `smb:\>` prompt appears.
### Finalize copied data
Finalizing the copied data prepares the appliance for shipping back to Google.
Once you finalize the copied data, the data on the
appliance becomes inaccessible and can't be retrieved again.
1. [Finalize the copied data](https://docs.cloud.google.com/transfer-appliance/docs/4.0/return-appliance.md.txt#finalizing).
### Return the appliance
[Package and return the appliance](https://docs.cloud.google.com/transfer-appliance/docs/4.0/return-appliance.md.txt)
to Google.
## Security considerations
Your data is encrypted using a data encryption key (DEK) generated by
Google Cloud. The DEK is then encrypted by a key encryption key (KEK) and stored
in your source bucket. Your encrypted data is moved to the appliance which is
additionally encrypted using dm-crypt on Google's private data center network
using secure TLS connections.
Your data remains encrypted in the data center, during transit, and is only
accessible once you activate the appliance. For more information about Google's
security protocols, see
[Security and encryption](https://docs.cloud.google.com/transfer-appliance/docs/4.0/security-and-encryption.md.txt).
## Pricing
Standard Transfer Appliance pricing applies to data export appliances. For
more information, see
[Transfer Appliance pricing page](https://cloud.google.com/transfer-appliance/pricing).