# Transcribe speech to text by using the Google Cloud console
This quickstart introduces you to the
[Cloud Cloud Speech-to-Text Console](https://console.cloud.google.com/speech). In this
quickstart, you will create and refine a transcription and learn how to
use this configuration with the Cloud Speech-to-Text API for your own applications.
To learn how to send requests and receive responses using the REST API instead
of the Console, see the
[before you begin](https://docs.cloud.google.com/speech-to-text/docs/v1/before-you-begin) page.
## Before you begin
Before you can begin using the Cloud Speech-to-Text Console, you must enable the
API in the Google Cloud Platform Console. The steps below walk you through the
following actions:
- Enable Cloud Speech-to-Text on a project.
- Make sure billing is enabled for Cloud Speech-to-Text.
### Set up your Google Cloud project
1. [Sign in to Google Cloud console](https://console.cloud.google.com/)
2. [Go to the project selector page](https://console.cloud.google.com/projectselector2/home/dashboard)
You can either choose an existing project or create a new one. For more details
about creating a project, see
[Google Cloud Platform documentation](https://docs.cloud.google.com/resource-manager/docs/creating-managing-projects.md.txt).
3. If you create a new project, you will be prompted to link a billing account
to this project. If you are using a pre-existing project, make sure that you
have billing enabled.
[Learn how to confirm that billing is enabled for your project](https://docs.cloud.google.com/billing/docs/how-to/modify-project.md.txt)
> [!NOTE]
> **Note:** You must enable billing to use Cloud Speech-to-Text API, however you will not be charged unless you exceed the free quota. See the [pricing](https://cloud.google.com/speech-to-text/pricing) page for more details.
4. Once you have selected a project and linked it to a billing account, you
can enable the Cloud Speech-to-Text API. Go to the **Search products and
resources** bar at the top of the page and type in **"speech"**.
5. Select the **Cloud Speech-to-Text API** from the list of results.
6. To try Cloud Speech-to-Text without linking it to your project, choose
the **TRY THIS API** option. To enable the Cloud Speech-to-Text API for use
with your project, click **ENABLE**.
### Required roles
To get the permissions that
you need to create a transcription,
ask your administrator to grant you the
[Storage Admin](https://docs.cloud.google.com/iam/docs/roles-permissions/storage.md.txt#storage.admin) (`roles/storage.admin`) IAM role on your project.
For more information about granting roles, see [Manage access to projects, folders, and organizations](https://docs.cloud.google.com/iam/docs/granting-changing-revoking-access.md.txt).
This predefined role contains
the permissions required to create a transcription. To see the exact permissions that are
required, expand the **Required permissions** section:
#### Required permissions
The following permissions are required to create a transcription:
- `storage.buckets.get`
- `storage.buckets.list`
- `storage.buckets.update`
- At the project or bucket level:
- `storage.objects.create`
- `storage.objects.delete`
- `storage.objects.get`
- `storage.objects.list`
- `storage.objects.update`
You might also be able to get
these permissions
with [custom roles](https://docs.cloud.google.com/iam/docs/creating-custom-roles.md.txt) or
other [predefined roles](https://docs.cloud.google.com/iam/docs/roles-overview.md.txt#predefined).
## Create a transcription
Use the Google Cloud console to create a transcription.
### Audio configuration
1. Open the [**Cloud Speech-to-Text** overview](https://console.cloud.google.com/speech).
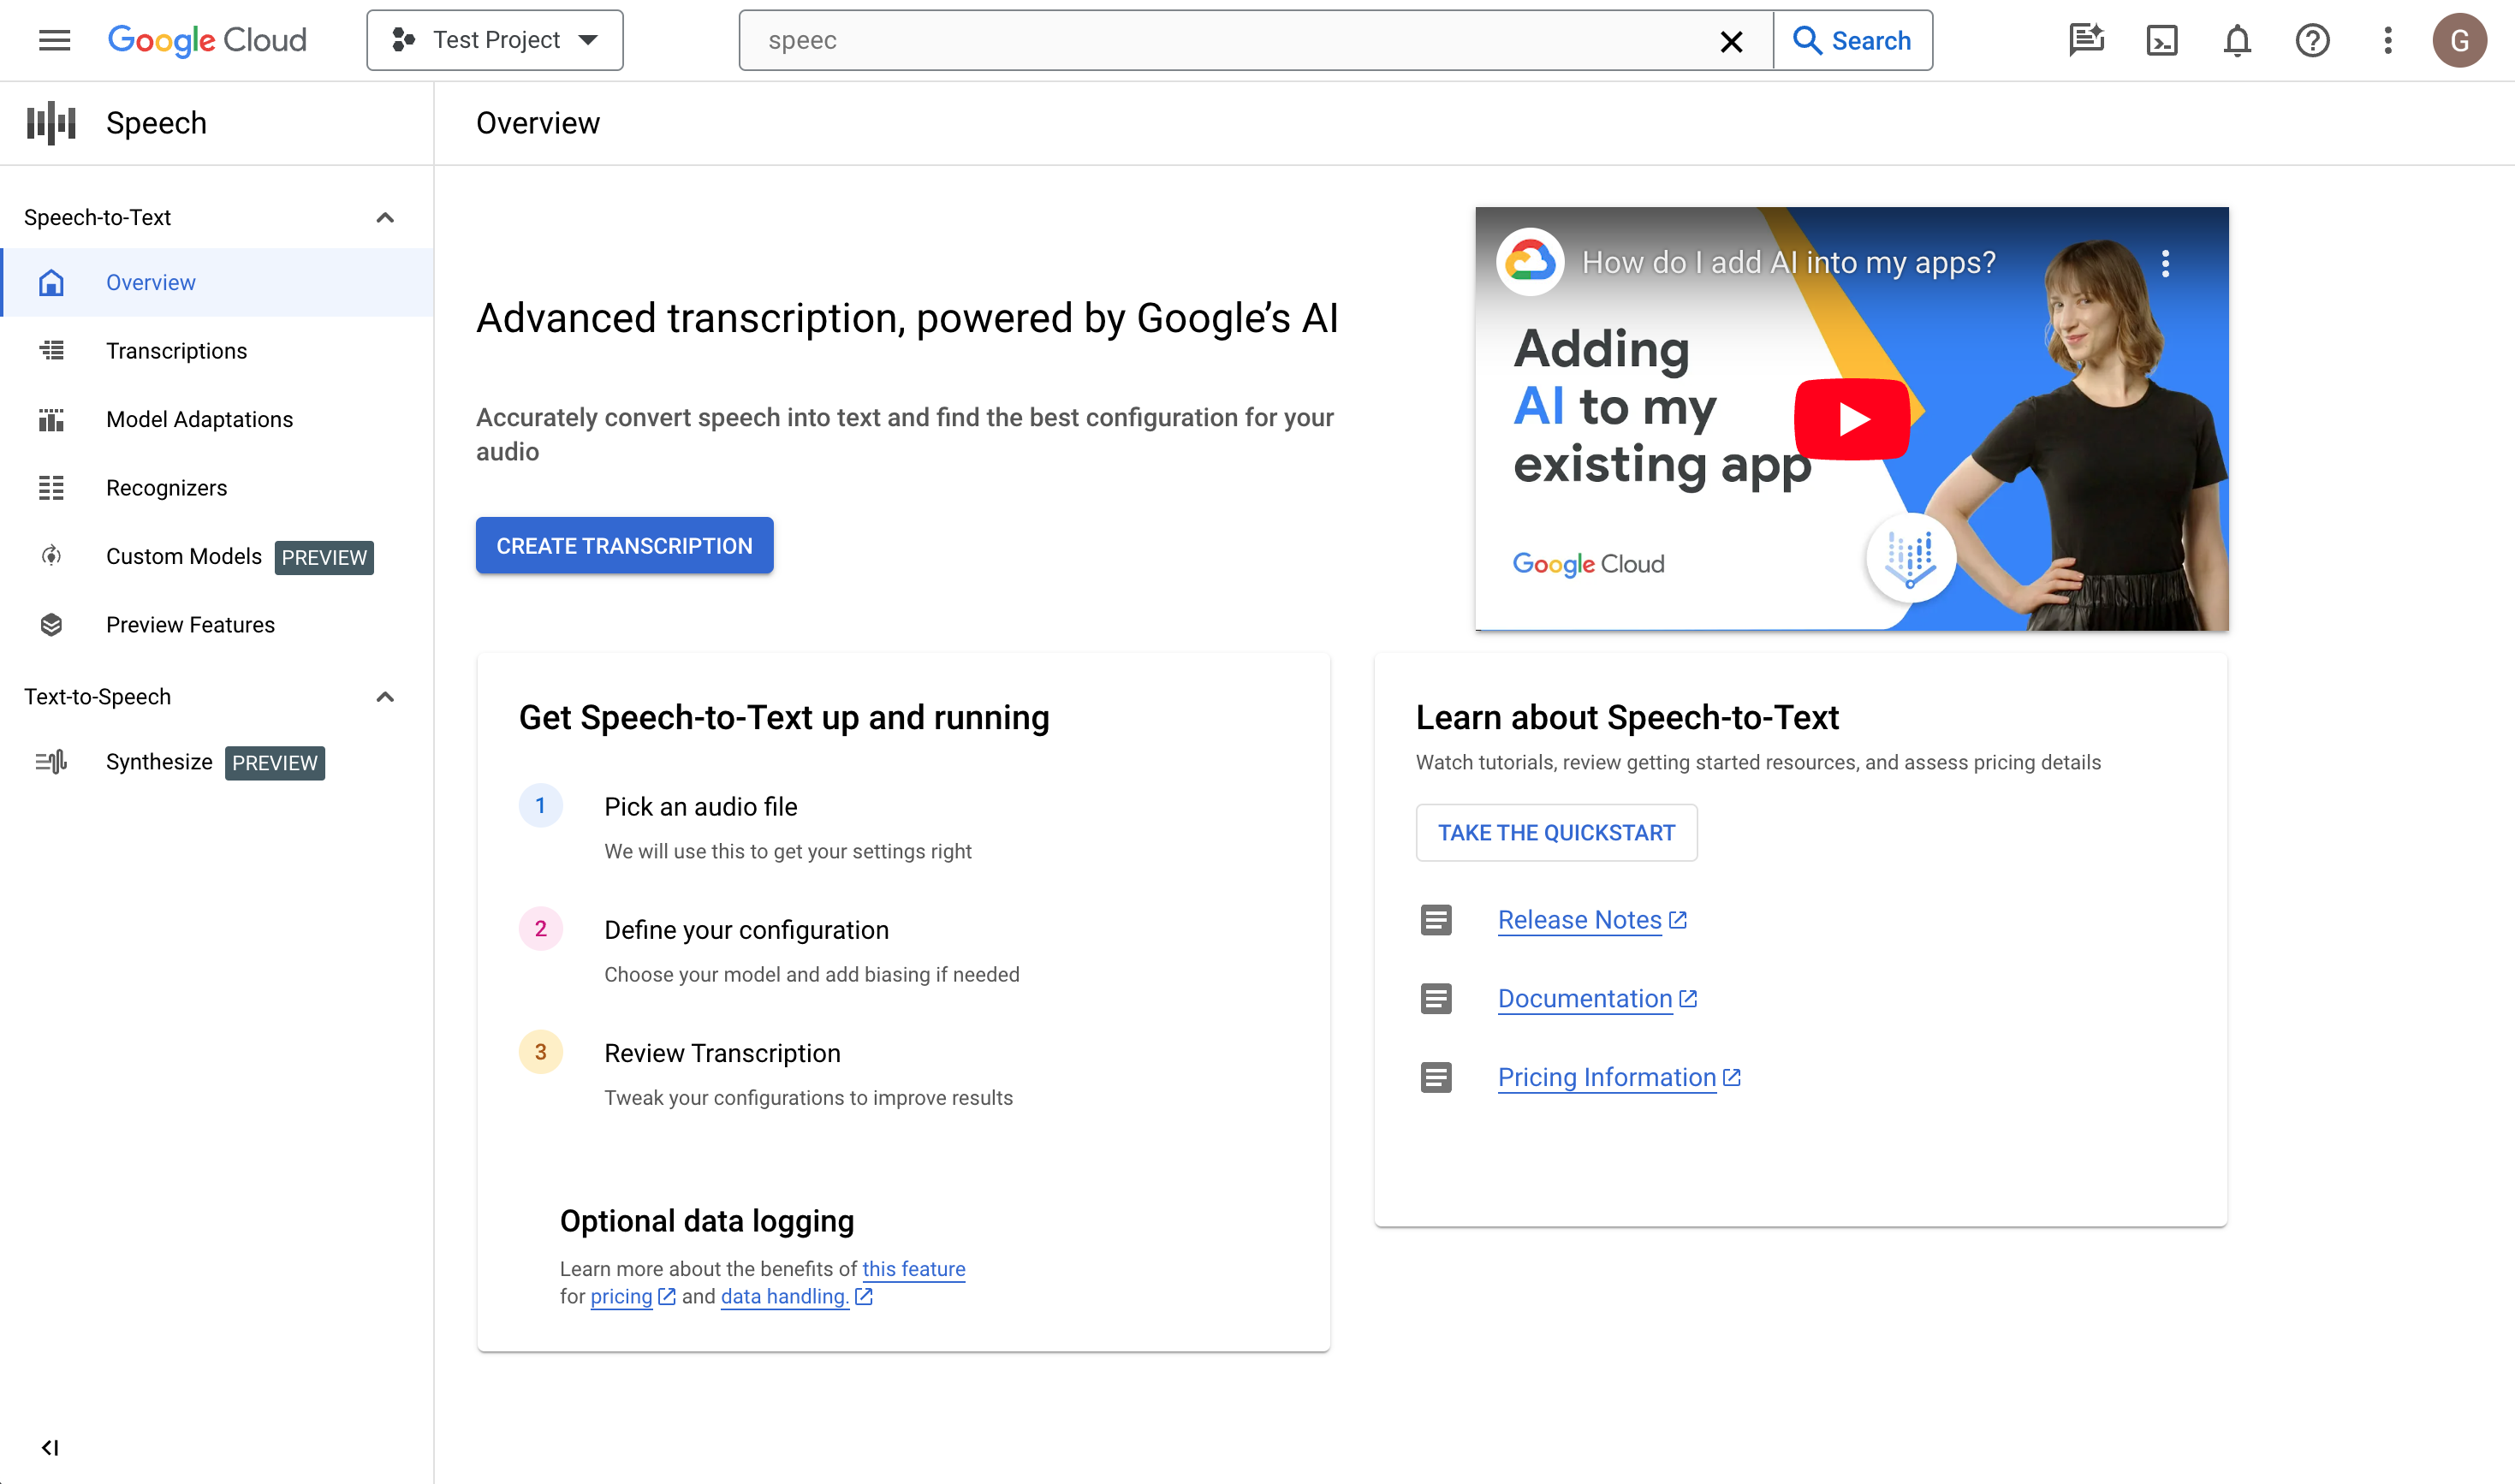
2. Click **Create transcription**.
- If this is your first time using the console, you will be asked to choose where in Cloud Storage to store your configurations and transcriptions. 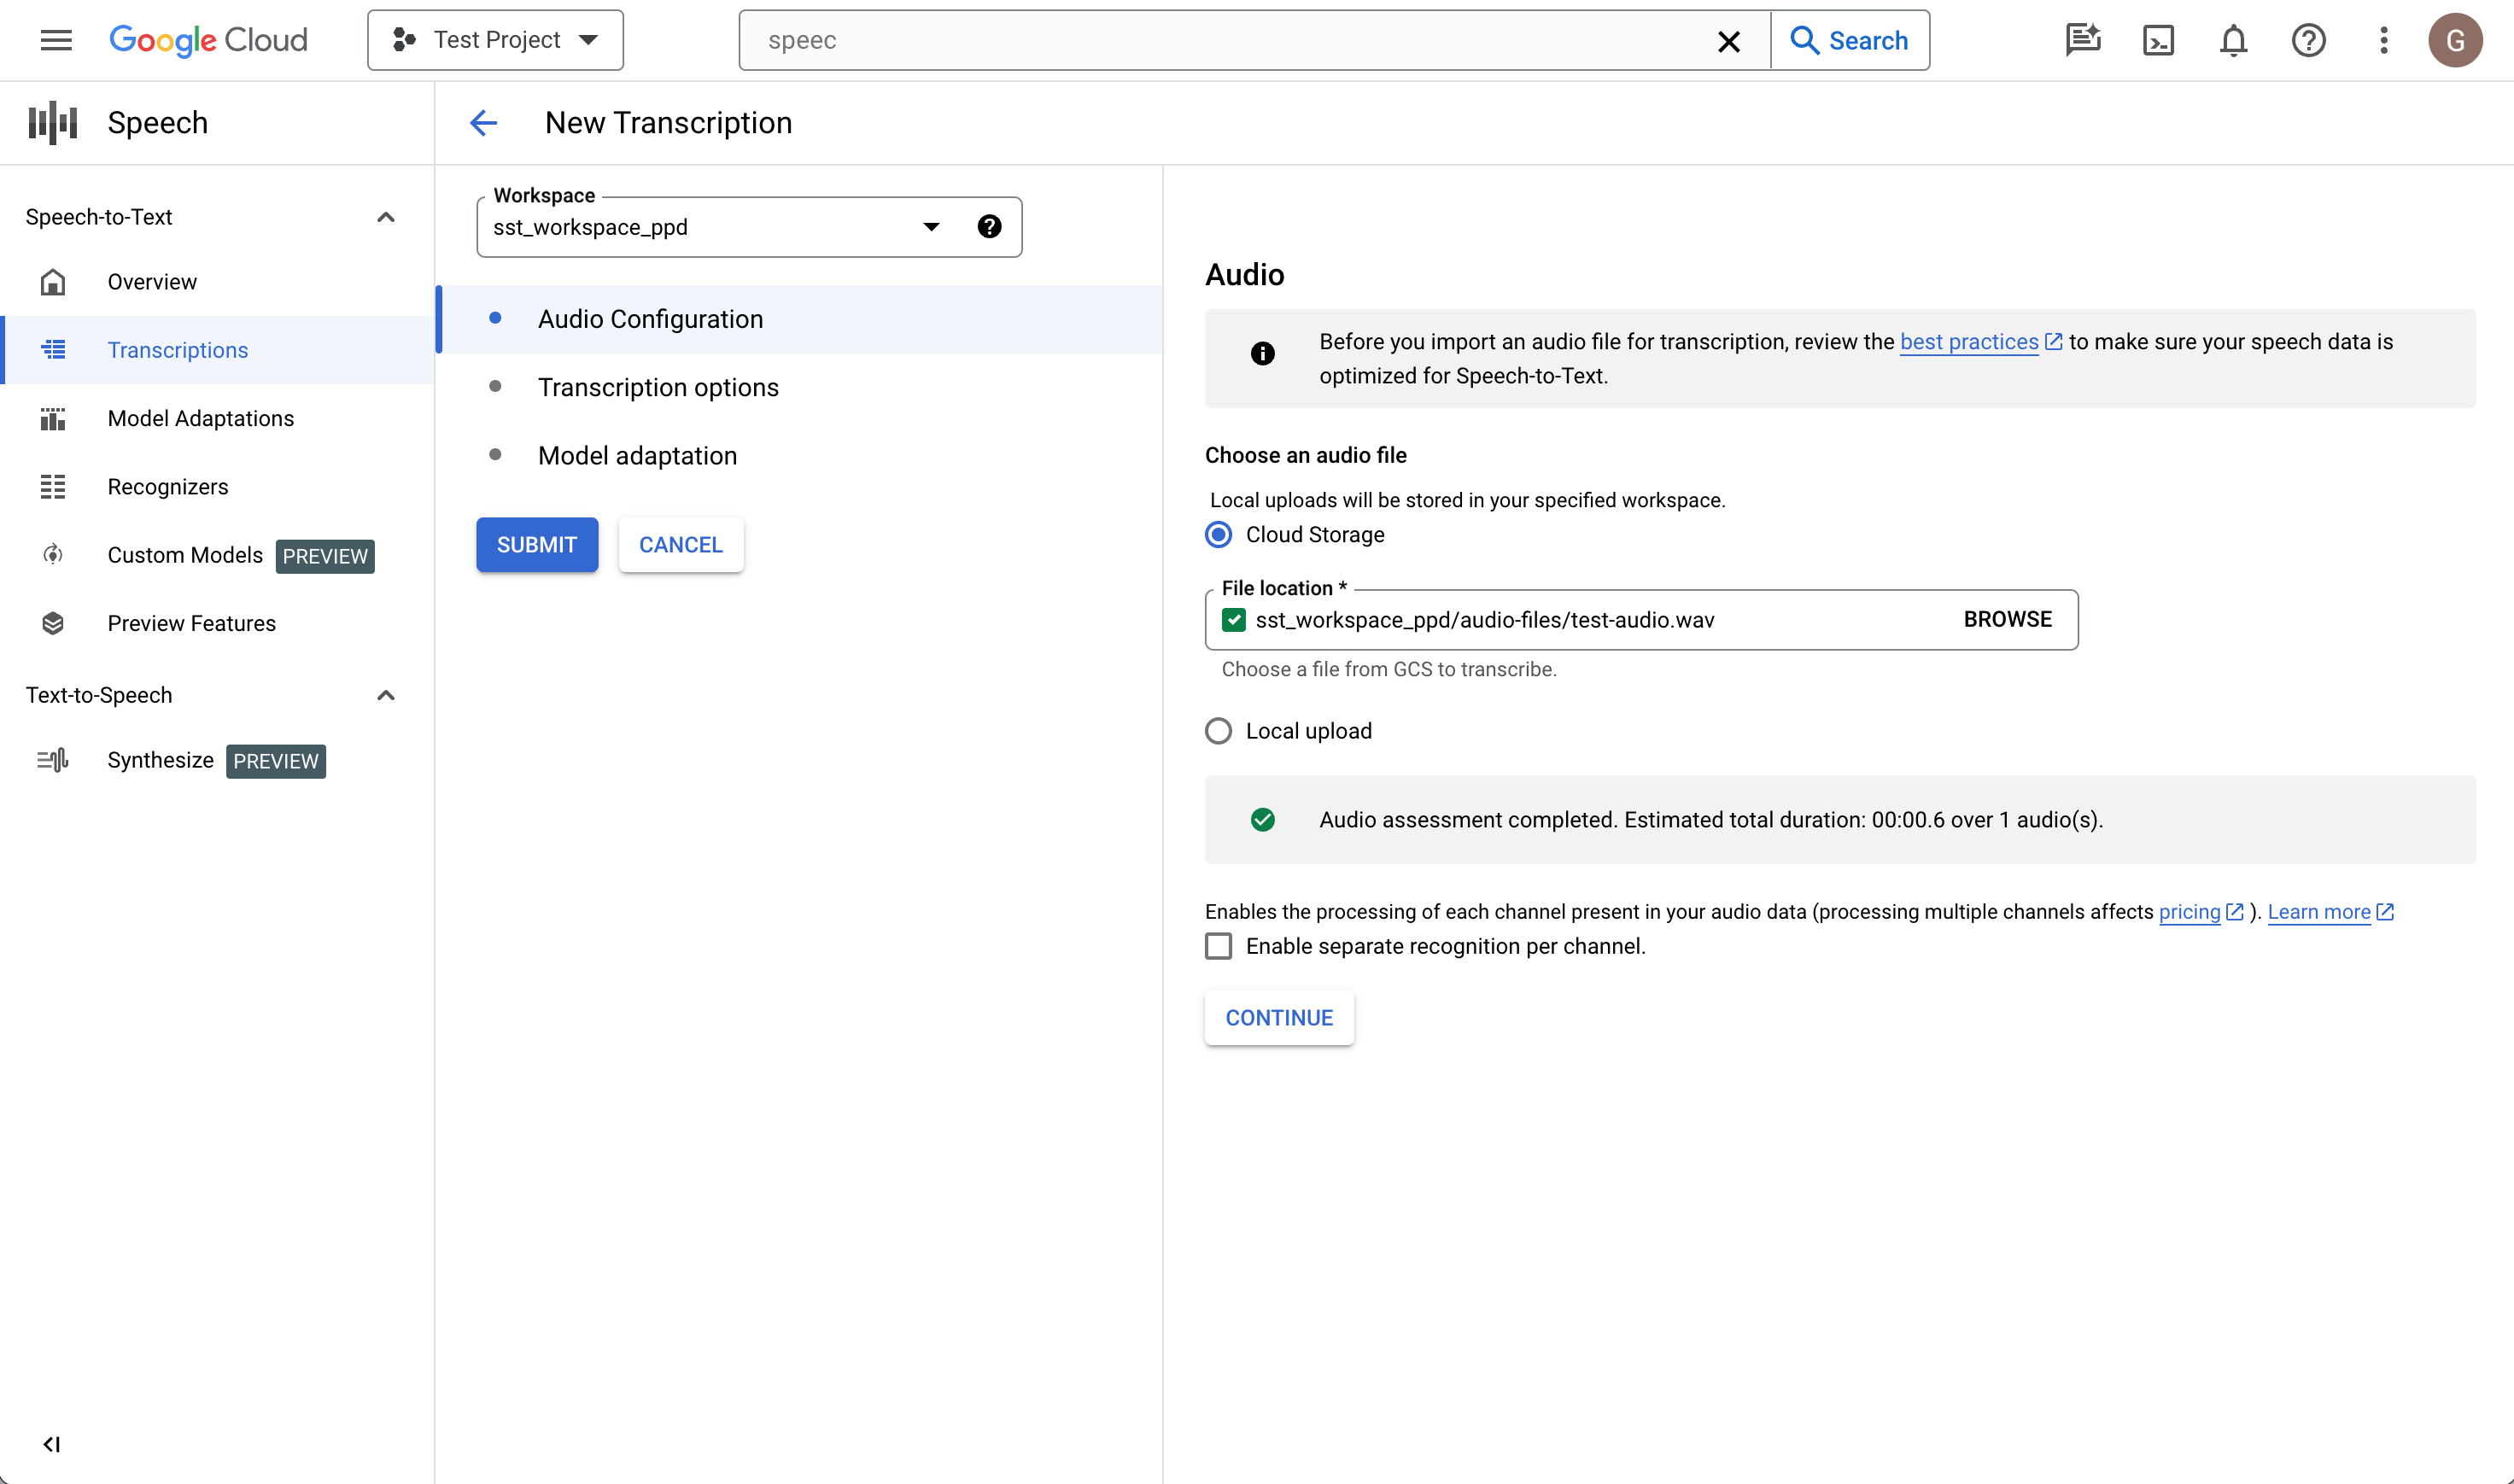
3. In the **Create transcription** page, **Upload a source audio file**.
You can choose a file that is already saved in Cloud Storage or upload a
new one to your specified Cloud Storage destination.
4. Select the uploaded audio file's **encoding type**.
5. Specify its **sample rate**.
6. Click **Continue** . You will be taken to **Transcription options**.
### Transcription options
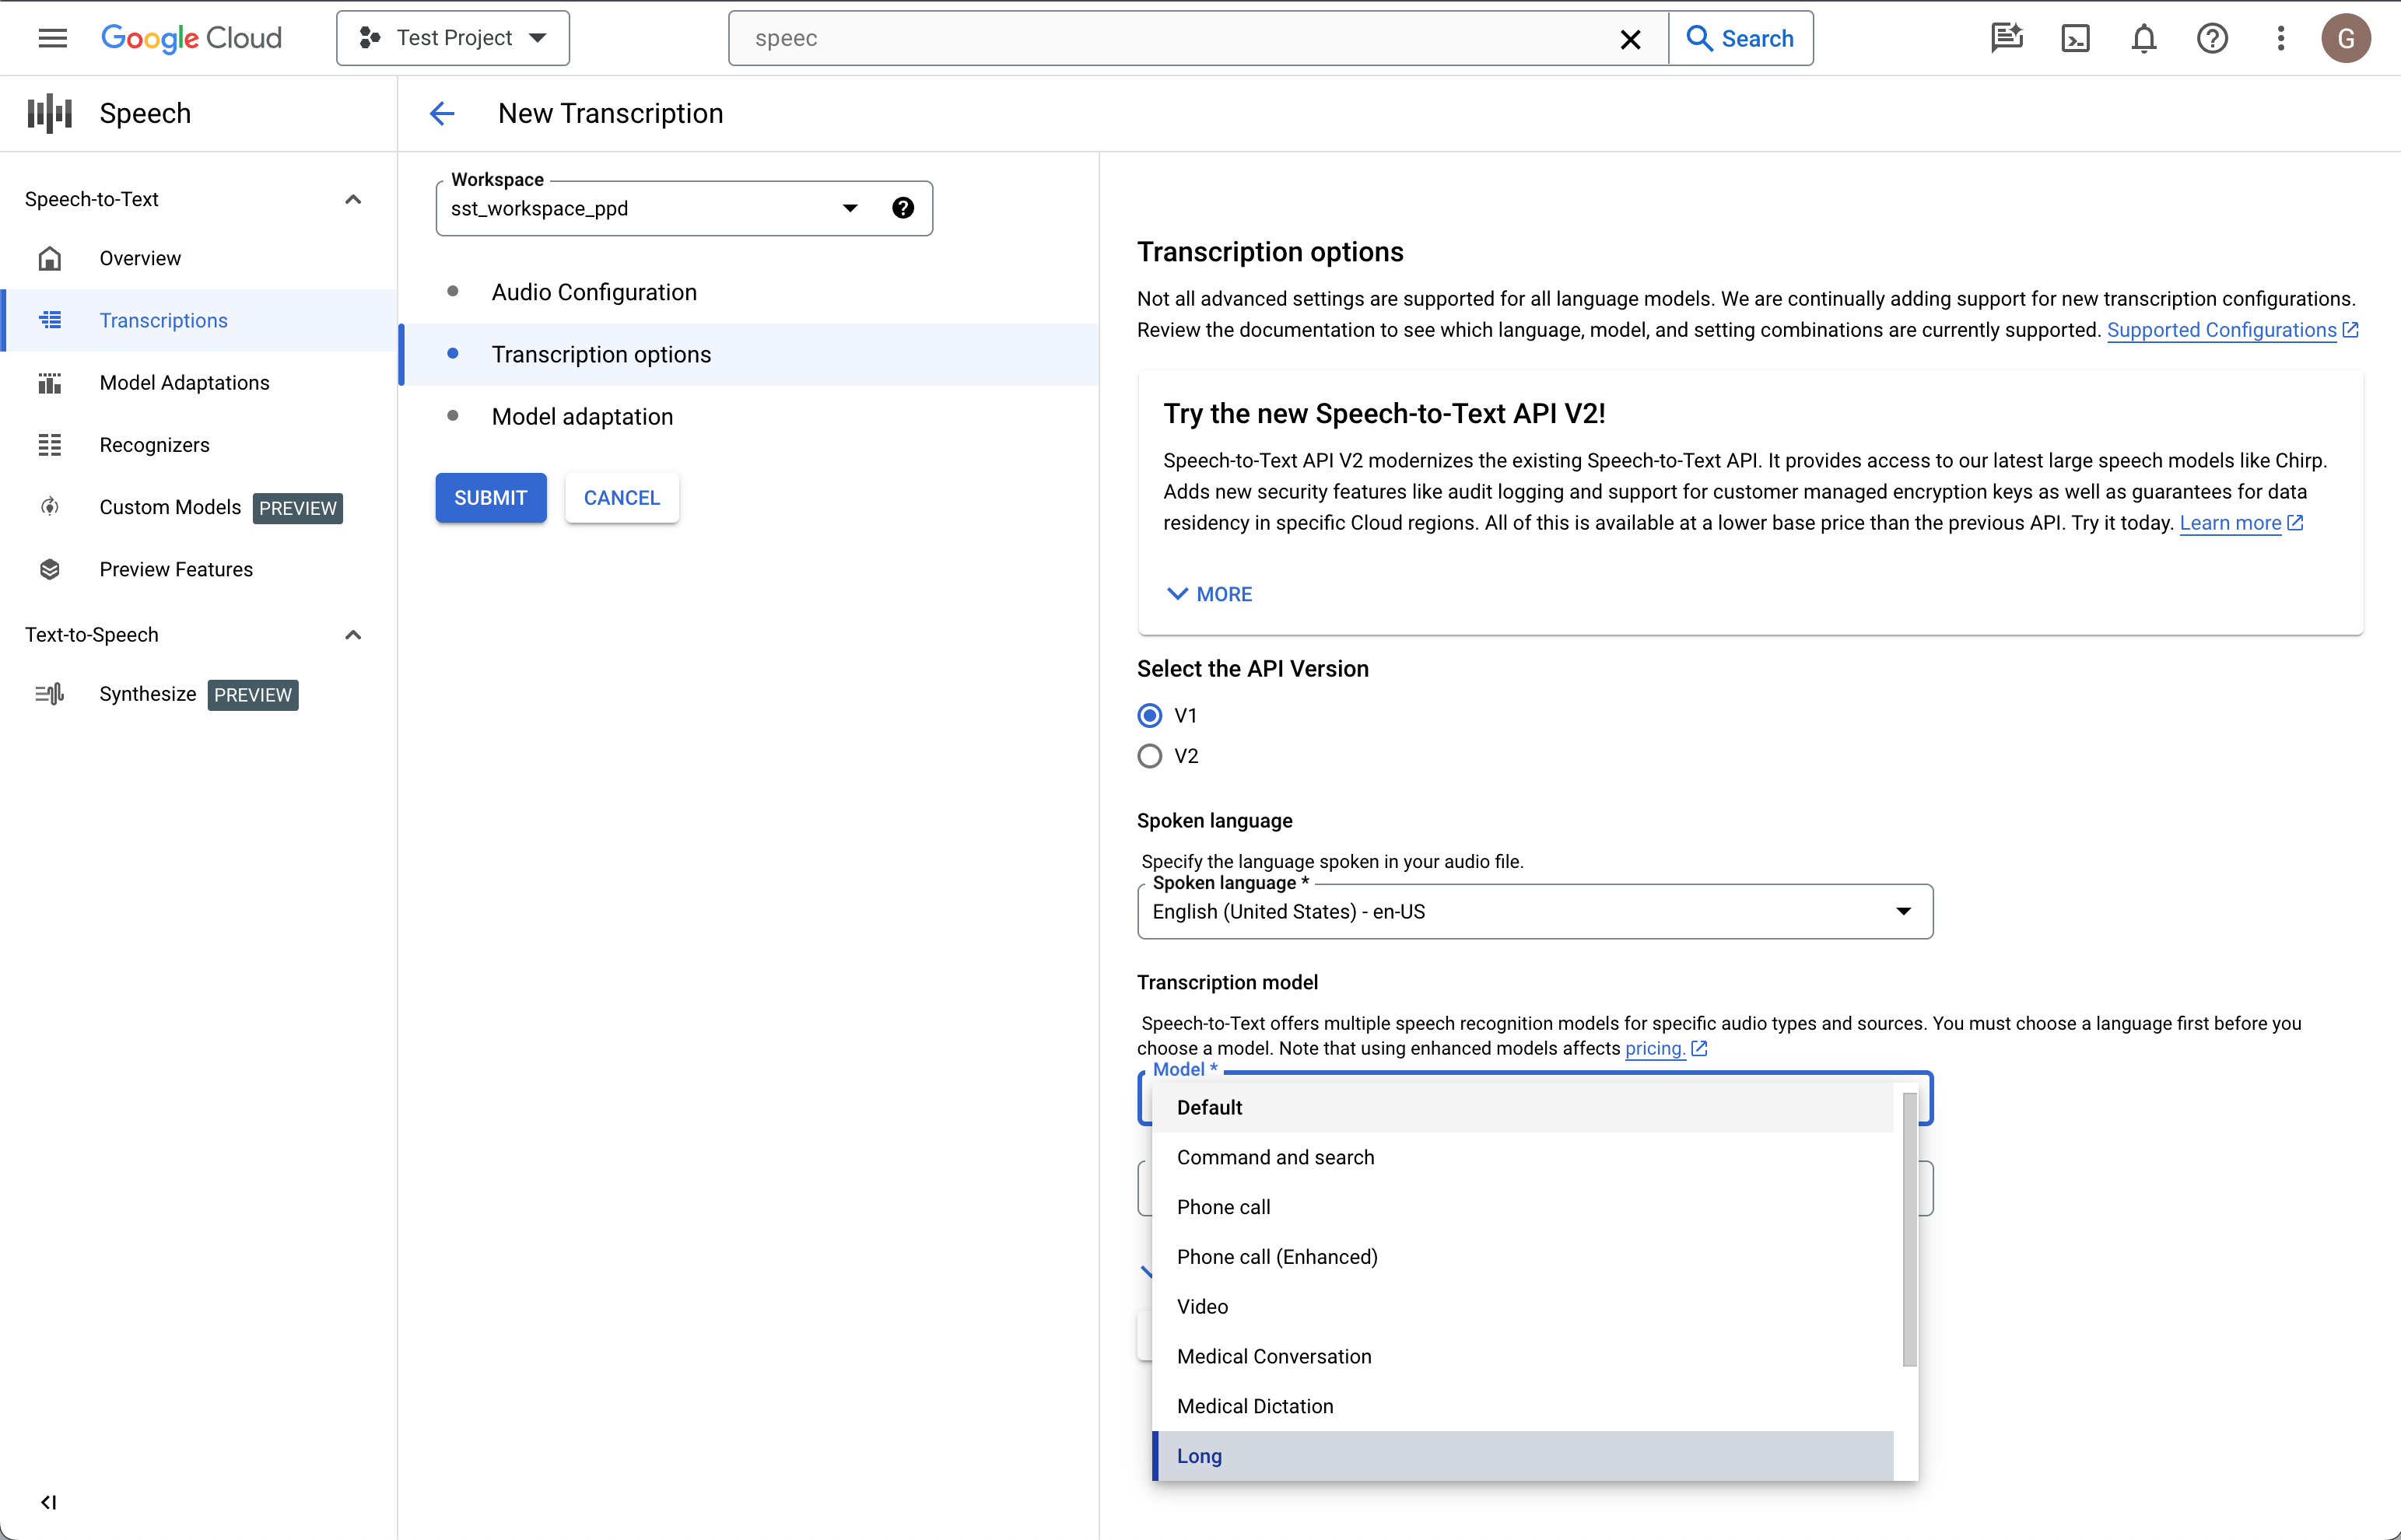
1. Select the **language code** of your source audio. This is the language
being spoken in the recording.
2. Choose the **transcription model** you would like to use on the file.
The Default option is pre-selected and, generally, no change is needed,
but matching the model to the type of audio may result in higher accuracy.
Note that model costs vary.
3. Click **Continue** . You will be taken to **Model adaptation**.
### Model adaptation (optional)
If your source audio contains things like rare words, proper names, or
proprietary terms and you experience problems with recognition, model
adaptation can help.
1. Check **Turn on model adaptation**.
2. Choose **One-time adaptation resource**.
3. Add relevant **phrases** and give them a **boost value**.
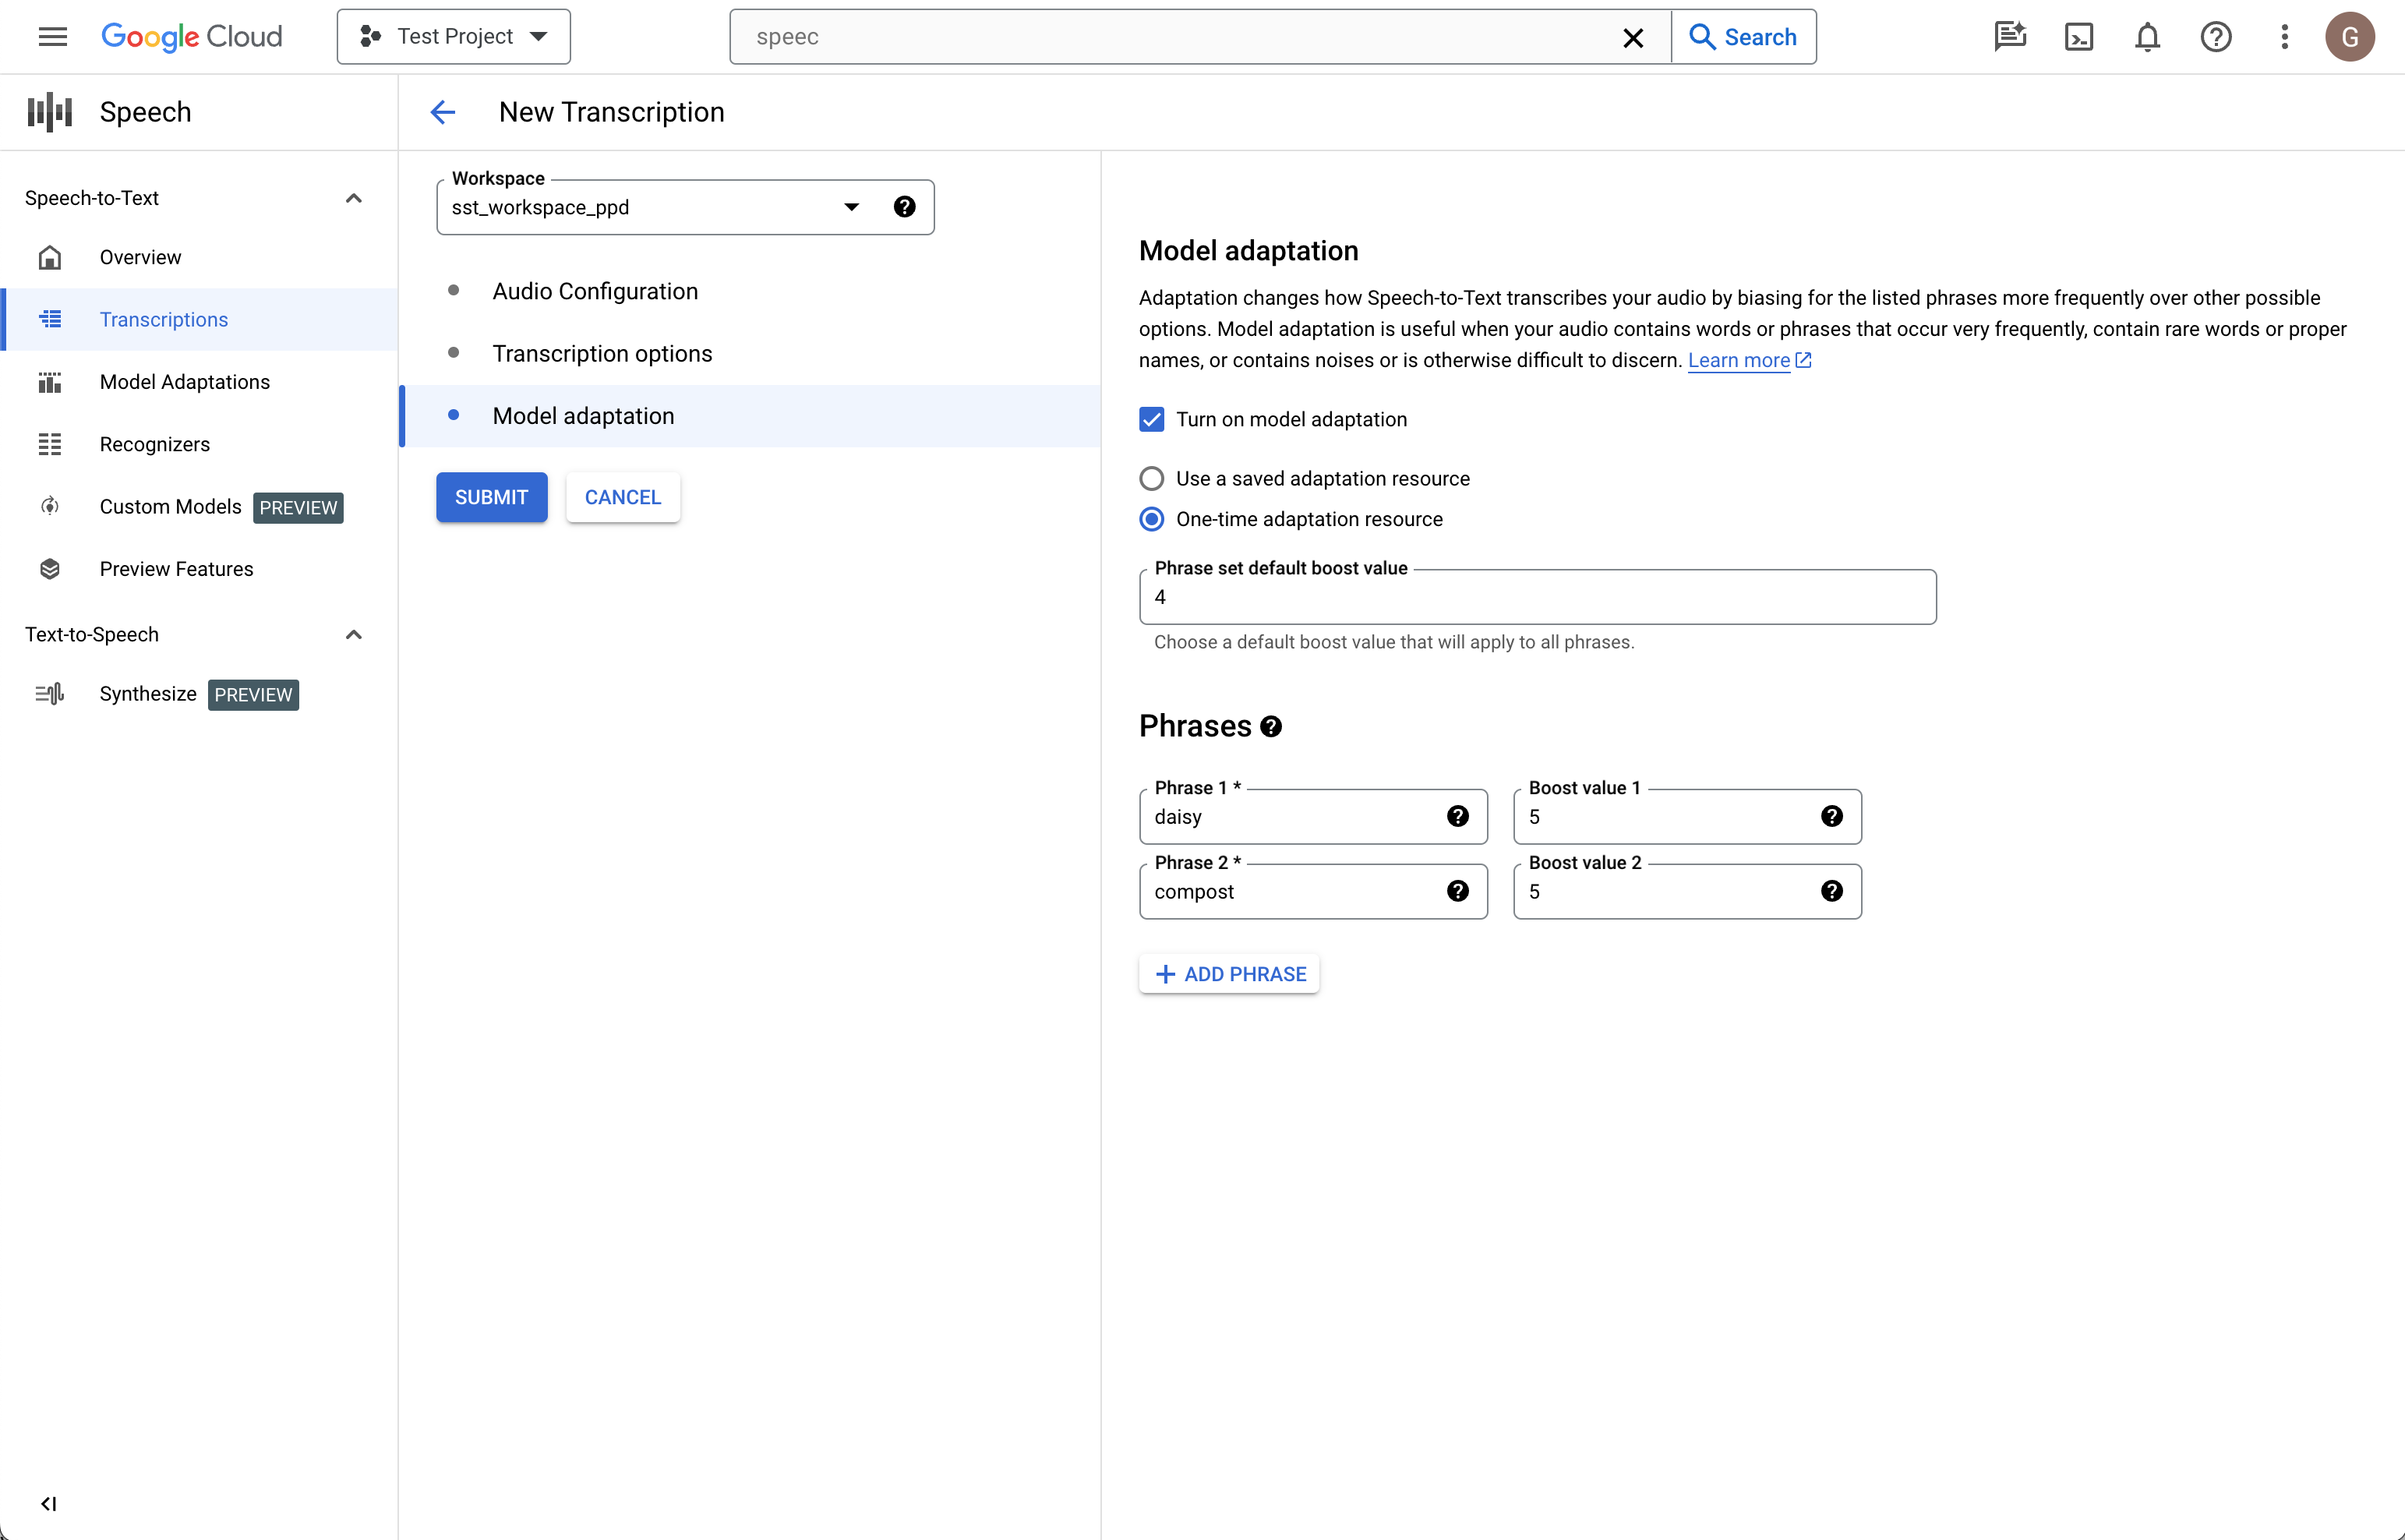
4. In the left column, click **Submit** to create your transcription.
### Review your transcription
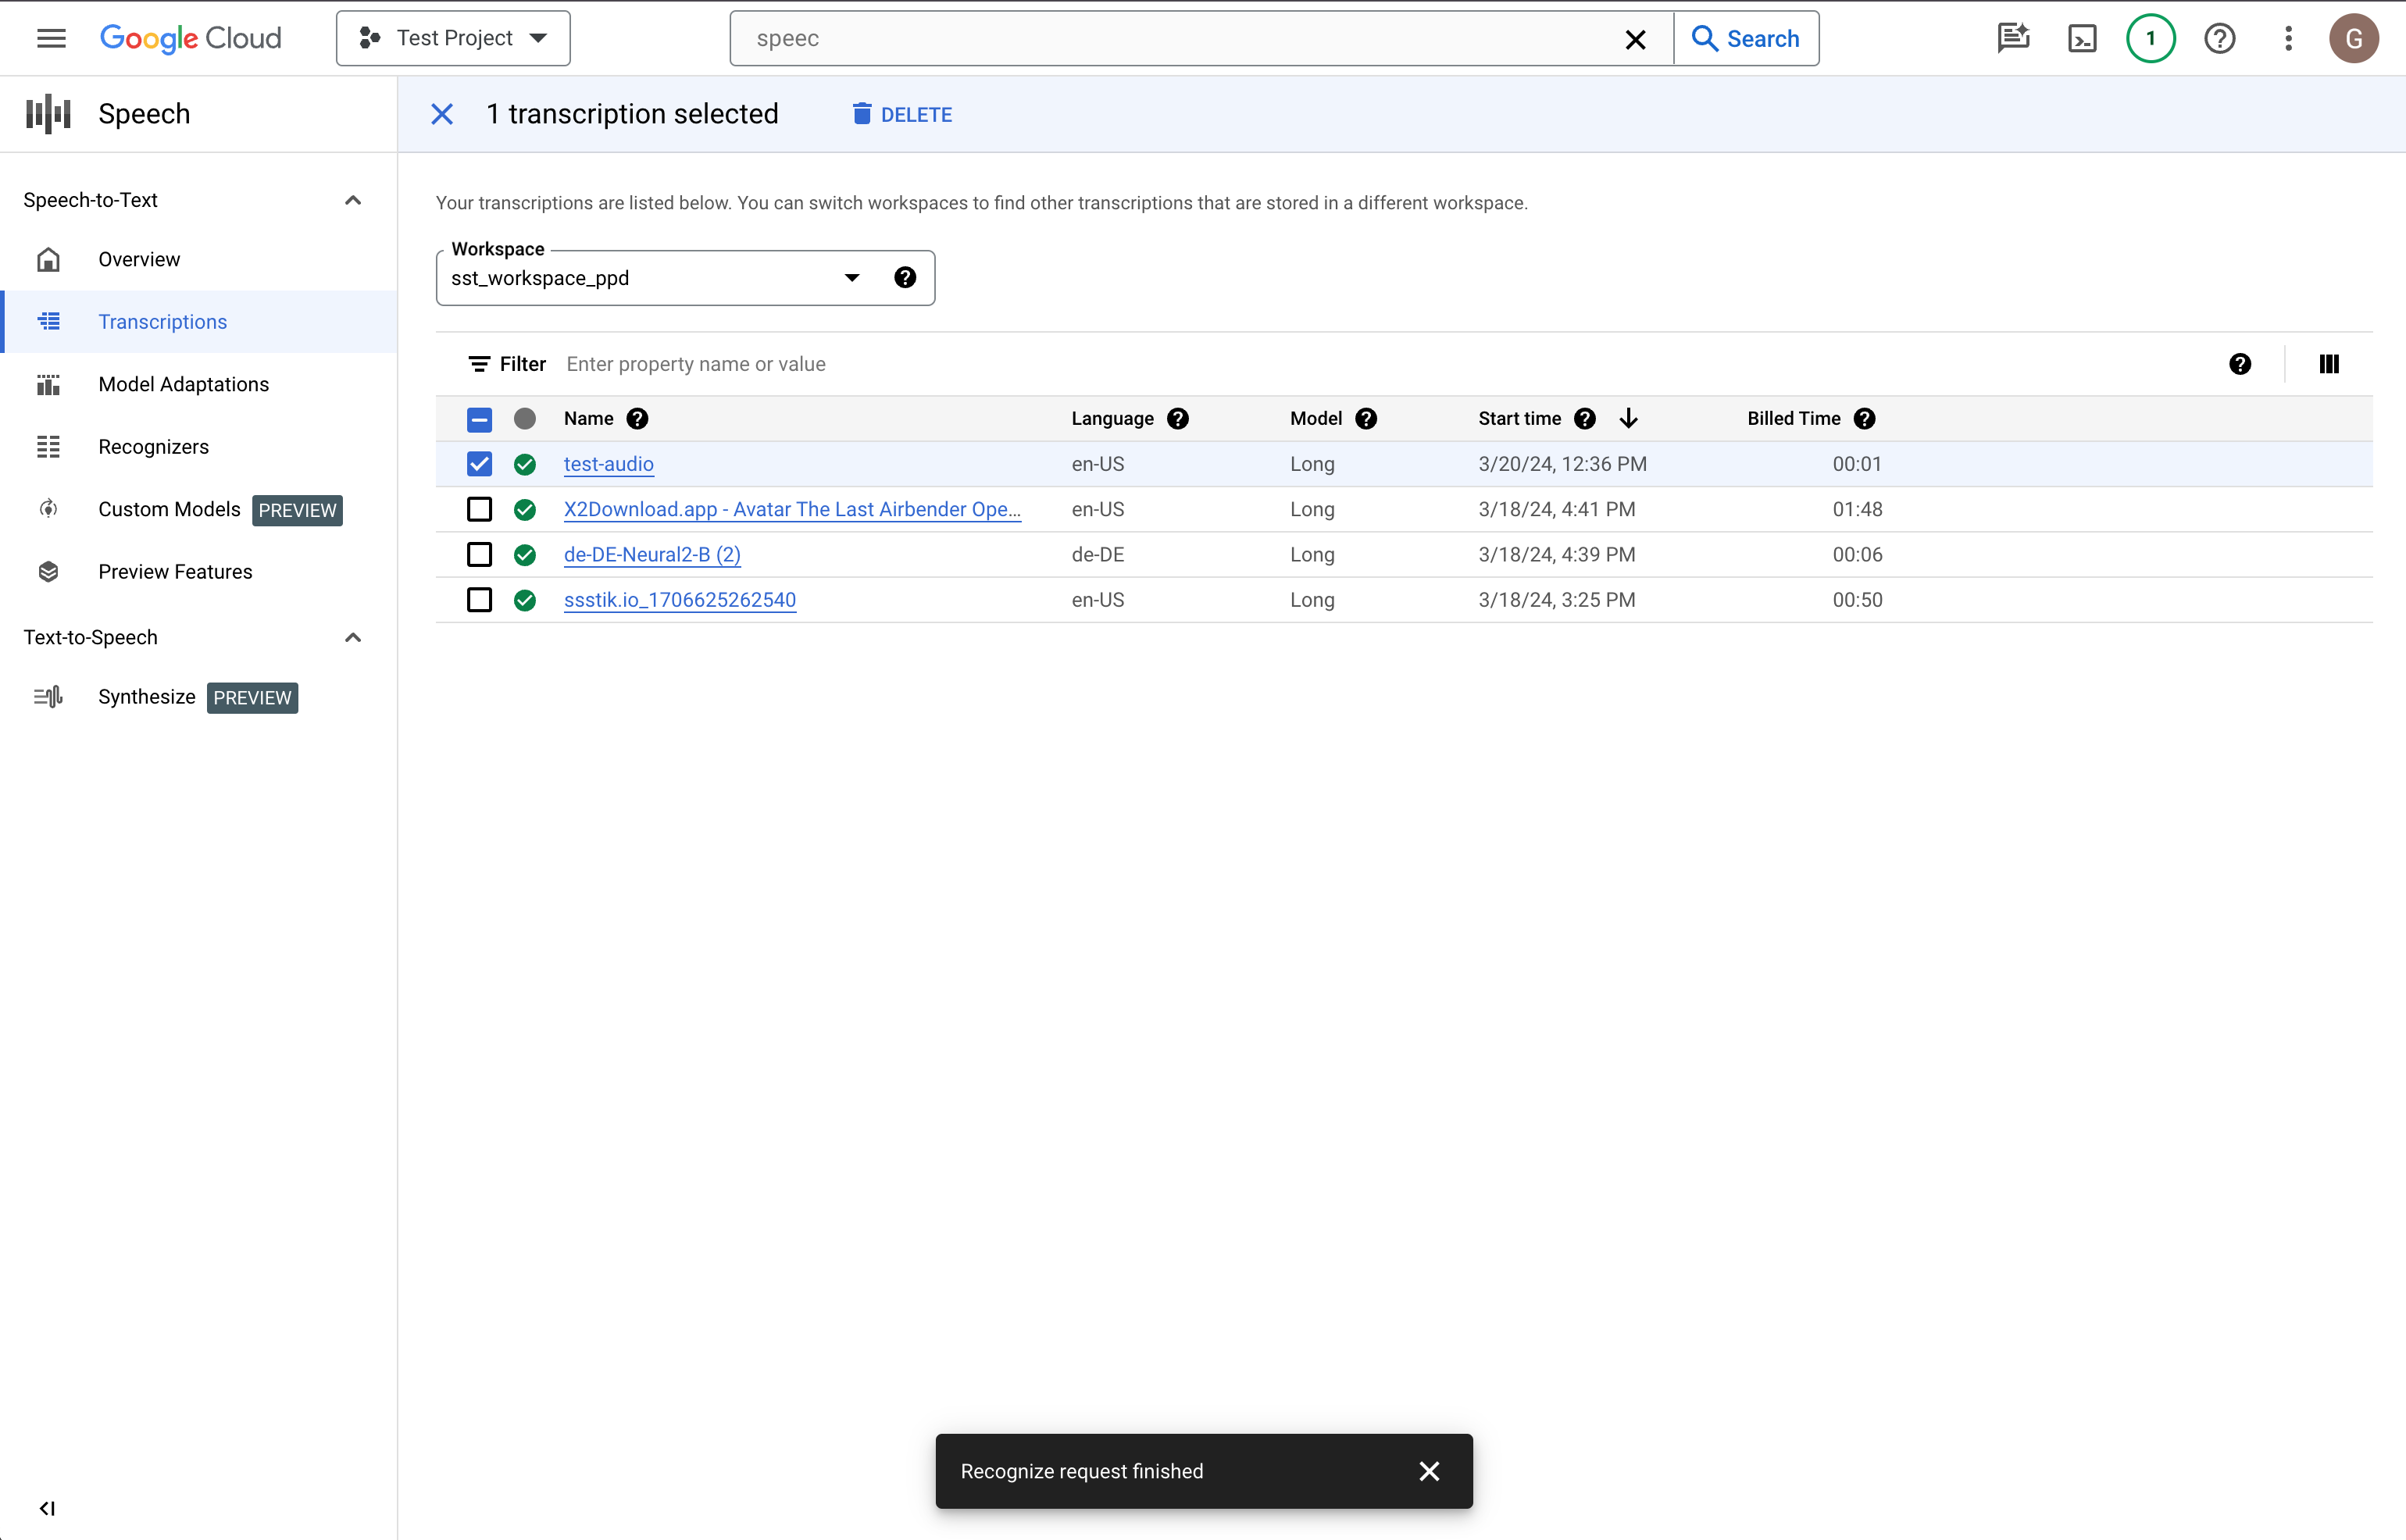
Depending on the size of your audio file, a transcription may take from minutes
to hours to create. Once your transcription has been created, it's ready for
review. Sorting the table by timestamp can help you easily locate your recent
transcriptions.
1. Click on the **Name** of the transcription you would like to review.
2. Compare the **Transcription** text to the audio file
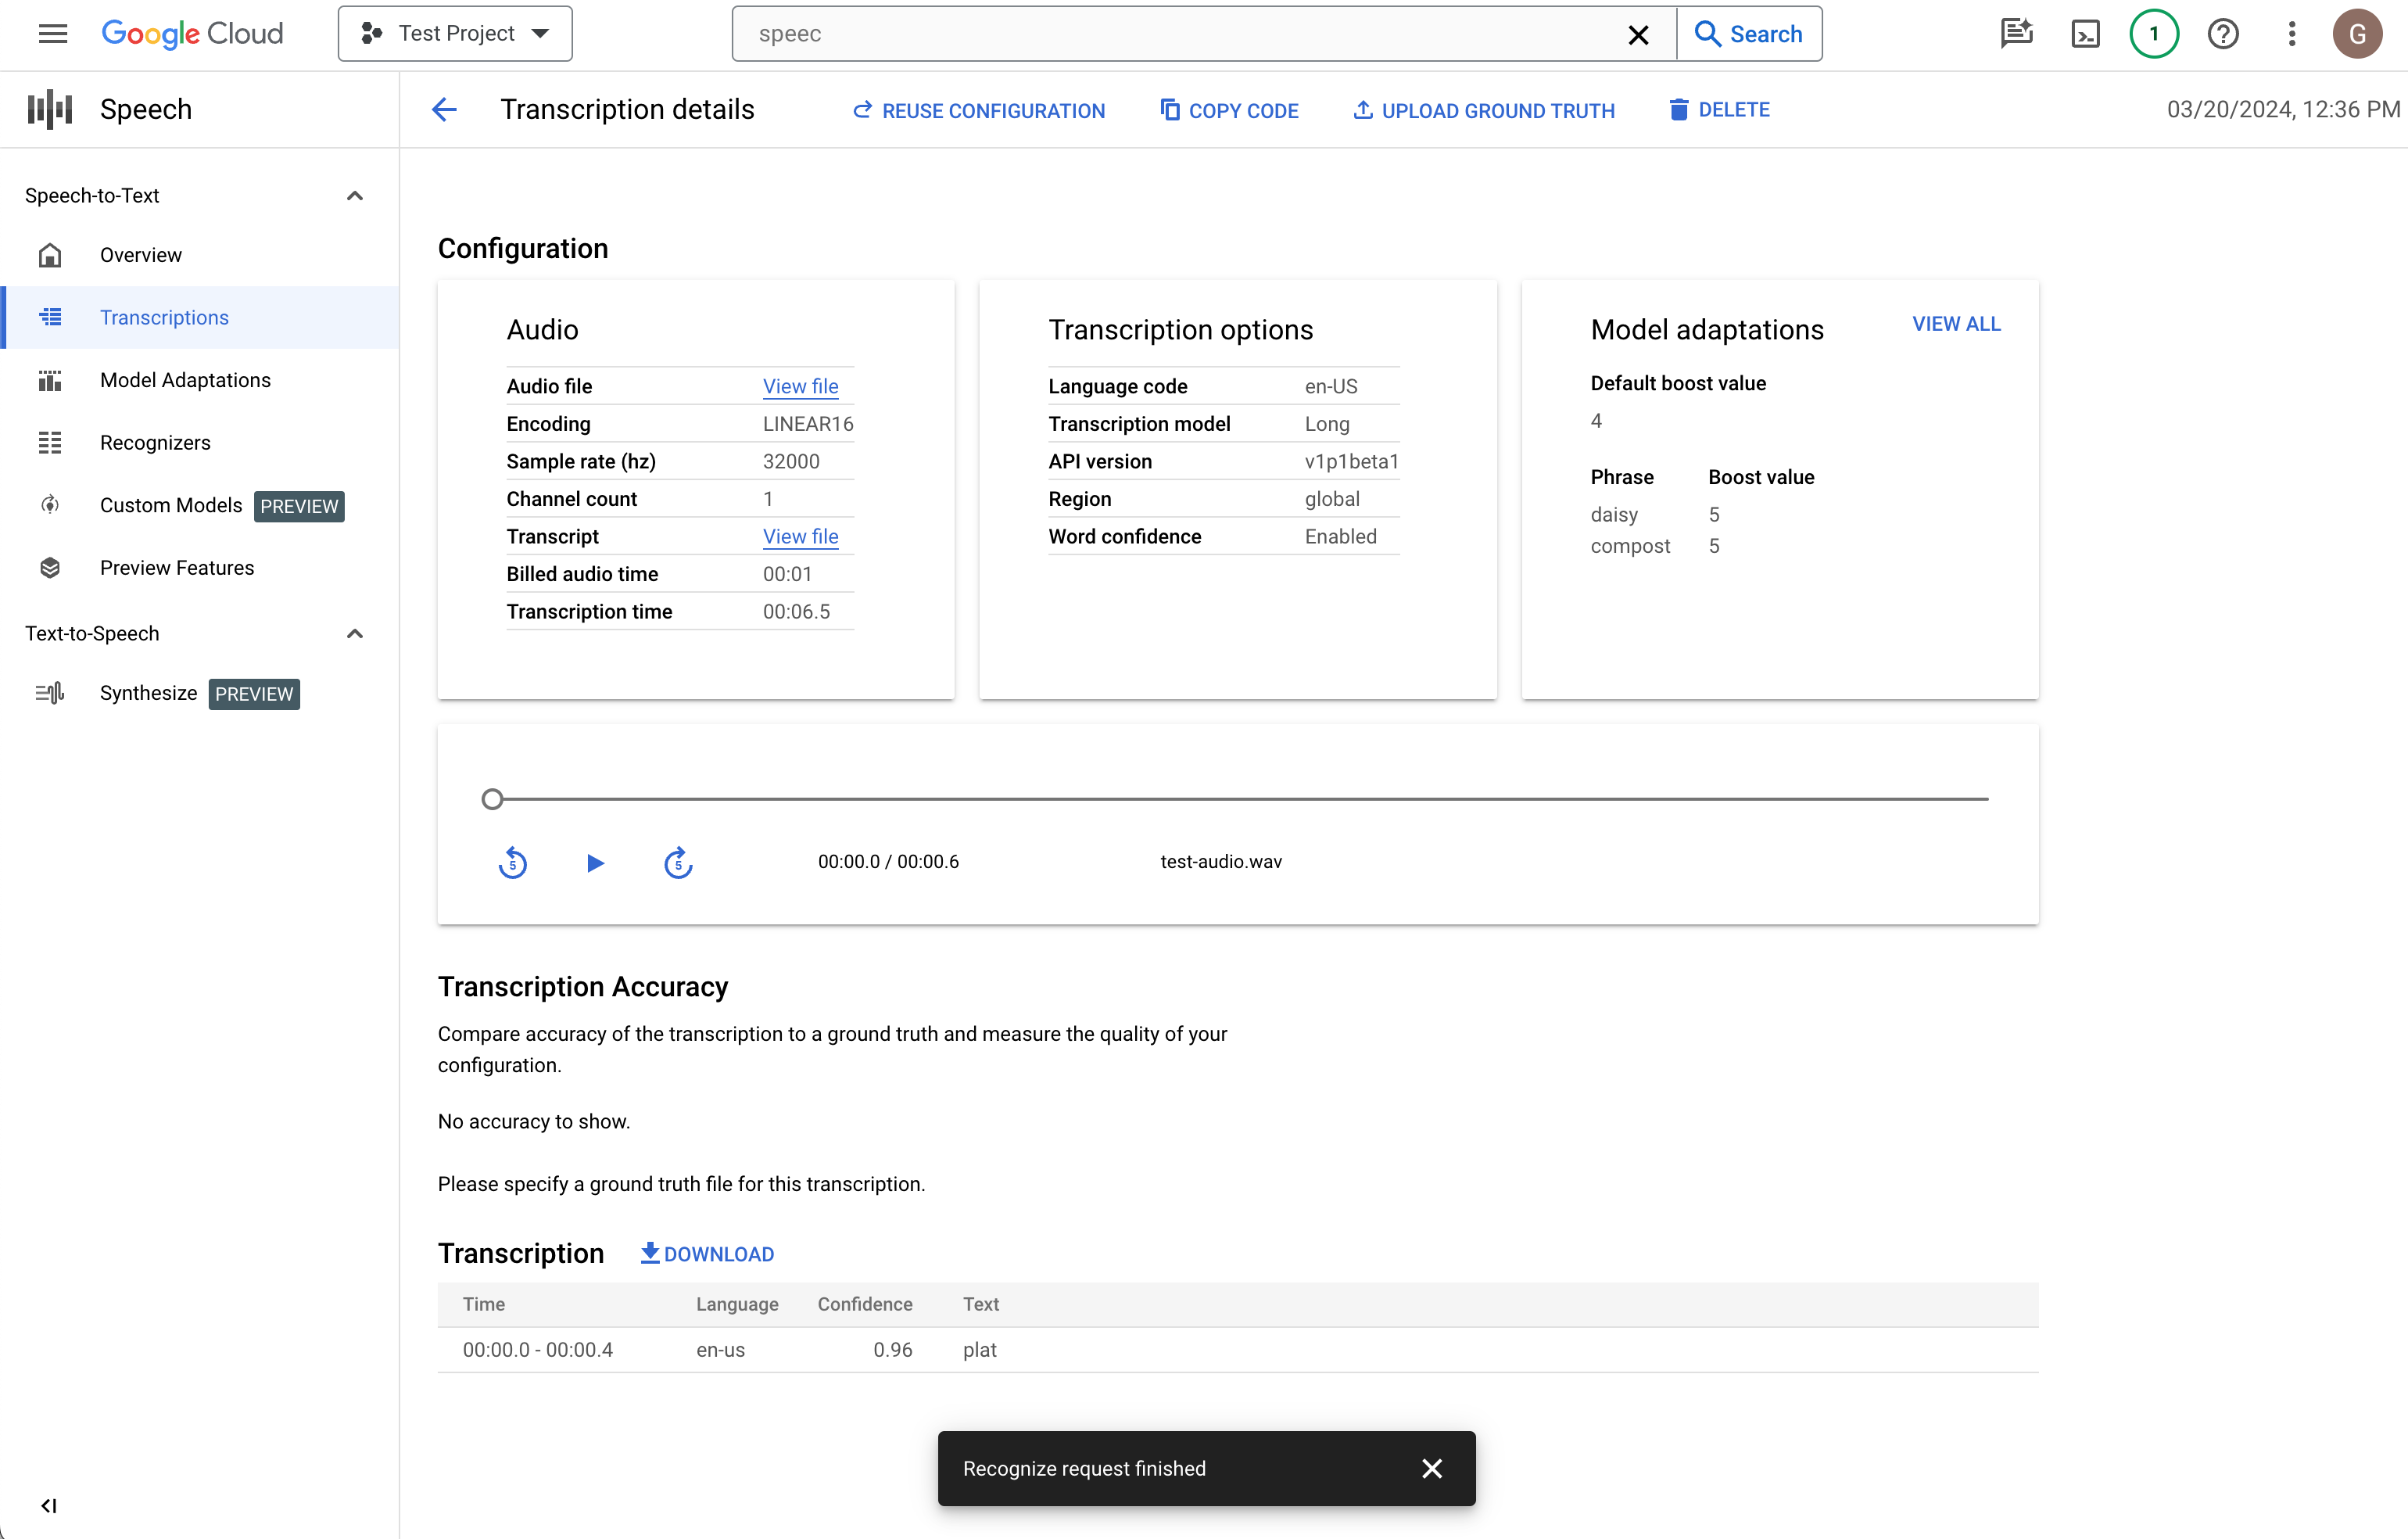
3. If you would like to make changes, click **Reuse configuration** .
This will bring you to the **Create transcription** flow with the same
options pre-selected, allowing you to change a few things, create a new
transcription, and compare the results.
## What's next
- Practice [transcribing short audio files](https://docs.cloud.google.com/speech-to-text/docs/sync-recognize.md.txt).
- Learn how to [batch long audio files for speech recognition](https://docs.cloud.google.com/speech-to-text/docs/async-recognize).
- Learn how to [transcribe streaming audio](https://docs.cloud.google.com/speech-to-text/docs/streaming-recognize.md.txt) like from a microphone.
- Get started with the Cloud STT in your language of choice by using a [Cloud STT client library](https://docs.cloud.google.com/speech-to-text/docs/reference/libraries).
- Work through the [sample applications](https://docs.cloud.google.com/speech-to-text/docs/samples.md.txt).
- For best performance, accuracy, and other tips, see the [best practices](https://docs.cloud.google.com/speech-to-text/docs/best-practices.md.txt) documentation.