> [!NOTE]
> **Objective:**
> 1. Create a Managed Service for Apache Spark workflow template that runs a
> [Spark PI job](https://spark.apache.org/examples.html)
> 2. Create a [Cloud Scheduler](https://docs.cloud.google.com/scheduler/docs.md.txt) job to start the workflow at a specified time.
In this document, you use the following billable components of Google Cloud:
- Dataproc
- Compute Engine
- Cloud Scheduler
To generate a cost estimate based on your projected usage,
use the [pricing calculator](https://docs.cloud.google.com/products/calculator).
New Google Cloud users might be eligible for a [free trial](https://docs.cloud.google.com/free).
## Before you begin
### Set up your project
### Create a custom role
1. Open the Open **[IAM \& Admin → Roles](https://console.cloud.google.com/iam-admin/roles)** page in the Google Cloud console.
1. Click CREATE ROLE to open the **Create Role** page.
2. Complete the Title, Description, ID, Launch stage fields. Suggestion: Use "Dataproc Workflow Template Create" as the role title.
3. Click ADD PERMISSIONS,
1. In the **Add permissions** form, click **Filter**, then select "Permission". Complete the filter to read "Permission: dataproc.workflowTemplates.instantiate".
2. Click the checkbox to the left of the listed permission, then click **Add** . 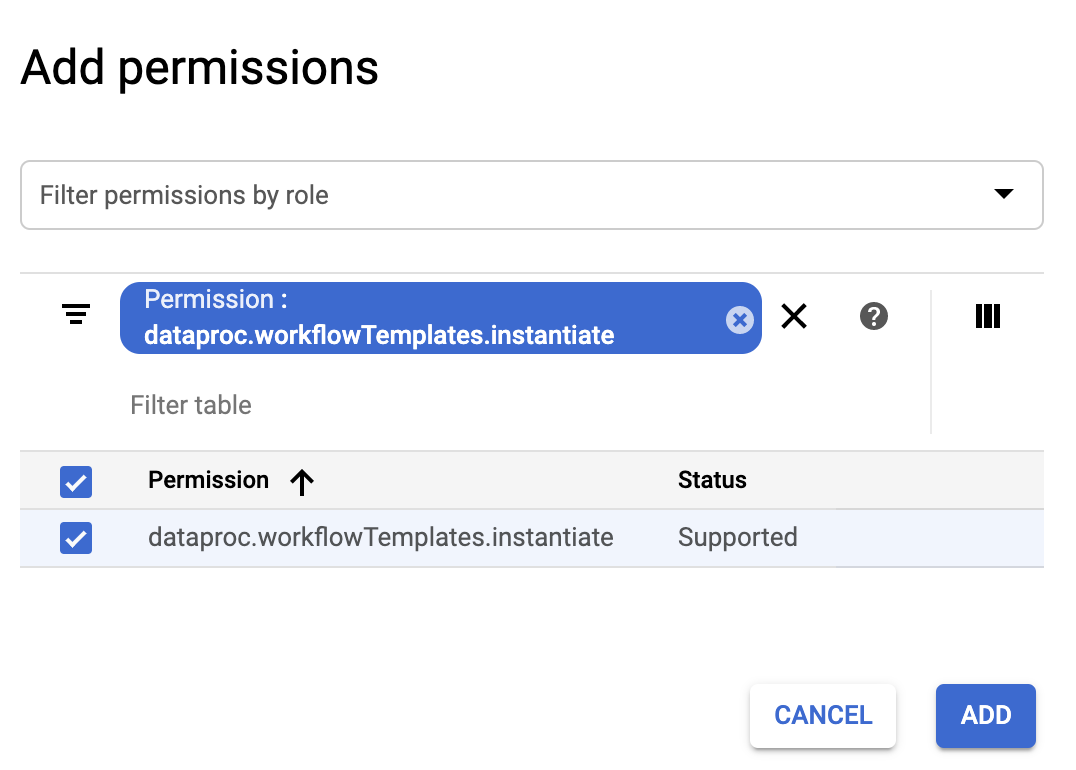
4. On the Create Role page, click ADD PERMISSIONS again to repeat the previous sub-steps to add the "iam.serviceAccounts.actAs" permission to the custom role. The **Create Role** page now lists two permissions. 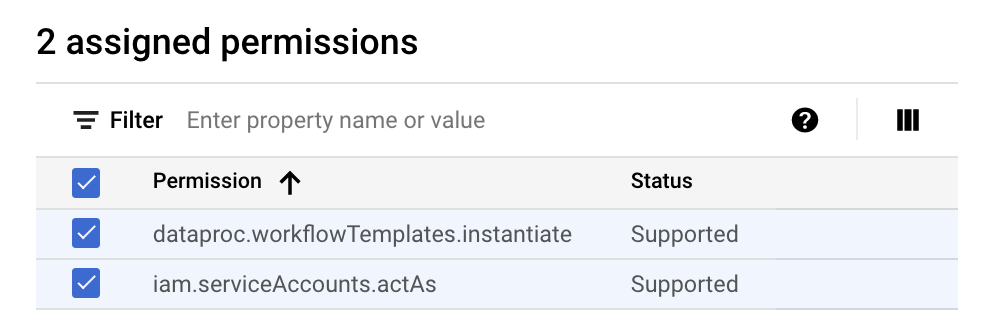
5. Click CREATE on the **Custom Role** page. The custom role is listed on the **Roles** page. 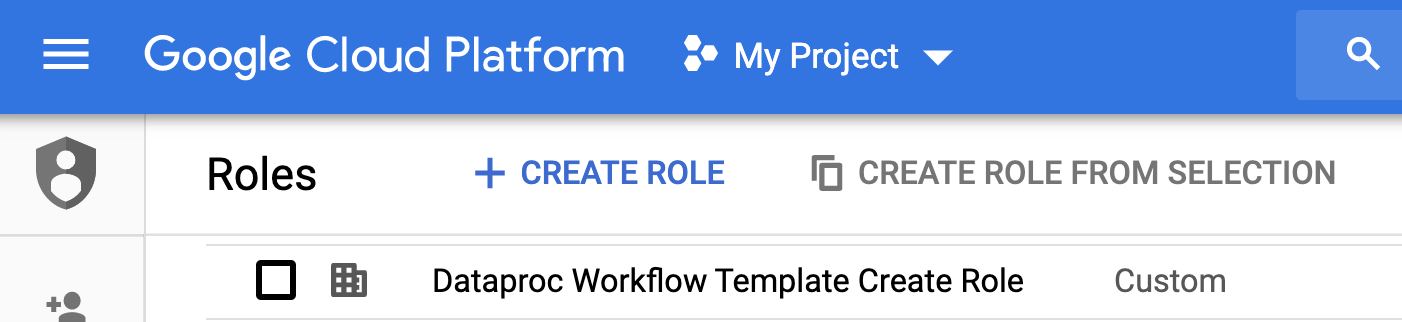
### Create a service account
1. In the Google Cloud console, go to the **Service Accounts** page.
[Go to
Service Accounts](https://console.cloud.google.com/iam-admin/serviceaccounts)
2. Select your project.
3. Click **Create Service
Account**.
4. In the **Service account name** field, enter the name `workflow-scheduler`.
The Google Cloud console fills in the **Service account ID** field based on
this name.
5. Optional: In the **Service account description** field, enter a
description for the service account.
6. Click **Create and continue**.
7. Click the **Select a role** field and choose the **Dataproc Workflow Template
Create** custom role that you created in the previous step.
8. Click **Continue**.
9. In the **Service account admins role** field, enter your Google account email
address.
10. Click **Done** to finish creating the service account.
## Create a workflow template.
Copy and run the commands listed below in a local terminal window or in
[Cloud Shell](https://console.cloud.google.com/?cloudshell=true) to create and
define a [workflow template](https://docs.cloud.google.com/managed-spark/docs/concepts/workflows/using-workflows).
Notes:
- The commands specify the "us-central1" [region](https://docs.cloud.google.com/compute/docs/regions-zones.md.txt#available). You can specify a different region or delete the `--region` flag if you have previously run [`gcloud config set compute/region`](https://docs.cloud.google.com/sdk/gcloud/reference/config/set.md.txt#compute) to set the region property.
- The "-- " (dash dash space) sequence in the `add-job` command passes the `1000` argument to the SparkPi job, which specifies the number of samples to use to estimate the value of Pi.
1. Create the workflow template.
```
gcloud dataproc workflow-templates create sparkpi \
--region=us-central1
```
2. Add the spark job to the sparkpi workflow template. The "compute" step ID is required, and identifies the added SparkPi job.
```
gcloud dataproc workflow-templates add-job spark \
--workflow-template=sparkpi \
--step-id=compute \
--class=org.apache.spark.examples.SparkPi \
--jars=file:///usr/lib/spark/examples/jars/spark-examples.jar \
--region=us-central1 \
-- 1000
```
3. Use a [managed](https://docs.cloud.google.com/managed-spark/docs/concepts/workflows/overview.md.txt#managed_cluster), [single-node](https://docs.cloud.google.com/managed-spark/docs/concepts/configuring-clusters/single-node-clusters.md.txt) cluster to run the workflow. Managed Service for Apache Spark will create the cluster, run the workflow on it, then delete the cluster when the workflow completes.
```
gcloud dataproc workflow-templates set-managed-cluster sparkpi \
--cluster-name=sparkpi \
--single-node \
--region=us-central1
```
4. Click the `sparkpi` name on the Managed Service for Apache Spark [**Workflows**](https://console.cloud.google.com/dataproc/workflows/templates) page in the Google Cloud console to open the **Workflow template details** page. Confirm the sparkpi template attributes. 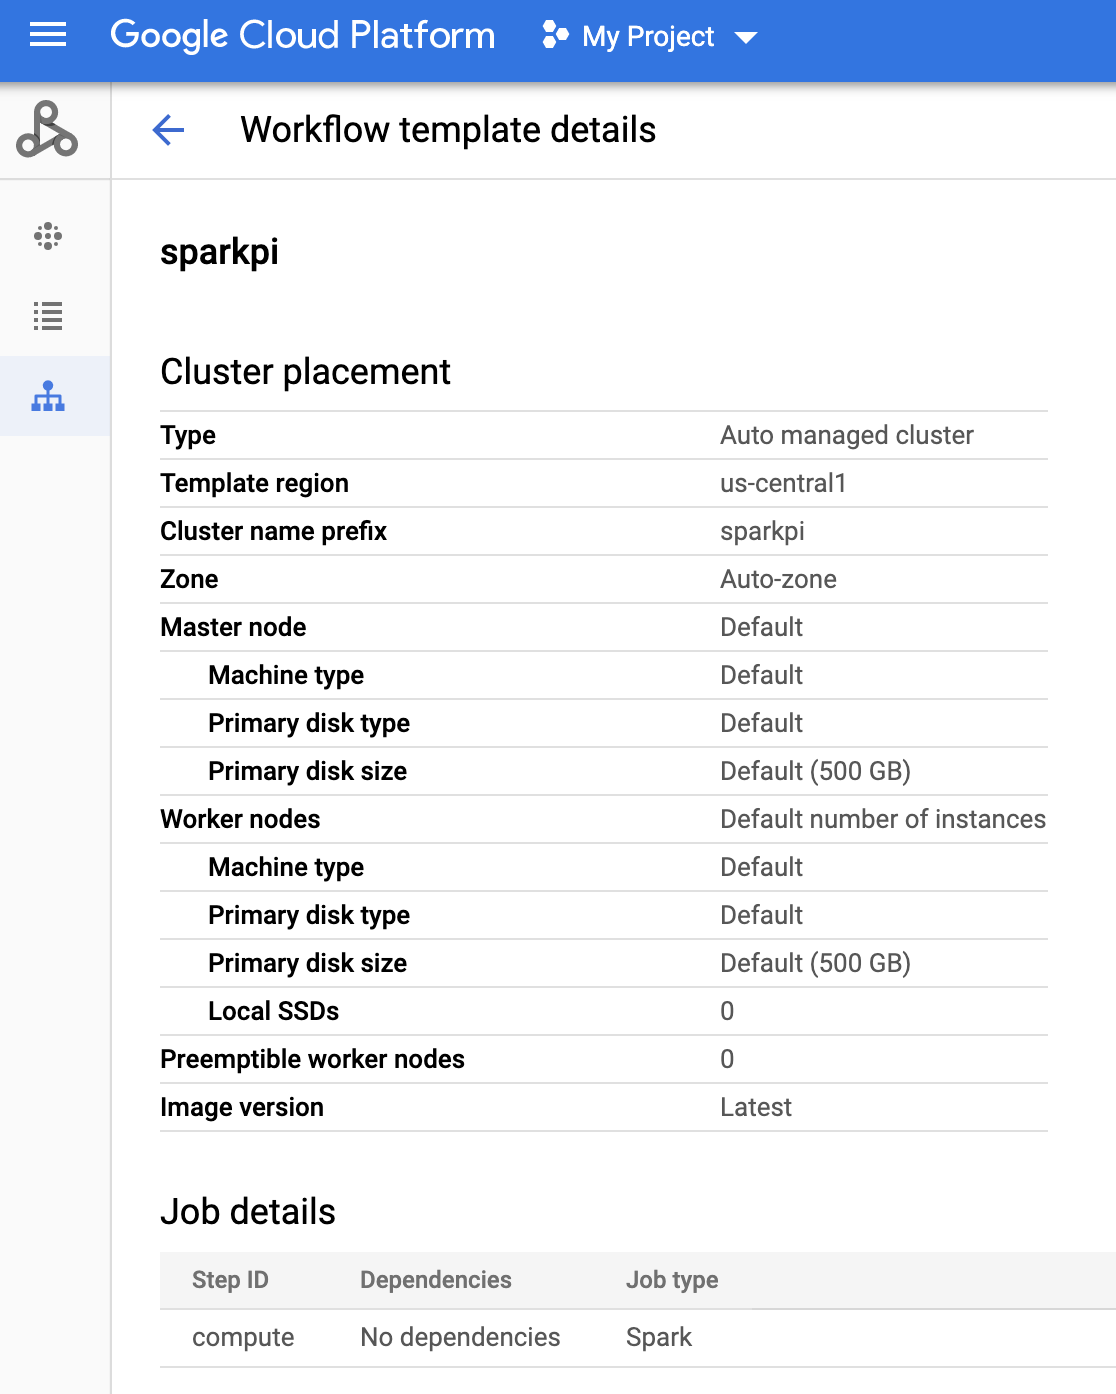
## Create a Cloud Scheduler job
1. Open the **[Cloud Scheduler](https://console.cloud.google.com/cloudscheduler/start)** page in the
Google Cloud console (you may need to select your project to open the page).
Click CREATE JOB.
2. Enter or select the following job information:
1. **Select a region:** "us-central" or other region where you created your workflow template.
2. **Name:** "sparkpi"
3. **Frequency:** "\* \* \* \* \*" selects every minute; "0 9 \* \* 1" selects every Monday at 9 AM. See [Defining the Job Schedule](https://docs.cloud.google.com/scheduler/docs/configuring/cron-job-schedules.md.txt) for other unix-cron values. **Note:** You will be able to click a RUN NOW button on the Cloud Scheduler **Jobs** in the Google Cloud console to run and test your job regardless of the frequency you set for your job.
4. **Timezone:** Select your timezone. Type "United States" to list U.S. timezones.
5. **Target:** "HTTP"
6. **URL:** Insert the following URL after inserting your-project-id. Replace "us-central1" if you created your workflow template in a different region. This URL will call the Managed Service for Apache Spark [`workflowTemplates.instantiate`](https://docs.cloud.google.com/managed-spark/docs/reference/rest/v1/projects.regions.workflowTemplates/instantiate.md.txt) API to run your [sparkpi workflow template](https://docs.cloud.google.com/managed-spark/docs/tutorials/workflow-scheduler.md.txt#create_a_workflow_template).
```
https://dataproc.googleapis.com/v1/projects/your-project-id/regions/us-central1/workflowTemplates/sparkpi:instantiate?alt=json
```
7. **HTTP method:**
1. "POST"
2. **Body:** "{}"
> [!IMPORTANT]
> If the scheduled job runs a [parameterized workflow](https://docs.cloud.google.com/managed-spark/docs/concepts/workflows/workflow-parameters.md.txt), you can pass the parameters to the workflow using a JSON payload in the Body:
>
> ```
> {"parameters": {"PARAMETER_NAME": "VALUE"}}
> ```
8. **Auth header:**
1. "Add OAuth token"
2. **Service account:** Insert the service account address of the [service account that you created for this tutorial](https://docs.cloud.google.com/managed-spark/docs/tutorials/workflow-scheduler.md.txt#create_a_service_account_for_this_tutorial). You can use the following account address after inserting your-project-id:
```
workflow-scheduler@your-project-id.iam.gserviceaccount.com
```
3. **Scope:** You can ignore this item.
9. Click CREATE.
## Test your scheduled workflow job
1. On the `sparkpi` job row on the
[Cloud Scheduler](https://console.cloud.google.com/cloudscheduler) **Jobs** page,
click RUN NOW.
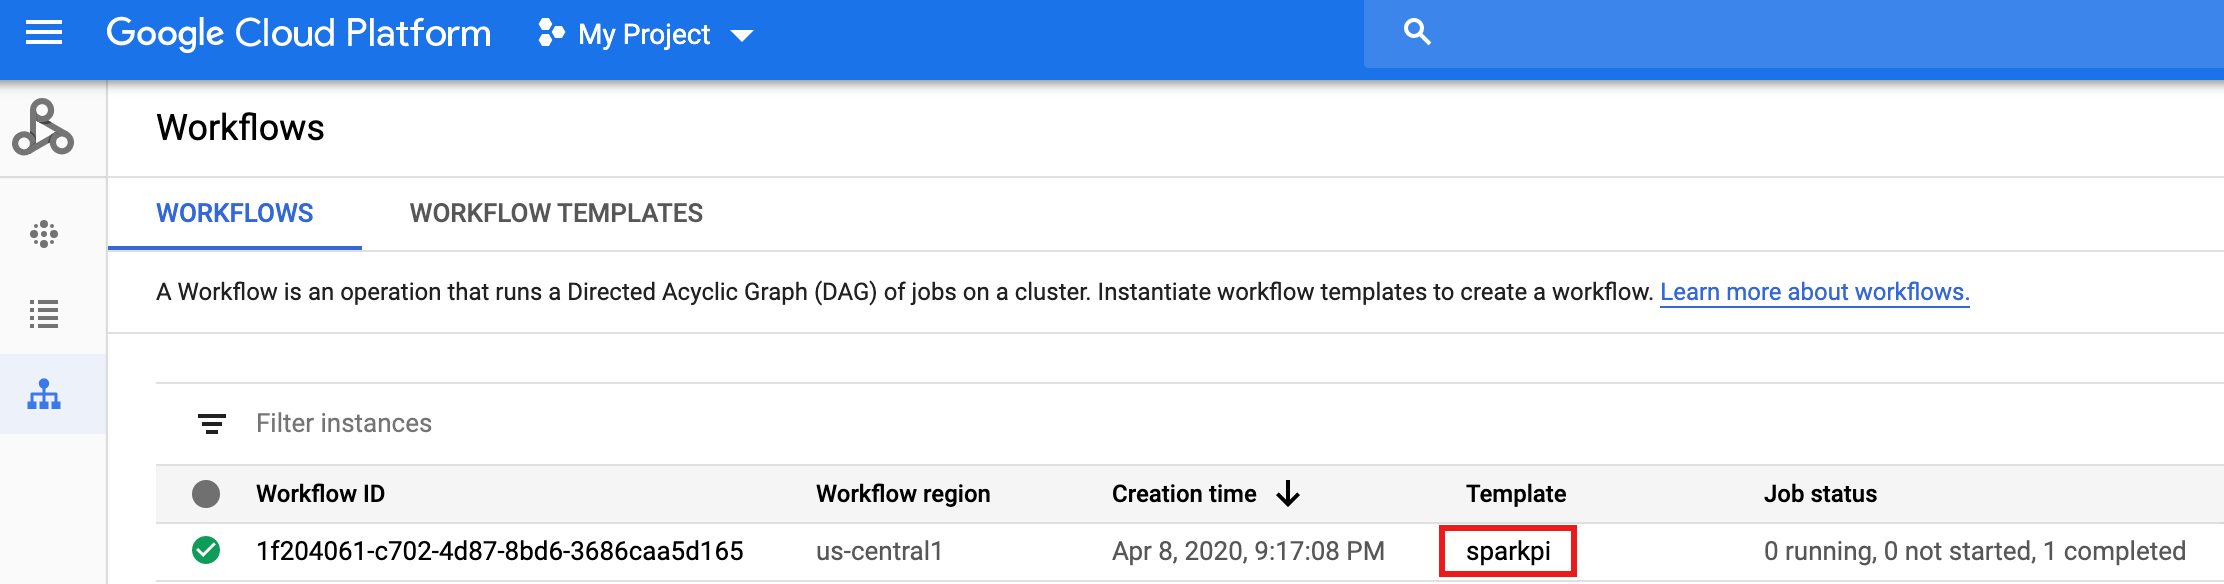
2. Wait a few minutes, then open the Managed Service for Apache Spark
**[Workflows](https://console.cloud.google.com/dataproc/workflows/instances)** page to verify
that the sparkpi workflow completed.
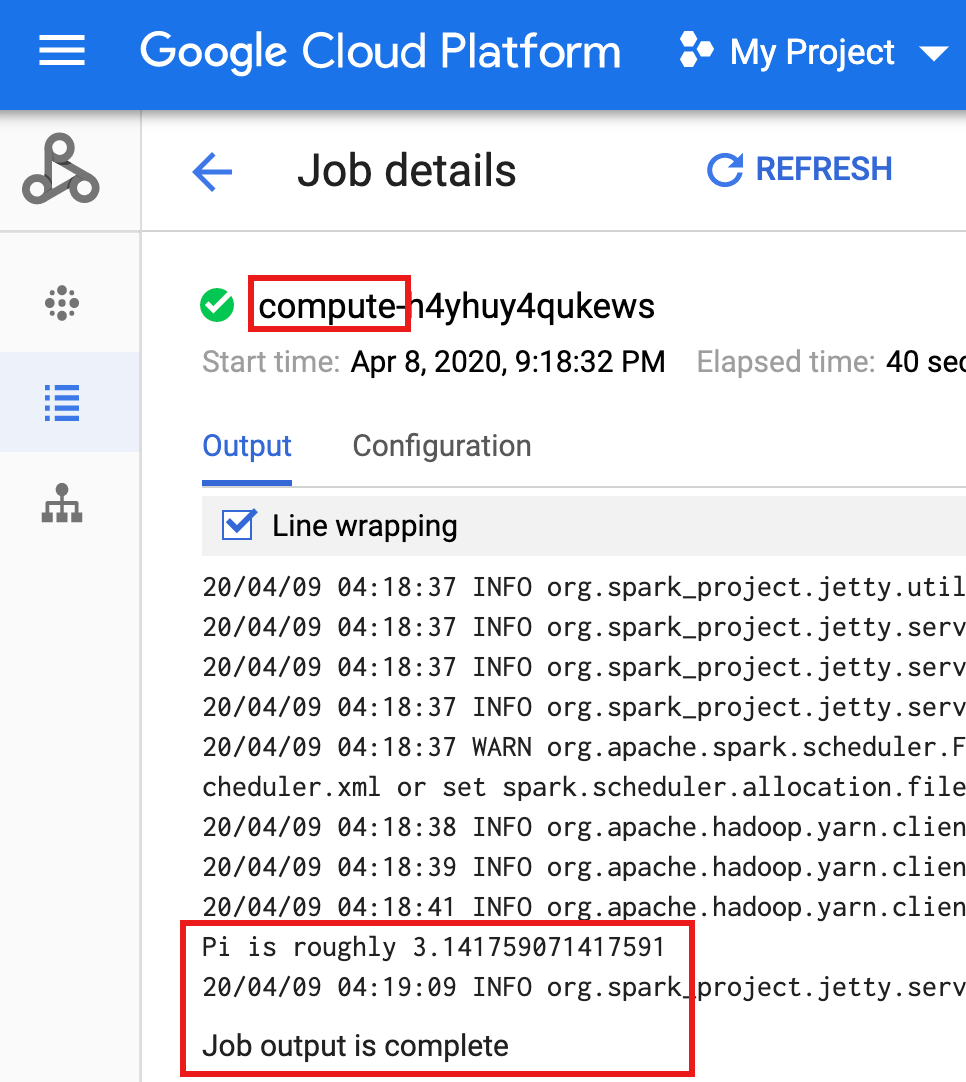
3. After the workflow deletes the managed cluster, job details
persist in the Google Cloud console. Click the
`compute...` job listed on the Managed Service for Apache Spark
[Jobs](https://console.cloud.google.com/dataproc/jobs) page to view workflow job details.
## Clean up
The workflow in this tutorial deletes its managed cluster
when the workflow completes. Keeping the workflow lets you rerun the
workflow and does not incur
charges. You can delete other resources created in this tutorial to avoid
recurring costs.
### Delete a project
> [!CAUTION]
> **Caution** : Deleting a project has the following effects:
>
> - **Everything in the project is deleted.** If you used an existing project for the tasks in this document, when you delete it, you also delete any other work you've done in the project.
> - **Custom project IDs are lost.** When you created this project, you might have created a custom project ID that you want to use in the future. To preserve the URLs that use the project ID, such as an `appspot.com` URL, delete selected resources inside the project instead of deleting the whole project.
>
>
> If you plan to explore multiple architectures, tutorials, or quickstarts, reusing projects
> can help you avoid exceeding project quota limits.
1. In the Google Cloud console, go to the **Manage resources** page.
[Go to Manage resources](https://console.cloud.google.com/iam-admin/projects)
2. In the project list, select the project that you want to delete, and then click **Delete**.
3. In the dialog, type the project ID, and then click **Shut down** to delete the project.
### Delete your workflow template
```
gcloud dataproc workflow-templates delete sparkpi \
--region=us-central1
```
### Delete your Cloud Scheduler job
Open the [Cloud Scheduler](https://console.cloud.google.com/cloudscheduler) **Jobs**
page in the Google Cloud console, select the box to the left of the `sparkpi`
function, then click DELETE.
### Delete your service account
Open the **[IAM \& Admin → Service Accounts](https://console.cloud.google.com/iam-admin/serviceaccounts)**
page in the Google Cloud console, select the box to the left of the `workflow-scheduler...`
service account, then click DELETE.
## What's next
- See [Overview of Managed Service for Apache Spark workflow templates](https://docs.cloud.google.com/managed-spark/docs/concepts/workflows/overview.md.txt).
- See [Workflow scheduling solutions](https://docs.cloud.google.com/managed-spark/docs/concepts/workflows/workflow-schedule-solutions.md.txt).