This tutorial illustrates different ways to create and submit a Spark Scala job to a
Managed Service for Apache Spark cluster, including how to:
- write and compile a Spark Scala "Hello World" app on a local machine from the command line using the [Scala REPL](https://docs.scala-lang.org/overviews/) (Read-Evaluate-Print-Loop or interactive interpreter) or the [SBT](http://www.scala-sbt.org/index.html) build tool
- package compiled Scala classes into a jar file with a manifest
- submit the Scala jar to a Spark job that runs on your Managed Service for Apache Spark cluster
- examine Scala job output from the Google Cloud console
This tutorial also shows you how to:
- write and run a Spark Scala "WordCount" mapreduce job directly on a Managed Service for Apache Spark
cluster using the `spark-shell` REPL
- run pre-installed Apache Spark and Hadoop examples on a cluster
> [!NOTE]
> Note that although the command line examples in this tutorial assume a Linux terminal environment, many or most will also run as written in a macOS or Windows terminal window.
## Set up a Google Cloud project
If you haven't already done so:
1. [Set up a project](https://docs.cloud.google.com/managed-spark/docs/guides/setup-project.md.txt)
2. [Create a Cloud Storage bucket](https://console.cloud.google.com/project/_/storage)
3. [Create a Managed Service for Apache Spark cluster](https://docs.cloud.google.com/managed-spark/docs/guides/create-cluster.md.txt)
## Write and compile Scala code locally
As a basic exercise for this tutorial, write a "Hello World" Scala app using the
[Scala REPL](http://docs.scala-lang.org/overviews/repl/overview.html) or
the [SBT](http://www.scala-sbt.org/index.html) command line interface
locally on your development machine.
- [Use Scala](https://docs.cloud.google.com/managed-spark/docs/tutorials/spark-scala.md.txt#use-scala)
- [Use SBT](https://docs.cloud.google.com/managed-spark/docs/tutorials/spark-scala.md.txt#use-sbt)
### Use Scala
1. Download the Scala binaries from the [Scala Install](http://www.scala-lang.org/download/install.html) page
2. Unpack the file, set the `SCALA_HOME` environment variable, and add it to your path, as
shown in the
[Scala Install](http://www.scala-lang.org/download/install.html)
instructions. For example:
```
export SCALA_HOME=/usr/local/share/scala
export PATH=$PATH:$SCALA_HOME/
```
3. Launch the Scala REPL
```
$ scala
Welcome to Scala version ...
Type in expressions to have them evaluated.
Type :help for more information.
scala>
```
4. Copy and paste `HelloWorld` code into Scala REPL
```
object HelloWorld {
def main(args: Array[String]): Unit = {
println("Hello, world!")
}
}
```
5. Save `HelloWorld.scala` and exit the REPL
```
scala> :save HelloWorld.scala
scala> :q
```
6. Compile with `scalac`
```
$ scalac HelloWorld.scala
```
7. List the compiled `.class` files
```
$ ls HelloWorld*.class
HelloWorld$.class HelloWorld.class
```
### Use SBT
1. [Download SBT](http://www.scala-sbt.org/)
2. [Create a "HelloWorld" project](http://www.scala-sbt.org/0.12.4/docs/Getting-Started/Hello.html), as shown below
```
$ mkdir hello
$ cd hello
$ echo \
'object HelloWorld {def main(args: Array[String]) = println("Hello, world!")}' > \
HelloWorld.scala
```
3. Create an `sbt.build` config file to set the `artifactName` (the name of the
[jar file](https://docs.oracle.com/javase/tutorial/deployment/jar/basicsindex.html)
that you will generate, below) to "HelloWorld.jar" (see
[Modifying default artifacts](http://www.scala-sbt.org/0.12.2/docs/Detailed-Topics/Artifacts.html#modifying-default-artifacts))
```
echo \
'artifactName := { (sv: ScalaVersion, module: ModuleID, artifact: Artifact) =>
"HelloWorld.jar" }' > \
build.sbt
```
4. Launch SBT and run code
```
$ sbt
[info] Set current project to hello ...
> run
... Compiling 1 Scala source to .../hello/target/scala-.../classes...
... Running HelloWorld
Hello, world!
[success] Total time: 3 s ...
```
5. Package code into a
[jar file](https://docs.oracle.com/javase/tutorial/deployment/jar/basicsindex.html) with a
[manifest that specifies the main class entry point](https://docs.oracle.com/javase/tutorial/deployment/jar/appman.html) (`HelloWorld`), then exit
```
> package
... Packaging .../hello/target/scala-.../HelloWorld.jar ...
... Done packaging.
[success] Total time: ...
> exit
```
## Create a jar
Create a [jar file](https://docs.oracle.com/javase/tutorial/deployment/jar/basicsindex.html)
with `SBT` or using the [jar](https://docs.oracle.com/javase/tutorial/deployment/jar/build.html)
command.
> [!NOTE]
> **Download Java?** To run the [jar](https://docs.oracle.com/javase/8/docs/technotes/tools/unix/jar.html) command, you must have Java SE (Standard Edition) JRE (Java Runtime Environment) installed on your machine---see [Java SE Downloads](http://www.oracle.com/technetwork/java/javase/downloads/index.html).
### Create a jar
with SBT
The SBT [package](http://www.scala-sbt.org/0.13/docs/Command-Line-Reference.html)
command creates a jar file (see [Use SBT](https://docs.cloud.google.com/managed-spark/docs/tutorials/spark-scala.md.txt#use-sbt)).
### Create a jar
manually
1. Change directory (`cd`) into the directory that contains your compiled `HelloWorld*.class` files, then run the following command to package the class files into a jar with a [manifest that specifies the main class entry point](https://docs.oracle.com/javase/tutorial/deployment/jar/appman.html) (`HelloWorld`).
```
$ jar cvfe HelloWorld.jar HelloWorld HelloWorld*.class
added manifest
adding: HelloWorld$.class(in = 637) (out= 403)(deflated 36%)
adding: HelloWorld.class(in = 586) (out= 482)(deflated 17%)
```
> [!NOTE]
> Unpacking and examining the jar's manifest (`MANIFEST.MF`) shows that it lists the `HelloWorld` Main-Class entry point:
>
> ```
> Manifest-Version: ...
> Created-By: ...
> Main-Class: HelloWorld
> ```
## Copy the jar to Cloud Storage
1. Use the Google Cloud CLI to copy the jar to a Cloud Storage [bucket](https://docs.cloud.google.com/storage/docs/buckets.md.txt) in your project
When passing bucket names to the Google Cloud CLI, make sure to only specify the bucket name after the `gs://` prefix. For example, if a project contains a "my-most-unique-bucket-name" bucket, as shown in the following [Google Cloud console Storage Browser](https://console.cloud.google.com/storage/browser) screenshot, 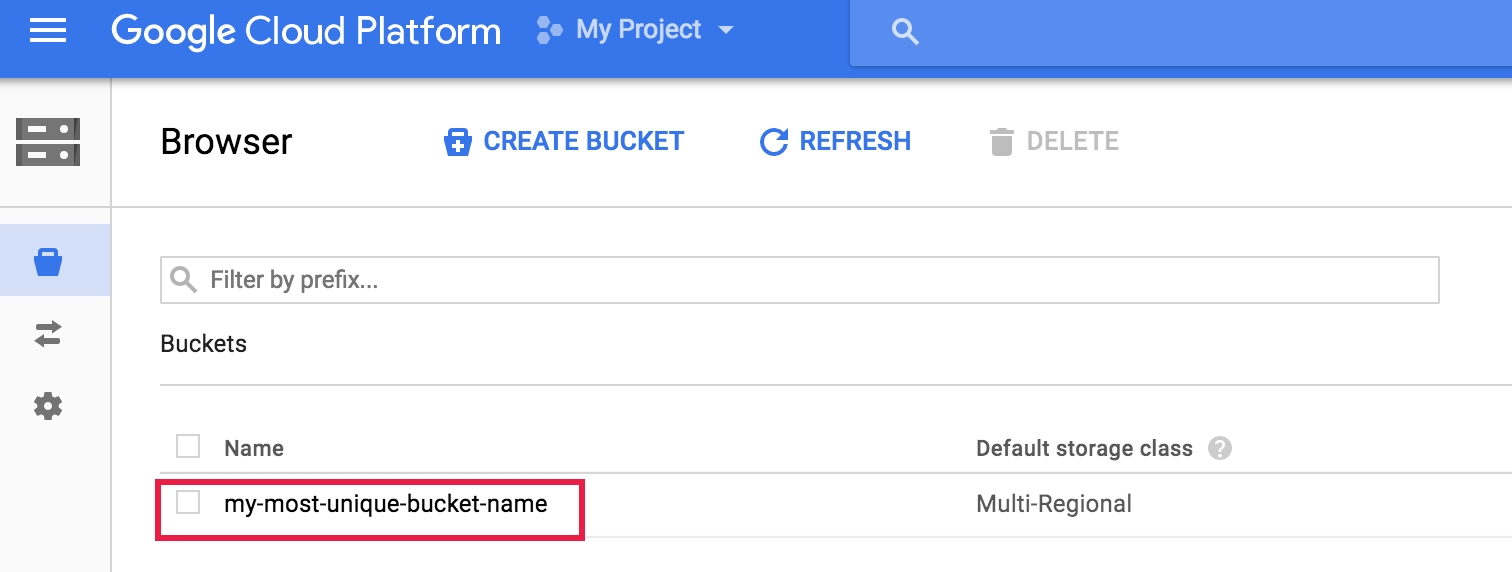 the following command will list the contents of that bucket:
```
gcloud storage ls gs://my-most-unique-bucket-name
```
```
$ gcloud storage cp HelloWorld.jar gs:///
Copying file://HelloWorld.jar [Content-Type=application/java-archive]...
Uploading gs://bucket-name/HelloWorld.jar: 1.46 KiB/1.46 KiB
```
## Submit the jar to a Managed Service for Apache Spark job
1. Use the [Google Cloud console](https://console.cloud.google.com/dataproc/jobs/jobsSubmit)
to submit the jar file to your Managed Service for Apache Spark job. Fill in the fields on
the **Submit a job** page as follows:
- *Select compute type for job* : **Spark on Compute Engine**
- *Cluster job details* :
- *Cluster*: Select your cluster's name from the cluster list
- *Files and artifacts*:
- *Job type* : **Spark (Scala / Java)**
- *Driver configuration* : Select **Main jar URI** , and in the **Main
jar** field, specify the Cloud Storage URI path to your HelloWorld
jar (`gs://your-bucket-name/HelloWorld.jar`).
If your jar does not include a manifest that specifies the entry
point to your code ("Main-Class: HelloWorld"), select **Main
class** under **Driver configuration** , enter the name of your main
class ("HelloWorld") in the **Main class** field, and fill in the
**Jar files** field with the URI path to your jar file
(`gs://your-bucket-name/HelloWorld.jar`).
2. Click **Submit** to start the job. Once the job starts, it is added to the Jobs
list.
3. Click the Job ID to open the **Jobs** page, where you can view the job's driver output.
## Write and run Spark Scala code using the cluster's `spark-shell` REPL
You may want to develop Scala apps directly on your Managed Service for Apache Spark cluster. Hadoop and Spark are
pre-installed on Managed Service for Apache Spark clusters, and they are configured with the Cloud Storage
connector, which allows your code to read and write data directly from and to Cloud Storage.
This example shows you how to use SSH to connect to the Managed Service for Apache Spark cluster master node, then use the
[spark-shell](http://spark.apache.org/docs/latest/quick-start.html#interactive-analysis-with-the-spark-shell)
REPL to create and run a Scala wordcount mapreduce application.
1. Use SSH to connect to the cluster master node
1. Go to the
[**Clusters**](https://console.cloud.google.com/dataproc/clusters)
page in the Google Cloud console, then click the name of your
cluster.
2. On the cluster detail page, select the **VM Instances** tab, then click the
SSH selection that appears at the right your cluster's name row.
A browser window opens at your home directory on the master node
2. Launch the `spark-shell`
```
$ spark-shell
...
Using Scala version ...
Type in expressions to have them evaluated.
Type :help for more information.
...
Spark context available as sc.
...
SQL context available as sqlContext.
scala>
```
3. Create an
[RDD](http://spark.apache.org/docs/latest/rdd-programming-guide.html#resilient-distributed-datasets-rdds)
(Resilient Distributed Dataset) from a Shakespeare text snippet located in public Cloud Storage
> [!IMPORTANT]
> Shakespeare text snippet:
>
> ```
> What's in a name? That which we call a rose
> By any other name would smell as sweet.
> ```
```
scala> val text_file = sc.textFile("gs://pub/shakespeare/rose.txt")
```
4. Run a wordcount mapreduce on the text, then display the `wordcounts` result
```
scala> val wordCounts = text_file.flatMap(line => line.split(" ")).map(word =>
(word, 1)).reduceByKey((a, b) => a + b)
scala> wordCounts.collect
... Array((call,1), (What's,1), (sweet.,1), (we,1), (as,1), (name?,1), (any,1), (other,1),
(rose,1), (smell,1), (name,1), (a,2), (would,1), (in,1), (which,1), (That,1), (By,1))
```
5. Save the counts in `/wordcounts-out` in Cloud Storage, then exit the `scala-shell`
```
scala> wordCounts.saveAsTextFile("gs:///wordcounts-out/")
scala> exit
```
6. Use the gcloud CLI to list the output files and display the file contents
```
$ gcloud storage ls gs://bucket-name/wordcounts-out/
gs://spark-scala-demo-bucket/wordcounts-out/
gs://spark-scala-demo-bucket/wordcounts-out/_SUCCESS
gs://spark-scala-demo-bucket/wordcounts-out/part-00000
gs://spark-scala-demo-bucket/wordcounts-out/part-00001
```
7. Check `gs:///wordcounts-out/part-00000` contents
```
$ gcloud storage cat gs://bucket-name/wordcounts-out/part-00000
(call,1)
(What's,1)
(sweet.,1)
(we,1)
(as,1)
(name?,1)
(any,1)
(other,1)
```
## Run the Pre-Installed Example code
The cluster master node contains runnable jar files with standard Apache Hadoop and Spark
examples.
| Jar Type | `Master node /usr/lib/ location` | GitHub Source | Apache Docs |
|---|---|---|---|
| Hadoop | `hadoop-mapreduce/hadoop-mapreduce-examples.jar` | [source link](https://github.com/apache/hadoop/tree/trunk/hadoop-mapreduce-project/hadoop-mapreduce-examples/src/main/java/org/apache/hadoop/examples) | [MapReduce Tutorial](https://hadoop.apache.org/docs/current/hadoop-mapreduce-client/hadoop-mapreduce-client-core/MapReduceTutorial.html) |
| Spark | `spark/lib/spark-examples.jar` | [source link](https://github.com/apache/spark/tree/master/examples/src/main) | [Spark Examples](http://spark.apache.org/examples.html) |
### Submit examples to your cluster from the command line
Examples can be submitted from your local development machine using the Google Cloud CLI `gcloud`
command-line tool (see
[Using the Google Cloud console](https://docs.cloud.google.com/managed-spark/docs/guides/submit-job.md.txt#using_the_console_name)
to submit jobs from the Google Cloud console).
#### Hadoop WordCount example
```
gcloud dataproc jobs submit hadoop --cluster=cluster-name \
--region=region \
--jars=file:///usr/lib/hadoop-mapreduce/hadoop-mapreduce-examples.jar \
--class=org.apache.hadoop.examples.WordCount \
-- URI of input file URI of output file
```
#### Spark WordCount example
```
gcloud dataproc jobs submit spark --cluster=cluster-name \
--region=region \
--jars=file:///usr/lib/spark/examples/jars/spark-examples.jar \
--class=org.apache.spark.examples.JavaWordCount \
-- URI of input file
```
## Shutdown your cluster
To avoid ongoing charges, shutdown your cluster and delete the Cloud Storage resources (Cloud
Storage bucket and files) used for this tutorial.
To shutdown a cluster:
```
gcloud dataproc clusters delete cluster-name \
--region=region
```
To delete the Cloud Storage jar file:
```
gcloud storage rm gs://bucket-name/HelloWorld.jar
```
You can delete a bucket and all of its folders and files with the following command:
```
gcloud storage rm gs://bucket-name/ --recursive
```
## What's next
- Read [Managing Java dependencies for Apache Spark applications on Managed Service for Apache Spark](https://docs.cloud.google.com/managed-spark/docs/guides/manage-spark-dependencies.md.txt).
- See [Spark job tuning tips](https://docs.cloud.google.com/managed-spark/docs/support/spark-job-tuning.md.txt)