## Objectives
This tutorial shows you how to install the Managed Service for Apache Spark
[Jupyter component](https://docs.cloud.google.com/managed-spark/docs/concepts/components/jupyter.md.txt)
on a new cluster, and then connect to the Jupyter notebook UI running on the
cluster from your local browser using the Managed Service for Apache Spark
[Component Gateway](https://docs.cloud.google.com/managed-spark/docs/concepts/accessing/gateways.md.txt).
> [!NOTE]
> **Note:** Running this tutorial will incur Google Cloud charges---see [Managed Service for Apache Spark Pricing](https://docs.cloud.google.com/managed-spark/docs/resources/pricing).
## Costs
In this document, you use the following billable components of Google Cloud:
- [Managed Service for Apache Spark](https://docs.cloud.google.com/managed-spark/pricing)
- [Cloud Storage](https://docs.cloud.google.com/storage/pricing)
To generate a cost estimate based on your projected usage,
use the [pricing calculator](https://docs.cloud.google.com/products/calculator).
New Google Cloud users might be eligible for a [free trial](https://docs.cloud.google.com/free).
## Before you begin
If you haven't already done so, create a Google Cloud project and a
Cloud Storage [bucket](https://docs.cloud.google.com/storage/docs/xml-api/put-bucket-create.md.txt).
1. **Setting up your project**
2. **Creating a Cloud Storage [bucket](https://docs.cloud.google.com/storage/docs/xml-api/put-bucket-create.md.txt)**
in your project to store any notebooks you create in this tutorial.
1. In the Google Cloud console, go to the Cloud Storage **Buckets** page.
[Go to Buckets](https://console.cloud.google.com/storage/browser)
2. Click **Create**.
3. On the **Create a bucket** page, enter your bucket information. To go to the next step, click **Continue** .
1. In the **Get started** section, do the following:
- Enter a globally unique name that meets the [bucket naming requirements](https://docs.cloud.google.com/storage/docs/bucket-naming#requirements).
- To add a [bucket label](https://docs.cloud.google.com/storage/docs/tags-and-labels.md.txt#bucket-labels), expand the **Labels** section (), click **Add label** , and specify a `key` and a `value` for your label.
2. In the **Choose where to store your data** section, do the following:
1. Select a [Location type](https://docs.cloud.google.com/storage/docs/locations.md.txt).
2. Choose a location where your bucket's data is permanently stored from the **[Location type](https://docs.cloud.google.com/storage/docs/locations.md.txt#available-locations)** drop-down menu.
- If you select the [dual-region](https://docs.cloud.google.com/storage/docs/locations.md.txt#location-dr) location type, you can also choose to enable [turbo replication](https://docs.cloud.google.com/storage/docs/availability-durability.md.txt#turbo-replication) by using the relevant checkbox.
3. To set up [cross-bucket replication](https://docs.cloud.google.com/storage/docs/availability-durability.md.txt#cross-bucket-replication), select **Add cross-bucket replication via Storage Transfer Service** and follow these steps:
#### Set up cross-bucket replication
1. In the **Bucket** menu, select a bucket.
2. In the **Replication settings** section,
click **Configure** to configure settings for the
replication job.
The **Configure cross-bucket replication** pane
appears.
- To filter objects to replicate by object name prefix, enter a prefix that you want to include or exclude objects from, then click **Add a prefix**.
- To set a storage class for the replicated objects, select a storage class from the **Storage class** menu. If you skip this step, the replicated objects will use the destination bucket's storage class by default.
- Click **Done**.
3. In the **Choose how to store your data** section, do the following:
1. Select a [default storage class](https://docs.cloud.google.com/storage/docs/storage-classes.md.txt) for the bucket or [Autoclass](https://docs.cloud.google.com/storage/docs/autoclass.md.txt) for automatic storage class management of your bucket's data.
2. To enable [hierarchical namespace](https://docs.cloud.google.com/storage/docs/hns-overview.md.txt), in the **Optimize storage for data-intensive workloads** section, select **Enable hierarchical namespace on this bucket** . **Note:** You cannot enable hierarchical namespace in existing buckets.
4. In the **Choose how to control access to objects** section, select whether or not your bucket enforces [public access prevention](https://docs.cloud.google.com/storage/docs/public-access-prevention.md.txt), and select an [access control method](https://docs.cloud.google.com/storage/docs/access-control.md.txt) for your bucket's objects. **Note:** You cannot change the **Prevent public access** setting if this setting is enforced at an [organization policy](https://docs.cloud.google.com/storage/docs/org-policy-constraints.md.txt#public-access-prevention).
5. In the **Choose how to protect object data** section, do the following:
- Select any of the options under **Data protection** that you want to set for your bucket.
- To enable [soft delete](https://docs.cloud.google.com/storage/docs/soft-delete.md.txt), click the **Soft delete policy (For data recovery)** checkbox, and specify the number of days you want to retain objects after deletion.
- To set [Object Versioning](https://docs.cloud.google.com/storage/docs/object-versioning.md.txt), click the **Object versioning (For version control)** checkbox, and specify the maximum number of versions per object and the number of days after which the noncurrent versions expire.
- To enable the retention policy on objects and buckets, click the **Retention (For compliance)** checkbox, and then do the following:
- To enable [Object Retention Lock](https://docs.cloud.google.com/storage/docs/object-lock.md.txt), click the **Enable object retention** checkbox.
- To enable [Bucket Lock](https://docs.cloud.google.com/storage/docs/bucket-lock.md.txt), click the **Set bucket retention policy** checkbox, and choose a unit of time and a length of time for your retention period.
- To choose how your object data will be encrypted, expand the **Data encryption** section (), and select a [**Data encryption** method](https://docs.cloud.google.com/storage/docs/encryption.md.txt).
4. Click **Create**.
Your notebooks will be stored in Cloud Storage under `gs://bucket-name/notebooks/jupyter`.
## Create a cluster and install the Jupyter component
[Create a cluster with the installed Jupyter component](https://docs.cloud.google.com/managed-spark/docs/concepts/components/jupyter.md.txt#install_jupyter).
> [!NOTE]
> **Note:** When creating the cluster, specify the name of the bucket you created in [Before you begin](https://docs.cloud.google.com/managed-spark/docs/tutorials/jupyter-notebook.md.txt#before-you-begin), step 2 (only specify the name of the bucket) as the Managed Service for Apache Spark `staging bucket` (see [Dataproc staging and temp buckets](https://docs.cloud.google.com/managed-spark/docs/concepts/configuring-clusters/staging-bucket.md.txt) for instructions on setting the staging bucket). Your notebooks will be stored in Cloud Storage under `gs://bucket-name/notebooks/jupyter`.
## Open the Jupyter and JupyterLab UIs
Click the [Google Cloud console Component Gateway links](https://docs.cloud.google.com/managed-spark/docs/concepts/accessing/gateways.md.txt#viewing_and_accessing_component_gateway_urls)
in the Google Cloud console to open the Jupyter notebook
or JupyterLab UIs running on your cluster's
The top-level directory displayed by your Jupyter instance is a virtual
directory that lets you see the contents of either your
Cloud Storage bucket or your local file system. You can choose either
location by clicking on the **GCS** link for Cloud Storage or
**Local Disk** for the local file system of the master node in your cluster.
1. Click the **GCS** link. The Jupyter notebook web UI displays notebooks stored in your Cloud Storage bucket, including any notebooks you create in this tutorial. 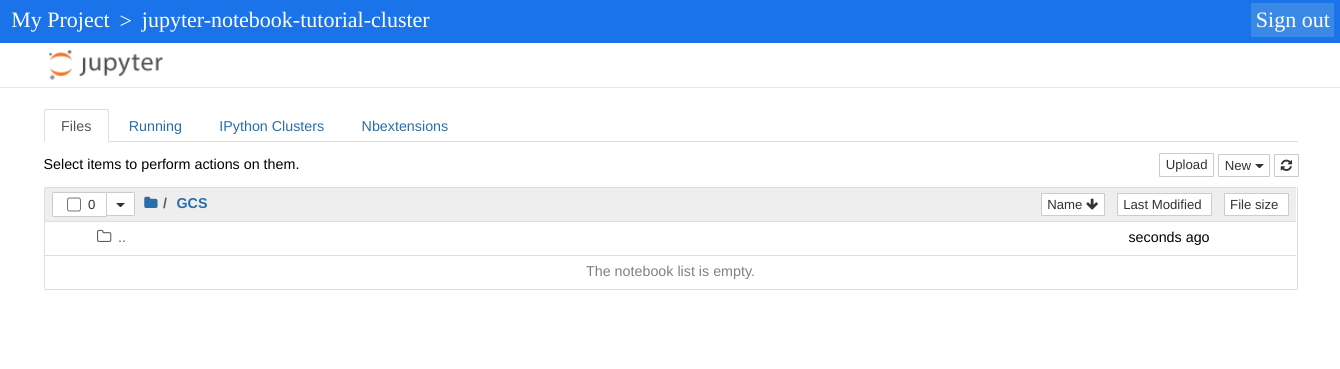
## Clean up
After you finish the tutorial, you can clean up the resources that you created so that they
stop using quota and incurring charges. The following sections describe how to delete or turn off
these resources.
### Delete the project
The easiest way to eliminate billing is to delete the project that you
created for the tutorial.
To delete the project:
> [!CAUTION]
> **Caution** : Deleting a project has the following effects:
>
> - **Everything in the project is deleted.** If you used an existing project for the tasks in this document, when you delete it, you also delete any other work you've done in the project.
> - **Custom project IDs are lost.** When you created this project, you might have created a custom project ID that you want to use in the future. To preserve the URLs that use the project ID, such as an `appspot.com` URL, delete selected resources inside the project instead of deleting the whole project.
>
>
> If you plan to explore multiple architectures, tutorials, or quickstarts, reusing projects
> can help you avoid exceeding project quota limits.
1. In the Google Cloud console, go to the **Manage resources** page.
[Go to Manage resources](https://console.cloud.google.com/iam-admin/projects)
2. In the project list, select the project that you want to delete, and then click **Delete**.
3. In the dialog, type the project ID, and then click **Shut down** to delete the project.
### Delete the cluster
- To delete your cluster:
```
gcloud dataproc clusters delete cluster-name \
--region=${REGION}
```
### Delete the bucket
- To delete the Cloud Storage bucket you created in [Before you begin](https://docs.cloud.google.com/managed-spark/docs/tutorials/jupyter-notebook.md.txt#before-you-begin), step 2, **including the notebooks
stored in the bucket** :
```
gcloud storage rm gs://${BUCKET_NAME} --recursive
```
## What's next
- [Manage your data workload lifecycle in your agent environment](https://docs.cloud.google.com/data-agent-kit/overview.md.txt) using Google Cloud Data Agent Kit
- [Build data pipelines with Data Agent Kit](https://docs.cloud.google.com/data-agent-kit/build-pipelines.md.txt)
- See the [Jupyter/IPython Notebook Quick Start Guide](http://jupyter-notebook-beginner-guide.readthedocs.io/en/latest/)