
To view a dashboard, you must have:
- The [**View**](https://docs.cloud.google.com/looker/docs/organizing-spaces.md.txt#folder_access_levels) access level for the folder in which the dashboard resides
- The [`see_user_dashboards`](https://docs.cloud.google.com/looker/docs/admin-panel-users-roles.md.txt#see_user_dashboards) Looker permission
Additionally, to view a specific dashboard tile, you must have [access to the model](https://docs.cloud.google.com/looker/docs/admin-panel-users-roles.md.txt#model_sets) the tile is based on.
For more information on the access levels and permissions required to [view a dashboard](https://docs.cloud.google.com/looker/docs/access-control-and-permission-management.md.txt#viewing_a_folder_and_lists_of_looks_and_dashboards) or [view dashboard tiles](https://docs.cloud.google.com/looker/docs/access-control-and-permission-management.md.txt#viewing_data_in_looks_and_dashboards), visit the [Access control and permission management](https://docs.cloud.google.com/looker/docs/access-control-and-permission-management.md.txt) documentation page.
## Anatomy of a dashboard
Each dashboard contains a number of elements:
- [Navigation breadcrumb](https://docs.cloud.google.com/looker/docs/viewing-dashboards.md.txt#navigation_breadcrumb)
- [Add to boards icon](https://docs.cloud.google.com/looker/docs/viewing-dashboards.md.txt#add_to_boards_icon)
- [Certification icon](https://docs.cloud.google.com/looker/docs/viewing-dashboards.md.txt#certification_icon)
- [Dashboard tabs](https://docs.cloud.google.com/looker/docs/viewing-dashboards.md.txt#dashboard-tabs)
- [Tile groups](https://docs.cloud.google.com/looker/docs/viewing-dashboards.md.txt#tile_groups)
- [Dashboard filters](https://docs.cloud.google.com/looker/docs/viewing-dashboards.md.txt#dashboard_filters)
- [Dashboard last updated indicator](https://docs.cloud.google.com/looker/docs/viewing-dashboards.md.txt#dashboard_last_updated_indicator)
- [Reload data icon](https://docs.cloud.google.com/looker/docs/viewing-dashboards.md.txt#reload_data_icon)
- [Filters icon](https://docs.cloud.google.com/looker/docs/viewing-dashboards.md.txt#filters_icon)
- [Three-dot dashboard menu](https://docs.cloud.google.com/looker/docs/viewing-dashboards.md.txt#three-dot_dashboard_menu)
### Navigation breadcrumb

A navigation breadcrumb appears at the top left of the dashboard, indicating the enclosing folder for the dashboard. Click the breadcrumb to be taken to the enclosing folder.
### Dashboard title and favorite indicator

The dashboard title and the heart-shaped favorite indicator appear at the top left of the dashboard.
The dashboard favorite indicator shows whether you have [marked the dashboard as a favorite](https://docs.cloud.google.com/looker/docs/finding-content.md.txt#marking_content_as_a_favorite). If the dashboard is marked as a favorite, the heart icon is colored solid blue. You can also favorite or unfavorite directly in the dashboard by clicking on the heart.
### Add to boards icon

The **Add to boards** icon appears to the right of the dashboard title and the heart-shaped favorite indicator.
Selecting the **Add to boards** icon opens the **Add to Boards** window, where you can [add the dashboard to one or more boards](https://docs.cloud.google.com/looker/docs/presenting-content.md.txt#adding_with_the_add_to_boards_icon). Any boards that you have selected appear in the right-hand pane of the **Add to Boards** window.
### Certification icon
If [content certification](https://docs.cloud.google.com/looker/docs/content-certification.md.txt) is enabled on your instance, a green certified content badge  appears to the right of the dashboard title for any dashboard that has been certified. You can hover over the badge to view the certifier's name, the certification date and time, and any notes that were saved by the certifier.
### Dashboard tabs
Content may be organized on different dashboard tabs, if your content creator has added them. Dashboard tabs let you better organize content, improve data storytelling, enhance performance, and reduce clutter.
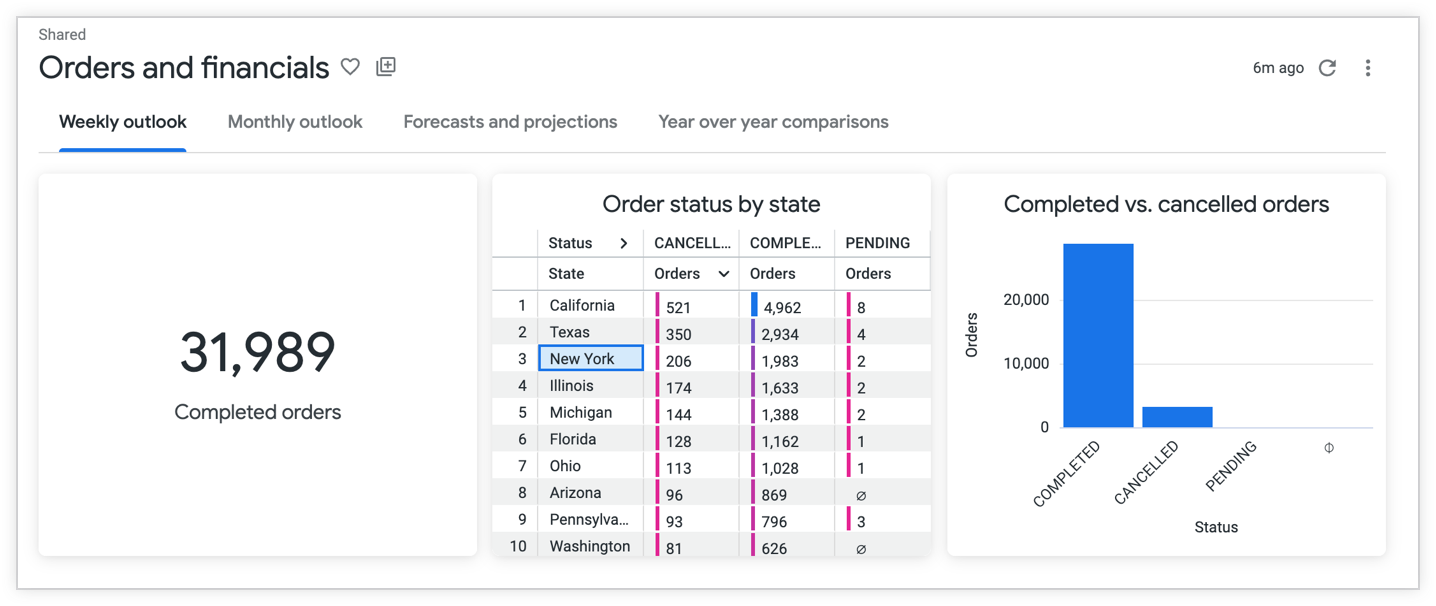
To view the content on a tab, click the name of the tab. [Learn more about viewing and interacting with tabbed dashboards](https://docs.cloud.google.com/looker/docs/tabbed-dashboards.md.txt#tabbed-dashboard-features-for-viewers).
### Tile groups
> [!WARNING]
>
> **Preview**
>
>
> This feature is
>
> subject to the "Pre-GA Offerings Terms" in the General Service Terms section of the
> [Service Specific
> Terms](https://docs.cloud.google.com/terms/service-terms#1), and the
> [Additional Terms for Generative AI
> Preview Products](https://cloud.google.com/trustedtester/aitos).
>
> Pre-GA features are available "as is" and might have limited support.
>
> For more information, see the
> [launch stage descriptions](https://cloud.google.com/products/#product-launch-stages).
> [!NOTE]
> **Note:** Use the [Looker Tile Groups - Preview Issues form](https://docs.google.com/forms/d/e/1FAIpQLSdqtRfbUyyIhZqKkyfsEJyVhJ83sGG58-t1sAssvZ3V_ruUrw/viewform) to provide feedback or report issues with this preview feature.
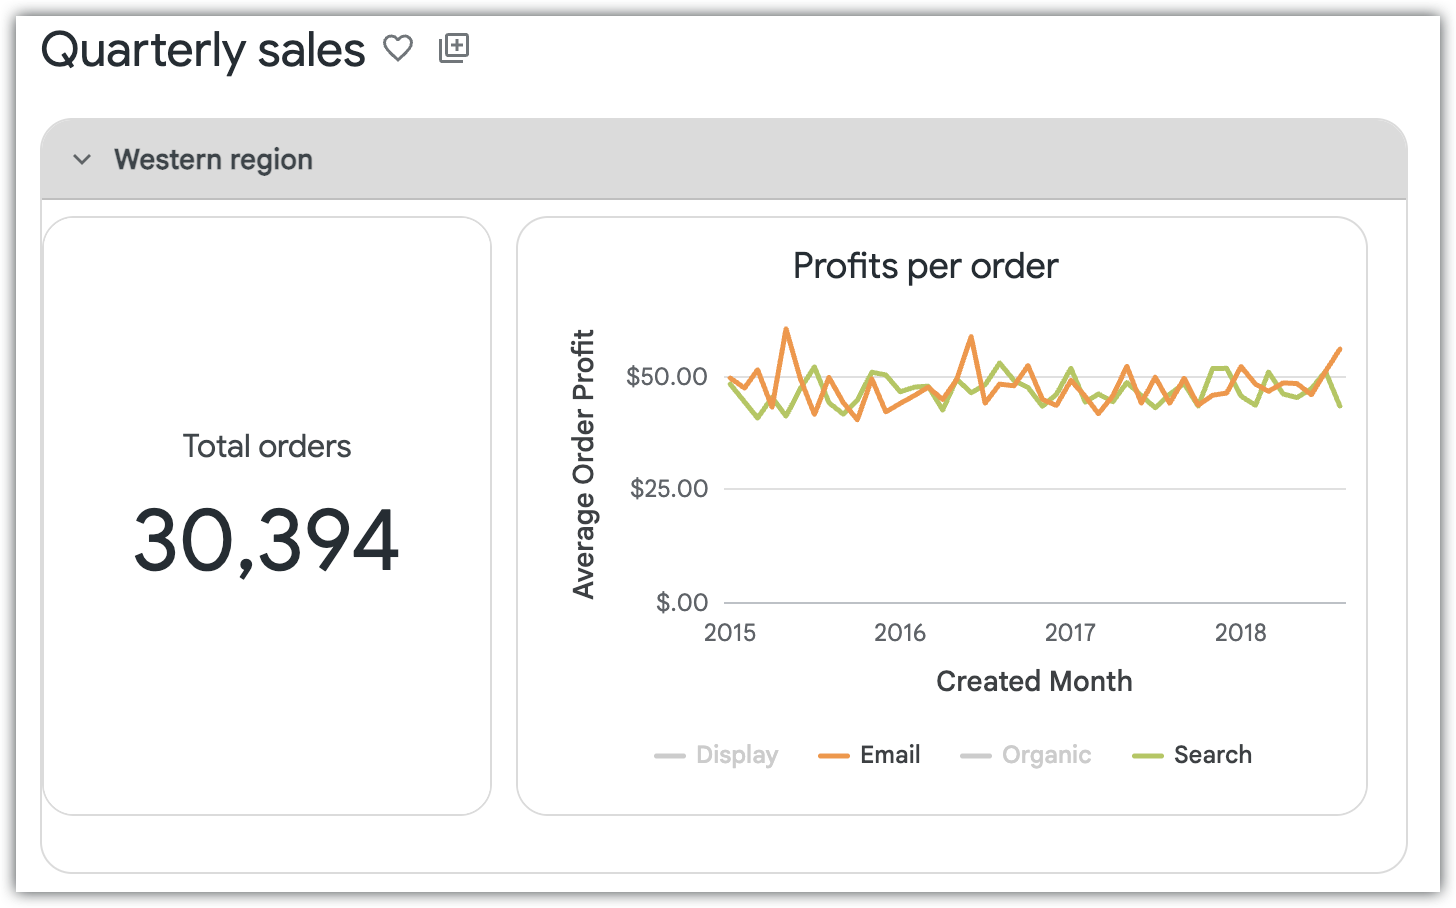
If your Looker admin has enabled the
[**Dashboard Tile Groups** preview feature](https://docs.cloud.google.com/looker/docs/admin-panel-general-preview-features.md.txt#dashboard-tile-groups),
dashboard creators can organize related tiles---including visualizations, text
tiles, buttons, and extensions---into collapsible group containers.
To collapse or expand a tile group while viewing a dashboard, click the expand
or collapse arrow next to the group title in the group header. Collapsing a
group hides all of the tiles inside the group and reduces the container to its
header so that you can focus on other sections of the dashboard.
When a tile group is expanded, you can interact with the tiles inside the group
just as you do with ungrouped [dashboard tiles](https://docs.cloud.google.com/looker/docs/viewing-dashboards.md.txt#dashboard_tiles), including
exploring data, viewing or following alerts, downloading data, drilling into
data points, and cross-filtering. For information about creating and editing
tile groups, see
[Organizing tiles into groups](https://docs.cloud.google.com/looker/docs/editing-user-defined-dashboards.md.txt#organizing_tiles_into_groups)
on the **Editing user-defined dashboards** documentation page.
### Dashboard filters
> [!IMPORTANT]
> **Important:** If you view a [dashboard with tabs](https://docs.cloud.google.com/looker/docs/tabbed-dashboards.md.txt), a filter will only display on a tab if it is applied to at least one tile on that tab.
Dashboard-level filters appear in the filter bar at the top of the dashboard or to the right of the dashboard.
The filter bar, which contains the filters, may be [set to](https://docs.cloud.google.com/looker/docs/editing-user-defined-dashboards.md.txt#default_filters_view) collapsed or expanded by default. If the filter bar is collapsed, you will see a number next to the [filters icon](https://docs.cloud.google.com/looker/docs/viewing-dashboards.md.txt#filters_icon) at the top of the dashboard:

You can click the icon to expand the filter bar and see the filters.
Dashboard filters can be applied to all tiles on the dashboard, or to a subset of tiles on the dashboard. You can see which dashboard filters apply to a specific tile by [showing the filters on that tile](https://docs.cloud.google.com/looker/docs/viewing-dashboards.md.txt#show-filters).
In addition to dashboard-level filters, dashboards can also include [filters on visualization tiles](https://docs.cloud.google.com/looker/docs/viewing-dashboards.md.txt#changing-filters-on-visualization-tiles), which appear at the top of individual tiles and apply only to those tiles.
#### Filter controls
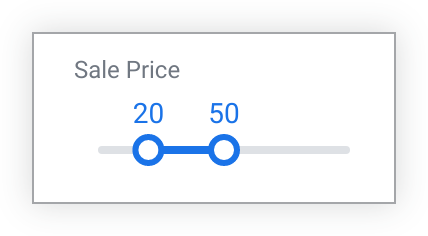
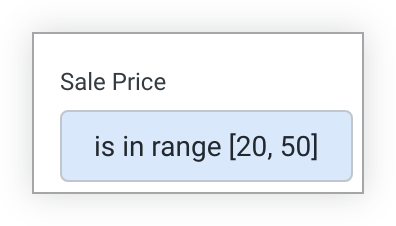
There are a variety of [filter controls](https://docs.cloud.google.com/looker/docs/filters-user-defined-dashboards.md.txt#dashboard_(beta)_filter_controls) that you might see. They cans be [displayed as](https://docs.cloud.google.com/looker/docs/filters-user-defined-dashboards.md.txt#displaying_dashboard_(beta)_filters):
inline filters:
popover filters:
or behind a **More** button:
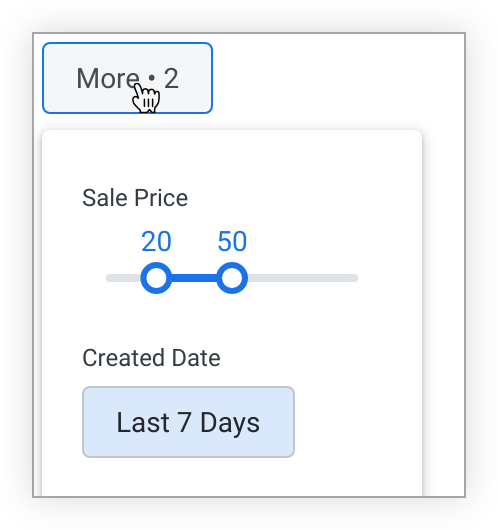
For popover filters and filters that are placed behind a **More** button, clicking on the filter value or the **More** button will reveal the full filter control.
### Dashboard last updated indicator
This indicator appears at the top right of the dashboard and shows how recently the data on the dashboard has been queried from --- in other words, "refreshed" from --- the database. It appears when the data for all dashboard tiles has been refreshed at approximately the same time.

When dashboard tiles have been updated at different times, the last updated indicator no longer appears in this position; instead, each tile contains its own indicator in the tile three-dot menu. For more information, see the [Updating data on dashboards](https://docs.cloud.google.com/looker/docs/viewing-dashboards.md.txt#updating_data_on_dashboards_(beta)) section on this page.
### Reload data icon
Clicking the circular reload data icon [updates the data](https://docs.cloud.google.com/looker/docs/viewing-dashboards.md.txt#updating_data_on_dashboards_(beta)) on the dashboard.

This is often useful once filters have been changed, added, or removed. In those circumstances, the icon becomes an **Update** button.
If [**Run on load**](https://docs.cloud.google.com/looker/docs/editing-user-defined-dashboards.md.txt#run_on_load) is disabled for the dashboard, when a dashboard is opened the icon becomes a **Load** button, which you must click to load the dashboard's data.
### Filters icon
> [!IMPORTANT]
> **Important:** If you view a [dashboard with tabs](https://docs.cloud.google.com/looker/docs/tabbed-dashboards.md.txt), a filter will only display on a tab if it is applied to at least one tile on that tab.

A dashboard's filter bar may be collapsed (filters hidden) or expanded (filters shown) by default. Clicking the filters icon lets you switch the state of the filter bar between collapsed and expanded. When the filter bar is collapsed, an indicator appears next to the filters icon that shows the number of filters on the dashboard.

### Three-dot dashboard menu
The three-dot dashboard menu is revealed when you click the three-dot icon at the top right of the dashboard.
The menu provides the following options (depending on your [permissions](https://docs.cloud.google.com/looker/docs/admin-panel-users-roles.md.txt#permissions_list)):
- [Clear cache and refresh](https://docs.cloud.google.com/looker/docs/viewing-dashboards.md.txt#updating_data_on_dashboards_(beta))
- [Edit dashboard](https://docs.cloud.google.com/looker/docs/editing-user-defined-dashboards.md.txt)
- [Show dashboard details](https://docs.cloud.google.com/looker/docs/viewing-dashboards.md.txt#dashboard_details)
- [Dashboard performance summary](https://docs.cloud.google.com/looker/docs/system-activity-dashboards.md.txt#dashboard_diagnostics)
- [Copy dashboard](https://docs.cloud.google.com/looker/docs/viewing-dashboards.md.txt#copying_dashboards)
- [Get LookML](https://docs.cloud.google.com/looker/docs/viewing-dashboards.md.txt#getting_the_lookml_from_a_dashboard_(beta))
- [Download](https://docs.cloud.google.com/looker/docs/downloading.md.txt#downloading_data_from_a_dashboard)
- [Schedule delivery](https://docs.cloud.google.com/looker/docs/scheduling-and-sending-dashboards.md.txt)
- [Add to a board](https://docs.cloud.google.com/looker/docs/viewing-dashboards.md.txt#pinning_dashboards_(beta)_to_boards)
- [Get embed URL](https://docs.cloud.google.com/looker/docs/viewing-dashboards.md.txt#getting_an_embed_url_for_a_dashboard)
- [Get link](https://docs.cloud.google.com/looker/docs/viewing-dashboards.md.txt#getting_a_dashboards_link)
- [Reset filters](https://docs.cloud.google.com/looker/docs/viewing-dashboards.md.txt#resetting_filter_values)
- [Dashboard time zone](https://docs.cloud.google.com/looker/docs/viewing-dashboards.md.txt#temporarily_changing_the_dashboard_time_zone)
- [Move to trash](https://docs.cloud.google.com/looker/docs/editing-user-defined-dashboards.md.txt#deleting_dashboards_(beta))
- [Certify or Remove certification](https://docs.cloud.google.com/looker/docs/viewing-dashboards.md.txt#certifying_a_dashboard)
You must have the [**Manage Access, Edit**](https://docs.cloud.google.com/looker/docs/organizing-spaces.md.txt#folder_access_levels) access level for the dashboard, or be a Looker admin, to see the options to edit the dashboard or move the dashboard to the trash. Filters must be present on the dashboard to see the **Reset filters** option.
### Dashboard details
The **Dashboard Details** panel appears to the right of the dashboard when the **Show dashboard details** option has been selected from the [three-dot dashboard menu](https://docs.cloud.google.com/looker/docs/viewing-dashboards.md.txt#three-dot_dashboard_menu).
This panel displays several metadata items. These include:
- **Description** : A text description of the dashboard, if a [description has been added](https://docs.cloud.google.com/looker/docs/creating-user-defined-dashboards.md.txt#adding_a_description_to_a_dashboard).
- **Favorites** : The number of users who have marked the dashboard as a [favorite](https://docs.cloud.google.com/looker/docs/viewing-dashboards.md.txt#dashboard_title_and_favorite_indicator).
- **Views**: The number of times the dashboard has been viewed.
- **Owner**: The name of the user that created the dashboard.
- **Created**: The date and time at which the dashboard was created.
- **Last updated**: The date and time at which the dashboard was most recently updated.
- **Updated by**: The name of the user that most recently updated the dashboard.
- **Certified by** and **Certified notes** : If [content certification](https://docs.cloud.google.com/looker/docs/content-certification.md.txt) is enabled on your instance, you will see a green certified content badge  in the **Dashboard Details** panel for any dashboard that has been certified. In addition, you will see the certifier's name, the certification date and time, and any notes that were saved by the certifier.
To hide the **Dashboard Details** panel, click the close icon (`X`) in the upper right corner of the panel.
## Dashboard tiles
Each dashboard tile represents a query or Look that can be explored further.

### Explore from here
The **Explore from here** icon lets you [explore the tile's data](https://docs.cloud.google.com/looker/docs/creating-and-editing-explores.md.txt).
When you select **Explore from here**, dashboard and visualization filters don't appear in the Explore query.
### Alerts
If your Looker admin has given you permission, you can use the bell icon at the upper right of a tile to create or follow an [alert](https://docs.cloud.google.com/looker/docs/alerts-overview.md.txt) on the tile. A numeric indicator will show how many alerts you are permitted to view on that tile.

### Show filters
When the [**Filters on Visualization Tiles**](https://docs.cloud.google.com/looker/docs/admin-panel-general-preview-features.md.txt#filters-on-visualization-tiles) preview feature is enabled, visualization tiles can include a **Show filters** filter icon in the tile header.
Selecting the **Show filters** icon opens a window that displays the filters that are applied to that tile, organized into the following categories:
- **Vis Filters** : Displays the filters that are applied directly to the visualization tile (if the **Filters on Visualization Tiles** preview feature is enabled).
- **Dashboard Filters** : Displays dashboard-level filters that apply to the tile. This includes [cross-filters](https://docs.cloud.google.com/looker/docs/cross-filtering-dashboards.md.txt).
- **Query Filters**: Displays the filters that are configured in the tile's underlying query (in the Explore or Look).
You can also view this information by selecting **Show Filters** from the tile's [three-dot **Tile actions** menu](https://docs.cloud.google.com/looker/docs/viewing-dashboards.md.txt#tile_three-dot_menu).
Dashboard editors can configure whether and which filters appear on tiles by using the [**Tile filter information** setting](https://docs.cloud.google.com/looker/docs/editing-user-defined-dashboards.md.txt#display-applied-filters-on-tiles) in dashboard settings. If an editor selects **Do not show** , the **Show Filters** option and icon don't appear on tiles.
To learn more, see [Filters on visualization tiles](https://docs.cloud.google.com/looker/docs/filters-user-defined-dashboards.md.txt#filters-on-visualization-tiles).
> [!NOTE]
> **Note:** This feature is in [preview](https://cloud.google.com/products).
### Accessibility descriptions
Dashboard editors can add [alternative text descriptions](https://docs.cloud.google.com/looker/docs/editing-user-defined-dashboards.md.txt#adding-or-editing-an-accessibility-description) to visualization tiles that describe the chart and its results for users who use screen readers. These descriptions aren't displayed on the dashboard tile, but screen reader software announces them when a user navigates to the tile.
### Tile three-dot menu
Depending on the permissions that your Looker admin has given you, each tile's three-dot **Tile actions** menu provides the following options:
- **Explore from here** , which lets you [explore the tile's data](https://docs.cloud.google.com/looker/docs/creating-and-editing-explores.md.txt)
- [Download](https://docs.cloud.google.com/looker/docs/downloading.md.txt#downloading_data_from_dashboard_tiles) the tile's data
- View the tile's parent Look (for [Look-linked tiles](https://docs.cloud.google.com/looker/docs/creating-user-defined-dashboards.md.txt#look-linked_tiles) only)
- **Show Filters** , which displays all filters that are applied to the tile, organized into **Vis Filters** , **Dashboard Filters** , and **Query Filters**
- Clear cache and refresh the tile to [update its data](https://docs.cloud.google.com/looker/docs/viewing-dashboards.md.txt#updating_data_on_dashboards_(beta))

If a tile contains a [**Table**](https://docs.cloud.google.com/looker/docs/table-options.md.txt) or a [**Table (Legacy)**](https://docs.cloud.google.com/looker/docs/legacy-table-options.md.txt) chart, the tile menu will also show options to [**Autosize all columns**](https://docs.cloud.google.com/looker/docs/table-options.md.txt#autosize_all_columns) and [**Reset all column widths**](https://docs.cloud.google.com/looker/docs/table-options.md.txt#reset_all_column_widths).
> [!IMPORTANT]
> **Important:** Changes made to column widths using the **Autosize all columns** or **Reset all column widths** option are not saved after you close the dashboard. To save changes to settings, enter [edit mode](https://docs.cloud.google.com/looker/docs/editing-user-defined-dashboards.md.txt#entering_edit_mode_in_dashboards) on the dashboard, [click **Edit** in the tile's three-dot menu](https://docs.cloud.google.com/looker/docs/editing-user-defined-dashboards.md.txt#editing_a_tiles_query_or_look), and change the settings in the edit window that appears.
The three-dot menu may also show when the tile's data was last refreshed from the database, if the tiles on the dashboard have been refreshed at different times.
### View options
If your Looker admin has enabled the [**Full Screen Visualizations** setting](https://docs.cloud.google.com/looker/docs/admin-panel-general-settings.md.txt#full_screen_visualizations), you will see an additional menu item in each tile's three-dot **Tile actions** menu, **View** . Selecting **View** opens a submenu that reveals options for **Expanded** or **Full Screen**:

Selecting **Expanded** from the submenu opens an overlay on top of the dashboard with an expanded view of the tile:

Clicking the forward or back arrows on the overlay cycles the viewer through expanded views of the tiles and buttons that are present on the dashboard. Clicking the **Close** (**X**) icon at the top right of the overlay, or pressing the escape key, closes the overlay.
Selecting **Full Screen** from the **View** submenu opens a full-screen view of the tile's visualization. Clicking the **X** icon at the top right closes the full-screen view.
### Data history playback
If the [**Data history playback** feature](https://docs.cloud.google.com/looker/docs/admin-panel-general-settings.md.txt#data-history-playback) is enabled, you will see an additional menu item in each tile's three-dot **Tile actions** menu, **Data History Playback**.
**Data History Playback** produces a time-based animation of the tile's query, displaying the changes in data for that query over time.
**Data History Playback** is available for tiles that contain data from an [Explore](https://docs.cloud.google.com/looker/docs/creating-and-editing-explores.md.txt#explores_are_the_starting_point_for_exploration) that contains a [time field](https://docs.cloud.google.com/looker/docs/reference/param-dimension-filter-parameter-types.md.txt#time), even if the time field is not present in the query the tile is based on. If a tile is based on an Explore that contain no time fields, **Data History Playback** is unavailable and disabled in the three-dot **Tile actions** menu. **Data History Playback** is also unavailable for merged results tiles.
If the feature is available for a tile, once you select **Data History Playback** from the tile's menu, a window appears that shows the tile visualization for the data at the beginning of the data history timeframe. Viewers can pause, fast forward, or rewind the animation at any point. The window contains the following playback options:

1. **Time Field**: This drop-down menu contains options for all the time fields available in the visualization's Explore. The menu defaults to the first time field present in the view.
2. **View by**: This field determines the timeframe for the playback. The drop-down menu provides options for adjusting the timeframe, through either preset options or a custom date range. Looker displays a message if the selected timeframe gives too little data for playback. To address this, increase the timeframe to enable playback. Looker also displays a message if the selected timeframe does not contain any data for the query. To address this, change the timeframe to a range that contains data to enable the playback.
3. Playback player controls: Use the controls at the bottom left to play, pause, rewind, or fast-forward the playback.
4. Playback timeline: The playback timeline at the bottom of the window indicates the animation's current location within the playback timeframe. Click locations along the timeline to jump to those frames wihin the playback. Hovering over points along the timeline displays the [tooltip](https://docs.cloud.google.com/looker/docs/viewing-dashboards.md.txt#drilling_into_data_points) for each data point with more details about the data.
5. Playback speed: Select the **1x** option from the playback speed drop-down menu to play the animation at regular speed. Select the **2x** option from the playback speed drop-down menu to play the animation at double speed.
> [!CAUTION]
> **Caution:** Using **Data History Playback** on tiles that visualize very large numbers of data points may impact instance performance.
### Tile time zone
If your Looker admin has enabled [**User Specific Time Zones**](https://docs.cloud.google.com/looker/docs/using-time-zone-settings.md.txt#user_specific_time_zones) and your [dashboard time zone](https://docs.cloud.google.com/looker/docs/viewing-dashboards.md.txt#temporarily_changing_the_dashboard_time_zone) is set to **Each tile's timezone** , you may see a globe icon in the upper right corner of a tile. This indicates that the tile has a different time zone than the default dashboard time zone and that the tile is not in your default time zone, which is set in your [account settings](https://docs.cloud.google.com/looker/docs/user-account.md.txt#profile_section). Hover over the globe icon to see the time zone that the tile is using.

To see the default dashboard time zone, view the [three-dot dashboard menu](https://docs.cloud.google.com/looker/docs/viewing-dashboards.md.txt#three-dot_dashboard_menu). The default dashboard time zone appears under the **Each tile's time zone** text.
### Zooming on Cartesian charts
You may be able to zoom in on dashboard tiles that contain [Cartesian charts](https://docs.cloud.google.com/looker/docs/visualization-types.md.txt#cartesian_charts) (column, bar, scatterplot, line, area, waterfall, or boxplot charts).
To zoom, drag to highlight an area within the visualization that you want to zoom on. In the following tile, the shaded rectangle is the area that will be zoomed on:

After you highlight the area, the tile refreshes with the zoom area expanded to the full tile size. While zoomed in, you can pan the zoomed area horizontally by holding down the Shift key and dragging the visualization right or left.

A **Reset zoom** button appears near the top right of the tile. Click the button to reset the tile to its original appearance.
Zoom areas cannot be saved on a dashboard and will be reset when the viewer closes or navigates away from the dashboard.
If a tile's visualization has the [**Allow Zoom** option](https://docs.cloud.google.com/looker/docs/scatter-options.md.txt#y-allow_zoom) on the **Y** menu disabled, you cannot zoom into smaller portions of the y-axis; you can zoom only into smaller portions of the x-axis. When you highlight an area to zoom, the entire y-axis will be included as shown in the following tile:

If a tile's visualization has the [**Allow Zoom** option](https://docs.cloud.google.com/looker/docs/scatter-options.md.txt#x-allow_zoom) on the **X** menu disabled, you cannot zoom in on the visualization at all.
### Drilling into data points
You can hover over some regions or points in a tile's visualization to reveal a tooltip that displays more details about the data.

To go deeper, click on a region or data point. Depending on the underlying data, a drill overlay may open automatically, allowing you to drill down into that data point. (In table visualizations, data points that you can drill into show a dotted underscore when you hover over them.) For example, consider a tile displaying an **Orders** measure grouped by a **Status** dimension in a table visualization.

If you click on the **Orders** measure value in the row where **Status** has a value of `pending`, a drill overlay appears that gives you information about all the orders that are pending. The overlay also displays any filters applied, either from the original tile query or as a result of your click.

You can sort the drill overlay by a single column. Click on a column's header and the data table will sort in that column's ascending order. An upward pointing chevron appears at the right of the column to indicate the sort. Click the column header again to change the sort to descending order. The chevron on the right of the column will switch to downward pointing. Sorting by multiple columns is not available.
Click **Explore** at the top of the overlay to navigate to an [Explore page](https://docs.cloud.google.com/looker/docs/creating-and-editing-explores.md.txt) that contains this data, where you can explore the data more.
Click **Download** in the top right to [download](https://docs.cloud.google.com/looker/docs/downloading.md.txt) the data in the drill overlay.
Depending on the underlying data and the permissions given to you by your Looker admin, you may also be able to drill down further directly in the drill overlay. Drillable data points show dotted underscores when you hover over them. Click on the data point to drill further or open a drill menu with your drilling options, depending on the underlying data.
### Drill menu
Depending on the underlying data and the permissions given to you by your Looker admin, clicking on a data point in a tile may open the drill menu, which gives you options to drill into the data in various ways.
For example, consider a tile with an **Order Count** measure, grouped by a **Clothing type** dimension and pivoted on an **Order Created date** dimension. Say that you want to know more about sweater orders in July. You click on the sweaters bar in the July stack, and Looker displays a drill menu for sweater orders in July.

If you click **Show All \** under **Explore** in the drill menu, a [drill overlay](https://docs.cloud.google.com/looker/docs/viewing-dashboards.md.txt#drilling_into_data_points) appears that gives you information about all the sweater orders in July.
If you click one of the entries under one of the **Drill into...** headings, you can view the data in various ways.
You can use the options under **Drill into \** to drill into different timeframes for the month of July. A drill overlay will appear, showing all clothing orders organized by the timeframe you chose. For example, you could choose to drill in further **by Created Week**.

You can also drill into sweater orders by clicking **by Item Name** under **Drill into Sweaters**. A drill overlay will appear, showing orders for each individual sweater style broken out by month.

If a LookML developer has set up [visual drilling](https://docs.cloud.google.com/looker/docs/reference/param-field-link.md.txt#example:_using_link_to_customize_drill_visualizations) for the data you are drilling into, you may see a visualization instead of a data table when you choose a drill menu option. Switch between the visualization and the data table by clicking the **Visualization** and **Table** buttons at the top of the drill window:

In some instances, you must use right-click to open the drill menu:
- When you view [KPI (Single Value) visualizations](https://docs.cloud.google.com/looker/docs/kpi-single-value-options.md.txt) and [single value (legacy) visualizations](https://docs.cloud.google.com/looker/docs/single-value-options.md.txt)
- When you click certain data points in [table visualizations](https://docs.cloud.google.com/looker/docs/table-options.md.txt)
- When [cross-filtering](https://docs.cloud.google.com/looker/docs/cross-filtering-dashboards.md.txt#enabling_cross-filtering_for_individual_dashboards_(beta)) is enabled on a dashboard
### Links
If your Looker developers have added clickable [links](https://docs.cloud.google.com/looker/docs/reference/param-field-link.md.txt) to your data, these links will appear in the drill menu under a **Links** heading. In [table visualizations](https://docs.cloud.google.com/looker/docs/table-options.md.txt), the presence of a link is indicated by an ellipsis that follows the data in a field.

In the preceding example, clicking the **Google Search** option takes you to the Google Search results for the keyword "tops \& tees".
### Data actions
Your Looker developers may have added [data actions](https://docs.cloud.google.com/looker/docs/reference/param-field-action.md.txt) to the dimensions or measures in your data. With data actions, you can perform tasks with other tools directly from Looker, such as sending an email or setting values in other applications. These data actions appear in the drill menu under an **Actions** heading.

In the preceding example, the **Telephone** field has a Twilio action. When you click the phone number and select the Twilio action, a pop-up form prompts you to enter a message. Then Twilio sends that message to the phone number.
Not all data actions require a pop-up form. In that case, the action is triggered as soon as a user clicks on it. See the [`action`](https://docs.cloud.google.com/looker/docs/reference/param-field-action.md.txt#using_a_data_action_without_a_form) documentation page for more information.
## Temporarily changing the dashboard time zone
The time zone applied to your dashboard can affect the results shown, because of slight differences in the exact hours used for time-based data. If you are interested in the data as it applies to a different region, you might want to change the time zone of your dashboard to reflect that region.
If your Looker admin has enabled [**User Specific Time Zones**](https://docs.cloud.google.com/looker/docs/using-time-zone-settings.md.txt#user_specific_time_zones), you can view the dashboard time zone in the [three-dot dashboard menu](https://docs.cloud.google.com/looker/docs/viewing-dashboards.md.txt#three-dot_dashboard_menu). To temporarily change the time zone with which all tiles run their queries, click on the time zone in the menu to open a **Dashboard time zone** window where you can make adjustments.
You can choose one of the following options:
- Choose **Each tile's time zone** to run all tiles in the time zone in which they were saved.
- Choose **Viewer time zone** to run all tiles in the time zone selected in your [account settings](https://docs.cloud.google.com/looker/docs/user-account.md.txt#profile_section).
- Choose any of the time zones listed in the drop-down to run all tiles in that time zone.
Once you select your time zone, click **Update** in the dashboard time zone window; the dashboard will update for the new time zone.
Once you navigate away from the dashboard, the dashboard will return to its [default time zone setting](https://docs.cloud.google.com/looker/docs/viewing-dashboards.md.txt#three-dot_dashboard_menu).
## Temporarily changing filter values on dashboards
> [!IMPORTANT]
> **Important:** If you view a [dashboard with tabs](https://docs.cloud.google.com/looker/docs/tabbed-dashboards.md.txt), a filter will only display on a tab if it is applied to at least one tile on that tab.
Looker dashboards can have one or more [filters](https://docs.cloud.google.com/looker/docs/filters-user-defined-dashboards.md.txt) that affect one or more tiles. Filters appear at the top of the dashboard (if a **More** button appears at the top of your dashboard, click it to see all filters). You can format dashboard filters using a variety of [controls](https://docs.cloud.google.com/looker/docs/filters-user-defined-dashboards.md.txt#dashboard_(beta)_filter_controls) that you can interact with in different ways.
You can temporarily change dashboard filter values to see how the data changes by clicking on the different options or selections shown in the filter. You won't affect anyone else's filter results by changing the filter values temporarily using this method.
> [!NOTE]
> **Note:** If you have temporarily changed the filter values on a dashboard that you want to [add to one or more boards](https://docs.cloud.google.com/looker/docs/presenting-content.md.txt#adding_with_the_add_to_boards_icon), you can turn on the **Include custom filter values** toggle to add that dashboard with the custom filter values applied.
For example, many dashboards have a filter that specifies a timeframe to include. Consider a filter that specifies a **Created Date** of the **Last 7 Days**.

To change its timeframe, click on the filter to display a drop-down menu of preset range options.

Click **More** to see additional options.

Select the **Custom** tab to set any date range you want.

Once you have edited the filter as you like, click the **Update** button to see how the filter value changes will affect your data.
If you change a filter value and any tiles don't update, the filter may not apply to those tiles. To adjust which tiles a filter applies to, you must [edit the filter](https://docs.cloud.google.com/looker/docs/filters-user-defined-dashboards.md.txt#editing_dashboard_(beta)_filters).
> [!NOTE]
> **Note:** When you enter a filter value for a text dimension, Looker preserves any leading or trailing spaces. For example, a filter that contains the text " pants" would *not* match values that did not contain the leading space, such as "pants and leggings". However, the filter *would* match any values that contained the space before the word *pants* , such as "parachute pants".
>
>
>
>
>
> If you copy and paste a value into a text filter, however, leading and trailing spaces are trimmed as part of the copy and paste process.
Alternatively, you may want to make changes to filters that affect what other people see, such as:
- Changing default filter values
- Changing the format of the filter
- Adding or removing filters
In that case, you must select **Edit dashboard** from the three-dot dashboard menu, [edit the dashboard filter itself](https://docs.cloud.google.com/looker/docs/filters-user-defined-dashboards.md.txt#editing_dashboard_(beta)_filters), and then save the dashboard with your edits. Everyone who has access to the dashboard will see the updated version you saved.
## Changing filters on visualization tiles
Dashboards can also include [filters on visualization tiles](https://docs.cloud.google.com/looker/docs/filters-user-defined-dashboards.md.txt#filters-on-visualization-tiles), which are placed directly on individual visualization tiles rather than in the top filter bar.
When filters are configured on a tile, they appear in a filter bar directly at the top of the visualization tile. You can temporarily change these filter values to update the tile's data:
- **Tile-specific scope**: Changing a visualization-level filter value affects only the specific tile where the filter is placed.
- **Override behavior** : If a visualization tile has a filter on the same field as a dashboard-level filter, the visualization filter value overrides the dashboard filter value for that tile. For more details on filter precedence, see [Dashboard filter override behavior](https://docs.cloud.google.com/looker/docs/filters-user-defined-dashboards.md.txt#dashboard_filter_override_behavior).
- **Horizontal scrolling**: If a tile has multiple filters that exceed the width of the tile, a horizontal scroll bar appears at the top of the tile. You can scroll horizontally to view and interact with additional filters.
- **Sharing filtered states**: When you change visualization filter values, your selections are reflected in the dashboard URL, allowing you to copy and share the link with the custom filter values applied.
## Resetting filter values
> [!IMPORTANT]
> **Important:** If you view a [dashboard with tabs](https://docs.cloud.google.com/looker/docs/tabbed-dashboards.md.txt), a filter will only display on a tab if it is applied to at least one tile on that tab.
To reset all filters to their default values, select **Reset filters** from the [three-dot dashboard menu](https://docs.cloud.google.com/looker/docs/viewing-dashboards.md.txt#three-dot_dashboard_menu). **Reset filters** resets both dashboard-level filters and visualization-level filters to their default values and clears any [cross-filters](https://docs.cloud.google.com/looker/docs/viewing-dashboards.md.txt#creating_cross-filters_on_dashboards) that appear on the dashboard.
If a filter value is [required](https://docs.cloud.google.com/looker/docs/filters-user-defined-dashboards.md.txt#requiring_a_filter_value), selecting **Reset filters** clears the data from any tiles linked to that filter. The data reappears when a value is selected for that filter.
Filters must be present on the dashboard for the **Reset filters** option to be visible.
## Creating cross-filters on dashboards
If cross-filtering is turned on for a dashboard, you can create cross-filters on dashboards by clicking data points within the dashboard; the rest of the dashboard will then be filtered by those data points. To learn more about cross-filtering, see the [Cross-filtering dashboards](https://docs.cloud.google.com/looker/docs/cross-filtering-dashboards.md.txt) documentation page.
## Updating data on dashboards
Looker dashboards aren't static snapshots of data from a specific time. Dashboards pull data from your live database, and you can update the data on a dashboard at any point. Additionally, if you make edits to a dashboard's filters, you need to update the dashboard to apply those edits.
If the data for all tiles on the dashboard has been refreshed from the database at roughly the same time, the top right of your dashboard shows how recently the data was updated.

If data has been refreshed from the database at different times for different tiles, you can see when each tile was last refreshed in [the tile's three-dot menu](https://docs.cloud.google.com/looker/docs/viewing-dashboards.md.txt#dashboard_(beta)_tiles).
If you want to manually update the data on a dashboard, you have several options:
1. Click the circular reload data icon . In most cases, this is the best option for updating all your dashboard's data. This method will apply any changes that are made to dashboard filters; and, depending on the [cache settings](https://docs.cloud.google.com/looker/docs/caching-and-datagroups.md.txt#how_long_is_data_stored_in_the_cache?) for your data, this updates the dashboard with any changed data in the cache or refreshes the data for each tile from the database.
2. Select **Clear cache and refresh** from the three-dot menu in the upper right of the dashboard. This method refreshes the data for all tiles on the dashboard from the database and resets the data cached for the dashboard.

> [!CAUTION]
> **Caution:** Using the dashboard-level **Clear cache and refresh** option on a dashboard that contains many tiles, or tiles built on very large queries or Looks, can cause a strain on your database.
3. If you want to refresh the data of only a few tiles on your dashboard, it may be faster and less load on your database to use the **Clear cache \& refresh** option in the three-dot [**Tile actions** menu](https://docs.cloud.google.com/looker/docs/viewing-dashboards.md.txt#dashboard_(beta)_tiles) of each tile, which refreshes the data for individual tiles from the database and resets their cached data.

## Copying dashboards
If you have [**Manage Access, Edit** access](https://docs.cloud.google.com/looker/docs/organizing-spaces.md.txt#folder_access_levels) to the folder in which a dashboard is located, you will see the **Copy dashboard** option in the dashboard's [three-dot menu](https://docs.cloud.google.com/looker/docs/viewing-dashboards.md.txt#three-dot_dashboard_menu). Selecting this option lets you make a copy of the dashboard and place it into any other folder for which you have **Manage Access, Edit** access.
If the dashboard you are copying contains [Look-linked tiles](https://docs.cloud.google.com/looker/docs/creating-user-defined-dashboards.md.txt#look-linked_tiles), the Looks those tiles are based on will also be copied and placed in the destination folder.
## Getting a dashboard's link
Selecting the **Get link** option from the dashboard's [three-dot menu](https://docs.cloud.google.com/looker/docs/viewing-dashboards.md.txt#three-dot_dashboard_menu) reveals a dialog that contains a link to the dashboard, which can be copied and shared.
By default, the **Include current filter values in URL** switch is enabled, and the link contains the URL parameters for the filter values as they appear on the dashboard. This means that if you have [temporarily changed](https://docs.cloud.google.com/looker/docs/viewing-dashboards.md.txt#temporarily_changing_filter_values_on_dashboards) the filter values away from the default values, the link displays the dashboard with the changed filter values. If you have not temporarily changed any filter values, the link displays the dashboard with default filter values. The link also displays any [cross-filters](https://docs.cloud.google.com/looker/docs/cross-filtering-dashboards.md.txt) that are applied to the dashboard, if cross-filtering is enabled.
You can also view the dashboard slug by selecting **Get link** . The slug is a randomly chosen short string that takes the place of the content ID value in a URL. For example, in this dashboard URL, `https://docserver.cloud.looker.com/dashboards/CQ1fu99Z9Y1ggq2wcHDfMm`, the string `CQ1fu99Z9Y1ggq2wcHDfMm` is the slug.
If you disable the **Include current filter values in URL** switch, the dialog contains a shorter link, which displays the dashboard with default filter values and no cross-filters applied.
To view the dashboard, anyone with the link must have access to the Looker instance on which the dashboard is saved, as well as access to the [dashboard](https://docs.cloud.google.com/looker/docs/organizing-spaces.md.txt#viewing_and_managing_access_for_a_folder) and [models](https://docs.cloud.google.com/looker/docs/admin-panel-users-roles.md.txt#model_sets) that the tiles are based on.
> [!NOTE]
> **Note:** If a [dashboard has tabs](https://docs.cloud.google.com/looker/docs/tabbed-dashboards.md.txt#get-links), you can get and share the link for a specific dashboard tab by clicking the tab and copying the browser URL.
## Getting the LookML from a dashboard
If you have the [`see_lookml`](https://docs.cloud.google.com/looker/docs/admin-panel-users-roles.md.txt#see_lookml) permission, the dashboard menu displays an option to **Get LookML**.
To get the [dashboard LookML](https://docs.cloud.google.com/looker/docs/viewing-dashboards.md.txt#getting_dashboard_lookml_from_a_dashboard_(beta)) or [aggregate table LookML](https://docs.cloud.google.com/looker/docs/viewing-dashboards.md.txt#getting_aggregate_table_lookml_from_a_dashboard_(beta)) for a dashboard, select **Get LookML** from the dashboard's three-dot menu, and then choose the **Dashboard** tab or the **Aggregate Tables** tab, respectively.
### Getting dashboard LookML from a dashboard
To get the dashboard LookML for a dashboard, select the **Dashboard** tab in the **Get LookML** window.

You can then select **Copy to Clipboard** to copy the dashboard LookML and use it to [create a LookML dashboard](https://docs.cloud.google.com/looker/docs/building-lookml-dashboards.md.txt#creating_a_lookml_copy_of_a_user-defined_dashboard).
### Getting aggregate table LookML from a dashboard
To get the aggregate table LookML for your dashboard tiles, select the **Aggregate Tables** tab in the **Get LookML** window.

Aggregate table LookML is used to [define aggregate tables](https://docs.cloud.google.com/looker/docs/reference/param-explore-aggregate-table.md.txt), which make use of Looker's [aggregate awareness](https://docs.cloud.google.com/looker/docs/aggregate_awareness.md.txt) logic to optimize the number of queries made on large database tables. This can improve query and dashboard performance.
To learn more about how to use the aggregate table LookML that is generated through the **Get LookML** option, see the [`aggregate_table`](https://docs.cloud.google.com/looker/docs/reference/param-explore-aggregate-table.md.txt#getting_aggregate_table_lookml_from_a_dashboard) parameter documentation page.
## Viewing the LookML for a LookML dashboard
If you have the [`see_lookml`](https://docs.cloud.google.com/looker/docs/admin-panel-users-roles.md.txt#see_lookml) permission, you can go to the LookML for a LookML dashboard by selecting the **Go to LookML** option from the dashboard menu.
When you select **Go to LookML**, Looker navigates to the dashboard file in which the LookML dashboard is defined.
## Adding dashboards to boards
You can add dashboards to boards in several ways:
- [Adding the dashboard to a board from a board](https://docs.cloud.google.com/looker/docs/presenting-content.md.txt#adding_from_a_board)
- [Adding the dashboard to a board from a folder](https://docs.cloud.google.com/looker/docs/presenting-content.md.txt#adding_from_a_folder)
- [Adding the dashboard to a board from a dashboard](https://docs.cloud.google.com/looker/docs/presenting-content.md.txt#pinning_from_a_look_or_dashboard)
- [Adding with the **Add to boards** icon on a dashboard](https://docs.cloud.google.com/looker/docs/presenting-content.md.txt#adding_with_the_add_to_boards_icon)
## Downloading a dashboard
To learn about downloading data from your dashboard or from one of its tiles, visit the [Downloading content](https://docs.cloud.google.com/looker/docs/downloading.md.txt#downloading_data_from_a_dashboard) documentation page.
## Getting an embed URL for a dashboard
To generate and copy either a [private embed URL](https://docs.cloud.google.com/looker/docs/private-embedding.md.txt) or a [signed embed URL](https://docs.cloud.google.com/looker/docs/get-signed-embed-url.md.txt) to embed your dashboard, select **Get embed URL** from the [three-dot dashboard menu](https://docs.cloud.google.com/looker/docs/viewing-dashboards.md.txt#three-dot_dashboard_menu).
Once you've generated and copied an embed URL, you can paste the embed URL into a new browser window or tab to preview the embedded dashboard. You can also use the private URL to [embed the dashboard in an iframe](https://docs.cloud.google.com/looker/docs/private-embedding.md.txt#embedding_a_dashboard).
## Certifying a Dashboard
If [content certification](https://docs.cloud.google.com/looker/docs/content-certification.md.txt) is enabled on your instance, users with the proper permission can certify a dashboard by selecting **Certify** from the dashboard's three-dot dashboard menu. If the dashboard has already been certified, select **Remove certification** to revoke the dashboard certification.
## Keyboard shortcuts you can use when viewing dashboards
To see the keyboard shortcuts you can use when viewing dashboards, visit the [Keyboard shortcuts in Looker](https://docs.cloud.google.com/looker/docs/keyboard-shortcuts.md.txt#shortcuts_when_viewing_dashboards) documentation page.