
Tutorial ini menunjukkan cara menangani sesi di Cloud Run.
Banyak aplikasi memerlukan penanganan sesi untuk autentikasi dan preferensi pengguna.
Paket Gorilla Web Toolkit
sessions dilengkapi dengan penerapan berbasis sistem file untuk menjalankan fungsi ini. Namun, penerapan ini tidak cocok untuk aplikasi yang dapat ditayangkan
dari beberapa instance, karena sesi yang direkam dalam satu instance
mungkin berbeda dengan instance lainnya. Paket
gorilla/sessions
juga dilengkapi dengan penerapan berbasis cookie. Namun, penerapan ini
memerlukan enkripsi cookie dan penyimpanan seluruh sesi di klien, bukan
hanya ID sesi, yang mungkin terlalu besar untuk beberapa aplikasi.
Tujuan
- Tulis aplikasi.
- Jalankan aplikasi secara lokal.
- Deploy aplikasi di Cloud Run.
Biaya
Di dokumen ini, Anda akan menggunakan komponen Google Cloudyang dapat ditagih berikut:
Untuk membuat perkiraan biaya berdasarkan proyeksi penggunaan Anda, gunakan kalkulator harga.
Setelah menyelesaikan tugas yang dijelaskan dalam dokumen ini, Anda dapat menghindari penagihan berkelanjutan dengan menghapus resource yang Anda buat. Untuk mengetahui informasi selengkapnya, baca bagian Pembersihan.
Sebelum memulai
- Sign in to your Google Cloud account. If you're new to Google Cloud, create an account to evaluate how our products perform in real-world scenarios. New customers also get $300 in free credits to run, test, and deploy workloads.
-
In the Google Cloud console, on the project selector page, select or create a Google Cloud project.
Roles required to select or create a project
- Select a project: Selecting a project doesn't require a specific IAM role—you can select any project that you've been granted a role on.
-
Create a project: To create a project, you need the Project Creator role
(
roles/resourcemanager.projectCreator), which contains theresourcemanager.projects.createpermission. Learn how to grant roles.
-
Verify that billing is enabled for your Google Cloud project.
-
Enable the Firestore API.
Roles required to enable APIs
To enable APIs, you need the Service Usage Admin IAM role (
roles/serviceusage.serviceUsageAdmin), which contains theserviceusage.services.enablepermission. Learn how to grant roles. -
Di konsol Google Cloud , buka aplikasi di Cloud Shell.
Cloud Shell menyediakan akses command line ke resource cloud Anda langsung dari browser. Buka Cloud Shell di browser Anda dan klik Proceed untuk mendownload kode contoh dan beralih ke direktori aplikasi.
-
Di Cloud Shell, konfigurasikan gcloud CLI untuk menggunakan project Google Cloud baru Anda:
# Configure gcloud for your project
gcloud config set project YOUR_PROJECT_ID
Menyiapkan project
Di jendela terminal, clone repositori aplikasi contoh ke komputer lokal Anda:
git clone https://github.com/GoogleCloudPlatform/golang-samples.git
Ubah ke direktori yang berisi kode contoh:
cd golang-samples/getting-started/sessions
Memahami aplikasi web
Aplikasi ini menampilkan sapaan dalam berbagai bahasa untuk setiap pengguna. Pengguna yang kembali selalu disapa dalam bahasa yang sama.
Sebelum aplikasi dapat menyimpan preferensi untuk pengguna, Anda memerlukan cara untuk menyimpan informasi tentang pengguna saat ini dalam sesi. Aplikasi contoh ini menggunakan Firestore untuk menyimpan data sesi.
Aplikasi dimulai dengan mengimpor dependensi, menentukan jenis
appuntuk menyimpansessions.Storedan template HTML, serta menentukan daftar ucapan.Selanjutnya, aplikasi menentukan fungsi
main, yang membuat instanceappbaru, mendaftarkan handler indeks, dan memulai server HTTP. FungsinewAppmembuat instanceappdengan menyetel nilaiprojectIDdancollectionIDserta mengurai template HTML.Handler indeks mendapatkan sesi pengguna, dan membuat sesi jika diperlukan. Sesi baru diberi bahasa acak dan jumlah penayangan 0. Kemudian, jumlah penayangan bertambah satu, sesi disimpan, dan template HTML menulis respons.
Diagram berikut mengilustrasikan cara Firestore menangani sesi untuk aplikasi Cloud Run.

Menghapus sesi
Anda dapat menghapus data sesi di konsolGoogle Cloud atau menerapkan strategi penghapusan otomatis. Jika Anda menggunakan solusi penyimpanan untuk sesi seperti Memcache atau Redis, sesi yang sudah berakhir akan otomatis dihapus.
Berjalan secara lokal
Di jendela terminal, buat biner
sessions:go buildMulai server HTTP:
./sessionsLihat aplikasi di browser web Anda:
Cloud Shell
Di toolbar Cloud Shell, klik Web preview
 dan pilih Preview on port 8080.
Komputer lokal
Di browser Anda, buka
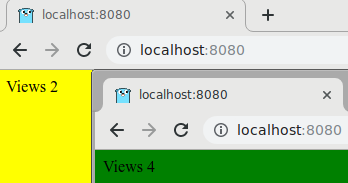
http://localhost:8080Anda akan melihat salah satu dari lima ucapan: “Hello World”, “Hallo Welt”, "Hola mundo”, “Salut le Monde”, atau “Ciao Mondo”. Bahasa akan berubah jika Anda membuka halaman di browser lain atau dalam mode samaran. Anda dapat melihat dan mengedit data sesi di konsolGoogle Cloud .

Untuk menghentikan server HTTP, di jendela terminal, tekan
Control+C.
Men-deploy dan menjalankan di Cloud Run
Anda dapat menggunakan Cloud Run untuk membangun dan men-deploy aplikasi yang berjalan dengan andal meskipun menangani beban berat dan dengan jumlah data yang besar.
- Men-deploy aplikasi di Cloud Run:
    gcloud run deploy firestore-tutorial-go

    --source . --allow-unauthenticated --port=8080

--set-env-vars=GOOGLE_CLOUD_PROJECT=YOUR_PROJECT_ID - Buka URL yang ditampilkan oleh perintah ini untuk melihat cara data sesi tetap ada di antara pemuatan halaman.
Ucapan kini dikirim oleh server web yang berjalan di instance Cloud Run.
Men-debug aplikasi
Jika Anda tidak dapat terhubung ke aplikasi Cloud Run, periksa hal berikut:
- Periksa apakah perintah deployment
gcloudberhasil diselesaikan dan tidak menampilkan error apa pun. Jika ada error (misalnya,message=Build failed), perbaiki, lalu coba men-deploy aplikasi Cloud Run lagi. Di konsol Google Cloud , buka halaman Logs Explorer.
Di menu drop-down Recently selected resources, klik Cloud Run Application, lalu klik All module_id. Anda akan melihat daftar permintaan dari saat Anda mengunjungi aplikasi. Jika Anda tidak melihat daftar permintaan, pastikan Anda memilih Semua module_id dari daftar drop-down. Jika Anda melihat pesan error yang dicetak ke konsol Google Cloud , periksa apakah kode aplikasi Anda cocok dengan kode di bagian tentang penulisan aplikasi web.
Pastikan Firestore API diaktifkan.
Pembersihan
Menghapus project
- In the Google Cloud console, go to the Manage resources page.
- In the project list, select the project that you want to delete, and then click Delete.
- In the dialog, type the project ID, and then click Shut down to delete the project.
Menghapus instance Cloud Run
- In the Google Cloud console, go to the Versions page for App Engine.
- Select the checkbox for the non-default app version that you want to delete.
- Untuk menghapus versi aplikasi, klik Hapus.
Langkah berikutnya
- Coba tutorial Cloud Run functions.
- Pelajari Cloud Run lebih lanjut.
- Coba Cloud Run, yang memungkinkan Anda menjalankan container stateless di lingkungan yang terkelola sepenuhnya atau di cluster Google Kubernetes Engine milik Anda sendiri.