> [!NOTE]
> **Public preview:** The federated search is in public preview. This feature is subject to the "Pre-GA Offerings Terms" in the [General Service Terms section of the Service Specific Terms](https://cloud.google.com/terms/service-terms). Pre-GA features are available "as is" and might have limited support. For more information, see the [launch stage descriptions](https://cloud.google.com/products#product-launch-stages).
This page describes how to set up authentication and permissions before creating the Zendesk data store.
## Enable token access
To allow the Zendesk to authenticate and interact with your Zendesk instance, you must enable token access. Follow these steps to enable token access:
1. Navigate to your Zendesk instance and sign in with an administrator account.
2. In the navigation menu, expand **Apps and integrations** , then select **API configuration** from **APIs**.
3. Select the **Allow API token access** checkbox.
4. Click **Save**.
## Set up authentication and permissions
For secure integration using OAuth 2.0, you must register your application in Zendesk to obtain the necessary client ID and client secret.
### Create an OAuth client and obtain authentication credentials
To create an OAuth client in Zendesk and obtain the authentication credentials, follow these steps:
1. Navigate to your Zendesk instance and sign in with an administrator account.
> [!NOTE]
> **Note:** Your instance URL is in the format `https://your-subdomain.zendesk.com`.
2. Click the Zendesk Products icon, then select **Admin Center**.
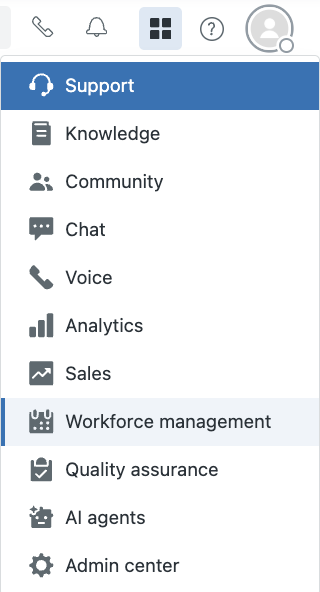 Zendesk Admin Center
3. In the navigation menu, expand **Apps and integrations** and select **OAuth clients** from **APIs**.
4. Click **Add OAuth client**.
5. Enter the following client details:
- **Name:** Enter a descriptive name for your application.
- Optional: **Description:** Enter a short description.
- Optional: **Company:** Enter your company name.
- Optional: **Logo:** Provide a logo, which appears on the consent screen.
- **Unique Identifier (Client ID):** Provide a unique name for your client. You can edit the initial suggestion, but it must be unique.
- **Client kind:** Select **Public** for applications running in a browser or on a mobile device, or **Confidential** for applications running on secure servers.
- **Redirect URLs (Required):** Enter `https://vertexaisearch.cloud.google.com/oauth-redirect`. This is the URL Zendesk redirects to after authorization, receiving the authorization code.
6. Click **Save** to obtain the client secret.
- **Client ID:** The value from the **Unique Identifier** field.
- **Client secret:** A new **Secret** field appears. Copy this secret and save it immediately in a secure location. For security, the full secret is shown only once. If you lose it, you must regenerate it.
:secret: Generated client credentials
7. Click **Save** again to finalize the changes.
### Set up permissions
To set up the required permissions, follow these steps:
1. Navigate to your Zendesk instance and sign in with an administrator account.
2. Click the Zendesk Products icon, then select **Admin Center**.
3. In the navigation menu, expand **Apps and integrations** and select **OAuth Clients** from **Connections**.
4. Click **Add client**.
5. Enter the following client details:
- **Name**: Enter a descriptive name. This cannot be changed.
- **OAuth grant type** : Select **Authorization code**.
- **Client ID** : Enter the client ID obtained from the [Create an OAuth client in Zendesk](https://docs.cloud.google.com/gemini/enterprise/docs/connectors/zendesk/zendesk-config.md.txt#create-oauth-client) section.
- **Client Secret** : Enter the client secret value obtained from the [Create an OAuth client in Zendesk](https://docs.cloud.google.com/gemini/enterprise/docs/connectors/zendesk/zendesk-config.md.txt#create-oauth-client) section.
- **Authorize URL** : The authorization endpoint is typically in the format `https://your-subdomain.zendesk.com/oauth/authorize`. Replace `your-subdomain` with your actual Zendesk subdomain.
- **Token URL** : The token endpoint is typically in the format `https://your-subdomain.zendesk.com/oauth/token`. Replace `your-subdomain` with your actual Zendesk subdomain. 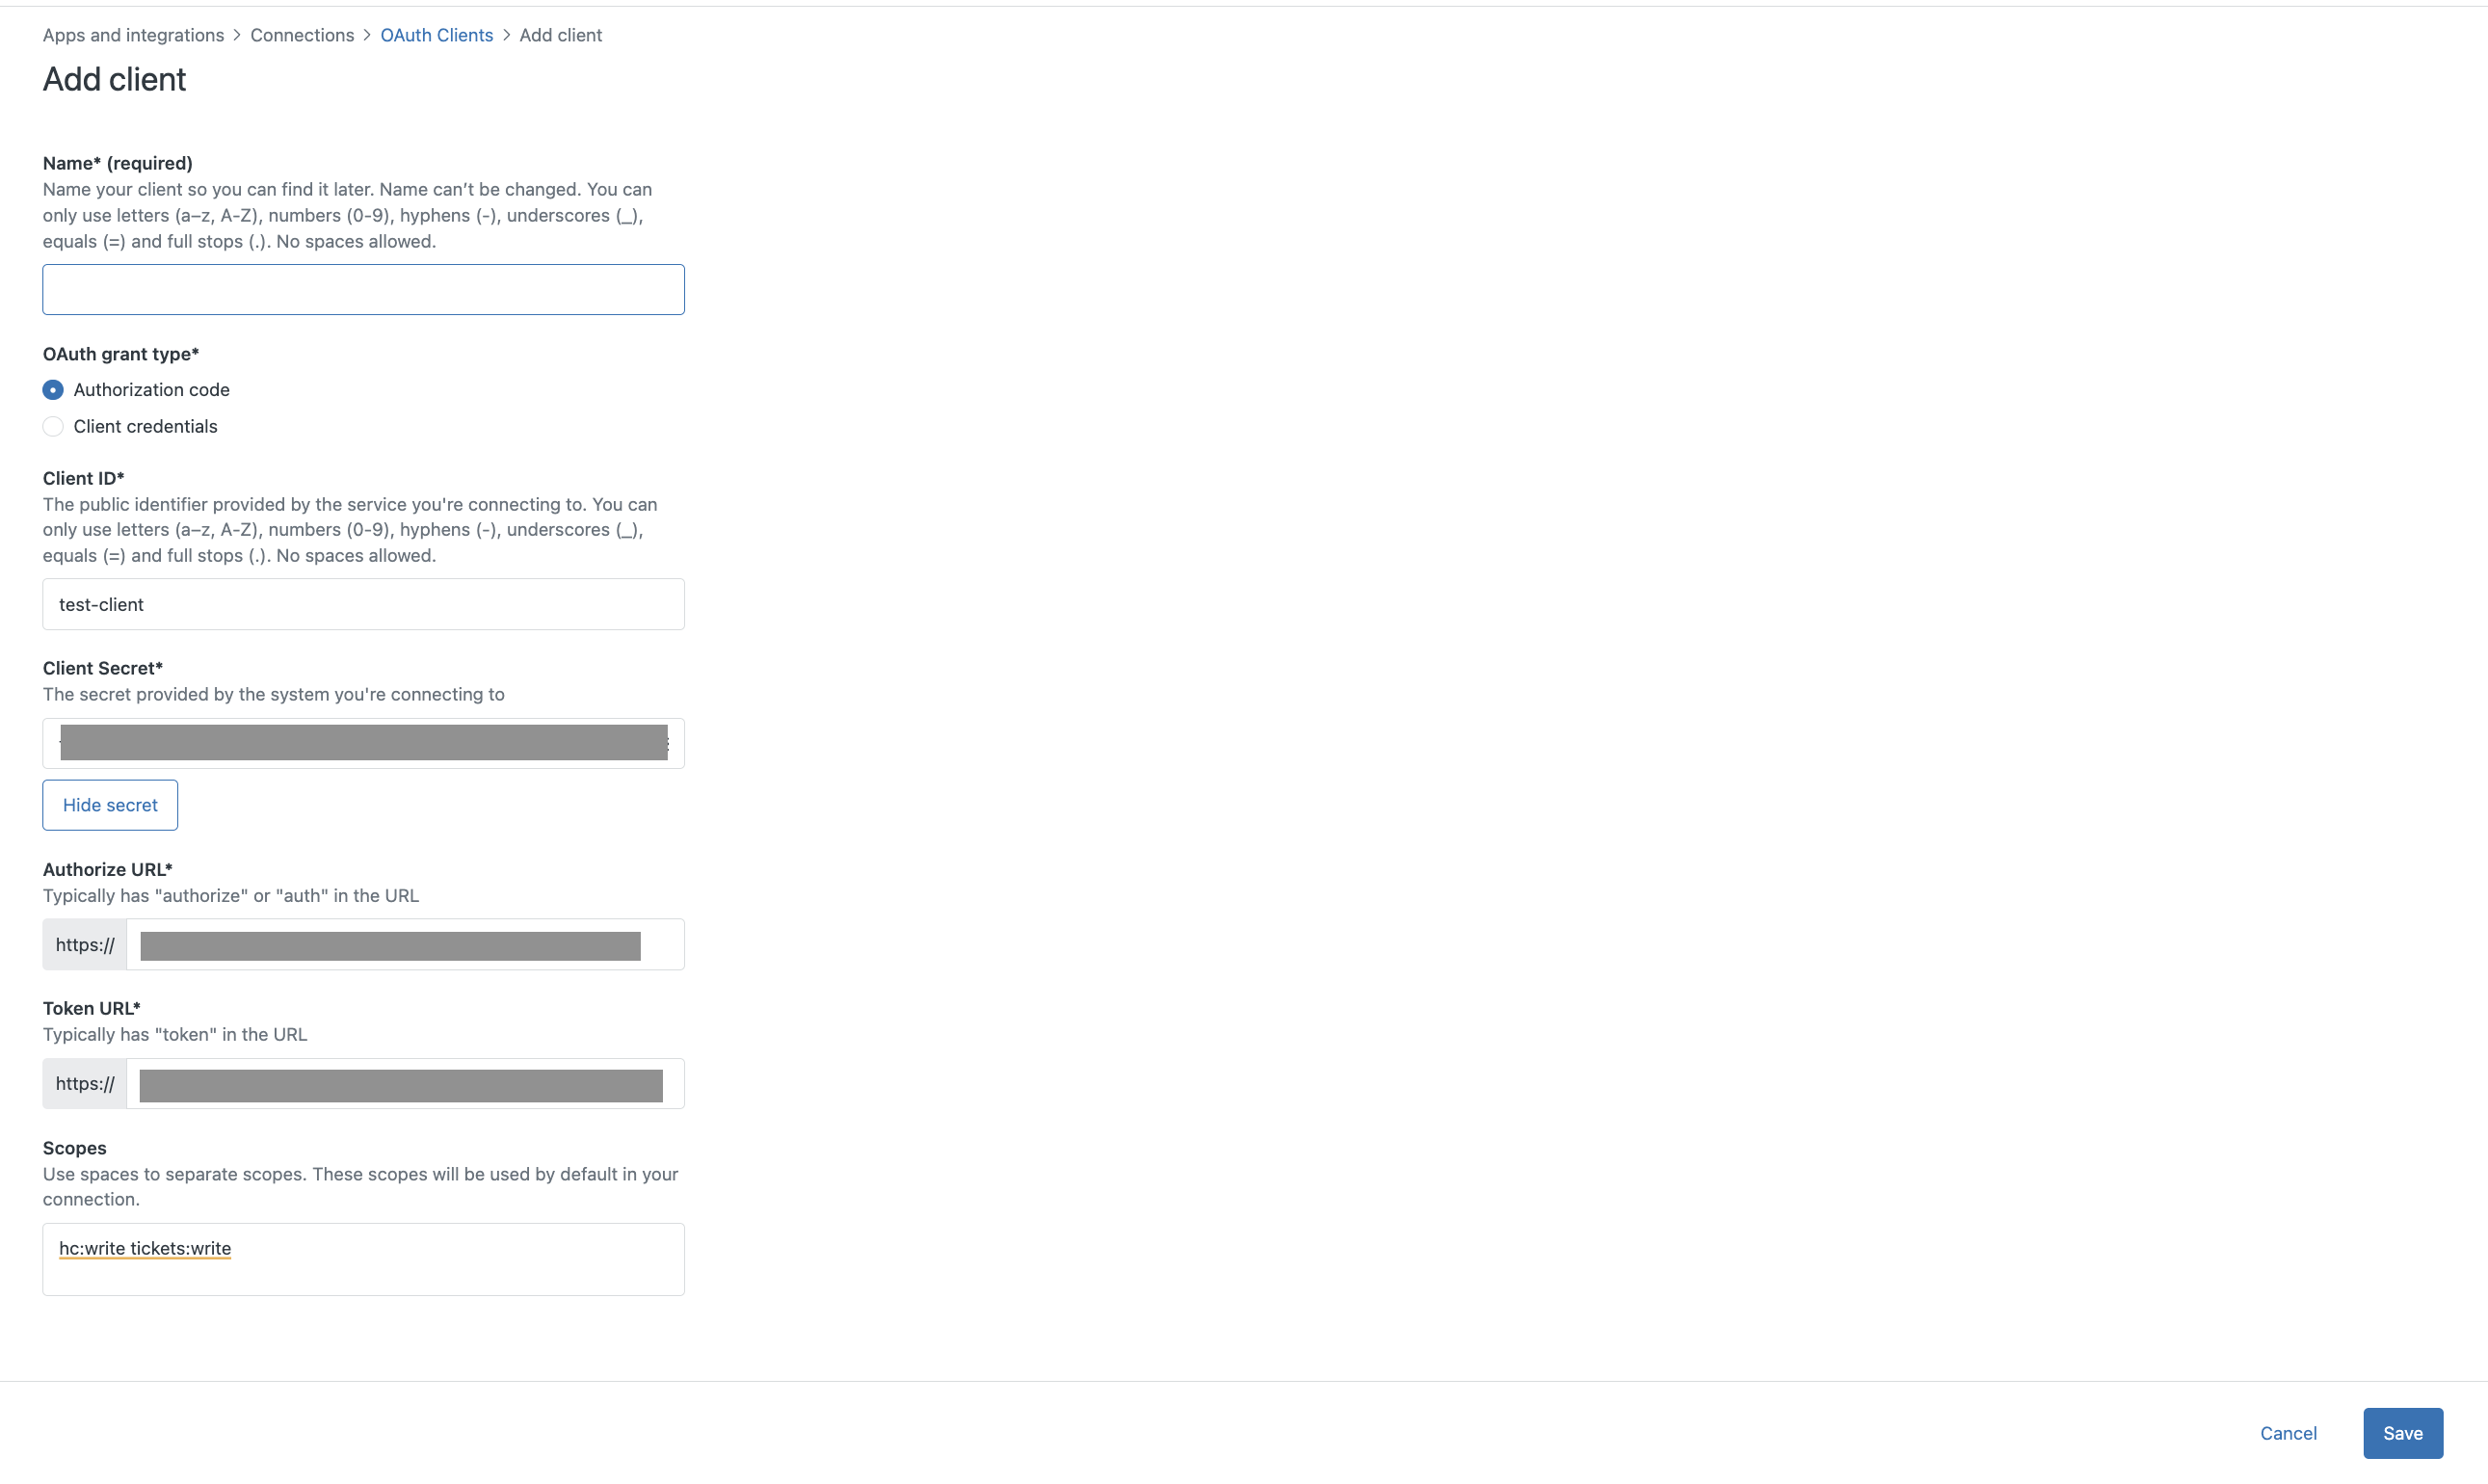 Add scopes
- **Scopes**: Enter the following scopes separated by spaces, based on your connection mode:
| Connection mode | Scope | Purpose |
|---|---|---|
| **Federated search** | `read`, `users:read` | Required to perform searching across Zendesk data. |
| **Federated search and actions** | `tickets:write` | Required to perform search, create, update, and merge tickets. |
| **Federated search and actions** | `hc:write` | Required to create category and update post. |
> [!NOTE]
> **Note:** Before you configure these details, ensure that [token access](https://docs.cloud.google.com/gemini/enterprise/docs/connectors/zendesk/zendesk-config.md.txt#enable-token-access) is enabled in Zendesk.
6. Click **Save**.