
本教程介绍了如何在 Compute Engine 上配置和部署预建 Docker 容器中运行的示例 API 和 Extensible Service Proxy V2 (ESPv2)。
示例代码的 REST API 是使用 OpenAPI 规范描述的。本教程还介绍如何创建 API 密钥,以及在向 API 发送请求时如何使用此密钥。
如需大致了解 Cloud Endpoints,请参阅关于 Endpoints 和 Endpoints 架构。
目标
学习本教程时,请使用以下概要任务列表。为确保请求成功发送到 API,您必须完成所有任务。- 设置 Google Cloud 项目。请参阅准备工作。
- 创建 Compute Engine 虚拟机实例。请参阅创建 Compute Engine 实例。
- 下载示例代码。请参阅获取示例代码。
- 配置
openapi.yaml文件,该文件用于配置 Endpoints。请参阅配置 Endpoints。 - 部署 Endpoints 配置以创建 Endpoints 服务。请参阅部署 Endpoints 配置。
- 在 Compute Engine 虚拟机上部署 API 和 ESPv2。请参阅部署 API 后端。
- 使用 IP 地址向 API 发送请求。请参阅使用 IP 地址发送请求。
- 为示例 API 配置 DNS 记录。请参阅为 Endpoints 配置 DNS。
- 使用完全限定的域名向 API 发送请求。请参阅使用 FQDN 发送请求。
- 跟踪 API 活动。请参阅跟踪 API 活动。
- 避免您的 Google Cloud 账号产生费用。请参阅清理。
费用
在本文档中,您将使用 Google Cloud的以下收费组件:
如需根据您的预计使用情况来估算费用,请使用价格计算器。
完成本文档中描述的任务后,您可以通过删除所创建的资源来避免继续计费。如需了解详情,请参阅清理。
准备工作
- 登录您的 Google Cloud 账号。如果您是 Google Cloud新手,请 创建一个账号来评估我们的产品在实际场景中的表现。新客户还可获享 $300 赠金,用于运行、测试和部署工作负载。
-
In the Google Cloud console, on the project selector page, select or create a Google Cloud project.
Roles required to select or create a project
- Select a project: Selecting a project doesn't require a specific IAM role—you can select any project that you've been granted a role on.
-
Create a project: To create a project, you need the Project Creator role
(
roles/resourcemanager.projectCreator), which contains theresourcemanager.projects.createpermission. Learn how to grant roles.
-
Verify that billing is enabled for your Google Cloud project.
-
In the Google Cloud console, on the project selector page, select or create a Google Cloud project.
Roles required to select or create a project
- Select a project: Selecting a project doesn't require a specific IAM role—you can select any project that you've been granted a role on.
-
Create a project: To create a project, you need the Project Creator role
(
roles/resourcemanager.projectCreator), which contains theresourcemanager.projects.createpermission. Learn how to grant roles.
-
Verify that billing is enabled for your Google Cloud project.
- 记下项目 ID,您稍后需要用到。
-
您需要一个应用来向示例 API 发送请求。
- Linux 和 macOS 用户:本教程提供了一个使用
curl的示例,它通常已预装在您的操作系统中。如果您没有curl,可以从curl版本和下载页面中下载。 - Windows 用户:本教程提供了一个使用
Invoke-WebRequest的示例,PowerShell 3.0 及更高版本支持该命令。
- Linux 和 macOS 用户:本教程提供了一个使用
- 下载 Google Cloud CLI。
-
更新 gcloud CLI 并安装 Endpoints 组件。
gcloud components update
-
确保 Google Cloud CLI (
gcloud) 有权访问您在 Google Cloud上的数据和服务:gcloud auth login
- 将默认项目设置为您的项目 ID。
gcloud config set project YOUR_PROJECT_ID
将 YOUR_PROJECT_ID 替换为项目 ID。如果您有其他 Google Cloud 项目,并且想使用
gcloud来管理这些项目,请参阅管理 gcloud CLI 配置。
完成本文档中描述的任务后,您可以通过删除所创建的资源来避免继续计费。如需了解详情,请参阅清理。
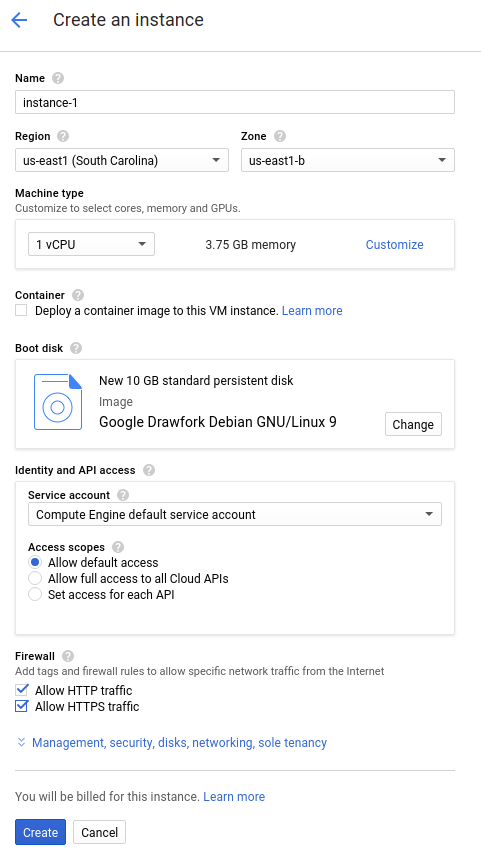
创建 Compute Engine 实例
- 在 Google Cloud 控制台中,前往创建实例页面。
- 点击选择。
- 在防火墙部分,选择允许 HTTP 流量和允许 HTTPS 流量。
- 如需创建虚拟机,请点击创建。
- 确保您可以连接到虚拟机实例。
- 在虚拟机实例列表中,点击要连接的实例所在行中的 SSH。
- 现在,您可以使用终端在 Debian 实例上运行 Linux 命令。
- 输入
exit以断开与该实例的连接。
- 请记下实例名称、地区和外部 IP 地址,因为您稍后需要用到。
要创建 Compute Engine 实例,请执行以下操作:
实例启动需要您稍等片刻。准备就绪后,该实例将在虚拟机实例页面上列出,并显示绿色状态图标。
下载示例代码
将示例代码下载到本地机器。
如需克隆或下载示例 API,请执行以下操作:
- 将示例应用代码库克隆到本地机器:
git clone https://github.com/GoogleCloudPlatform/java-docs-samples
或者,下载该示例的 zip 文件并将其解压缩。
- 转到包含示例代码的目录:
cd java-docs-samples/endpoints/getting-started
如需克隆或下载示例 API,请执行以下操作:
- 将示例应用代码库克隆到本地机器:
git clone https://github.com/GoogleCloudPlatform/python-docs-samples
或者,下载该示例的 zip 文件并将其解压缩。
- 转到包含示例代码的目录:
cd python-docs-samples/endpoints/getting-started
如需克隆或下载示例 API,请执行以下操作:
- 确保已设置
GOPATH环境变量。 - 将示例应用代码库克隆到本地机器:
go get -d github.com/GoogleCloudPlatform/golang-samples/endpoints/getting-started
- 转到包含示例代码的目录:
cd $GOPATH/src/github.com/GoogleCloudPlatform/golang-samples/endpoints/getting-started
如需克隆或下载示例 API,请执行以下操作:
- 将示例应用代码库克隆到本地机器:
git clone https://github.com/GoogleCloudPlatform/php-docs-samples
或者,下载该示例的 zip 文件并将其解压缩。
- 转到包含示例代码的目录:
cd php-docs-samples/endpoints/getting-started
如需克隆或下载示例 API,请执行以下操作:
- 将示例应用代码库克隆到本地机器:
git clone https://github.com/GoogleCloudPlatform/ruby-docs-samples
或者,下载该示例的 zip 文件并将其解压缩。
- 转到包含示例代码的目录:
cd ruby-docs-samples/endpoints/getting-started
如需克隆或下载示例 API,请执行以下操作:
- 将示例应用代码库克隆到本地机器:
git clone https://github.com/GoogleCloudPlatform/nodejs-docs-samples
或者,下载该示例的 zip 文件并将其解压缩。
- 切换到包含示例代码的目录:
cd nodejs-docs-samples/endpoints/getting-started
配置 Endpoints
您必须拥有基于 OpenAPI 2.0 或 OpenAPI 3.x 的 OpenAPI 文档,该文档描述了您的应用的表面和各项身份验证要求。如需了解详情,请参阅支持的 OpenAPI 版本。
您还需要添加包含各应用的网址的 Google 专属字段,以便 ESPv2 获得调用应用所需的信息。如果您刚接触 OpenAPI,请参阅 OpenAPI 概览了解详情。
OpenAPI 2.0
如需使用 OpenAPI 2.0 规范配置 Endpoints,您可以使用下载的示例代码的 endpoints/getting-started 目录中提供的 openapi.yaml 文件。
OpenAPI 2.0 规范的内容应类似于以下内容:
swagger: "2.0"
info:
  description: "A simple Google Cloud Endpoints API example."
  title: "Endpoints Example"
  version: "1.0.0"

host: "echo-api.endpoints.YOUR_PROJECT_ID.cloud.goog"

consumes:
  - "application/json"
produces:
  - "application/json"

schemes:
# Uncomment the next line if you configure SSL for this API.
# - "https"
  - "http"

paths:
  /echo:
    post:
      description: "Echo back a given message."
      operationId: "echo"
      produces:
        - "application/json"
      responses:
        200:
          description: "Echo"
          schema:
            $ref: "#/definitions/echoMessage"
      parameters:
        -
          description: "Message to echo"
          in: body
          name: message
          required: true
          schema:
            $ref: "#/definitions/echoMessage"
      security:
        - api_key: []
  /auth/info/googlejwt:
    get:
      description: "Returns the requests' authentication information."
      operationId: "auth_info_google_jwt"
      produces:
        - "application/json"
      responses:
        200:
          description: "Authenication info."
          schema:
            $ref: "#/definitions/authInfoResponse"
      security:
        - api_key: []
          google_jwt: []
  /auth/info/googleidtoken:
    get:
      description: "Returns the requests' authentication information."
      operationId: "authInfoGoogleIdToken"
      produces:
        - "application/json"
      responses:
        200:
          description: "Authentication info."
          schema:
            $ref: "#/definitions/authInfoResponse"
      security:
        - api_key: []
          google_id_token: []

definitions:
  echoMessage:
    type: "object"
    properties:
      message:
        type: "string"
  authInfoResponse:
    properties:
      id:
        type: "string"
      email:
        type: "string"

securityDefinitions:
  # This section configures basic authentication with an API key.
  api_key:
    type: "apiKey"
    name: "key"
    in: "query"

  # This section configures authentication using Google API Service Accounts
  # to sign a json web token. This is mostly used for server-to-server
  # communication.
  google_jwt:
    authorizationUrl: ""
    flow: "implicit"
    type: "oauth2"
    # This must match the 'iss' field in the JWT.
    x-google-issuer: "jwt-client.endpoints.sample.google.com"
    # Update this with your service account's email address.
    x-google-jwks_uri: "https://www.googleapis.com/service_accounts/v1/jwk/YOUR_SERVICE_ACCOUNT_EMAIL"
    # This must match the "aud" field in the JWT. You can add multiple
    # audiences to accept JWTs from multiple clients.
    x-google-audiences: "echo.endpoints.sample.google.com"
  # This section configures authentication using Google OAuth2 ID Tokens.
  # ID Tokens can be obtained using OAuth2 clients, and can be used to access
  # your API on behalf of a particular user.

  google_id_token:
    authorizationUrl: ""
    flow: "implicit"
    type: "oauth2"
    x-google-issuer: "https://accounts.google.com"
    x-google-jwks_uri: "https://www.googleapis.com/oauth2/v3/certs"
    # Your OAuth2 client's Client ID must be added here. You can add
    # multiple client IDs to accept tokens from multiple clients.
    x-google-audiences: "YOUR_CLIENT_ID"
OpenAPI 3.x
如需使用 OpenAPI 3.x 规范配置 Endpoints,您可以替换下载的示例代码的 endpoints/getting-started 目录中提供的 openapi.yaml 文件的内容:
- 在文本编辑器中打开
openapi.yaml,然后将内容替换为以下内容:openapi: 3.0.4 info: description: "A simple Google Cloud Endpoints API example." title: "Endpoints Example" version: "1.0.0" servers: - url: "http://echo-api.endpoints.YOUR_PROJECT_ID.cloud.goog" x-google-endpoint: {} paths: /echo: post: description: "Echo back a given message." operationId: "echo" requestBody: description: "Message to echo" required: true content: "application/json": schema: $ref: "#/components/schemas/echoMessage" responses: '200': description: "Echo" content: "application/json": schema: $ref: "#/components/schemas/echoMessage" security: - api_key: [] /auth/info/googlejwt: get: description: "Returns the requests' authentication information." operationId: "auth_info_google_jwt" responses: '200': description: "Authentication info." content: "application/json": schema: $ref: "#/components/schemas/authInfoResponse" security: - api_key: [] google_jwt: [] /auth/info/googleidtoken: get: description: "Returns the requests' authentication information." operationId: "authInfoGoogleIdToken" responses: '200': description: "Authentication info." content: "application/json": schema: $ref: "#/components/schemas/authInfoResponse" security: - api_key: [] google_id_token: [] components: schemas: echoMessage: type: "object" properties: message: type: "string" authInfoResponse: properties: id: type: "string" email: type: "string" securitySchemes: api_key: type: "apiKey" name: "key" in: "query" google_jwt: type: "oauth2" flows: implicit: authorizationUrl: "" scopes: {} x-google-auth: issuer: "jwt-client.endpoints.sample.google.com" jwksUri: "https://www.googleapis.com/service_accounts/v1/jwk/YOUR_SERVICE_ACCOUNT_EMAIL" audiences: - "echo.endpoints.sample.google.com" google_id_token: type: "oauth2" flows: implicit: authorizationUrl: "" scopes: {} x-google-auth: issuer: "https://accounts.google.com" jwks_uri: "https://www.googleapis.com/oauth2/v3/certs" audiences: - "YOUR_CLIENT_ID"
- 保存
openapi.yaml的新内容。
本教程使用特定于 Google 的 OpenAPI 规范扩展程序,该扩展程序可让您配置服务名称。指定服务名称的方法取决于您使用的 OpenAPI 规范版本。
OpenAPI 2.0
使用 host 字段指定服务名称:
host: echo-api.endpoints.YOUR_PROJECT_ID.cloud.goog
要配置 Endpoints,请执行以下操作:
- 打开
openapi.yaml文件。 - 在
host字段中,将 YOUR_PROJECT_ID 替换为您的 Google Cloud 项目 ID。 - 保存
openapi.yaml文件。
OpenAPI 3.x
使用 servers 对象中的 url 字段指定服务名称:
servers:
  - url: https://echo-api.endpoints.YOUR_PROJECT_ID.cloud.goog
    x-google-endpoint: {}
要配置 Endpoints,请执行以下操作:
- 打开
openapi.yaml文件。 - 如果您的
openapi.yaml文件包含host字段,请将其移除。 - 添加一个
servers对象,如下所示。 - 在
url字段中,将 YOUR_PROJECT_ID 替换为您的 Google Cloud 项目 ID。 - 保存
openapi.yaml文件。
为了能够使用 IP 地址向示例 API 成功发送请求,您需要完成以下所有配置步骤。在完成这些步骤后,请参阅配置 Endpoints DNS,了解如何将 echo-api.endpoints.YOUR_PROJECT_ID.cloud.goog 配置为完全限定域名 (FQDN)。
部署 Endpoints 配置
如需部署 Endpoints 配置,请使用 gcloud endpoints
services deploy 命令。此命令使用 Service Management 创建一项托管式服务。
要部署 Endpoints 配置,请执行以下操作:
- 确保您位于
openapi.yaml配置文件所在的目录中。 - 上传配置并创建托管式服务:
gcloud endpoints services deploy openapi.yaml
然后,gcloud 命令会调用 Service Management API,以便使用您在 openapi.yaml 文件的 host 或 servers.url 字段中指定的名称创建代管式服务。Service Management 会根据 openapi.yaml 文件中的设置来配置服务。如果您对 openapi.yaml 做出更改,则必须重新部署该文件才能更新 Endpoints 服务。
在创建和配置服务时,Service Management 会向终端输出信息。您尽可忽略有关 openapi.yaml 文件中的路径未要求使用 API 密钥的警告。完成服务配置后,Service Management 将显示如下所示的消息,其中包含服务配置 ID 和服务名称:
Service Configuration [2017-02-13r0] uploaded for service [echo-api.endpoints.example-project-12345.cloud.goog]
在上面的示例中,2017-02-13r0 是服务配置 ID,echo-api.endpoints.example-project-12345.cloud.goog 是 Endpoints 服务。服务配置 ID 由日期戳后跟一个修订版本号组成。如果您在同一天再次部署 openapi.yaml 文件,服务配置 ID 中的修订版本号将递增。您可以在 Google Cloud 控制台中的 Endpoints > 服务页面上查看 Endpoints 服务配置。
如果您收到错误消息,请参阅排查 Endpoints 配置部署问题。
检查所需服务
Endpoints 和 ESP 至少需要启用以下 Google 服务:| 姓名 | 标题 |
|---|---|
servicemanagement.googleapis.com |
Service Management API |
servicecontrol.googleapis.com |
Service Control API |
在大多数情况下,gcloud endpoints services deploy 命令会启用这些必需的服务。但在以下情况下,gcloud 命令会成功完成,但不启用必需的服务:
您使用了 Terraform 之类的第三方应用,但未添加这些服务。
您将 Endpoints 配置部署到已明确停用这些服务的现有Google Cloud 项目。
使用以下命令确认必需服务是否已启用:
gcloud services list
如果您没有看到列出的必需服务,请启用它们:
gcloud services enable servicemanagement.googleapis.com
gcloud services enable servicecontrol.googleapis.com
同时启用 Endpoints 服务:
gcloud services enable ENDPOINTS_SERVICE_NAME
要确定 ENDPOINTS_SERVICE_NAME,您可以执行以下任一操作:
部署 Endpoints 配置后,转到 Cloud 控制台中的 Endpoints 页面。服务名称列下显示了可能的 ENDPOINTS_SERVICE_NAME 列表。
对于 OpenAPI,ENDPOINTS_SERVICE_NAME 是您在 OpenAPI 规范的
host字段中指定的值。对于 gRPC,ENDPOINTS_SERVICE_NAME 是您在 gRPC Endpoints 配置的name字段中指定的值。
如需详细了解 gcloud 命令,请参阅 gcloud 服务。
部署 API 后端
到目前为止,您已将 OpenAPI 文档部署到 Service Management,但尚未部署为 API 后端提供服务的代码。本部分逐步介绍了如何在虚拟机实例上安装 Docker,以及如何在 Docker 容器中运行 API 后端代码和 ESPv2。
检查所需权限
- 在 Google Cloud 控制台中,前往 Compute Engine 实例页面。
- 从列表中选择实例。
- 您可以看到关联的服务账号及其拥有的权限。
向服务账号授予所需权限:
gcloud projects add-iam-policy-binding PROJECT_NAME \
  --member "serviceAccount:SERVICE_ACCOUNT" \
  --role roles/servicemanagement.serviceController
如需了解详情,请参阅什么是角色和权限?
在虚拟机实例上安装 Docker
如需在虚拟机实例上安装 Docker,请执行以下操作:
- 运行以下命令,为项目设置地区:
gcloud config set compute/zone YOUR_INSTANCE_ZONE
将 YOUR_INSTANCE_ZONE 替换为运行实例的地区。
- 使用以下命令连接到实例:
gcloud compute ssh INSTANCE_NAME
将 INSTANCE_NAME 替换为虚拟机实例的名称。
- 如需设置 Docker 代码库,请参阅 Docker 文档。请务必按照与虚拟机实例的版本和架构相对应的步骤进行操作:
- Jessie 或更高版本
- x86_64/amd64
在 Docker 容器中运行 API 和 ESPv2
ESPv2 是一种基于 Envoy 的代理,位于后端代码的前面。它可处理传入的流量,以提供身份验证、API 密钥管理、日志记录和其他 Endpoints API 管理功能。
如需在 Docker 容器中安装和运行示例 API 和 ESPv2,请执行以下操作:
- 自行创建名为
esp_net的容器网络。sudo docker network create --driver bridge esp_net
- 运行为示例 API 提供服务的示例 Echo 服务器:
Java sudo docker run --detach --name=echo --net=esp_net gcr.io/google-samples/echo-java:1.0
Python sudo docker run --detach --name=echo --net=esp_net gcr.io/google-samples/echo-python:1.0
Go sudo docker run --detach --name=echo --net=esp_net gcr.io/google-samples/echo-go:1.0
PHP sudo docker run --detach --name=echo --net=esp_net gcr.io/google-samples/echo-php:1.0
Ruby sudo docker run --detach --name=echo --net=esp_net gcr.io/google-samples/echo-ruby:1.0
NodeJS sudo docker run --detach --name=echo --net=esp_net gcr.io/google-samples/echo-node:1.0
- 运行预封装的公共 ESPv2 Docker 容器。在 ESPv2 启动选项中,将 SERVICE_NAME 替换为您的服务名称。该名称与您在 OpenAPI 文档中配置为主机名的名称相同。
sudo docker run \ --detach \ --name=esp \ --publish=80:9000 \ --net=esp_net \ gcr.io/endpoints-release/endpoints-runtime:2 \ --service=SERVICE_NAME \ --rollout_strategy=managed \ --listener_port=9000 \ --backend=http://echo:8080--rollout_strategy=managed选项可将 ESPv2 配置为使用最新部署的服务配置。如果指定此选项,则 ESPv2 会在您部署新服务配置后的一分钟内检测到更改并自动开始使用该服务配置。建议您指定此选项,而不是提供特定配置 ID 供 ESPv2 使用。如需了解所使用的其他 ESPv2 选项,请参阅 ESPv2 启动选项。
如果您收到错误消息,请参阅排查 Compute Engine 上的 Endpoints 问题。 如需了解详情,请参阅部署 API 后端。
使用 IP 地址发送请求
在 Compute Engine 实例上运行示例 API 和 ESPv2 后,您可以从本地机器向 API 发送请求。
创建 API 密钥并设置环境变量
示例代码需要 API 密钥。为简化请求,请为 API 密钥设置环境变量。
在您用于 API 的同一 Google Cloud 项目中,在 API 凭据页面上创建 API 密钥。如果要在其他 Google Cloud 项目中创建 API 密钥,请参阅在 Google Cloud 项目中启用 API。
- 点击创建凭据,然后选择 API 密钥。
- 将密钥复制到剪贴板。
- 点击关闭。
- 在本地计算机上,粘贴 API 密钥以将其分配给环境变量:
- 在 Linux 或 macOS 中:
export ENDPOINTS_KEY=AIza... - 在 Windows PowerShell 中:
$Env:ENDPOINTS_KEY="AIza..."
- 在 Linux 或 macOS 中:
发送请求
Linux 或 macOS
通过 curl 使用之前设置的 ENDPOINTS_KEY 环境变量发送 HTTP 请求。将 IP_ADDRESS 替换为实例的外部 IP 地址。
curl --request POST \
   --header "content-type:application/json" \
   --data '{"message":"hello world"}' \
   "http://IP_ADDRESS:80/echo?key=${ENDPOINTS_KEY}"
在上面的 curl 中:
--data选项用于指定要发布到 API 的数据。--header选项用于指定数据采用 JSON 格式。
PowerShell
通过 Invoke-WebRequest 使用之前设置的 ENDPOINTS_KEY 环境变量发送 HTTP 请求。将 IP_ADDRESS 替换为实例的外部 IP 地址。
(Invoke-WebRequest -Method POST -Body '{"message": "hello world"}' `
    -Headers @{"content-type"="application/json"} `
    -URI "http://IP_ADDRESS:80/echo?key=$Env:ENDPOINTS_KEY").Content
在上面的示例中,前两行以反引号结束。将示例粘贴到 PowerShell 中时,请确保反引号后面没有空格。 如需了解示例请求中使用的选项,请参阅 Microsoft 文档中的 Invoke-WebRequest。
第三方应用
您可以使用第三方应用(如 Chrome 浏览器扩展程序 Postman)发送请求:
- 选择
POST作为 HTTP 谓词。 - 对于标头,请选择键
content-type和值application/json。 - 对于正文,请输入以下内容:
{"message":"hello world"} -
在网址中,使用实际的 API 密钥,而非环境变量。例如:
http://192.0.2.0:80/echo?key=AIza...
API 会回显您发送的消息,并以如下内容作为响应:
{
  "message": "hello world"
}
如果未成功收到响应,请参阅排查响应错误。
您刚刚在 Endpoints 中部署并测试了一个 API!
为 Endpoints 配置 DNS
<< "endpoints/docs/_shared/_configuring-endpoints-dns.md" >>
使用 FQDN 发送请求
<< "endpoints/docs/_shared/_send-request-fqdn.md" >>
跟踪 API 活动
要跟踪 API 活动,请执行以下操作:
- 在 Endpoints > 服务页面中查看您的 API 的活动图表。
请求可能需要一些时间才能体现在图表中。 - 在“日志浏览器”页面中查看 API 的请求日志。
清理
为避免因本教程中使用的资源导致您的 Google Cloud 账号产生费用,请删除包含这些资源的项目,或者保留项目但删除各个资源。
清理
- 删除 API:
gcloud endpoints services delete SERVICE_NAME
将
SERVICE_NAME替换为服务的名称。 - 在 Google Cloud 控制台中,前往虚拟机实例页面。
- 选中要删除的实例对应的复选框。
- 如需删除实例,请点击更多操作,点击删除,然后按照说明操作。