This document includes troubleshooting information about a VM becoming unresponsive due to kernel panic errors.
## Before you begin
- If you want to log serial port output in Cloud Logging, familiarize yourself with [Cloud Logging](https://docs.cloud.google.com/logging).
- If you haven't already, set up [authentication](https://docs.cloud.google.com/compute/docs/authentication). Authentication verifies your identity for access to Google Cloud services and APIs. To run code or samples from a local development environment, you can authenticate to Compute Engine by selecting one of the following options:
Select the tab for how you plan to use the samples on this page:
### Console
When you use the Google Cloud console to access Google Cloud services and
APIs, you don't need to set up authentication.
### gcloud
1.
[Install](https://docs.cloud.google.com/sdk/docs/install) the Google Cloud CLI.
After installation,
[initialize](https://docs.cloud.google.com/sdk/docs/initializing) the Google Cloud CLI by running the following command:
```bash
gcloud init
```
If you're using an external identity provider (IdP), you must first
[sign in to the gcloud CLI with your federated identity](https://docs.cloud.google.com/iam/docs/workforce-log-in-gcloud).
> [!NOTE]
> **Note:** If you installed the gcloud CLI previously, make sure you have the latest version by running `gcloud components update`.
2. [Set a default region and zone](https://docs.cloud.google.com/compute/docs/gcloud-compute#set_default_zone_and_region_in_your_local_client).
### REST
To use the REST API samples on this page in a local development environment, you use the
credentials you provide to the gcloud CLI.
1. [Install](https://docs.cloud.google.com/sdk/docs/install) the Google Cloud CLI.
2. If you're using an external identity provider (IdP), you must first [sign in to the gcloud CLI with your federated identity](https://docs.cloud.google.com/iam/docs/workforce-log-in-gcloud).
For more information, see
[Authenticate for using REST](https://docs.cloud.google.com/docs/authentication/rest)
in the Google Cloud authentication documentation.
## Kernel panic
A kernel panic can happen when the kernel is unable to load properly `initramfs`
modules, which are required for the guest OS to boot.
Another form of kernel panic can occur in a situation where the kernel doesn't
know how to handle a certain request and protects itself by stopping.
Kernel panic can happen on a Compute Engine VM running RedHat, SUSE, CentOS,
or Ubuntu.
### Common error messages
Below are some of the most common kernel panic events for reference:
```
Kernel panic - not syncing: hung_task: blocked tasks
```
```
Kernel Panic - not syncing: VFS: Unable to mount root fs on unknown-block(0,0)
```
```
Kernel panic - not syncing: NMI: Not continuing
```
```
Kernel panic - not syncing: out of memory. panic_on_oom is selected
```
```
Kernel panic - not syncing: Fatal Machine check
```
### Common causes
The kernel panic error can occur due to multiple reasons. Some of the
common reasons are:
- The entry related to the `initramfs` file that corresponds to the kernel doesn't exist in the `grub.cfg` file.
- The `initramfs` file doesn't get generated in the `/boot` directory during kernel installation.
- The `initramfs` file gets only partially generated or is corrupted.
### Symptoms
When you experience kernel panic on a VM instance, a common symptom is that the
kernel does not allow you to connect to the VM, even when using the serial
console.
You should check the serial console logs to identify the kernel that was loaded
by the guest OS, for example:
```
[ 0.000000] Initializing cgroup subsys cpu
[ 0.000000] Initializing cgroup subsys cpuacct
[ 0.000000] Linux version 3.10.0-1160.95.1.el7.x86_64 (mockbuild@x86-vm-42.build.eng.bos.redhat.com) (gcc version 4.8.5 20150623 (Red Hat 4.8.5-44) (GCC) ) #1 SMP Thu Aug 10 10:46:21 EDT 2023
```
Also check the kernel panic error. This error is normally seen either at the kernel line when the VM starts or at the end of the serial console logs with multiple stack call traces.
The following example shows a kernel panic event due to `initramfs` issues:
```
[ 1.520840] No filesystem could mount root, tried:
[ 1.520840]
[ 1.521964] Kernel panic - not syncing: VFS: Unable to mount root fs on unknown-block(0,0)
[ 1.523495] CPU: 1 PID: 1 Comm: swapper/0 Not tainted 3.10.0-1160.95.1.el7.x86_64 #1
[ 1.524932] Hardware name: Google Google Compute Engine/Google Compute Engine, BIOS Google 10/11/2022
[ 1.526901] Call Trace:
[ 1.527421] dump_stack+0x41/0x60
[ 1.527978] panic+0xe7/0x2ac
[ 1.528578] mount_block_root+0x2be/0x2e6
[ 1.529693] ? do_early_param+0x95/0x95
[ 1.530441] prepare_namespace+0x135/0x16b
[ 1.531237] kernel_init_freeable+0x203/0x22d
[ 1.532081] ? rest_init+0xaa/0xaa
[ 1.532808] kernel_init+0xa/0x103
[ 1.533395] ret_from_fork+0x35/0x40
[ 1.535229] Kernel Offset: 0x23a00000 from 0xffffffff81000000
```
## Resolve the kernel panic error
To resolve the kernel panic error, perform the following steps:
1. Connect to the [serial console](https://docs.cloud.google.com/compute/docs/troubleshooting/troubleshooting-using-serial-console#connectserialconsole)
and log in to the VM from the Google Cloud console.
2. Click **Reset** for VM in the Google Cloud console.
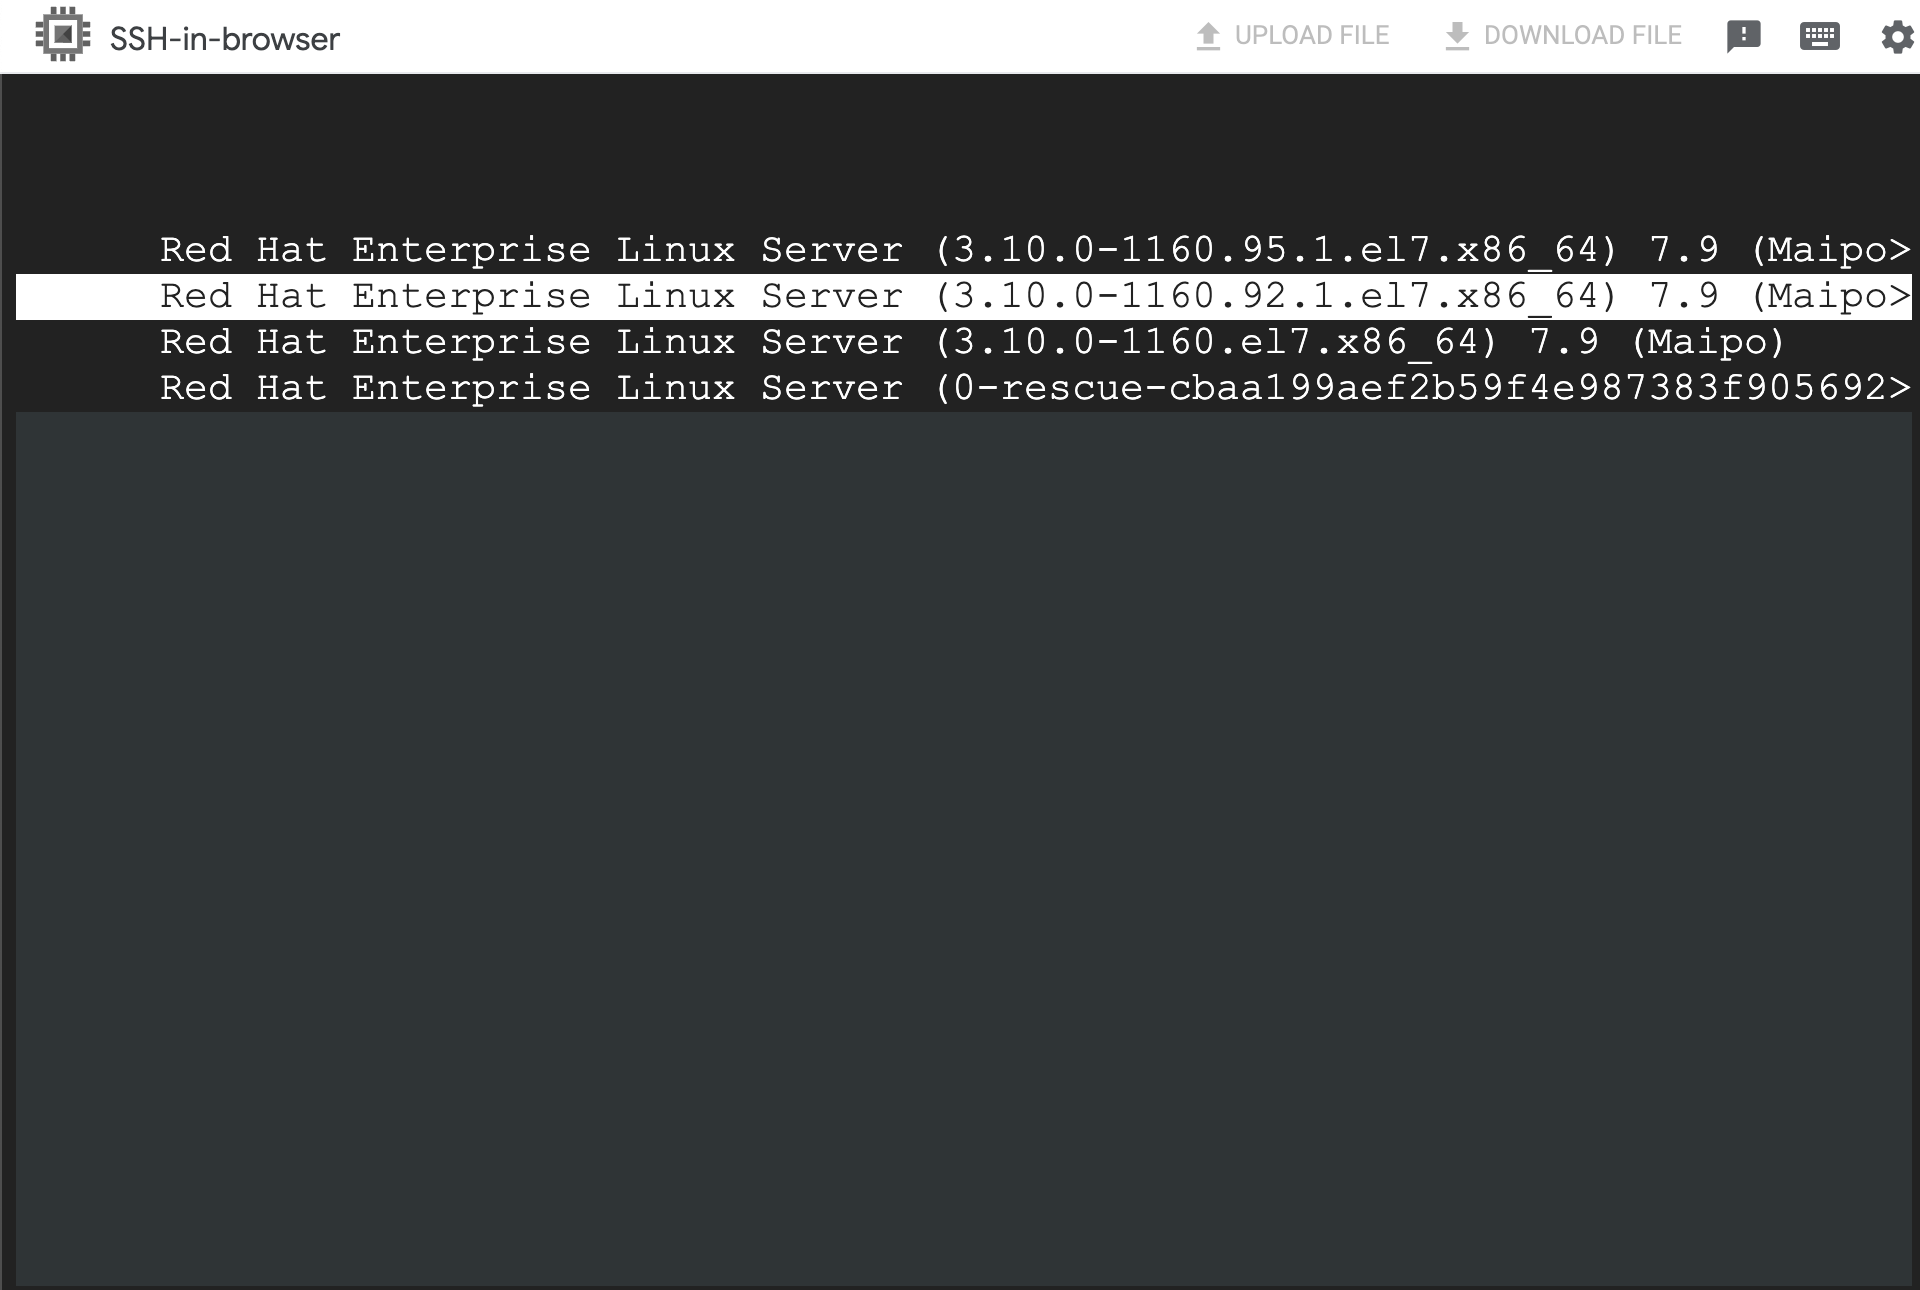
3. After the GRUB splash screen appears, select the previously working
kernel or rescue kernel, and then boot the system. This causes the VM
to start with the selected kernel.
> [!NOTE]
> **Note:** Booting the VM by selecting the previous kernel from the GRUB splash screen doesn't make changes to GRUB configuration file, so this is not a persistent change.
4. When the VM is accessible, you can initiate an SSH connection to the VM.
5. Identify the cause of the issue and take further action accordingly.
For example, if the `initramfs` file is missing or corrupted,
complete the following steps:
1. Generate the `initramfs` file corresponding to original kernel by using
the `dracut` command:
```
dracut -f /boot/initramfs-KERNEL_VERSION.img KERNEL_VERSION
```
Replace `KERNEL_VERSION` with the VM's current
kernel version. For example, `3.10.0-1160.95.1.el7.x86_64`.
2. Update the `grub2.cfg` file using the `grub2-mkconfig` command, for
example:
```
grub2-mkconfig -o /boot/grub2/grub.cfg
```
3. After the `initramfs` file is generated, you can restart the VM without
any errors.