This page provides an overview of Kubernetes development in
Cloud Code.
## Use the Kubernetes Explorer in Cloud Code
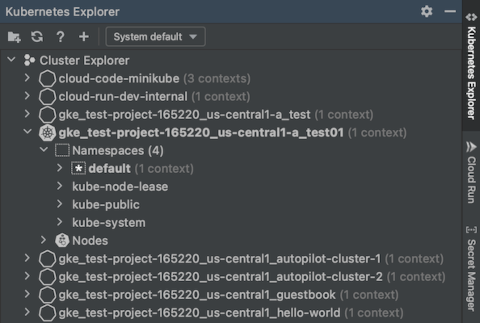
The **Kubernetes** Explorer lets you access information about your
[clusters](https://docs.cloud.google.com/code/docs/intellij/k8s-overview#clusters), nodes, workloads, and more, right from your IDE.
You can also [set a current context](https://docs.cloud.google.com/code/docs/intellij/k8s-overview#clusters), [stream and view logs](https://docs.cloud.google.com/code/docs/intellij/k8s-overview#pods),
[open an interactive terminal](https://docs.cloud.google.com/code/docs/intellij/k8s-overview#launch_a_terminal), and
[look up resource descriptions](https://docs.cloud.google.com/code/docs/intellij/k8s-overview#describe_resources) with the Kubernetes
Explorer.
Cloud Code uses the default kubeconfig file, located under
the `$HOME/.kube` directory on MacOS/Linux or `%USERPROFILE%\.kube` on Windows,
for retrieving Kubernetes resources. You can switch or add new Kubeconfig files
from within the Kubernetes Explorer. Kubeconfig files are YAML files
containing your Kubernetes cluster details, certificate, and secret token for
authenticating to the cluster.
To use a kubeconfig file other than the default kubeconfig, refer to the
[Work with kubeconfig files](https://docs.cloud.google.com/code/docs/intellij/kubeconfigs) guide.
## Access the Kubernetes Explorer
To view and manage your Kubernetes resources, use the Kubernetes Explorer, accessible from the side panel on the right. Alternatively, it can be accessed using **Tools** \> **Cloud Code** \> **Kubernetes** \> **View Cluster Explorer** .
When you start a development or debugging session, the
**Development sessions** section displays the structured logging view.

## Basic actions
The **Kubernetes** Explorer is powered by `kubectl`. As long as you've
configured your `kubectl` config file to access your clusters, you can use the
**Kubernetes** Explorer to add clusters, browse all your available
namespaces, resources, and nodes for your clusters, regardless of them being in
the active or inactive context.
The available general Kubernetes actions, accessible through their icons in the
**Kubernetes** Explorer, are:
-  Create a new Kubernetes application from a sample
-  Refresh the Explorer
-  Open the Cloud Code Kubernetes documentation in a web browser
Additional common Kubernetes debugging actions, accessible through their icons in
the **Kubernetes** Explorer, are:
-  Run the current Run/Debug configuration.
-  Launch the run configuration in debug mode.
-  Stop an active debugging session.
### Copy a resource name
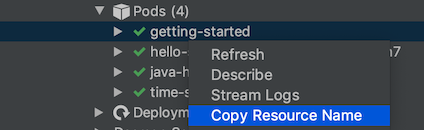
You can copy any Kubernetes resource name to the clipboard (including container
and cluster names). To copy a resource name, right-click on the resource and
choose **Copy resource name**.
### Refresh resources
The **Kubernetes** Explorer watches for changes and automatically
refreshes to reflect updates. To force a refresh of any Kubernetes resource to
fetch its latest information, right-click the resource and choose **Refresh**.

You can also force a refresh of the entire **Kubernetes** Explorer using the **Kubernetes** Explorer's refresh button. 
### Describe resources
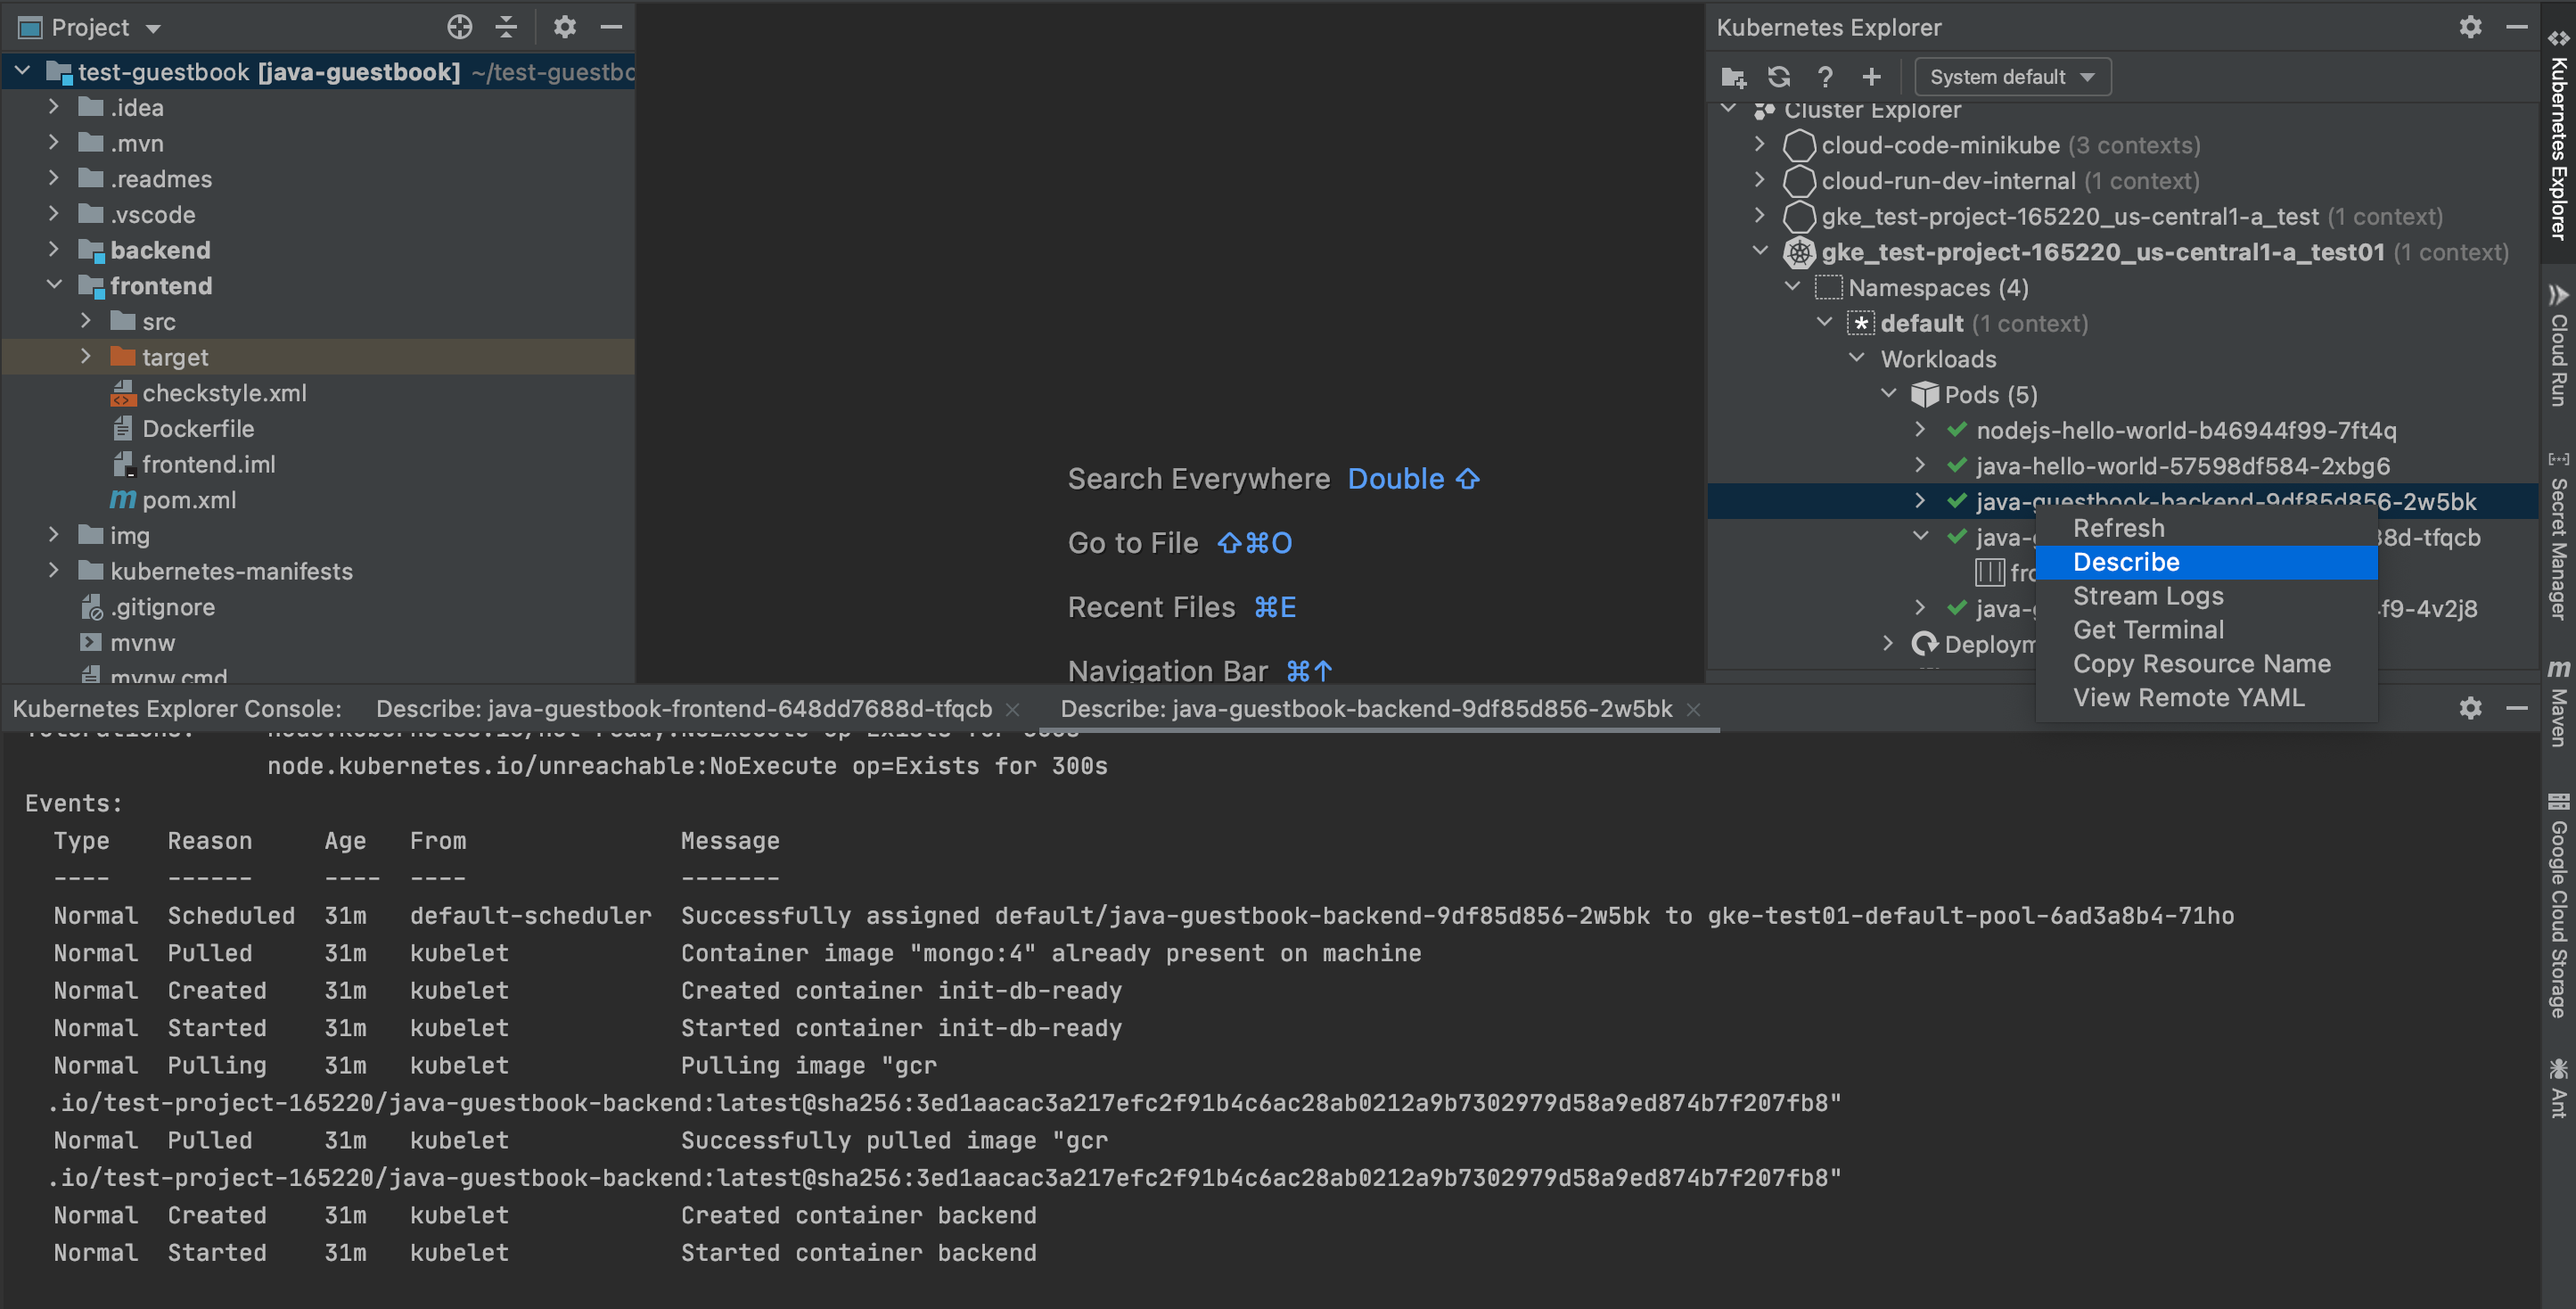
To display the details of any non-cluster resource, right-click the resource, then select **Describe** . The resource information is presented in the Kubernetes Explorer console panel.
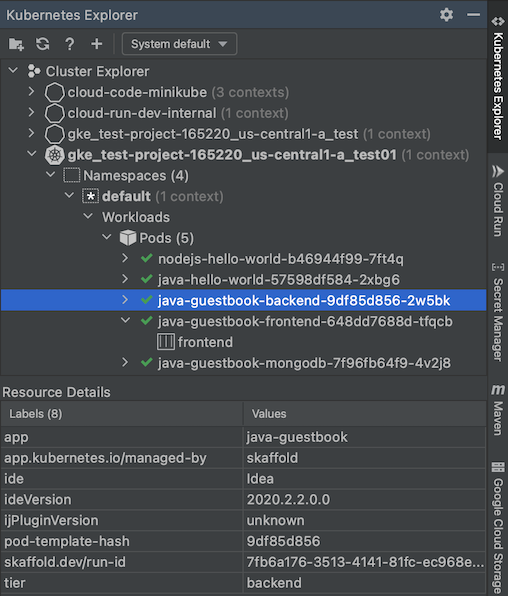
To view resource details, you can also click any resource. If it has
attached metadata, the metadata is available in the Resource Details panel
in the Kubernetes Explorer.
### Skaffold options
- **Skaffold configuration** - selects a `skaffold.yaml` configuration file. Will be automatically detected if you have a `skaffold.yaml` in your project.
- **Deployment profile** - selects a [profile](https://skaffold.dev/docs/how-tos/profiles/) from the available options configured in your `skaffold.yaml` file.
- **Environment variables** - lets you configure additional environment variables to be passed to the deployment process. Skaffold flags can also be configured as environment variables to be used in this field. Refer to the [Skaffold CLI reference documentation](https://skaffold.dev/docs/references/cli/) for a comprehensive list of available Skaffold environment variables.
- **Verbosity** - allows you to set your output verbosity level at `trace`, `debug`, `info`, `warn`, `error`, or `fatal`. The default verbosity level is `warn`.
### Kubernetes options
- **Deployment Context** - represents the Kubernetes context with which your
application is deployed. The default behavior, if a deployment context is
not specified, is deploying to your current system context if one exists.
If you'd rather not deploy to the current context, under the Deployment
section of Run/Debug settings, you can choose to:
- **Deploy locally to a minikube cluster** - starts a Cloud Code-managed minikube cluster to run your app and stops the cluster after deployment stops. If a minikube cluster is already running, Cloud Code uses the existing minikube cluster for deployment.
- **Switch context and deploy to** - changes the current context on your
system to your specified context upon deployment.
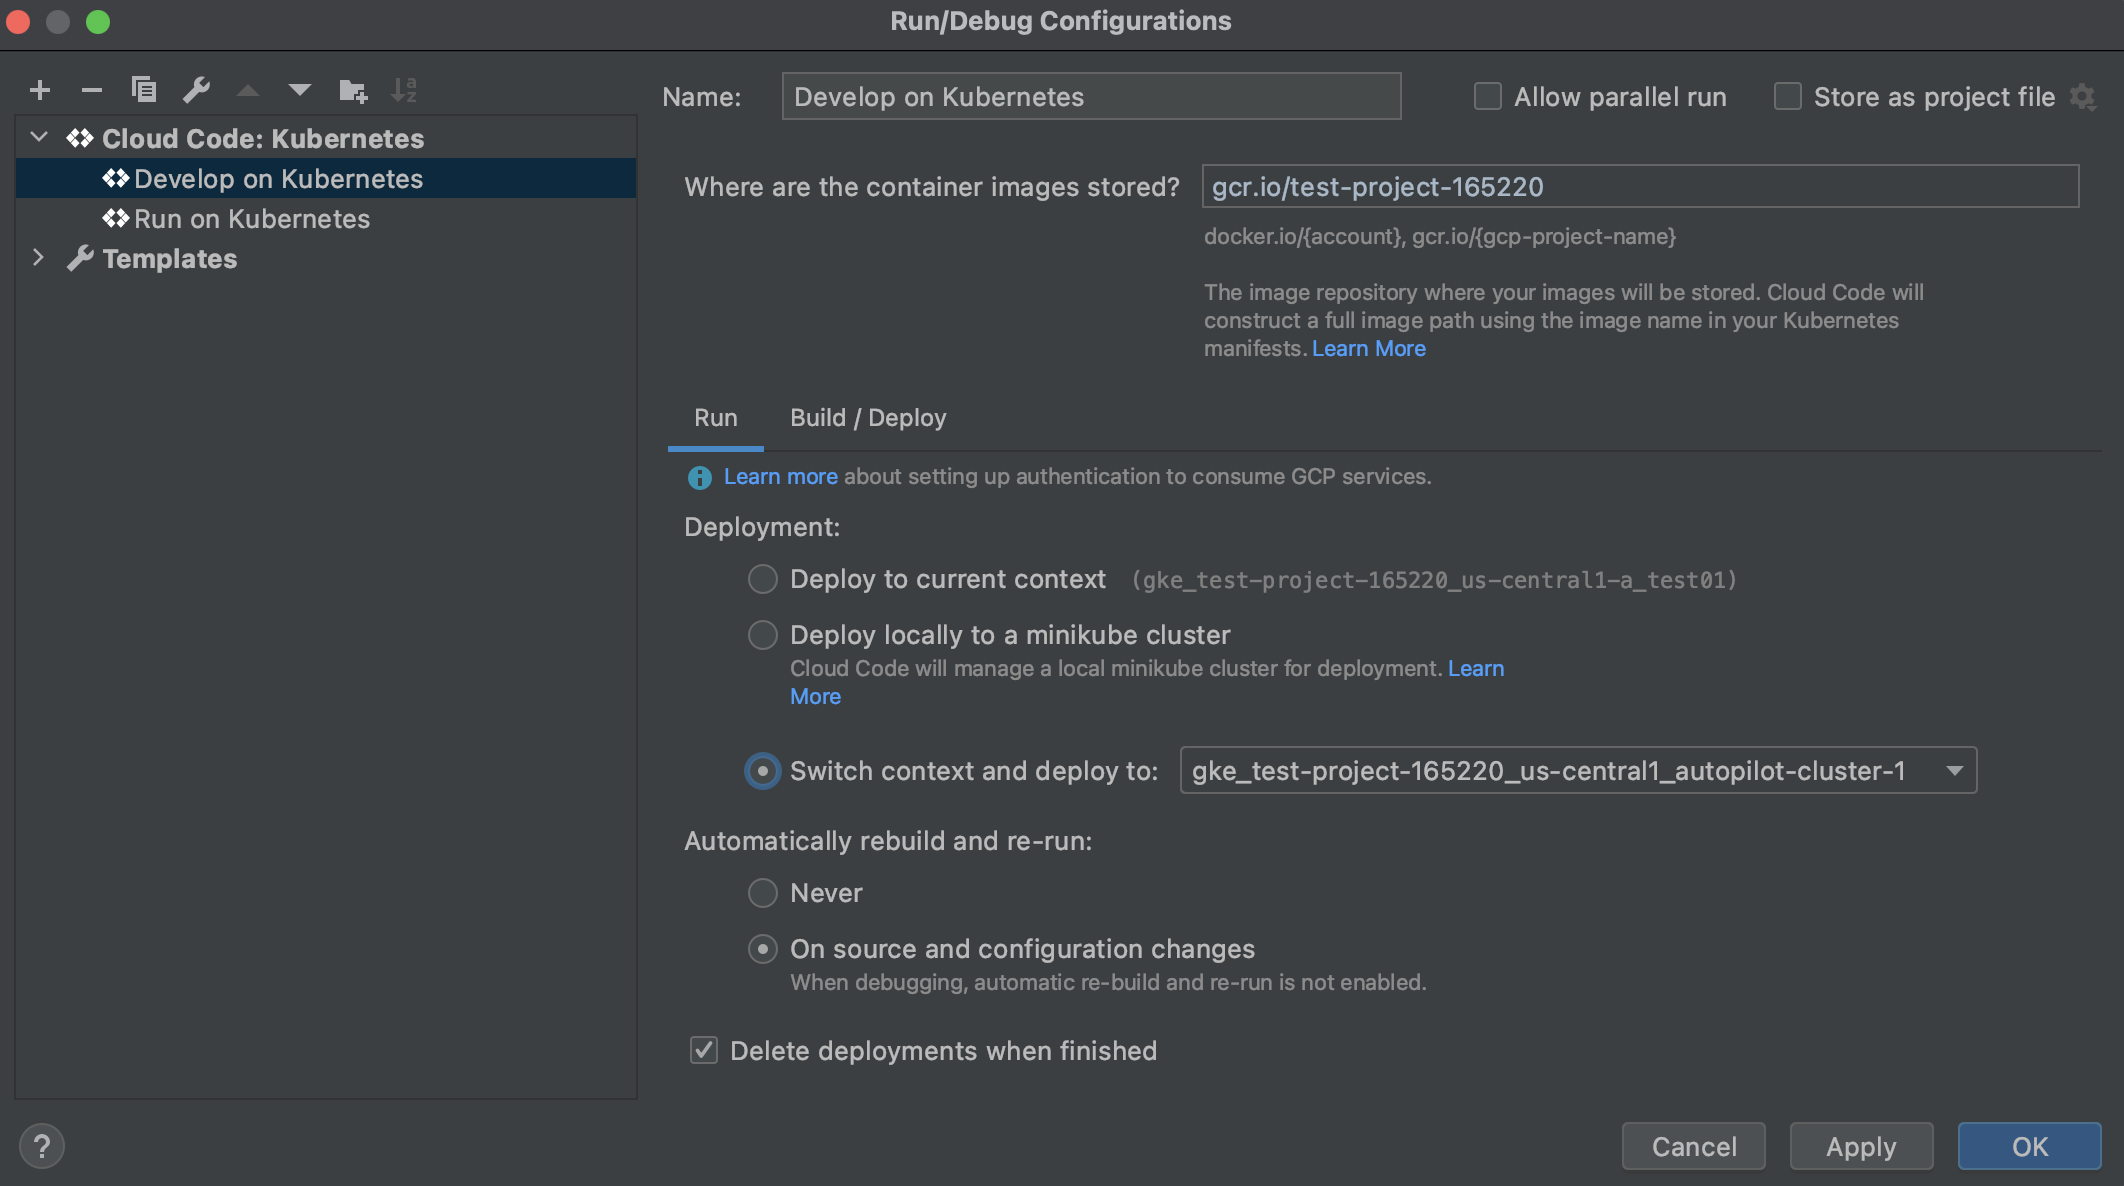
- **Delete deployments when finished** - deletes Kubernetes deployments when the process
is terminated. This is default behavior. Alternatively, you can toggle this
setting to prevent deployments from being deleted
## Customize your launch configuration
To configure how your application is run, you can customize your
[`skaffold.yaml`](https://skaffold.dev/docs/references/yaml) file.
You can also configure your launch in your **Run/Debug configurations** . To edit your configurations, go to **Run** \> **Edit configurations** .
### View remote YAML
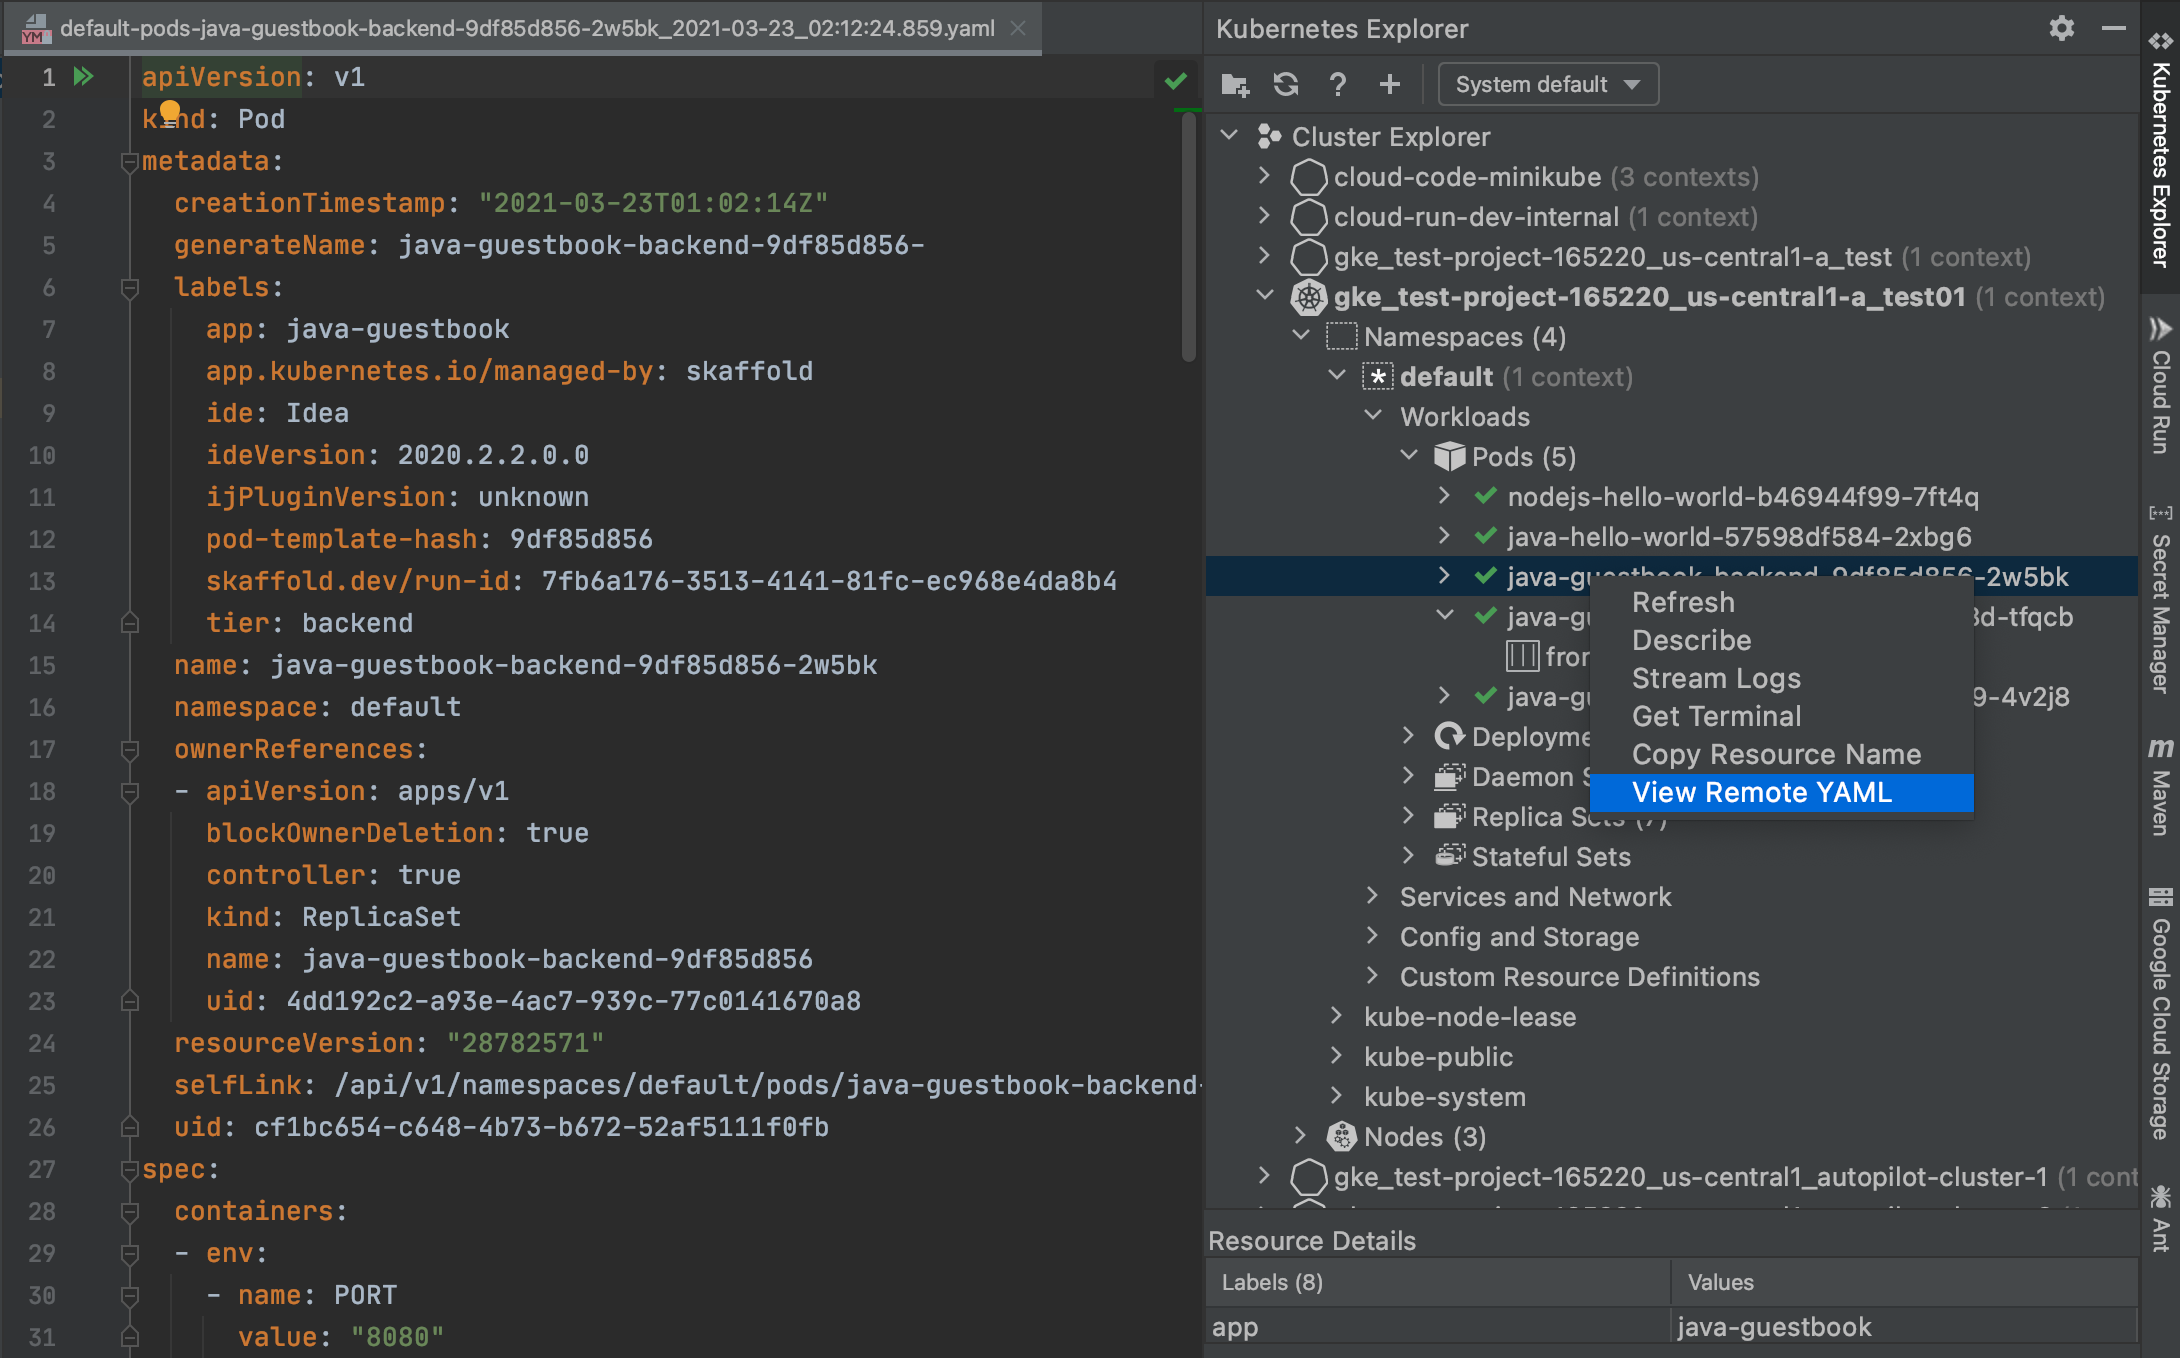
To view the YAML of a resource in your cluster, right from the Kubernetes Explorer. Navigate to a resource in the Kubernetes Explorer, such as a pod, right-click the resource name, and then select **View Remote YAML** .
The YAML file corresponding to your specified resource opens in a new editor
tab.
### View logs
You can stream and view logs from Kubernetes resources into the Kubernetes
Explorer console to monitor their progress.
After your application builds and runs in either regular or development mode, you'll be able to monitor logs streaming from your application from within your IDE.

You can also view logs from a specific service by navigating to the Kubernetes
Explorer.
To select the resource you'd like to see logs from, such as a pod, a deployment,
or a service:
1. Right-click the resource and select **Stream Logs**. Alternatively, you can
stream logs for individual containers running in pods.
This outputs logs to the Kubernetes Explorer Console.
To view the status of resources in your deployment:
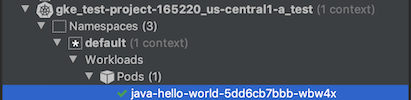
- **Pod, deployment and node statuses**: These Kubernetes resources have colored
status marks next to their labels; red for failed state, yellow for
starting/terminating/warning, and green for healthy, desired state.
- **Deployed resource descriptions** : You can run a `kubectl describe` on your
deployed resources to display its details by right-clicking and choosing
**Describe**.

### Launch a terminal
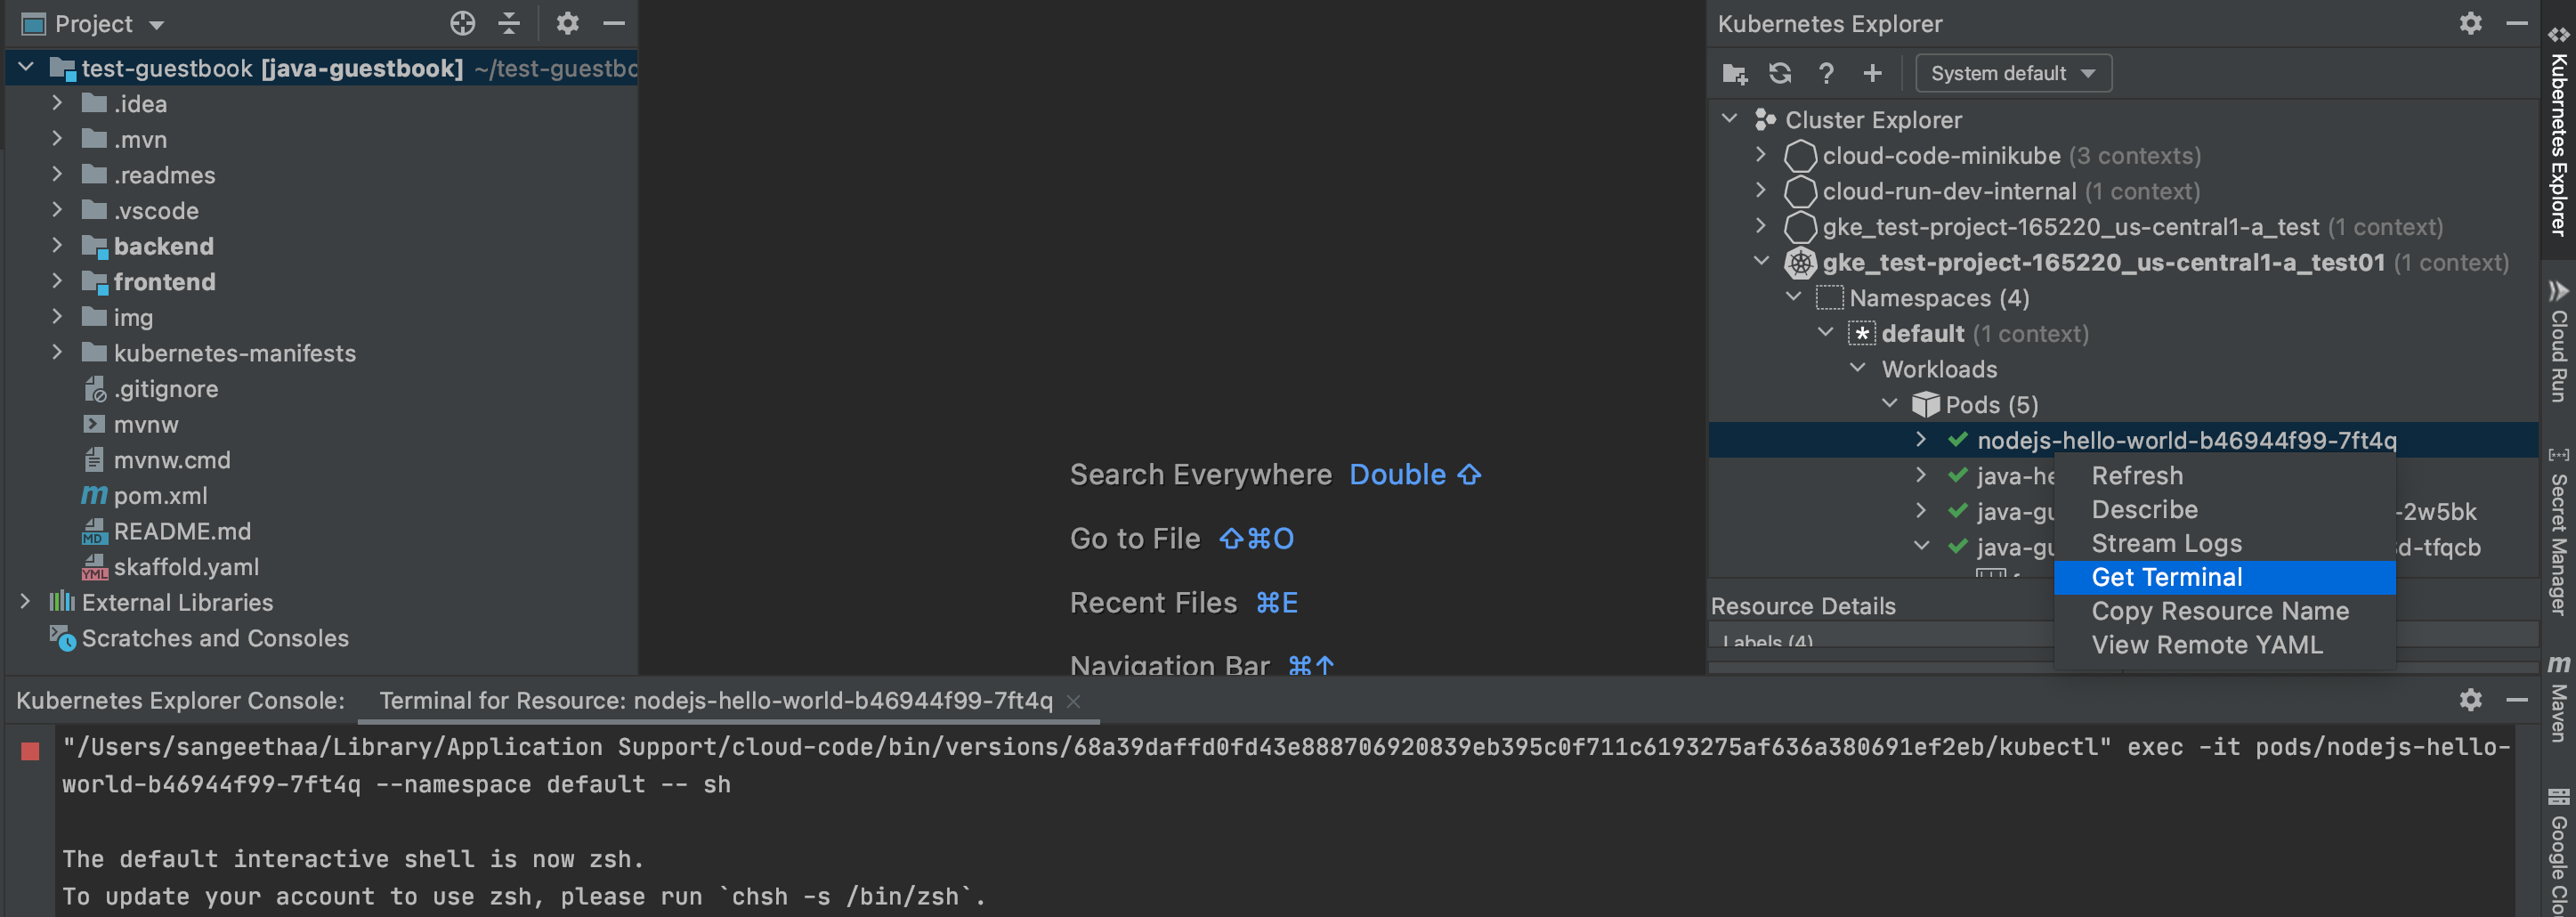
For pods and containers, you can open an interactive terminal by right-clicking
the pod or container and selecting **Get terminal**.
## Resource-specific actions
The Kubernetes Explorer displays clusters, namespaces, nodes, workloads
(such as deployments, replicasets, pods and containers), services and ingresses,
configurations (such as secrets and config maps) and storage (such as volumes).
Using the Kubernetes Explorer, you can perform unique actions on some
of these resources.
You can access the Kubernetes Explorer from the side panel or go to
**Tools** \> **Cloud Code** \> **Kubernetes** \> **View Cluster Explorer**.

To display the details of your deployed resources, right-click a resource label
in the Kubernetes Explorer and then click **Describe**.

### Clusters
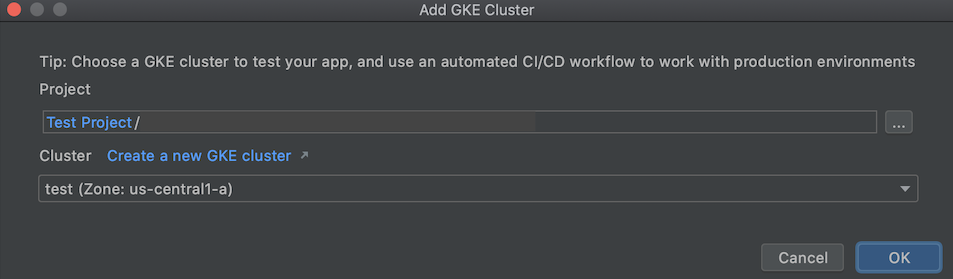
- **Add a Google Kubernetes Engine cluster:** Add an existing Standard or Autopilot GKE cluster or create a new one by clicking **+ Add GKE Cluster** within the Kubernetes Explorer.
The Add Cluster dialog appears and you can choose the project and cluster
you'd like to use or create a new cluster.
Once done, click **OK** and access your chosen cluster and its underlying resources through the Kubernetes Explorer.
- **Set as current context:** Set specified cluster as active such that your
configured `kubectl` context accesses this cluster by default.
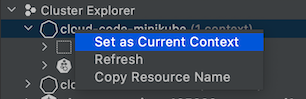
The Kubernetes Explorer refreshes automatically and you'll see the
Kubernetes symbol next to the appropriate cluster.
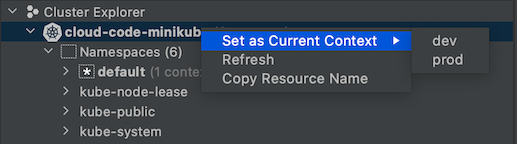
If a cluster has multiple contexts configured, you'll be able
to choose one of the available contexts to set as the current context.
### Namespaces
- **Set as current context:** Set a namespace as active such that your
configured `kubectl` context accesses this namespace by default.
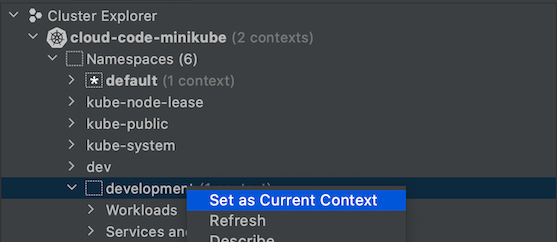
If this action is successful, the Kubernetes Explorer refreshes automatically and you'll see an asterisk next to the namespace to signify that it's part of the current context.
Note that a Kubernetes context is a shortcut which gives you quick access
to a namespace in your cluster. Contexts are normally created
automatically when you start a minikube or GKE cluster. If you don't see
the **Set as current context** option for a given namespace and you'd
like to create a context for it, use the
[`kubectl config set-context` command](https://kubernetes.io/docs/reference/generated/kubectl/kubectl-commands#-em-set-context-em-)
in your terminal to set a context with your preferred cluster, user, and
namespace.
### Pods
- **View Logs:** [View logs](https://docs.cloud.google.com/code/docs/intellij/k8s-overview#view_logs) from a pod into the Kubernetes Explorer Console.
- **Get Terminal:** [Get terminal](https://docs.cloud.google.com/code/docs/intellij/k8s-overview#launch_a_terminal) for a pod in the Kubernetes Explorer Console.
Additionally, running pods have colored status marks next to their labels:
- **Red**: Pod is in a failed state
- **Yellow**: Pod is starting or terminating
- **Green**: Pod is healthy and running

### Containers
- **View logs:** [View logs](https://docs.cloud.google.com/code/docs/intellij/k8s-overview#view_logs) from a container into the Kubernetes Explorer console.
- **Get Terminal:** [Get terminal](https://docs.cloud.google.com/code/docs/intellij/k8s-overview#launch_a_terminal) for a container in the Kubernetes Explorer console.

### Deployments
- **View logs:** [View logs](https://docs.cloud.google.com/code/docs/intellij/k8s-overview#view_logs)
from a deployment into the Kubernetes Explorer console.
Live deployments have colored status marks next to their labels and counts of
current/total replicas:
- **Yellow**: Deployment does not have minimum availability or have image problems.
- **Green**: Deployment is healthy and had minimum availability.

### Nodes
Nodes of your cluster have colored status marks next to their names:
- **Yellow**: Node has a resource problem such as memory or disk availability.
- **Green**: Node is healthy.
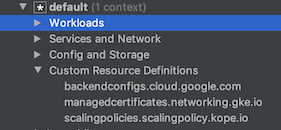
### Custom Resource Definitions (CRDs)
The Kubernetes Explorer lists all Custom Resource Definitions (CRDs)
installed and available on your cluster:
## What's next
- [Get started with Cloud Code for IntelliJ for Kubernetes](https://docs.cloud.google.com/code/docs/intellij/get-started-k8s) by creating and deploying a Kubernetes application from a code sample.
- Use [file sync and hot reloading](https://docs.cloud.google.com/code/docs/intellij/speed-up-k8s-development#enable-skaffold-file-sync-and-hot-reloading) to speed up development.
- [Debug your application in Cloud Code](https://docs.cloud.google.com/code/docs/intellij/debug)
## Get support
To submit feedback or report an issue in your IntelliJ IDE, go to **Tools** \> **Cloud Code** \> **Help / About** \> **Submit
feedback or report an issue** to report an issue on [GitHub](https://github.com/GoogleCloudPlatform/cloud-code-intellij/issues).