# Create and run a notebook using the notebook gallery
Get started analyzing data by using the notebook gallery in BigQuery Studio.
## Before you begin
1.
Enable the BigQuery API, if it is not already enabled.
**Roles required to enable APIs**
To enable APIs, you need the `serviceusage.services.enable` permission. If you
created the project, then you likely already have this permission through the
Owner role (`roles/owner`). Otherwise, you can get this permission through the
Service Usage Admin role (`roles/serviceusage.serviceUsageAdmin`).
[Learn how to grant roles](https://docs.cloud.google.com/iam/docs/granting-changing-revoking-access).
[Enable the API](https://console.cloud.google.com/apis/enableflow?apiid=bigquery)
For new projects, the BigQuery API is
automatically enabled.
2. Optional: [Enable
billing](https://docs.cloud.google.com/billing/docs/how-to/modify-project) for the project. If you don't want to enable billing or provide a credit card, the steps in this document still work. BigQuery provides you a sandbox to perform the steps. For more information, see [Enable the BigQuery sandbox](https://docs.cloud.google.com/bigquery/docs/sandbox#setup).
> [!NOTE]
> **Note:** If your project has a billing account and you want to use the BigQuery sandbox, then [disable billing for your project](https://docs.cloud.google.com/billing/docs/how-to/modify-project#disable_billing_for_a_project).
### Required roles
To get the permissions that
you need to create a run notebooks,
ask your administrator to grant you the
following IAM roles on your project:
- [BigQuery Read Session User](https://docs.cloud.google.com/iam/docs/roles-permissions/bigquery#bigquery.readSessionUser) (`roles/bigquery.readSessionUser`)
- [BigQuery Studio User](https://docs.cloud.google.com/iam/docs/roles-permissions/bigquery#bigquery.studioUser) (`roles/bigquery.studioUser`)
For more information about granting roles, see [Manage access to projects, folders, and organizations](https://docs.cloud.google.com/iam/docs/granting-changing-revoking-access).
You might also be able to get
the required permissions through [custom
roles](https://docs.cloud.google.com/iam/docs/creating-custom-roles) or other [predefined
roles](https://docs.cloud.google.com/iam/docs/roles-overview#predefined).
If you're new to notebooks in BigQuery, see
[required permissions](https://docs.cloud.google.com/bigquery/docs/create-notebooks#required_permissions) on
the Create notebooks page.
## Notebook gallery
The notebook gallery is a central hub for discovering and using prebuilt
notebook templates. These templates let you perform common tasks like data
preparation, data analysis, and visualization. Notebook templates also help you
explore BigQuery Studio features, manage workflows, and promote best
practices.
You can use notebook gallery templates to streamline your entire
intent-to-insights workflow across each stage of the data lifecycle-from
ingestion and exploration to advanced analytics and BigQuery ML.
The notebook gallery provides templates for every skill level. The gallery
includes fundamental templates for SQL, Python, Apache Spark, and
DataFrames. You can also explore topics like generative AI and multimodal data
analytics in BigQuery.
For more information on using notebook gallery templates, see
[Create a notebook using the notebook gallery](https://docs.cloud.google.com/bigquery/docs/create-notebooks#create-notebook-console).
## Create a notebook from a notebook gallery template
The following example uses the Introduction to notebooks in BigQuery Studio
template. This notebook shows you how to perform these tasks:
- **Query data** : Run queries using [SQL cells](https://docs.cloud.google.com/colab/docs/sql-cells).
- **Visualize query results** : Create visualizations without code by using [Visualization cells](https://docs.cloud.google.com/colab/docs/visualization-cells).
- **Clean and transform data** : Sort, deduplicate, and filter your data using the [BigQuery DataFrames](https://docs.cloud.google.com/bigquery/docs/bigquery-dataframes-introduction) (pandas) API.
- **Run AI predictions** : Generate predictions using the ([`AI.FORECAST` function](https://docs.cloud.google.com/bigquery/docs/reference/standard-sql/bigqueryml-syntax-ai-forecast)) in BigQuery DataFrames. The `AI.FORECAST` function uses the [TimesFM foundation model](https://docs.cloud.google.com/bigquery/docs/timesfm-model) to generate predictions directly from a dataset with no model training required.
- **Plot data**: Plot data using Python's built-in visualization libraries. You plot the data using the BigQuery DataFrames visualization library, powered by Matplotlib and Pandas.
To use the notebook, you open the template, convert it to a runnable notebook,
connect to the notebook's runtime environment, and then run the notebook.
### Open the template and convert it to a runnable notebook
Before you can use a notebook created from a notebook gallery template, you must
convert the template to a runnable notebook.
To open the *Introduction to notebooks in BigQuery Studio* template in
notebook gallery, and to convert it to a runnable notebook, follow these steps:
1. Go to the **Studio** page.
[Go to Studio](https://console.cloud.google.com/bigquery)
2. Click the arrow
drop-down and then choose **Notebook \> All templates**.
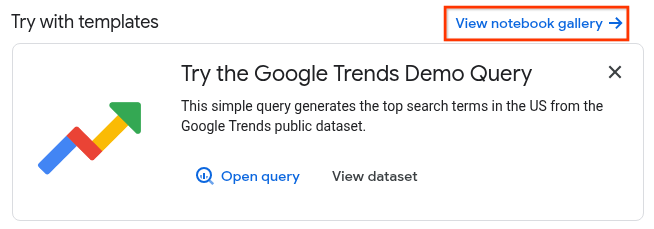
3. Alternatively, from the BigQuery Studio home page, click
**View notebook gallery**.
4. Click the **Introduction to notebooks in BigQuery Studio** card or search
for it in the gallery.
5. After the template opens, click **Use this template** to convert the
template into a runnable notebook.
### Connect to the default runtime
Before you can run the notebook, you must connect it to an
[Gemini Enterprise Agent Platform runtime](https://docs.cloud.google.com/colab/docs/create-runtime). A runtime is a
compute resource that runs the code in your notebook. The runtime must be in the
same region as your notebook.
For more information about runtimes, see
[Runtimes and runtime templates](https://docs.cloud.google.com/colab/docs/runtimes). For more information
about configuring regional settings, see [Set the default region for code
assets](https://docs.cloud.google.com/bigquery/docs/create-notebooks#set_the_default_region_for_code_assets).
> [!NOTE]
> **Note:** If you use [VPC Service Controls](https://docs.cloud.google.com/vpc-service-controls/docs/overview), make sure you have configured [Private Google Access with VPC Service Controls](https://docs.cloud.google.com/vpc-service-controls/docs/private-connectivity) before connecting to a runtime. Otherwise, the service returns the error `Failed to connect to Runtime Network
> projects/*projectid*/global/networks/default' was not found.`
In this tutorial, you use the default runtime. The default runtime is a preset
runtime that requires minimal setup. To connect to the default runtime, follow
these steps:
1. With your notebook open, click **Connect**.
It might take several minutes to connect to the default runtime if you
don't already have an active runtime.
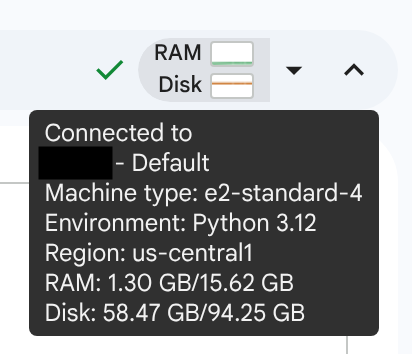
2. When the runtime is ready, you should see a checkmark with RAM and disk
graphs displayed. If you hover over the graphs, you see the type of runtime
and the runtime's configuration.
### Run the notebook
Introduction to notebooks in BigQuery Studio contains text, SQL,
visualization, and code cells. Cells other than text cells can be run
individually, or you can run all cells in order from first to last.
In this tutorial, you run the cells in the notebook individually so you can
view the results in stages. To run the notebook:
1. In the **Query your data using SQL cells** section, hover over the SQL cell,
and then click **Run cell**.
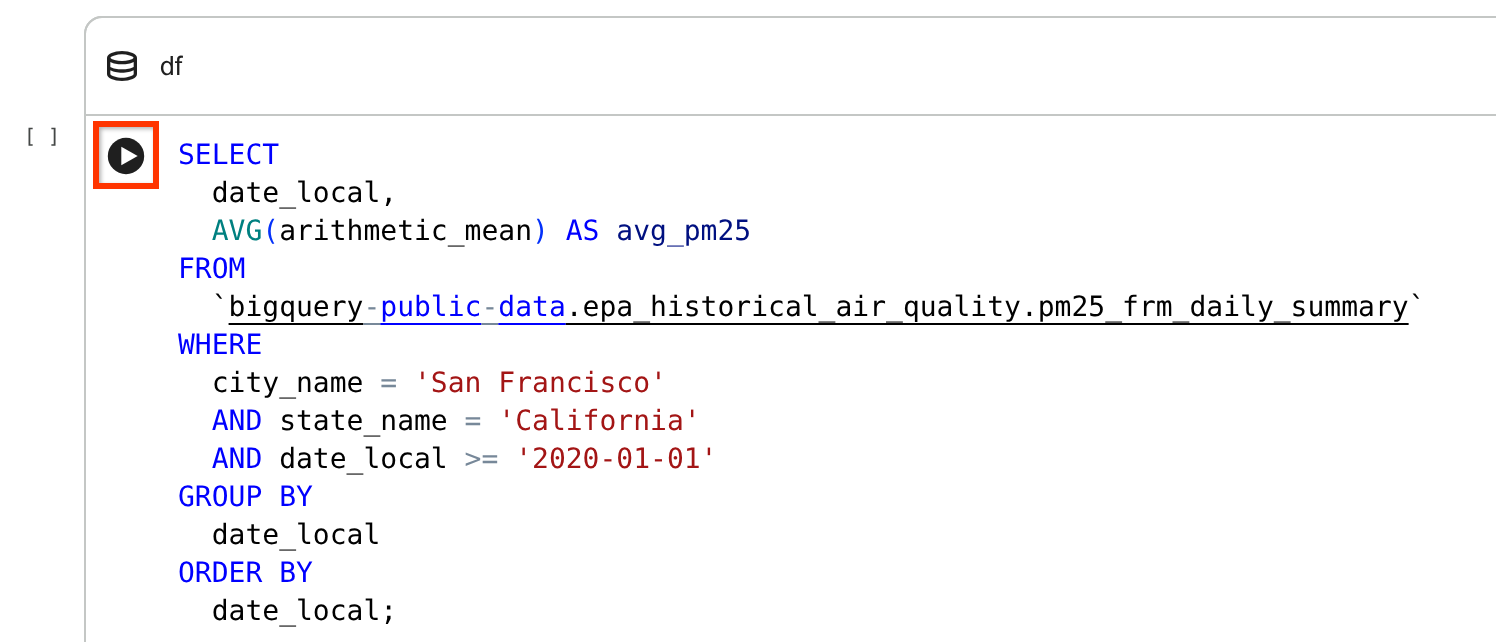
This SQL cell queries the
`bigquery-public-data.epa_historical_air_quality.pm25_frm_daily_summary`
table in the [Historical Air Quality public dataset](https://console.cloud.google.com/marketplace/product/epa/historical-air-quality)
and returns the daily average PM2.5 (a common air quality metric) for San
Francisco over the past few years.
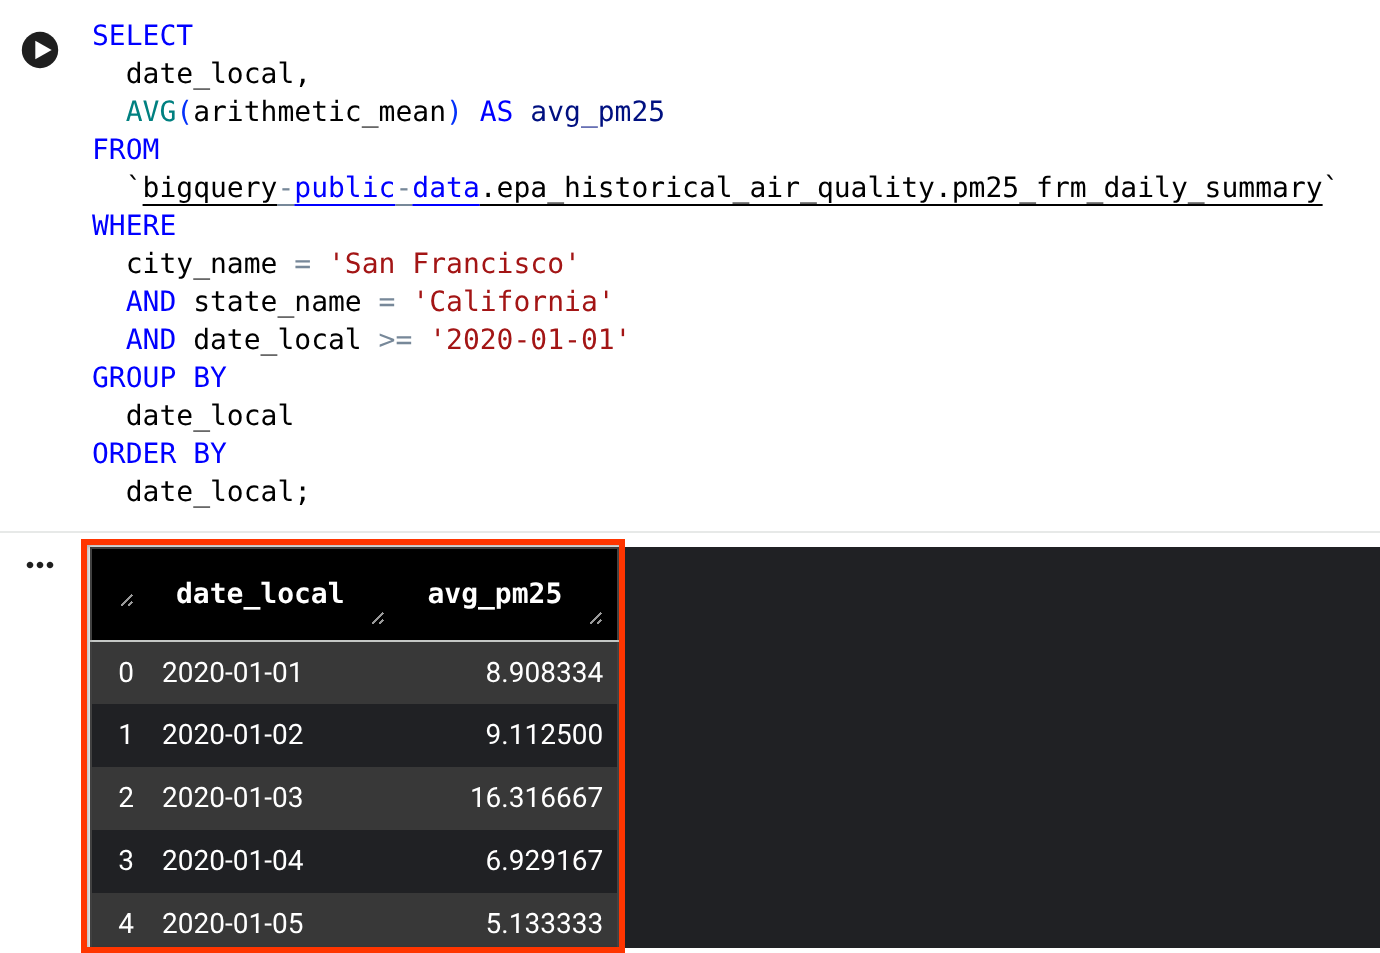
2. View the results. The query results are displayed in a DataFrame.
> [!NOTE]
> **Note:** To clear or copy the results, click **Code cell output actions**.
3. In the **Visualize data** section, hover over the visualization cell, and
then click **Run cell**.
4. View the generated visualization.
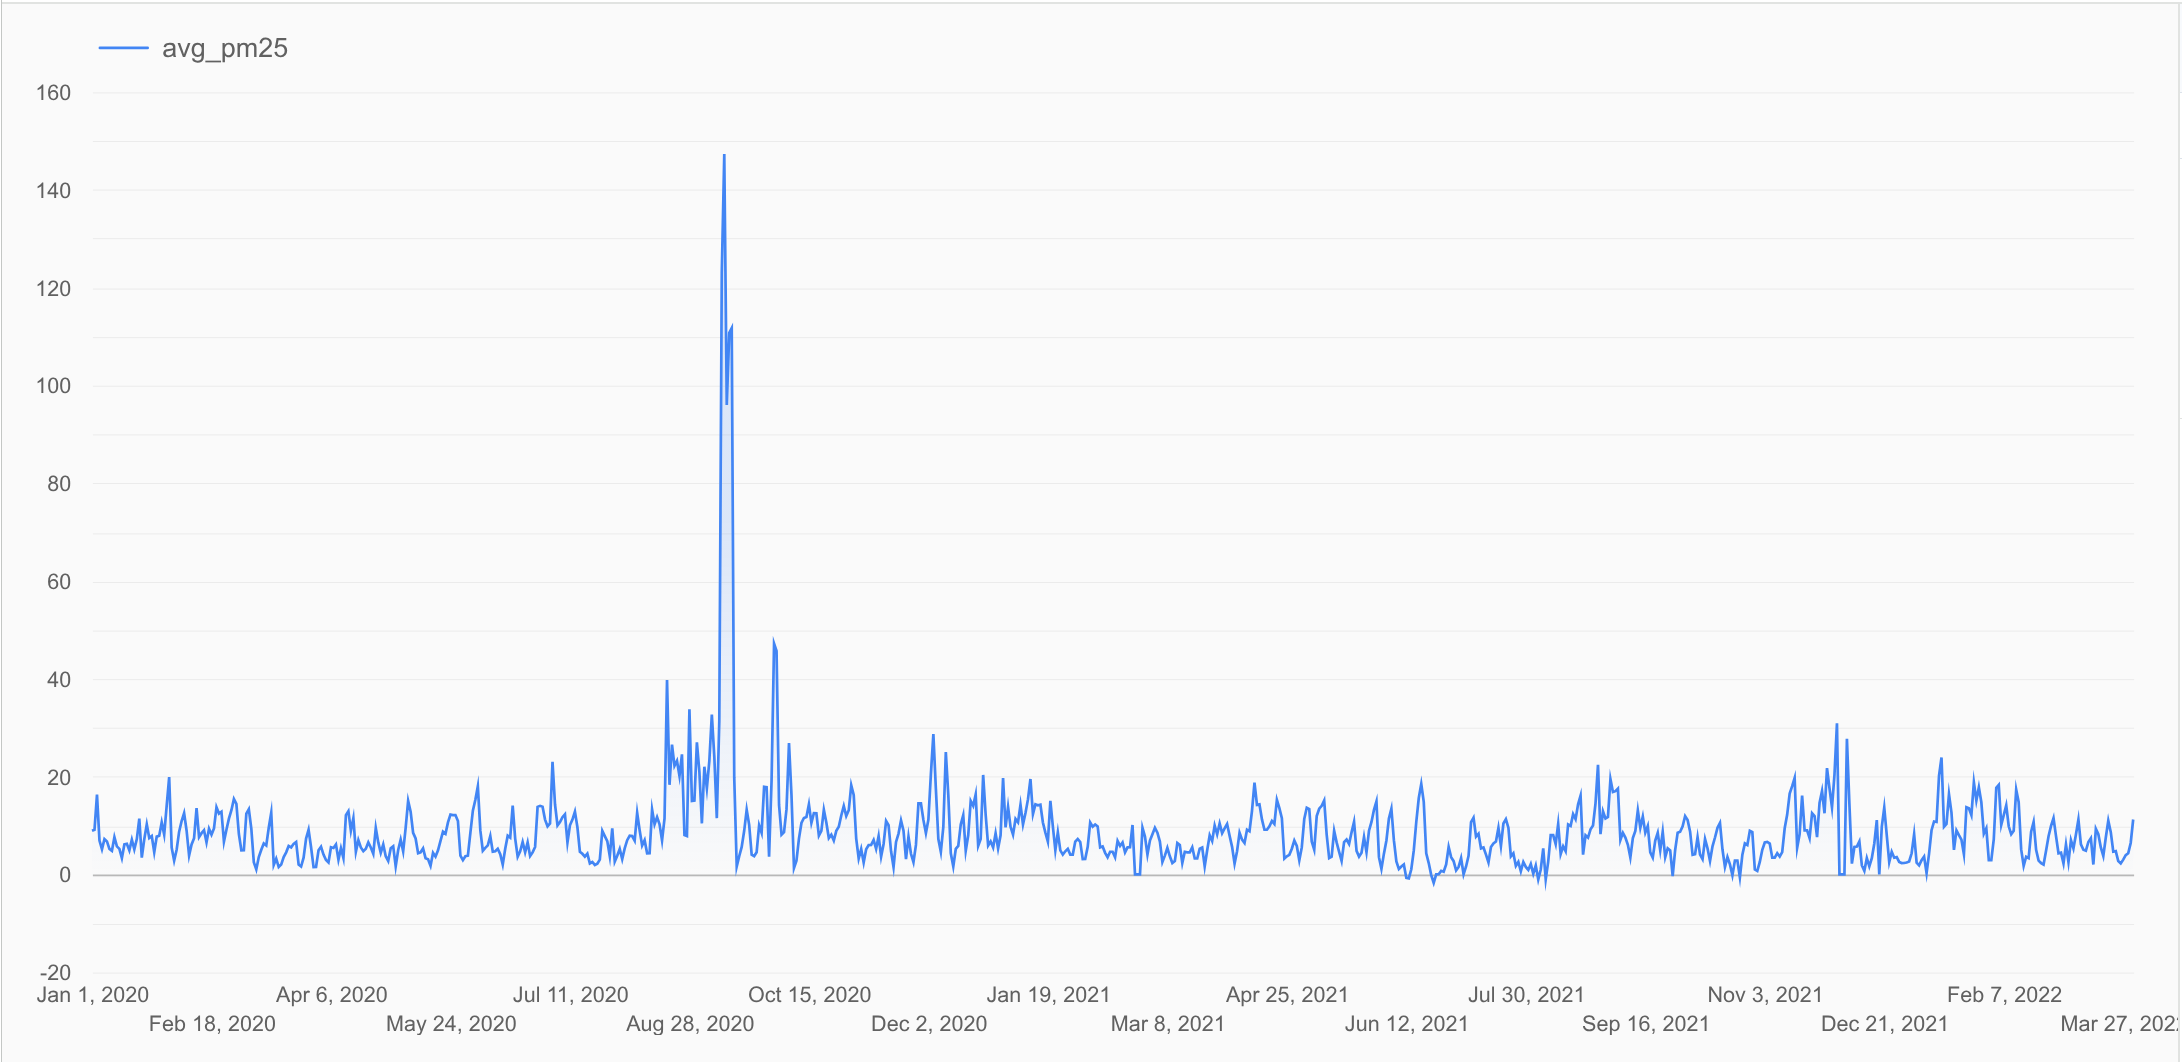
The result shows a time series chart that plots the daily average PM2.5
values in the `df` DataFrame you generated previously. This chart shows the
trend in PM2.5 levels over time.
5. In the **Clean the data** section, hover over the code cell, and then click
**Run cell**.
6. View the results. The results are displayed in a DataFrame.
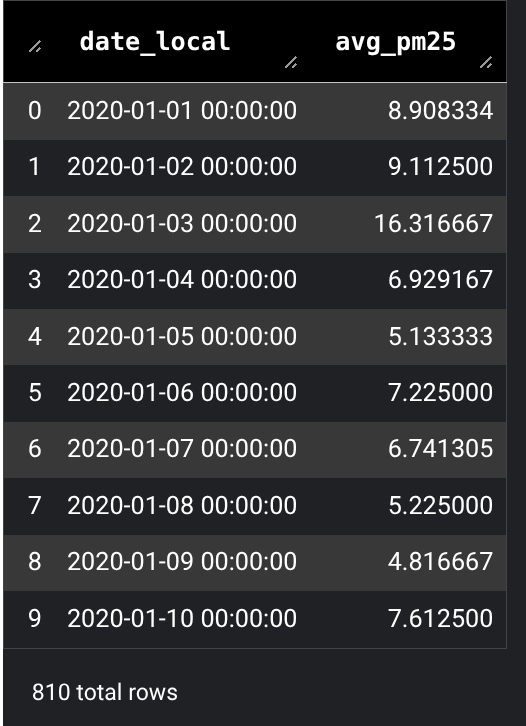
The code does the following:
- Import the `bigframes.pandas` library.
- Ensure the `date_local` field is a timestamp.
- Sort the results by date, which is required for forecasting.
- Remove duplicate rows.
- Drop rows where `avg_pm25` is `null`.
- Filter outliers.
- Display the results in a BigQuery DataFrames named `df_cleaned`.
7. In the **Predict values using `AI.FORECAST`** section, hover over the SQL
cell, and then click **Run cell**.
8. View the results. The query results are displayed in a DataFrame.
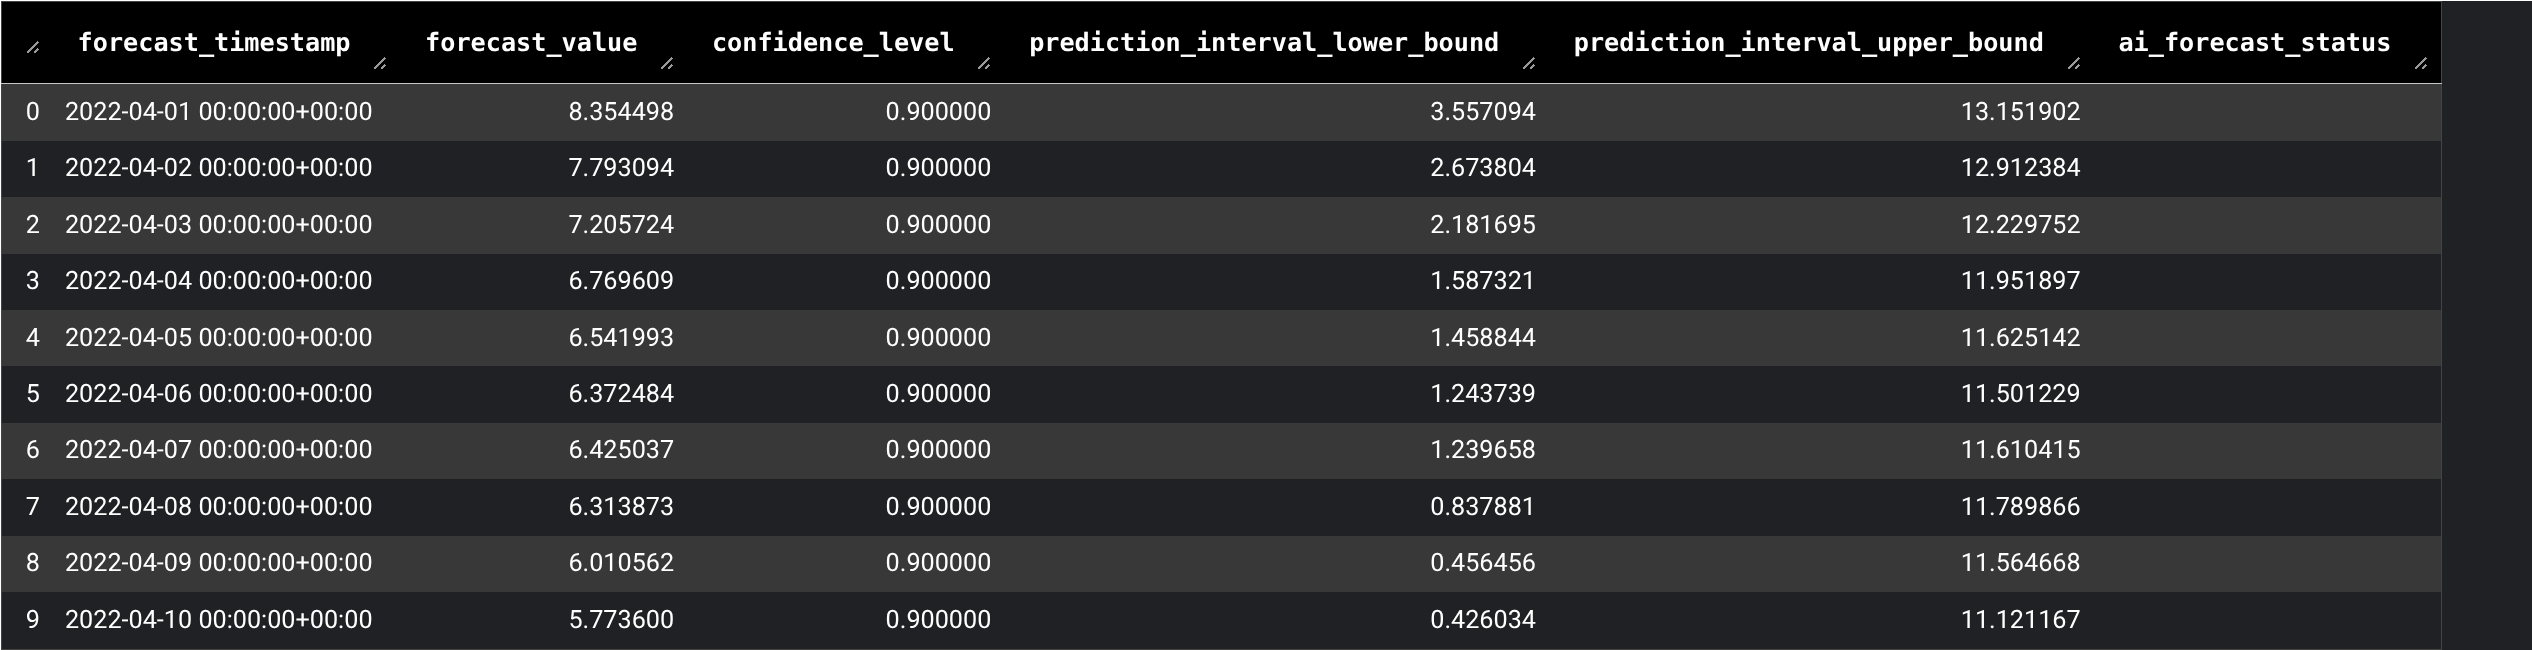
This SQL cell runs a query that uses the `AI.FORECAST` function to forecast
future average daily PM2.5 using the `df_cleaned` DataFrame you generated
previously.
9. In the **Visualize data using Python** section, hover over the code cell,
and then click **Run cell**.
10. View the results. The results are displayed in a chart.
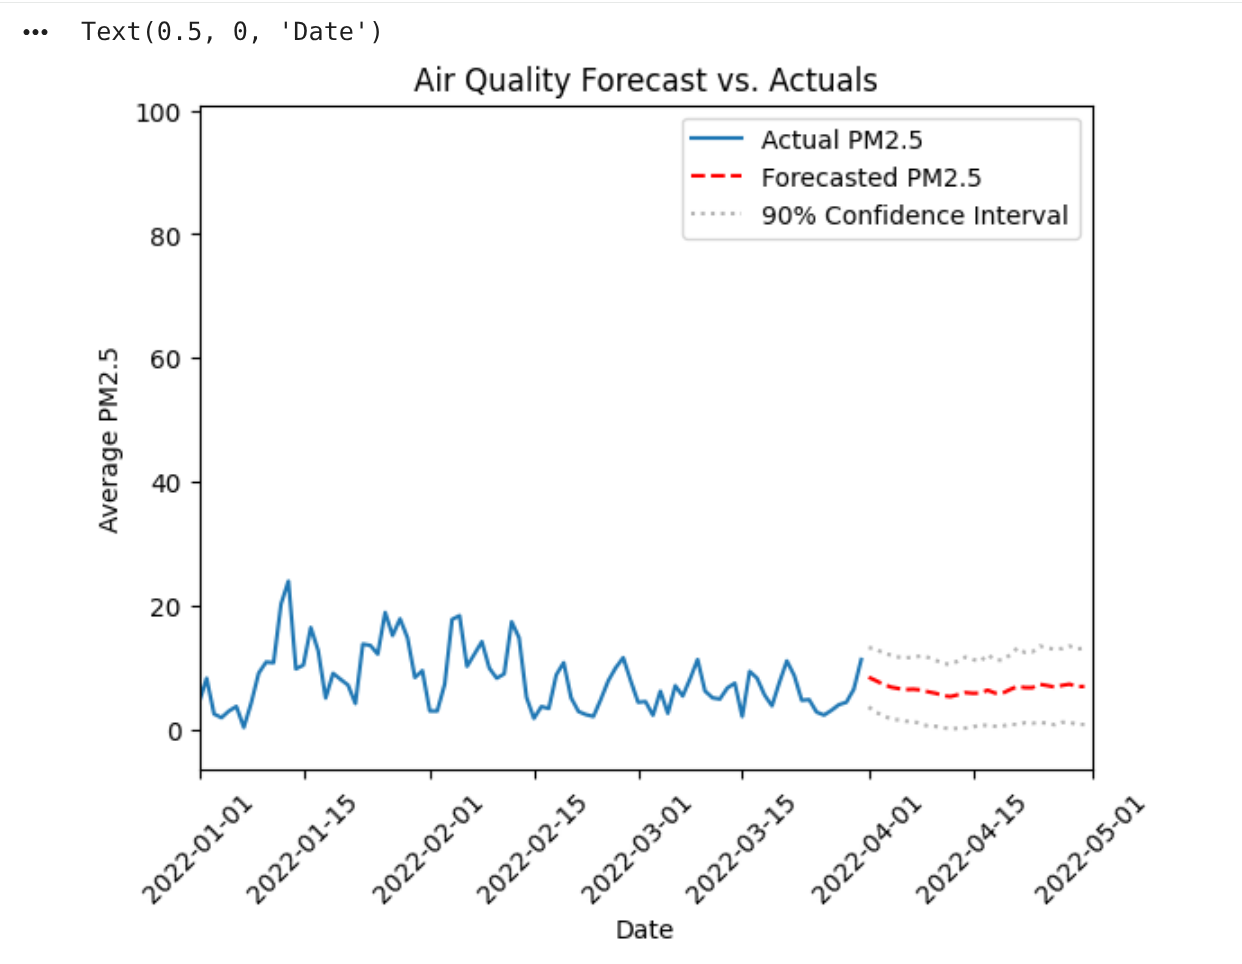
The Python code does the following:
- Import the `datetime` module.
- Plot the historical data first and get the axes.
- Plot the forecasted data on the same axes.
- Plot the confidence interval.
This visualization resembles standard Python plotting, but `df_cleaned.plot`
is a BigQuery DataFrames command. The command retrieves only the data
needed (a sample) to render the chart, not the entire dataset.
## Clean up
To avoid incurring charges to your Google Cloud account for
the resources used on this page, follow these steps.
> [!CAUTION]
> **Caution** : Deleting a project has the following effects:
>
> - **Everything in the project is deleted.** If you used an existing project for the tasks in this document, when you delete it, you also delete any other work you've done in the project.
> - **Custom project IDs are lost.** When you created this project, you might have created a custom project ID that you want to use in the future. To preserve the URLs that use the project ID, such as an `appspot.com` URL, delete selected resources inside the project instead of deleting the whole project.
>
>
> If you plan to explore multiple architectures, tutorials, or quickstarts, reusing projects
> can help you avoid exceeding project quota limits.
1. In the Google Cloud console, go to the **Manage resources** page.
[Go to Manage resources](https://console.cloud.google.com/iam-admin/projects)
2. In the project list, select the project that you want to delete, and then click **Delete**.
3. In the dialog, type the project ID, and then click **Shut down** to delete the project.
Alternatively, to keep the project and delete the resources used in this
tutorial, follow these steps:
1. Go to the **Studio** page.
[Go to Studio](https://console.cloud.google.com/bigquery)
2. In the left pane, expand your project, and then click **Notebooks**.
3. For the notebook you're deleting, click
**Open actions \> Delete**.
4. In the **Delete notebook** dialog, click **Delete** to confirm.
## What's next
To run other sample notebook templates in the notebook gallery, see:
- [Getting started with notebooks for SQL users](https://console.cloud.google.com/bigquery/notebook-gallery/getting_started_bq_sql)
- [Getting started with notebooks for Python users](https://console.cloud.google.com/bigquery/notebook-gallery/getting_started_bq_python)
To learn more about DataFrames, see:
- [Introduction to BigQuery DataFrames](https://docs.cloud.google.com/bigquery/docs/bigquery-dataframes-introduction)
- [BigQuery DataFrames API reference](https://docs.cloud.google.com/python/docs/reference/bigframes/latest)
To learn more about generative AI and ML functions in BigQuery,
see the [Generative AI overview](https://docs.cloud.google.com/bigquery/docs/generative-ai-overview).