# Tutorial: Run inference on an object table by using a feature vector model
This tutorial shows you how to create an object table based on the images
from the
[flowers dataset](https://www.tensorflow.org/datasets/catalog/tf_flowers),
and then run inference on that object table using the
[MobileNet V3 model](https://tfhub.dev/google/imagenet/mobilenet_v3_small_075_224/feature_vector/5).
## The MobileNet V3 model
The MobileNet V3 model analyzes image files and returns a feature vector array.
The feature vector array is a list of numerical elements which describe the
characteristics of the images analyzed. Each feature vector describes a
multi-dimensional feature space, and provides the coordinates of the image in
this space. You can use the feature
vector information for an image to further classify the image, for example
by using cosine similarity to group similar images.
The MobileNet V3 model input takes a tensor of
[`DType`](https://www.tensorflow.org/api_docs/python/tf/dtypes/DType)
`tf.float32` in the shape `[-1, 224, 224, 3]`. The output is an array of
tensors of `tf.float32` in the shape`[-1, 1024]`.
## Required permissions
- To create the dataset, you need the `bigquery.datasets.create` permission.
- To create the connection resource, you need the following permissions:
- `bigquery.connections.create`
- `bigquery.connections.get`
- To grant permissions to the connection's service account, you need the
following permission:
- `resourcemanager.projects.setIamPolicy`
- To create the object table, you need the following permissions:
- `bigquery.tables.create`
- `bigquery.tables.update`
- `bigquery.connections.delegate`
- To create the bucket, you need the `storage.buckets.create` permission.
- To upload the dataset and model to Cloud Storage, you need the
`storage.objects.create` and `storage.objects.get` permissions.
- To load the model into BigQuery ML, you need the following
permissions:
- `bigquery.jobs.create`
- `bigquery.models.create`
- `bigquery.models.getData`
- `bigquery.models.updateData`
- To run inference, you need the following permissions:
- `bigquery.tables.getData` on the object table
- `bigquery.models.getData` on the model
- `bigquery.jobs.create`
## Costs
In this document, you use the following billable components of Google Cloud:
- **BigQuery**: You incur storage costs for the object table you create in BigQuery.
- **BigQuery ML**: You incur costs for the model you create and the inference you perform in BigQuery ML.
- **Cloud Storage**: You incur costs for the objects you store in Cloud Storage.
To generate a cost estimate based on your projected usage,
use the [pricing calculator](https://docs.cloud.google.com/products/calculator).
New Google Cloud users might be eligible for a [free trial](https://docs.cloud.google.com/free).
For more information on BigQuery storage pricing, see
[Storage pricing](https://cloud.google.com/bigquery/pricing#storage) in the BigQuery
documentation.
For more information on BigQuery ML pricing, see
[BigQuery ML pricing](https://cloud.google.com/bigquery/pricing#bqml) in
the BigQuery documentation.
For more information on Cloud Storage pricing, see the
[Cloud Storage pricing](https://cloud.google.com/storage/pricing) page.
## Before you begin
### Create a reservation
To use an
[imported model](https://docs.cloud.google.com/bigquery/docs/reference/standard-sql/inference-overview#inference_using_imported_models)
with an object table, you must
[create a reservation](https://docs.cloud.google.com/bigquery/docs/reservations-tasks#create_reservations)
that uses the BigQuery
[Enterprise or Enterprise Plus edition](https://docs.cloud.google.com/bigquery/docs/editions-intro),
and then
[create a reservation assignment](https://docs.cloud.google.com/bigquery/docs/reservations-assignments#create_reservation_assignments)
that uses the `QUERY` job type.
## Create a dataset
Create a dataset named `mobilenet_inference_test`:
### SQL
1. Go to the **BigQuery** page.
[Go to BigQuery](https://console.cloud.google.com/bigquery)
2. In the **Editor** pane, run the following SQL statement:
```googlesql
CREATE SCHEMA `PROJECT_ID.mobilenet_inference_test`;
```
Replace `PROJECT_ID` with your project ID.
### bq
1. In the Google Cloud console, activate Cloud Shell.
[Activate Cloud Shell](https://console.cloud.google.com/?cloudshell=true)
2. Run the
[`bq mk` command](https://docs.cloud.google.com/bigquery/docs/reference/bq-cli-reference#mk-dataset)
to create the dataset:
```bash
bq mk --dataset --location=us PROJECT_ID:resnet_inference_test
```
Replace `PROJECT_ID` with your project ID.
## Create a connection
Create a connection named `lake-connection`:
### Console
1. Go to the **BigQuery** page.
[Go to BigQuery](https://console.cloud.google.com/bigquery)
2. In the left pane, click database **Data Explorer**:
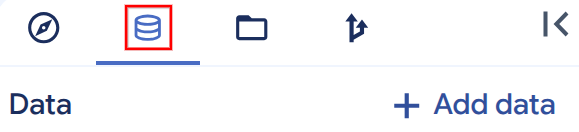
If you don't see the left pane, click **Expand left pane** to open the pane.
3. In the **Data** pane, click **Add data**.
The **Add data** dialog opens.
4. In the **Filter By** pane, in the **Data Source Type** section, select **Databases**.
Alternatively, in the **Search for data sources** field, you can enter
`Vertex AI`.
5. In the **Featured data sources** section, click **Vertex AI**.
6. Click the **Vertex AI Models: BigQuery Federation** solution card.
7. In the **Connection type** list, select
**Vertex AI remote models, remote functions, BigLake and Spanner (Cloud Resource)**.
8. In the **Connection ID** field, type `lake-connection`.
9. Click **Create connection**.
10. In the **Explorer** pane, expand your project, click
**Connections** , and select the `us.lake-connection`
connection.
11. In the **Connection info** pane, copy the value from the
**Service account ID** field. You need this information to
[grant permission](https://docs.cloud.google.com/bigquery/docs/inference-tutorial-mobilenet#grant-permissions) to the connection's service account
on the Cloud Storage bucket that you create in the next step.
### bq
1. In Cloud Shell, run the
[`bq mk` command](https://docs.cloud.google.com/bigquery/docs/reference/bq-cli-reference#mk-connection)
to create the connection:
bq mk --connection --location=us --connection_type=CLOUD_RESOURCE \
lake-connection
2. Run the [`bq show` command](https://docs.cloud.google.com/bigquery/docs/reference/bq-cli-reference#bq_show)
to retrieve information about the connection:
bq show --connection us.lake-connection
3. From the `properties` column, copy the value of the `serviceAccountId`
property and save it somewhere. You need this information to
[grant permissions](https://docs.cloud.google.com/bigquery/docs/inference-tutorial-mobilenet#grant-permissions) to the connection's
service account.
## Create a Cloud Storage bucket
1. [Create a Cloud Storage bucket](https://docs.cloud.google.com/storage/docs/creating-buckets).
2. [Create two folders](https://docs.cloud.google.com/storage/docs/objects#namespace) in the bucket, one named `mobilenet` for the model files and one named `flowers` for the dataset.
## Grant permissions to the connection's service account
### Console
1. Go to the **IAM \& Admin** page.
[Go to IAM \& Admin](https://console.cloud.google.com/project/_/iam-admin)
2. Click **Grant Access**.
The **Add principals** dialog opens.
3. In the **New principals** field, enter the service account ID that you
copied earlier.
4. In the **Select a role** field, select **Cloud Storage** , and then
select **Storage Object Viewer**.
5. Click **Save**.
### gcloud
In Cloud Shell, run the
[`gcloud storage buckets add-iam-policy-binding` command](https://docs.cloud.google.com/sdk/gcloud/reference/storage/buckets/add-iam-policy-binding):
```bash
gcloud storage buckets add-iam-policy-binding gs://BUCKET_NAME \
--member=serviceAccount:MEMBER \
--role=roles/storage.objectViewer
```
Replace `MEMBER` with the service account ID that you
copied earlier. Replace `BUCKET_NAME` with the name
of the bucket you previously created.
For more information, see [Add a principal to a bucket-level
policy](https://docs.cloud.google.com/storage/docs/access-control/using-iam-permissions#bucket-add).
> [!NOTE]
> **Note:** There can be a delay of up to a minute before new permissions take effect.
## Upload the dataset to Cloud Storage
Get the dataset files and make them available in Cloud Storage:
1. [Download](https://storage.googleapis.com/download.tensorflow.org/example_images/flower_photos.tgz) the flowers dataset to your local machine.
2. Unzip the `flower_photos.tgz` file.
3. [Upload](https://docs.cloud.google.com/storage/docs/uploading-objects) the `flower_photos` folder to the `flowers` folder in the bucket you previously created.
4. Once the upload has completed, delete the `LICENSE.txt` file in the `flower_photos` folder.
## Create an object table
Create an object table named `sample_images` based on the flowers dataset you
uploaded:
### SQL
1. Go to the **BigQuery** page.
[Go to BigQuery](https://console.cloud.google.com/bigquery)
2. In the **Editor** pane, run the following SQL statement:
```googlesql
CREATE EXTERNAL TABLE mobilenet_inference_test.sample_images
WITH CONNECTION `us.lake-connection`
OPTIONS(
object_metadata = 'SIMPLE',
uris = ['gs://BUCKET_NAME/flowers/*']);
```
Replace `BUCKET_NAME` with the name of the bucket you
previously created.
### bq
In Cloud Shell, run the
[`bq mk` command](https://docs.cloud.google.com/bigquery/docs/reference/bq-cli-reference#mk-table)
to create the connection:
```bash
bq mk --table \
--external_table_definition='gs://BUCKET_NAME/flowers/*@us.lake-connection' \
--object_metadata=SIMPLE \
mobilenet_inference_test.sample_images
```
Replace `BUCKET_NAME` with the name of the bucket you
previously created.
## Upload the model to Cloud Storage
Get the model files and make them available in Cloud Storage:
1. [Download](https://tfhub.dev/google/imagenet/mobilenet_v3_small_075_224/feature_vector/5?tf-hub-format=compressed) the MobileNet V3 model to your local machine. This gives you a `saved_model.pb` file and a `variables` folder for the model.
2. [Upload](https://docs.cloud.google.com/storage/docs/uploading-objects) the `saved_model.pb` file and the `variables` folder to the `mobilenet` folder in the bucket you previously created.
## Load the model into BigQuery ML
1. Go to the **BigQuery** page.
[Go to BigQuery](https://console.cloud.google.com/bigquery)
2. In the **Editor** pane, run the following SQL statement:
```googlesql
CREATE MODEL `mobilenet_inference_test.mobilenet`
OPTIONS(
model_type = 'TENSORFLOW',
model_path = 'gs://BUCKET_NAME/mobilenet/*');
```
Replace `BUCKET_NAME` with the name of the bucket
you previously created.
## Inspect the model
Inspect the uploaded model to see what its input and output fields are:
1. Go to the **BigQuery** page.
[Go to BigQuery](https://console.cloud.google.com/bigquery)
2. In the left pane, click **Explorer**:

3. In the **Explorer** pane, expand your project, click **Datasets** , and then
click the `mobilenet_inference_test` dataset.
4. Go to the **Models** tab.
5. Click the `mobilenet` model.
6. In the model pane that opens, click the **Schema** tab.
7. Look at the **Labels** section. This identifies the fields that are output
by the model. In this case, the field name value is
`feature_vector`.
8. Look at the **Features** section. This identifies the fields that must
be input into the model. You reference them in the `SELECT` statement
for the `ML.DECODE_IMAGE` function. In this case, the field name value is
`inputs`.
## Run inference
Run inference on the `sample_images` object table using the `mobilenet` model:
1. Go to the **BigQuery** page.
[Go to BigQuery](https://console.cloud.google.com/bigquery)
2. In the **Editor** pane, run the following SQL statement:
```googlesql
SELECT *
FROM ML.PREDICT(
MODEL `mobilenet_inference_test.mobilenet`,
(SELECT uri, ML.RESIZE_IMAGE(ML.DECODE_IMAGE(data), 224, 224, FALSE) AS inputs
FROM mobilenet_inference_test.sample_images)
);
```
The results should look similar to the following:
---
| feature_vector | uri | inputs |
---
| 0.850297749042511 | gs://mybucket/flowers/dandelion/3844111216_742ea491a0.jpg | 0.29019609093666077 |
---
| -0.27427938580513 | | 0.31372550129890442 |
--- ---
| -0.23189745843410492 | | 0.039215687662363052 |
--- ---
| -0.058292809873819351 | | 0.29985997080802917 |
---
## Clean up
> [!CAUTION]
> **Caution** : Deleting a project has the following effects:
>
> - **Everything in the project is deleted.** If you used an existing project for the tasks in this document, when you delete it, you also delete any other work you've done in the project.
> - **Custom project IDs are lost.** When you created this project, you might have created a custom project ID that you want to use in the future. To preserve the URLs that use the project ID, such as an `appspot.com` URL, delete selected resources inside the project instead of deleting the whole project.
>
>
> If you plan to explore multiple architectures, tutorials, or quickstarts, reusing projects
> can help you avoid exceeding project quota limits.
1. In the Google Cloud console, go to the **Manage resources** page.
[Go to Manage resources](https://console.cloud.google.com/iam-admin/projects)
2. In the project list, select the project that you want to delete, and then click **Delete**.
3. In the dialog, type the project ID, and then click **Shut down** to delete the project.