# Manage templates
> [!WARNING]
>
> **Preview
> --- templates**
>
>
> This feature is
>
> subject to the "Pre-GA Offerings Terms" in the General Service Terms section of the
> [Service Specific
> Terms](https://docs.cloud.google.com/terms/service-terms#1).
>
> Pre-GA features are available "as is" and might have limited support.
>
> For more information, see the
> [launch stage descriptions](https://cloud.google.com/products/#product-launch-stages).
This page describes how to edit and delete project templates in your Google Cloud project.
## Required role
To get the permissions that
you need to manage templates,
ask your administrator to grant you the
[Application Integration Editor](https://docs.cloud.google.com/iam/docs/roles-permissions/integrations#integrations.integrationEditor) (`roles/integrations.integrationEditor`) IAM role on the project.
For more information about granting roles, see [Manage access to projects, folders, and organizations](https://docs.cloud.google.com/iam/docs/granting-changing-revoking-access).
This predefined role contains
the permissions required to manage templates. To see the exact permissions that are
required, expand the **Required permissions** section:
#### Required permissions
The following permissions are required to manage templates:
- Edit templates: `integrations.templates.update`
- Delete templates: `integrations.templates.delete`
You might also be able to get
these permissions
with [custom roles](https://docs.cloud.google.com/iam/docs/creating-custom-roles) or
other [predefined roles](https://docs.cloud.google.com/iam/docs/roles-overview#predefined).
## Edit templates
To edit an existing project template, do the following:
> [!NOTE]
> **Note:** Editing a template does not update the existing integration versions created from the template.
1. In the Google Cloud console, go to the **Application Integration** page.
[Go to Application Integration](https://console.cloud.google.com/integrations)
2. In the navigation menu, click **Templates** .
The **Templates** page appears listing all the templates (global, shared, and project) available in your Google Cloud project.
3. To edit a shared template, click the **Shared templates** tab. To edit a project template, click the **Project templates** tab.
4. Click the template that you want to edit from the respective tab selected.
5. In the template details page, click edit **Edit** .
The **Edit template** pane appears.
> [!NOTE]
> **Note:** Application Integration currently only supports editing templates through a new intgeration version. You must therefore create a new integration version from the template, modify the integration, and then create a new template from the integration version.
- Enter the name of the new integration version and optionally, a description for the new integration version.
- Click **Create and edit** .
The integration editor page appears with the **Config variables** pane open.
6. Modify the config variables for your template (if any) and click **Done** . Click **Cancel** to skip this step.
7. In the integration editor page, add or modify the required components: [tasks](https://docs.cloud.google.com/application-integration/docs/tasks), [triggers](https://docs.cloud.google.com/application-integration/docs/triggers), or [connectors](https://docs.cloud.google.com/application-integration/docs/configure-connectors-task). Once your integration template is ready, go to the next step.
> [!TIP]
> **Tip:** Use [Config variables](https://docs.cloud.google.com/application-integration/docs/variables#config_var) when configuring the input and output parameters of the components of your integration. This allows you to create a template that can be used in multiple environments.
8. Click **Templates \> Edit template** from the integration editor navigation bar.
The integration editor switches to edit template mode, temporaily locking any further actions on the integration, and the **Edit Template** pane appears.
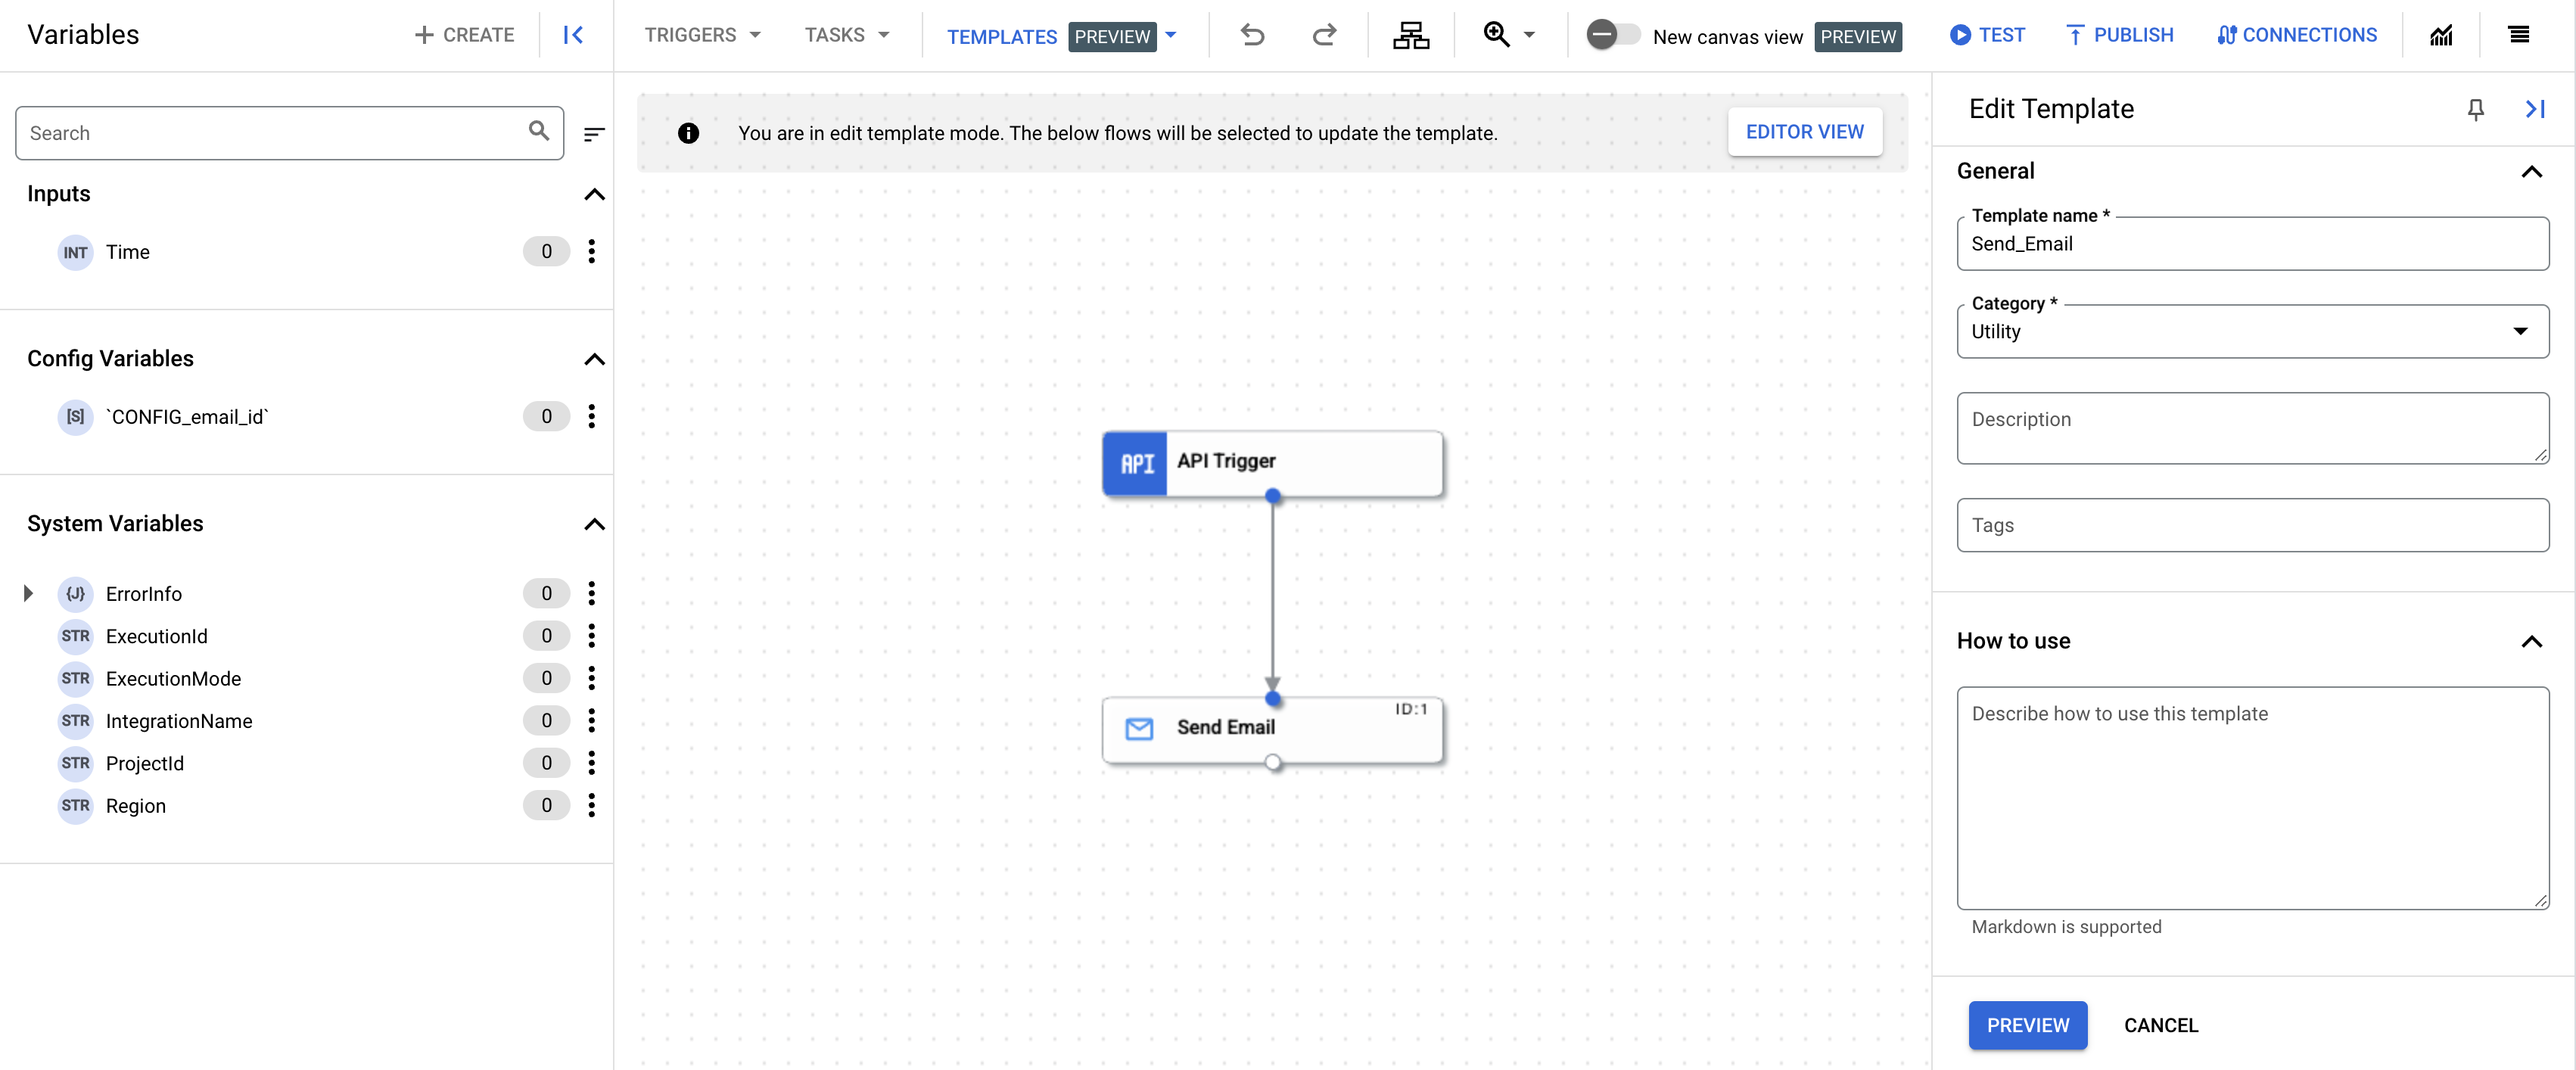

9. Make any changes to the template details and click **Preview**.
10. Review all your changes made to the template and click **Update template** .
The existing template is updated with the changes you made. To view the updated template, go to the **Templates** page and click the [Project Templates](https://console.cloud.google.com/integrations/templates) tab.
## Delete templates
To delete a template, do the following:
1. In the Google Cloud console, go to the **Templates** page.
[Go to Templates](https://console.cloud.google.com/integrations/templates)
2. To delete a shared template, click the **Shared templates** tab. To delete a project template, click the **Project templates** tab.
3. Click the template that you want to delete from the respective tab selected.
4. In the template details page, click delete **Remove template** .
A confirmation dialog appears.
5. Click **Delete** to permanently delete the template.
> [!NOTE]
> **Notes:**
>
> - Deleting a template does not delete the integrations created from the template.
> - You can only delete the project templates and shared templates that you own or have edit access to. Global templates cannot be deleted.
## What's next
- Learn how to use templates to create an integration, see [Create integrations from templates](https://docs.cloud.google.com/application-integration/docs/create-integration-from-templates).
- Learn how to import and download templates, see [import and download templates](https://docs.cloud.google.com/application-integration/docs/manage-templates).
- Learn how to create templates, see [create templates](https://docs.cloud.google.com/application-integration/docs/create-templates).
- Learn how to share templates, see [share templates](https://docs.cloud.google.com/application-integration/docs/share-templates).