*This page
applies to **Apigee** and **Apigee hybrid**.*
*View [Apigee Edge](https://docs.apigee.com/api-platform/get-started/what-apigee-edge) documentation.*

Adding policy-based capabilities to an API proxy is a two-step process:
1. Configure an instance of a policy type.
2. Attach the policy instance to a Flow.
The diagram below shows the relationship between policies and flows. As you can see, a policy
is attached to a flow as a processing *step* . To configure the desired behavior for your API, you
need to understand a little bit about flows.
(This topic was covered earlier in [Configuring flows](https://docs.cloud.google.com/apigee/docs/api-platform/fundamentals/flow-configurations.md.txt).)

One type of policy that is commonly used is the [SpikeArrest policy](https://docs.cloud.google.com/apigee/docs/api-platform/reference/policies/spike-arrest-policy.md.txt). SpikeArrest prevents
sudden increases
in message traffic that might swamp your backend services.
### Attaching a policy to a flow
To attach a policy to a flow:
1. Select an API proxy and navigate to the **Develop** view.
2. In the left-hand pane, click the **+** button in the **Policies** row.
3. In the **Create policy** dialog, click in the **Select policy type** field and
scroll down to **Traffic Management** and select **SpikeArrest**.
4. Optionally, you can change the **Display name** and **Name** of the policy.
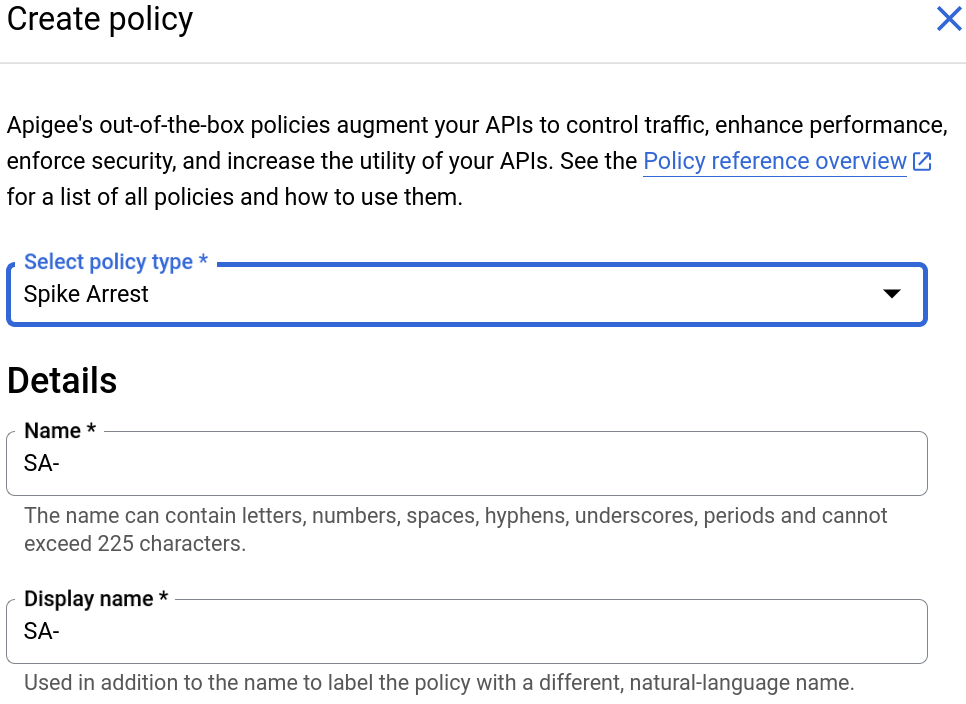
When you are done, click **Create** to create the policy.
5. Now that you have created the **Spike Arrest** policy, you can attach it to a step in the PreFlow. To do so, select **Proxy Endpoints \> default \> PreFlow** in the left-hand pane:

6. Click the **+** button next to **PreFlow** in the **Response** pane at the bottom-right of the Visual Editor:

7. In the **Add policy step** dialog, select the **Spike Arrest** policy.
8. Click **Add** to attach the policy.
The **Spike Arrest** policy is now displayed in the **Response** pane:
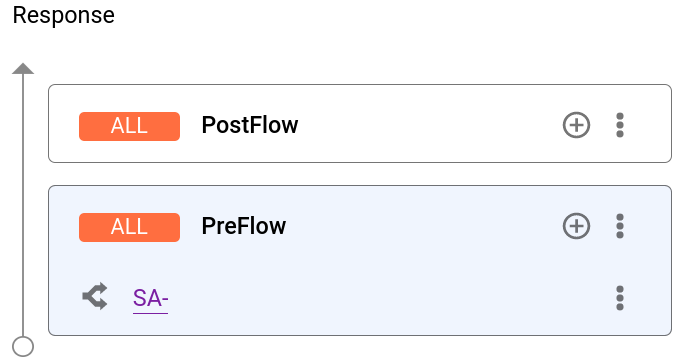
The following XML code for the proxy is displayed in the text editor:
```
<
SA-
/myproxy
default
```
### Detaching policies from a flow
To detach a policy from a flow, click the three-dot menu next to the flow and select
**Delete policy step**
### Deleting a policy instance
To delete a policy instance, mouse over the entry for the policy in the
**Navigator** view. Click the **X** in the circle that appears to the
right of the entry.
## Configuring policies in the UI
When the UI generates a policy instance, it applies reasonable default values for common
settings. You may need to modify these settings to meet your requirements.
For example:
```
SpikeArrest-1
30ps
```
You can configure a policy by directly editing its XML configuration in the
**Code** view. For example, the peak message rate for the Spike Arrest policy is
initially set to 30 messages per second. You can change the peak rate by changing the
\<`Rate`\> element value in the XML for the policy. For further details about
configuring policies, see the
[Policy reference](https://docs.cloud.google.com/apigee/docs/api-platform/reference/policies/reference-overview-policy.md.txt).
You can also cut-and-paste policies into the **Code** view. This is a great way
to re-use policies from the samples available on GitHub.
When you make changes to a policy definition in the **Code** view, the changes
are reflected in the **Property Inspector** . The reverse is also true --- make
changes in the **Property Inspector** and they appear in the XML in the
**Code** view.
For documentation specific to the Quota policy used in this topic, see [Quota policy](https://docs.cloud.google.com/apigee/docs/api-platform/reference/policies/quota-policy.md.txt).
### Use Gemini Code Assist code explain with policies
> [!WARNING]
>
> **Preview
> --- Gemini Code Assist policy code explain**
>
>
> This feature is
>
> subject to the "Pre-GA Offerings Terms" in the General Service Terms section of the
> [Service Specific
> Terms](https://docs.cloud.google.com/terms/service-terms#1).
>
> Pre-GA features are available "as is" and might have limited support.
>
> For more information, see the
> [launch stage descriptions](https://cloud.google.com/products/#product-launch-stages).
If you have Gemini Code Assist, you can use it to understand policies and policy elements
directly in the Apigee UI.
> [!NOTE]
> **Note:** During *preview* , you do not need to enable or activate the Gemini Code Assist add-on to your project to use code explain. You do need to enable the Gemini for Google Cloud API on your Google Cloud project. See [Enable the Gemini for Google Cloud API in a Google Cloud project](https://docs.cloud.google.com/gemini/docs/codeassist/set-up-gemini.md.txt#enable-api).
> [!NOTE]
> **Note:** For this feature to work, the you need both IAM roles: `Gemini for Google Cloud User` and `Service Usage Consumer`.
To use Gemini Code Assist code explain with policies:
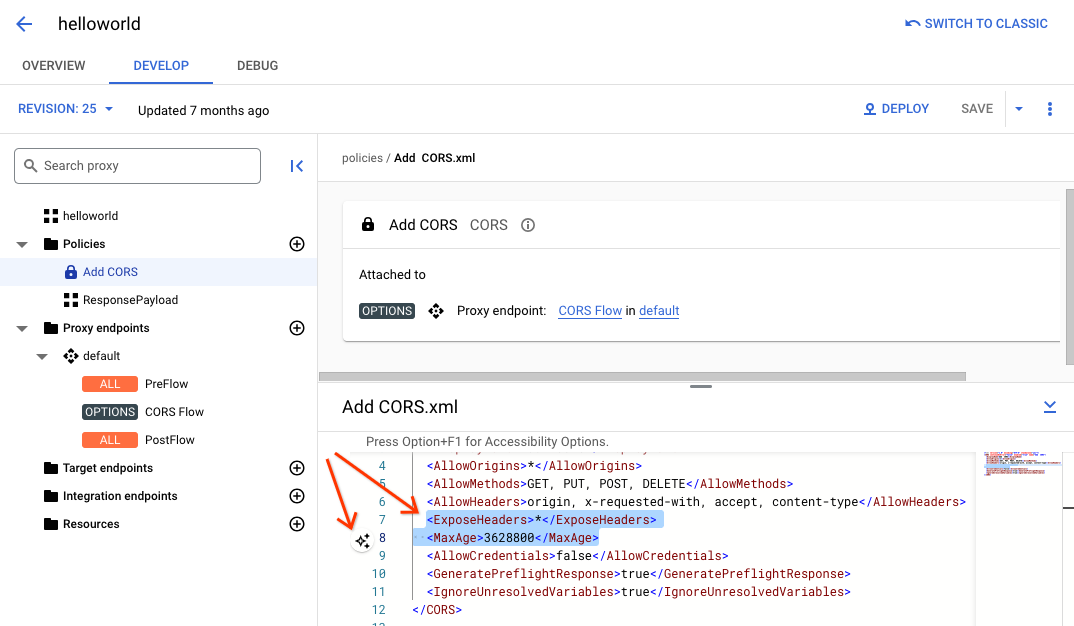
- While editing the policy in the **Code** view, highlight part of the policy code, such as an XML element or attribute. You can also highlight multiple elements.
- Click the Gemini Code Assist icon as shown below. The side panel shows information on the policy and the element you highlighted.
> [!WARNING]
> **Alert:** Clicking the Gemini Code Assist icon sends the highlighted text to Gemini in Google Cloud console.